- Joined
- Jun 10, 2015
- Messages
- 11
- Motherboard
- ASUS Prime Z490-A
- CPU
- i9-10850K
- Graphics
- UHD 630
- Mac
- Classic Mac
- Mobile Phone
So originally this post was to ask for help to get this set up working but now that it is working I figured I would update it for anyone trying to get this same set of hardware up and running. I am going to leave the original post bellow but the attachments on this post are the final files that will work for getting this system up and running.
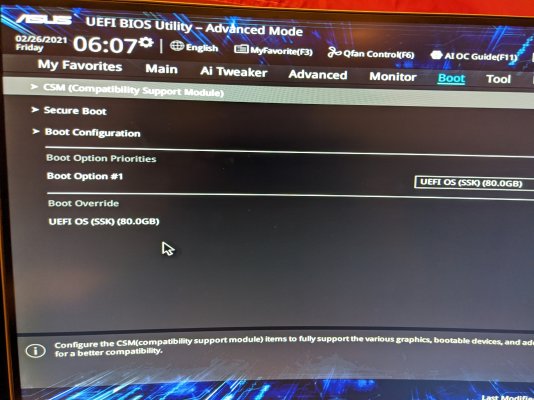
So first off I would change your BIOs for your mother board. Attached are my final BIOs (full disclosure I have never "overclocked" a CPU so those settings were the best that I could find and I had to do this because stock my CPU was running at .8 GHz, which obviously sucked). I did not need to update or downgrade the UEFI BIOs version, I was just using was came stock out of the box.
Next you want to create your bootable USB, I used Dortania's guide and it was really simple. I did it using a Macbook but there are instructions to use and OS to get this USB working.
If you have this exact hardware set up here is where you get to save a lot of head ache. Just use my EFI attached. I was using openCore 0.6.5 Debug mode and that is what is inside my EFI folder. You can easily switch it to the release version once you are stable and happy with your build. I would stick with openCore 0.6.5 just because of everything I have heard on this site. And once you are done with that you basically copy your EFI onto your internal HD so you don't need the bootable USB. I would leave it on the bootable USB till you are done tweaking the system because I got cocky at one point and then it was either pull out the HD and plug it into my other device to fix the setting I changed or start over with a fresh install.
And that's it, if you have my exact hardware the audio should work, the ethernet should work and it should run smoothly. I still haven't dealt with patching my iGPU which is next on my list because there are some small issues with the graphics. I also haven't tested iMessages, but Dortania has a guide for that if you need that to work.
* I mostly just followed Dortania guides to get this build working and for the most part it was pretty straight forward. If you want to know where I had issues with this build:
---------------------------------------------------------------------------------------------------------------------------------
************************* Everything Bellow is from the original post *******************************
As described in the the title I am trying a fresh install of Big Sur on a ASUS Z490-A mother board with a i9-10850k (Comet Lake) processor using OpenCore 0.6.6. I have followed these directions exactly: OpenCore Install Guide - Comet Lake and got it to boot up to the installer but now it is having issues in the reboot. First it was stuck in a reboot loop, and I found this thread and specifically this comment:
So first off I would change your BIOs for your mother board. Attached are my final BIOs (full disclosure I have never "overclocked" a CPU so those settings were the best that I could find and I had to do this because stock my CPU was running at .8 GHz, which obviously sucked). I did not need to update or downgrade the UEFI BIOs version, I was just using was came stock out of the box.
Next you want to create your bootable USB, I used Dortania's guide and it was really simple. I did it using a Macbook but there are instructions to use and OS to get this USB working.
If you have this exact hardware set up here is where you get to save a lot of head ache. Just use my EFI attached. I was using openCore 0.6.5 Debug mode and that is what is inside my EFI folder. You can easily switch it to the release version once you are stable and happy with your build. I would stick with openCore 0.6.5 just because of everything I have heard on this site. And once you are done with that you basically copy your EFI onto your internal HD so you don't need the bootable USB. I would leave it on the bootable USB till you are done tweaking the system because I got cocky at one point and then it was either pull out the HD and plug it into my other device to fix the setting I changed or start over with a fresh install.
And that's it, if you have my exact hardware the audio should work, the ethernet should work and it should run smoothly. I still haven't dealt with patching my iGPU which is next on my list because there are some small issues with the graphics. I also haven't tested iMessages, but Dortania has a guide for that if you need that to work.
* I mostly just followed Dortania guides to get this build working and for the most part it was pretty straight forward. If you want to know where I had issues with this build:
The biggest hiccups I came across was first setting my BIOs correctly (which the wonderful people here helped me with) Then getting my kext is the correct order. You can see my post bellow but basically Luli needs to be first and then you need VirtualSMC, WhateverGreen, AppleALC (I dont know if those need to be in a specific order but this order worked for me, and luckily my EFI has them in the correct order) I am really kind of upset that the Dortania guide didn't explain that when going through, I don't even think I realized I needed Luli till after I was done with everything and so I put it last and it wasn't till much later I found it somewhere saying it needed to be first (that was really my only gripe with the Dortania guides). The next issue I ran into was my ethernet port not working. That one was a pain in the butt, however it should work with the same hardware. If you are still having issues I would suggest changing in your config.plist, under "DeviceProperties" > PciRoot(0x0)/Pci(0x1C,0x4)/Pci(0x0,0x0) to PciRoot(0x0)/Pci(0x1C,0x1)/Pci(0x0,0x0). Notice the "4" changes to a "1", those are just different physical locations and you can use iORegerstryExplorer to find that location, this support thread helped me get that working, the other issue I had there was getting the ktexts that they were talking about in that thread. Once again those are in my EFI but something I didn't realize as a complete noob is that some kexts can be folders so that's how I got FakePCIID.kext to work because I couldn't find a kext file of that anywhere. The next issue was fixing my audio but I just followed the Dortania Guide on that and after some trial and error I found that layout 11 was right for this build, if you have the same hardware it should be exactly the same but that guide is pretty straight forward. The last hurdle I had to over come was the CPU not running at this full capacity, at first I tried the Power Management guide, and the results from that are also in my EFI but I honestly don't know if that fixed anything, it wasn't until I got into my BIOs and starting changing those settings did I get any results. I followed this Youtube video but if you matched my BIOs then it should be working as well for you. Or maybe you have over clocked a CPU before and you can help me get those setting correct. Like I said the last thing that still might need tweaking is my iGPU, once I get those tweaks in I will update this but for now this should help you easily get this exact set of hardware up and running. I hope this helped people please let me know if I can help explain anything or if you have any questions. Good luck, from one noob to another, you can do it!
---------------------------------------------------------------------------------------------------------------------------------
************************* Everything Bellow is from the original post *******************************
As described in the the title I am trying a fresh install of Big Sur on a ASUS Z490-A mother board with a i9-10850k (Comet Lake) processor using OpenCore 0.6.6. I have followed these directions exactly: OpenCore Install Guide - Comet Lake and got it to boot up to the installer but now it is having issues in the reboot. First it was stuck in a reboot loop, and I found this thread and specifically this comment:
and now it gets further but then crashes (like instead of a reboot loop, the mother board boots in safe mode because it crashed). I am very new to this, I have only built one other Hackintosh, I have built tons of PCs but as I am sure you are all well aware, those are not nearly as complicated. After starting on this journey, I am realizing that I didn't do the first Hackintosh right because I never got sound to work on that one. I am trying to better this time! I have attached my config.plist and the last OpenCore debug log. Any help would be greatly appreciated. Thank you!You right, Big Sur beta 10 required Security/SecureBootModel to Disabled on OC 0.6.2. It isn't the OC problem.
Attachments
Last edited: