Hello
@WhosMac
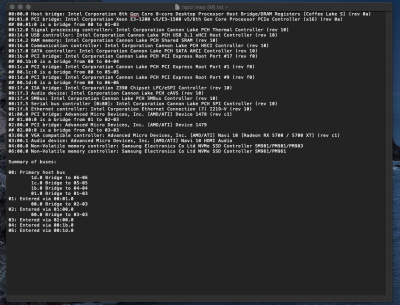
Because you're planning to do a fresh install of Catalina 10.15.1 with a Radeon RX 5700 XT, you could be our test subject for an updated installation procedure. Certain steps will be replaced with new versions of UniBeast and MultiBeast in the future.
If you're willing to be a test subject, please try the mini guide below that streamlines most of the work. By the way:
- What is the make/model of your NVMe SSD?
- Are you using a WiFi/BT card such as Fenvi FV-T919? If so, which slot is it in?
** Experimental Mini-Guide for Direct Installation of Catalina 10.15.1 **
Preparation:
- Set BIOS parameters according to main guide in Post #1.
- Set Initial Display Output to PCIe 1 Slot (if RX 5700 XT is in Slot 1)
- Connect monitor to RX 5700 XT.
Step 1: Create USB Install Disk
- Use a 16 to 32 GB flash disk.
- Format the disk in Disk Utility. Select View --> Show All Devices and click the parent name of your USB disk on left sidebar. Then select Erase and enter:
- Name: Catalina-USB (use exactly this name)
- Format: MacOS Extended (Journaled) --- do not use APFS here
- Scheme: GUID Partition Map
- Download Catalina installer from App Store on a supported Mac. Check that it's in the Applications folder.
- Also check that the USB disk has been mounted and its name is Catalina-USB
- Open a Terminal window and type:
sudo "/Applications/Install macOS Catalina.app/Contents/Resources/createinstallmedia" --volume /Volumes/Catalina-USB
- Enter your Mac password when requested.
- This step will cause your USB install disk to be renamed to Install macOS Catalina.
- If you encounter any errors, stop and report those errors.
- Download Clover v5098 or newer from GitHub by clicking here and downloading the xxxx.pkg file.
- Launch the Clover installer and allow the app to run (System Preferences --> Security & Privacy --> General).
- Click Continue, Continue, Change Install Location... and select the USB flash disk!
- Then click Customize -- don't overlook this.
- These 2 buttons are located here:
View attachment 436339
- Check that the Customize page looks exactly like this:
View attachment 436340
- Notice that Install RC scripts on target volume is unchecked. This is where you become our test subject! We'd like to start the installation without rc scripts and see what happens with shutdown and reboot. If shutdown and reboot don't work, then we can come back and install rc scripts.
- Click the Install button.
- Copy Clover Configurator to the standard partition of the USB flash disk (not the EFI partition).
- The EFI partition of the USB install disk will already be mounted (Clover installer will do this automatically).
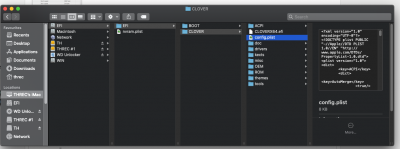
- Open the EFI Folder on the EFI partition of USB disk. You'll see a CLOVER folder, of course.
- Open the CLOVER folder.
- Download the attached Catalina Fresh Install.zip into your Downloads folder on the Mac (not on the USB disk).
- Open the CLOVER/drivers/UEFI folder on the USB disk (EFI partition) and:
- Delete all files in that folder and empty the trash.
- Locate the folder Copy-to-drivers-UEFI in the above ZIP file you downloaded.
- Copy all .efi files from this folder into the CLOVER/drivers/UEFI folder.
- Open the CLOVER/kexts/Other folder on the USB disk (EFI partition) and:
- Delete all files in that folder and empty the trash.
- Locate the folder Copy-to-kexts-Other in the above ZIP file you downloaded.
- Copy all .kext files from this folder into the CLOVER/kexts/Other folder.
- Open the CLOVER/ACPI/patched folder on the USB disk (EFI partition) and:
- Locate the Copy-to-ACPI-patched folder in the above ZIP file you downloaded.
- Copy all .aml files from this folder into the CLOVER/ACPI/patched folder.
- Finally, locate config.plist in the same ZIP file you downloaded.
- Copy the config.plist to the CLOVER folder on the USB install disk, overwriting the one that is there already.
- Now open the config.plist (from USB install disk) with Clover Configurator 5.7.0.0 or newer.
- Go to the SMBIOS page.
- Click the pop-up menu on the lower right and select iMac19,1.
View attachment 436342
- Everything else is already set in this file. So save it and quit Clover Configurator.
- Eject the USB flash disk.
Step 2: Install Catalina
- Insert the USB install disk into the Hackintosh and boot.
- Press F12 at BIOS Splash screen to bring up the BIOS Boot Menu and select the USB flash disk.
- When Clover Boot Menu appears, select Boot macOS Install from Install macOS Catalina
- Follow the onscreen progress and report any issues.
- When the installer starts, you'll need to run Disk Utility from inside the installer, select your target Catalina NVMe SSD, and format it.
- Be sure to select View --> Show All Devices
- Then select:
- Name: Catalina (you can change it later)
- Format: APFS
- Schema: GUID Partition Map
- Then begin the macOS installer.
- There might be one or two reboots.
- Whenever the system reboots and you're back in the Clover Boot Menu:
- Whenever you see a boot option called Boot macOS Install from Catalina, choose that option.
- Do not select the USB disk. The USB disk is selected only one time at the very beginning.
- If everything goes according to plan, you'll be greeted with the Catalina Welcome screen.
- Follow the onscreen guide.
- You may also sign in to iCloud when asked.
- If you encounter any problems, stop and let us know.
Step 3: Post Installation
- We'll make this really simple for now.
- Run Clover Configurator which was copied to the USB flash disk in Step 1.
- Click Mount EFI on left sidebar of Clover Configurator
- Mount EFI partitions of (a) USB flash disk and (b) Catalina SSD.
- Copy the entire EFI Folder from EFI partition of USB disk to EFI partition of Catalina SSD.
- Eject USB flash disk.
- Reboot directly from Catalina SSD.
- Does it work? Report any issues.


