Contribute
Register

Big Bertha's Big Brother:Asus Z10PE-D8 WS Dual Xeon Broadwell v4 CPU's 64GB DDR4 ECC RDIMM RAM

Status
Not open for further replies.
Joined
Oct 31, 2012
Messages
538
Motherboard
ASUS Z9PE-D8 WS
CPU
Dual E5-2680 v1
Graphics
GTX660 Ti
Mobile Phone
  1. iOS
TpwUK's Big Bertha's Big Brother Build:
Asus Z10PE-D8 WS Dual Xeon Broadwell v4 CPU's 64GB DDR4 ECC RDIMM RAM
full
Components

Asus Z10PE-D8 WS Workstation Motherboard
https://www.amazon.co.uk/gp/product/B00NHDDXN8/?tag=tonymacx86-21

2x Intel Xeon E5-2683 v4 S 2011-3 Broadwell-EP 16 Core 2.1GHz 40 MB Smart Cache Processor
https://www.amazon.co.uk/dp/B01BRCKPLS/?tag=tonymacx86-21

2x Kingston KVR21R15S8/4 RAM 4 GB 2133 MHz DDR4 ECC Reg CL15 DIMM 288-Pin
https://www.amazon.co.uk/gp/product/B00X60MS9M/?tag=tonymacx86-21

Samsung PM951 128GB M.2 NVMe solid state drives
https://www.amazon.co.uk/gp/product/B0179DQDMO/?tag=tonymacx86-21

PCI-E PCI EXPRESS 10/100/1000 Mbps Gigabit FAST Ethernet Lan NETWORK Card (Realtek RTL8111C)
https://www.amazon.co.uk/gp/product/B01HTIJK5G/?tag=tonymacx86-21

Seasonic P1050 1050 Watt 80 Plus Platinum Certified Full Modular Power Supply Unit
https://www.amazon.co.uk/dp/B00MA78C9M/?tag=tonymacx86-21

Phanteks Enthoo Primo Full Tower, Extended ATX Case
https://www.amazon.co.uk/dp/B00EB0A6FE/?tag=tonymacx86-21

Kingston Technology 32 GB Data Traveler USB Flash Drive with Metal Casing
https://www.amazon.co.uk/dp/B00IRD6PMY/?tag=tonymacx86-21

Logitech Wireless Solar Keyboard K750 - UK layout
https://www.amazon.co.uk/dp/B004CLVFU2/?tag=tonymacx86-21


Already Owned

Nvidia GeForce GT660Ti
Kingston SSDNow 480GB SSD
2 x Toshiba DT01ACA050 500GB 3.5" SATAIII HDD
1 x 3.5" Seagate ST3000DM001-1CH166 3TB SATAIII HDD
1 x 3.5" Seagate ST3500413AS 500GB SATAIII HDD
1 x 3.5" Seagate ST1000DM003-1ER162 SATAIII HDD


Comments

Build Purpose
Full powered high end 3D graphics workstation. A system that can cope with the high demands that KeyShot, Maya and Blender can place on a computer and the operating system along with the huge amount of storage that can required when working on production special effects and animations. The build will still have the flexability to work within the photo editing/retouching market place as well as possibly sound recording studio needs as well as being used as an occasional gaming platform.

Build Status - Ongoing. Parts to be added as and when available and or as needed.

Phase 1 Build Start Date - August 28th 2016
Phase 1 Build Finish Date - September 10th 2016

Other Hardware Required;
  • Your choice of USB Pen Drive with at least 8GB capacity (required for OS creation/installation.
  • A graphics card known to work with SMBios iMac 14,2 and that will boot with full UEFI support (I used an Nvidia GeForce GT660Ti).
  • A small SATA HDD/SSD - If you use a HDD then make sure it will format with Mac OS Extended (journaled) I tried an old 200GB HDD and it wouldn't format with journaled option.
  • Another Hackintosh/Mac running with a minimum Mountain Lion and internet access for downloading the software tools required.
  • A spare mouse or other pointing device unless you like swapping things all day

The Gamble Hypothesis...

The purpose of the phase 1 build was as a proof of concept build. The Asus Z10PE-D8 WS at the time of writing had already been on the market for two years and had zero OS X success stories. Plenty had tried, none had succeeded. However, not to be put off, I thought that with the research and development work carried out by PikeRAlpha and RehabMan over the past year or so that this board had potential now and was worth the gamble. If it failed it would have been fitted with better hardware and sold off as a Windows Workstation/Server. The gamble has paid off, and it's now time for the Asus Z10PE-D8 WS to inherit the role as the super OS X workstation from it's older brother the Z9PE-D8 WS of which there are plenty of success stories out there.

One of the best things going for the Z10PE board is that the board will now accept PCIe slot 1 for graphics cards. The Z9PE would only work with PCIe slot 5. Keep in mind that from Yosemite onwards Apple seem to have been making some big changes. USB3 being the most noteable, ATi/AMD Radeon R9 cards being another and of course the dropping of the 24 CPU threads limitation. All of these things combined with Piker's research lead me to conclude that Apple is working on a new Mac Pro system and the chances are it's going to be socket 2011v3 based with Intel Broadwell-EP v4 CPU support. I honestly don't think we will see another big boxed Mac Pro again (shame really, i loved that case design and expandability used from 2006-2012) so i doubt it will be dual socket/CPU .... Time will tell.

The first goal to achieve was a simple Snow Leopard 10.6.3 installation. If the board could take that and be stable, if successful then the idea was to progressively climb the OS X version tree and try to overcome any problems that arose and to keep upgrading the OS until it was no longer possible to go any further. To be honest, I thought that it would make it to Mavericks before encountering difficulties. How wrong i was, the problems start from the moment you try with Mountain Lion and AppleIntelCPUPowerManagement panics. You can read the saga here https://www.tonymacx86.com/threads/solved-the-dreaded-asus-z10pe-d8-ws.200758/ There was a few lessons learned from this process and they were a mix of hard and easy. Personally I feel the Snow Leopard installtion was really superflous but you may want a Snow Leopard based server so I will basically just give details below on how to create a Snow Leopard 10.6.3 Clover based bootable USB drive. You can upgrade through to 10.6.8 but that's the point at which I could not continue, you may get further than I did if you have the skills and the time to pursue it.

Creating the Snow Leopard 10.6.3 USB Boot Drive...
I was surprised just how easy this is. If you don't already have the Apple install DVD, then you will need to order one through Apple Sales. I already had the 10.6.3 version. Download the latest versions of Clover from https://sourceforge.net/projects/cloverefiboot/?source=typ_redirect and http://mackie100projects.altervista.org/download-clover-configurator/ unless you want to use Xcode or whatever your favourite text editor is. Follow these steps to make a bootable USB Snow Leopard USB installer.

  • Format your USB drive to be Mac Os Extended (Jorunaled) using Disk Utils from Applications/Other
  • Insert your official OS X Snow Leopard 10.6.3 DVD
  • Depending on your version of DiskUtils select the appropiate Restore option. You want to Restore your Installation DVD to your USB pen drive
  • Once the restore has completed eject the DVD
  • Run Clover Bootloader and install it to your Snow Leopard USB Installer with the following options
    Install for UEFI booting only
    Add a theme of your choice if you want one
    From Drivers64UEFI add DataHubDxe-64, OsxAptioFix2Drv-64 and PartitionDxe-64
    Install RC scripts on target volume​
  • When Clover has finished installing you should see an EFI partition either on your Desktop or in Finder. Browse your way to the Kexts/Other folder and add the following kext files
    NullCPUPowerManagement
    FakeSMC​
  • Using Clover Configurator or Xcode edit the Clover/config.plist and set the boot-args to "-v npci=0x2000 arch=x86_64"

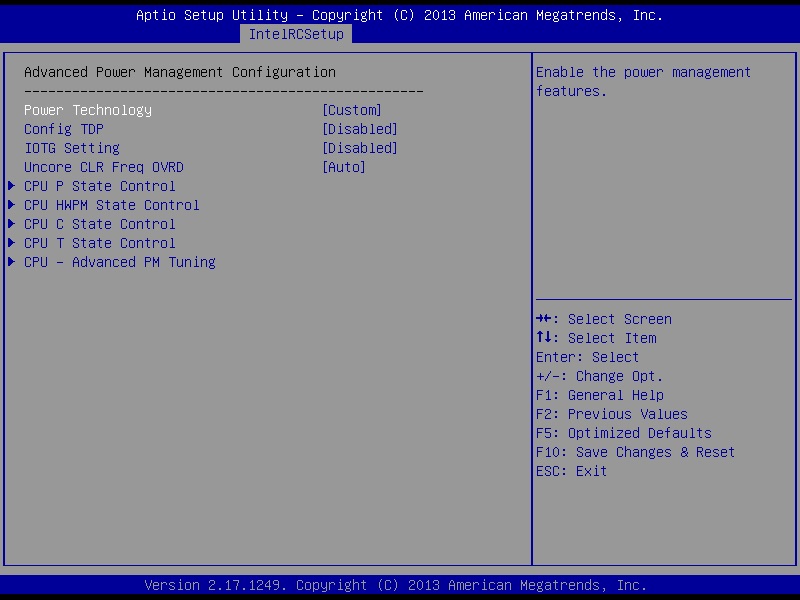
Z10PE-D8 WS BIOS Settings for Snow Leopard...
Turn off Secure Device support
Turn off Vt-d support
Set all boot devices to Legacy
Set Boot option to UEFI & Legacy
Set CSM as Always​
I used a top panel USB2 port (black connectors), but the back ones work too, however the back ones didn't like sharing the Keyboards Dongle so keep this in mind if you encounter problems. Power up the Z10PE with the USB Installer you created inserted in whatever USB2 port you choose. When you see the text based output on your screen, press and hold fn+f8 on the keyboard, don't let go until you see the boot device list or until you see boot setup displayed at the bottom of the screen. From that menu select the UEFI Pen Drive and let it boot and run. Install Snow Leopard and enjoy your basic OS X installation. I felt prretty lost in Snow Leopard once it was installed that wasn't quiet sure what to do next, Going Bald gave me the shove with
You go to Apple site, click on support, type 10.6.8 update (combo) in the search box and hit enter. Hopefully you get a hit the first go at it.

Download the two updates, one is over 1GB the other a little over 400MB - install them and reboot as you go along.

What won't work in Snow Leopard...
No Audio, No Ethernet and No USB 3.0 - however all the USB ports will function as USB 2.0 hubs, No NVMe support.

What can you do with Snow Leopard and the Z10PE ?
Simplest answer from my perspective is not a lot. You could I suppose add the extra network card purchased just in case the I210's were not supported and create a super quick server. But from a 3D modelling and rendering aspect, then this is of no use to me at all.

Conclusions drawn from the Snow Leopard test build...
Fast and stable platform, very fussy board when it comes to graphics cards just as the Z9 was. From other posts scattered around on TonyMac there was still more that needed to be investigated but everything was looking good. If you read the Dreaded Z10PE-D8 thread then you will know that we managed to leap through to Sierra 10.12 and that I can now make some choices regarding hardware and software and that Phase 2 of this build will be going ahead.

Phase 2 to be added shortly ...
 
Last edited:
Phase 2a - Prepping for & installing macOS Sierra 10.12 ...
This is really a lot easier than expected. When you take this board's reputation for being exceedingly difficult to work with when attempting to install OS X. The following steps will have you dancing with joy in no time at all!

Creating the Clover USB Sierra Install ...
  • Follow the guide on how to prep your 8GB USB to be Sierra ready here https://www.tonymacx86.com/threads/how-to-create-a-macos-sierra-public-beta-installation-usb.195077/
  • Install Clover Bootloader to the 8GB USB Pen Drive you have just created. Use the following install options;
    Install for UEFI booting only
    Add a theme of your choice if you want one
    From Drivers64UEFI add DataHubDxe-64, OsxAptioFix2Drv-64 and PartitionDxe-64
    Install RC scripts on target volume​
  • When Clover has finished installing you should see an EFI partition either on your Desktop or in Finder.
  • Browse your way to the Kexts/Other folder and add FakeSMC. You can find the kext here on TonyMac in the downloads/kexts section https://www.tonymacx86.com/resources/categories/kexts.11/
  • Using Clover Configurator or your favourite plist editor edit the Clover/config.plist thus...
    Acpi Settings - FakeLPC, Generate PStates, Generate Cstates, EnableC6 and Halt Enabler should be ticked. Drop SSDT TableId CpuPM and Cpu0lst also add Drop DMAR
    Boot Settings - Verbose npci=0x2000 -xcpm_ipi, set default loader to bootx64.efi, Legacy=PBR and XMPDetection=Yes
    Devices Settings - USB settings all ticked, Audio set to detect and tick ResetHDA
    GUI Settings - Adjust them to suit your theme if you added one.
    Kernel and Kext Patches Settings - Add ticks to Kernel CPU, KernelPM & AppleRTC. Set FakeCPUID to 0x000306F0
    SMBios Settings - Create an SMBios table for an iMac14,2
    System Parameters Settings - Inject Kexts = Detect, No Caches ticked, ExposeSysVariables ticked
    Install Drivers Settings - Select from Drivers UEFI 64 Bit menu ... DataHubDxe, OsxAptioFix2Drv, PartitionDxe add HFSPlusUEFI​
  • Save your config.plist and you're all done with creating your USB Sierra Install

Setting up the Z10PE-D8 WS BIOS ...
  • Download and install the latest BIOS from ASUS (3304 at time of writing) and use EZFlash utility built on the motherboard. You will need to select the OS Type to DOS to see the BIOS list available.
  • Download the manual from the support section so you can see how to use the EZFlash utility.
  • The computer will restart when flash is complete, when you see text on your screen press and hold Delete/Del on your keyboard and you will Enter Setup displayed at the bottom of the screen
  • With the new BIOS installed your settings should be as default, if not then reset them back to defaults by pressing F5 in the BIOS setup screens
  • Leave everything on Defaults other than the settings given below. Note the filenames as they show the title of the screen to be adjusted;


  • Under the Boot menu, set Network, Storage, Graphics and Other devices to all boot as UEFI Only, then set your Boot option to UEFI only, and then finally turn off CSM
  • Press F10 to save your settings and reboot.
Installing macOS Sierra 10.12 ...
When your computer system reboots and you see text on the screen press F8 or fn+F8 on your keyboard. You should only see the USB Installer to boot from if you're booting from a clean system that is. If not then select the USB Installer to boot. If all has can well, then after a few minutes you will be presented with the installation toolset. If you have a specific HDD to install to then select it and install to that drive. If you have an old drive or in some cases new drives for that matter, you will need to format and partition the drive to use GUID partition formatted to Mac OS Extended (Journaled). So if needs be, format the drive as just mentioned using the Disk Utility from the Installation Toolset. Once the drive has been formatted accordingly, then you can proceed to install macOS Sierra. Depending on your hardware this will take approximately 20 minutes or so. When you are in to macOS Sierra do not worry about the orange external drive icons being displayed as they will come in handy as we swap drives and exchange files over to the NVMe drive if you have one.

The first boot will create the Recovery Partition stage of the OS. The 2nd Reboot, you need to press F8 or fn+F8 boot from the USB again, but on the Clover drives list their should be an Install macOS Sierra option, select that drive and press enter. When it's complete, your computer should restart again. Again press F8 and boot from the USB, on the drives list should be your MacOS drive, boot that one and complete the setup process. You will now need to Install Clover to the disk where you have installed Sierra to. Copy over the EFI folder from your USB installer to your newly installed macOS Sierra. You can use Clover Configurator to mount the EFI partitions or you can use EFI Mounter v3 from here https://www.tonymacx86.com/resources/categories/community-software.10/

If you have invested in a NVMe SSD then you to read on to the next step. If not then you can jump to Phase 2b.
When you are in to macOS Sierra do not worry about the orange external drive icons being displayed as they will come in handy as we swap drives and exchange files over to the NVMe drive.

Activating the NVMe PCIe Solid State Drive ...
Again this part is surprisingly easy. PikeRAlpha and RehabMan have done an excellent job with this little hack, God bless you guys and a big thank you from me !!
To start you will need to download the zip archive from https://github.com/RehabMan/patch-nvme. Check in your downloads folder and you should see a folder named patch-nvme-master. If not then select Download Zip from the URL already mentioned here. Then proceed as follows;
  • Open your Downloads folder
  • Open a Terminal window from Applications/Other and type CD then drag and drop the patch-nvme-master folder on to the Terminal screen
  • In Finder double click the patch-nvme-folder and duplicate/copy the NVMe_patches_10-12-0.plist, you should then see "copy of NVMe_patches_10-12-0.plist"
  • Rename the copy file to NVMe_patches_.plist
  • Drag and Drop patch_nvme.sh to the Terminal screen and press space
  • Drag and Drop NVMe_patches_.plist to the Terminal screen and press enter
  • In your Downlaods/patch-nvme-master/ folder you shoud now see HackrNVMeFamily-.kext
  • Mount your boot drives EFI partition and browse to EFI/CLOVER/kexts/Other
  • Copy the HackrNVMeFamily-.kext file to the kexts/Other folder
  • Using Finder, browse to /System/Library/Extensions/
  • Locate IONVMeFamily.kext and copy it to your patch-nvme-folder just so you have a backup of that system kext if needed later in life
  • Delete the original file from /System/Library/Extensions using your password as required
  • That's it, you're done activating your NVMe SSD.... Reboot the system
Making the NVMe SSD the Boot Disk ...
For this process you will need a disc cloning tool, I highly recommend Carbon Copy Cloner from http://bombich.com/download It's inexpensive so support their work by purchasing a copy. It's a fine investment that can save your bacon if disaster besets your system. The following steps assume you downloaded or already had a copy of CCC, if not then adjust the instructions to suit your chosen disk cloner software.
  • The first step is to use Disk Utility (you should know where that is by now) Locate your NVMe and format it to GUID partition type with Mac OS Extended (Journaled)
  • Now launch CCC and set the source drive as your current boot disk, set the destination as the NVMe drive and click the Clone button
  • During the cloning process you will be offered the chance to create an emergency recovery partition on your NVMe, take advantage of the offer
  • Once the drive has been cloned, then install Clover to that drive
  • Mount your EFI partition on your current boot disk, copy the whole EFI folder and replace the one just created on your NVMe SSD just as you did from you USB to HDD/SSD above
  • On your next boot your NVMe SSD should be in the list of drives to boot. Boot from your NVMe
  • If all has gone well, then it'd be a good time to create our disaster recovery USB. So usink Disk Utility prep your 32GB USB Pen Drive to GUID Mac OS Extended (Journaled) name it RecoveryUSB
  • Using CCC again, set source as NVMe SSD and the destination as your RecoveryUSB, again the offer for the Recovery Partition will be offered, again accept the offer
  • It will be a slow process to clone the NVMe so got get some food and a coffee. Once it has cloned the NVMe then I recommend you use a cable tie and fasten your RecoveryUSB Pen Drive somewhere in the case where it will be safe. It will always be there when or if it is ever needed!
  • You're done, it's up to you but I would now flatten the original boot disk and reformat it ready for use as a storage drive.

Phase 2b Applying needed kexts and patches
There was only three obvious things wrong with this build two of which were easily recitified however the NVMe need a little help from RehabMan in the of a SSDT patch.
The problems were;
No audio - Fixed using VoodooHDA version 2.8.8 from https://sourceforge.net/projects/voodoohda/?source=typ_redirect
No USB3 - Easily fixed. Reboot into BIOS and set USBxHCI to use Intel, this will give you native USB3 support with no further action required.
Orange External Drives on Desktop - My prefered method is PJalms ASUS General patch for ESB2 SATA (Orange Icon Fix). Add his repository to MaciASL and apply this patch. Sadly this does not fix the NVMe M.2 Drive from displaying on the Desktop, for that you will need the SSDT-NVMe.aml provided below along with DSDT.aml
Phase 2c Testing stability and hunting any errors or bugs:
This will be ongoing but at this point you have a fully working Z10PE-D8 WS Based Hackintosh. It seems to be stable but I have not been able to test Speedstep or Turbo because my E5-2603 CPU's are locked at 1.7 Ghz and do not support HyperThreading. As can be seen with the image here https://www.tonymacx86.com/media/screen-shot-2016-09-25-at-01-32-14.187614/ this system is already capable of running KeyShot and that pushes CPU's to the max.

What Works?
With Sierra 10.12.0 everything works including Power Management, even though it does report false readings. I tested under Linux and Windows, the only OS that shows the true speed was Windows 10, the benchmark tests I carried out show there is no difference regarding performance across all three OS's. So it appears the flaw regarding CPU speed is inherent across the Linux and the OS X Kernels.

What Doesn't Work?

Sadly 10.12.1 Looses audio and also the NVMe M.2 SSD, so I still need time to find fixes for these things. I am a busy person right now and it might take me some time so be patient.

People that deserve my thanks and gratitude, without whom this build would probably have never of happened...
TonyMac, RehabMan, Stork (thanks for your patience bro!), P1LGRIM and VoiletDragon, Going Bald and cubawire (you were never ignored buddy)​
 

Attachments

  • DSDT.aml
    175.8 KB · Views: 546
  • SSDT-NVMe.aml
    115 bytes · Views: 515
Scarily "Wow!" on everything there :)

I guess Phase 2 will see a dramatic increase in memory and storage? And it does seem logical from what you've discovered that Apple might have a new Mac Pro in the pipeline. I suppose 12-cores must have a special name: how about "duodecacore" ?

Great to read about such a leading-edge build. Thanks for posting.

:)
The RAM upgrade is likely to be the first purchase, then a larger NVMe drive now that it gets recognised and booted thanks to PikeRAlpha's and RehabMan's hard work. I have 6 HDD's and 2 SSD's here already that I can harvest from the Z9 to keep me working on until I can afford to replace them. The ultimate goal is for dual 22c/44t CPU's but they cost an absolute fortune unless I can source some ES/QS types. If successful that will be 88 threads in total. For now however I am trying to decide to go with the 14c or 16c Broadwell Xeon versions at the moment.

Martin
 
Great i am currently running a Supermicro X10ASF board with one 2698V4 20 core cpu, and just ordered another CPU and the same motherboard you are using... would you mind to share a copy of your whole EFI partition?
 
Hi Panamamax, EFI folder uploaded for you, config.plist has been edited so you can add your own SMBios and RT Variables. You will NOT be able to used the SSDT files but they are left so you can see how things were done. If you get stuck with your build when you get to it give me a shout and I am sure we can get it sorted, this board really does behave as if it's made for Sierra.

Martin
 

Attachments

  • Z10PE-D8-WS-EFI.zip
    16.8 MB · Views: 533
What is your Geekbench score? I have a 12-core HP z800 with dual Xeons and 48gb. ram. I would like to know if it is worth it to upgrade. I get a geekbench score of 32000.
Not tested here yet, Just getting power management sorted - I think I have just achieved that - but the results here would be very poor regarding GeekBench the cpu's here are fixed at 6 cores no hyper threading no turbo and 1.7Ghz so they are pretty crappy. They were purchased purely to see if the build would work. I will GB it though, just for the laugh factor :)


Martin

** Edit: GeekBench3 results added **
 

Attachments

  • Screen Shot 2016-09-30 at 14.45.42.png
    Screen Shot 2016-09-30 at 14.45.42.png
    93.1 KB · Views: 851
  • Screen Shot 2016-09-30 at 14.50.28.png
    Screen Shot 2016-09-30 at 14.50.28.png
    91.4 KB · Views: 896
Last edited:
Hey Martin... Don't want to highjack your post, remarkable description and for sure i will have to use your help. my current build was not "made to work" by me... instead i mailed my hardware to a "expert" who did the major part for me...

attached you can see some screenshots from geek bench + cinebencz running my 2698V4 Engineering Sample from eBay (20 core 2,0ghz base, 2,3ghz max...) currently i can encode 4K DCI h264 files to ProRes422 in about 2,5x speed (so a 10 min clip takes 4 minutes)... can't wait to see the task manager with 80 cores :) :) :)

PS: Even the screenshots say 10.11.6... im now running 10.12 but with similar scores...
 

Attachments

  • Bildschirmfoto 2016-09-28 um 04.22.17.jpg
    Bildschirmfoto 2016-09-28 um 04.22.17.jpg
    774.2 KB · Views: 1,433
  • Bildschirmfoto 2016-09-30 um 18.05.21.png
    Bildschirmfoto 2016-09-30 um 18.05.21.png
    173.7 KB · Views: 1,443
  • Bildschirmfoto 2016-09-30 um 18.05.13.png
    Bildschirmfoto 2016-09-30 um 18.05.13.png
    322.9 KB · Views: 1,410
Hey Martin... Don't want to highjack your post, remarkable description and for sure i will have to use your help. my current build was not "made to work" by me... instead i mailed my hardware to a "expert" who did the major part for me...

attached you can see some screenshots from geek bench + cinebencz running my 2698V4 Engineering Sample from eBay (20 core 2,0ghz base, 2,3ghz max...) currently i can encode 4K DCI h264 files to ProRes422 in about 2,5x speed (so a 10 min clip takes 4 minutes)... can't wait to see the task manager with 80 cores :) :) :)

PS: Even the screenshots say 10.11.6... im now running 10.12 but with similar scores...
Nice ! - Not stealing my thread, gives me a ball park figure to work with. The ES chips are still pretty expensive for me and will take a while to save up for as I don't work anymore. I want to keep the costs down whilst ironing out problems with the build. Pure kernel power management is proving elusive so far, but getting close. :)

Martin
 
Good day Martin... just had a look into your EFI partitions... you really have little Kext in the Others file as well as not even the brumbär patch in kext to patch... interesting! on my supermicro i have like 7 kext and its full with changes in the config :)

Why did you use a system definition of the iMac instead of the mac pro 6.1?

may get the board in 2 weeks, can't wait to see how its doing ;)
 
Status
Not open for further replies.
Back
Top