Contribute
Register

[SUCCESS] Gigabyte Designare Z390 (Thunderbolt 3) + i7-9700K + AMD RX 580

No Idea how to change my shikigva value -

here's my config - Just noticed a legacy option is selected.. I don't have an option to deselect, same as in the guide
View attachment 458658
Just click the little + at the bottom right of the Boot Arguments box and type in: shikigva=16

However, there might be other issues.
  • Are you using Clover 5107 or newer (press "A" at Clover Boot Menu).
  • Are you using latest Lilu and WhateverGreen (in CLOVER/kexts/Other)?
 
Modified file attached.

There are two settings for USB-C:
  • If you connect a USB-C device to a USB-C port, a certain row in Hackintool or a certain port in IORegistryExplorer will light up.
  • If you now eject that USB-C disk, flip it over, and reinsert it (because USB-C ports are symmetrical), does the same row or the sameport light up?
    • If the same row or port lights up then it's a Type 9 device.
    • If different rows or ports light up then it's a Type 10 device.


It is the same port HS01 regardless of which way I insert the USBC cable.
should I also be removing my SSDC-EC-USBX.aml file from EFI? I currently have SSDT-EC-USBX which is a combo of the SSDT-EC and SSDT-USBX amls.
 
I'm building out the USB EFI folder between other tasks. I noticed my existing acpi\patched folder did not include the nvram aml, questions on that. Is the NVRAM aml enabling the native NVRAM support and could this be the reason 10.15.4 is erring out at the end with messages about not know startup disk?
Yes SSDT-NVRAM.aml is required for native NVRAM.
 
It is the same port HS01 regardless of which way I insert the USBC cable.
should I also be removing my SSDC-EC-USBX.aml file from EFI? I currently have SSDT-EC-USBX which is a combo of the SSDT-EC and SSDT-USBX amls.
Yes, but keep SSDT-EC.aml
 

Attachments

  • SSDT-EC.aml
    63 bytes · Views: 85
On a mission critical system your best bet is this:
  • If getting the Antelope Audio Interface to work is not mission critical, then it's probably best not to make any changes to a mission critical computer.
  • But if it is mission critical, then proceed by following the 3 guides in the red boxes below (see Post #1 for links):
View attachment 458408
  • Once you're ready to begin, attempt only to read the Thunderbolt flash chip three or four times in a row.
  • Compute the checksum of each file.
  • If all checksums match, type strings name-of-extracted-file.bin just to make sure the files are not empty.
  • All these steps are described in the guides referenced above.
  • If the chip cannot be read easily, don't force it and instead, STOP and let us know what's happening.

Thanks for this info Casey. It's not mission critical as I can still use the interface via USB, just not with all the functionality and extra i/o. Seeing as no-one has tested an antelope device yet there's no guarantee it'd work either. I'm not in a good position to do it right now because if I brick my chip, then I'm literally dead in the water as this is my main machine and I won't be able to work until I purchase a new chip (or board?). I'd also need to purchase a Raspberry Pi Kit to carry out the procedure.

Is it likely another method will be found to enable local node/bus? Or is flashing the chip looking like the only viable method? I understand you might not know the answer to this but your guess will be way better than mine!

If this is the only way forward I may be more tempted to try it, when I have the time to study the procedures properly and do my research thoroughly.
I agree with you 100 percent. We make cost/benefit calculations all the time. As someone once said, "Just because you can do a thing, it does not follow that you must do that thing."

We'll find another way or another user... :)
 
Plan C:
  • Find a spare USB flash disk or use an existing USB install disk.
  • If using a new USB flash disk, format the disk in Disk Utility:
    • Name: Boot Test
    • Format: MacOS Extended (Journaled)
    • Scheme: GUID Partition Map
  • Mount EFI partition of the USB flash disk.
  • If there's an EFI folder in the EFI partition, rename the EFI folder to something else, such as EFI-OLD.
  • Follow Step 1 of the Catalina 10.15.4 Mini-Guide except for the 3rd bullet (3rd bullet copies macOS installer to the USB disk, which we don't want).
  • Download the ZIP file from the same Catalina Mini-Guide. You will find 2 config files there:
    • config-IGPU.plist
    • config-AMD-GPU.plist
  • Ignore the first one. Instead, copy your existing RtVariables and SMBIOS sections into config-AMD-GPU.plist. You can use a text editor like BBEdit or a Plist Editor such as ProperTree to copy those two sections.
  • Then rename config-AMD-GPU.plist --> config.plist.
  • Remember to follow the other instruction in Step 1 of Catalina 10.15.4 Mini-Guide, including copying drivers, kexts, and ACPI files from the ZIP to the new CLOVER folder.
  • Then boot from the USB flash disk by pressing F12 at BIOS splash screen and choosing the USB disk.
  • At Clover Boot Menu, select the normal option to boot into macOS.
  • Does it work?

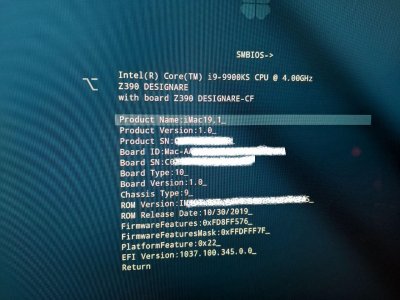
How do I get my existing RtVariables and SMBIOS?
can I type them in from the attached photo?
thanks again
 

Attachments

  • photo_2020-03-31_18-47-17.jpg
    photo_2020-03-31_18-47-17.jpg
    381.2 KB · Views: 79
How do I get my existing RtVariables and SMBIOS?
can I type them in from the attached photo?
thanks again

It now works!
I copied RtVariables and SMBIOS from a backup config.plist.

should I replace my efi folder with the one on the usb?

thanks for the help!
 
It now works!
I copied RtVariables and SMBIOS from a backup config.plist.

should I replace my efi folder with the one on the usb?

thanks for the help!
Wonderful!

Don't rush to do that yet. Instead, do a full shutdown, unplug power for 10 seconds, then boot again with USB disk (F12 at BIOS splash screen).

Also check that iCloud, Messages and FaceTime are working.
Also check the App Store is working.

Then backup the old EFI folder and copy the new EFI folder to the internal macOS SSD.
 
So after testing, I connected a DP to the DP-in.
Hot plugging works with the monitor, running 4k@60hz succesfuly if connected directly through the USB-C -> DP Adapter.

However, IF i connect the mointor to my dock, and the dock to the nearest thunderbolt connection to the HDMI. i'm getting only 4k@30hz, a bandwidth issue it seems @CaseySJ ?
Screen Shot 2020-03-31 at 19.47.38.png
 
Back
Top