So, when I last left off I was waiting for the an outlet for the back of my computer. I wanted a clean way to allow myself to plug a PSU into the wall without just passing a cord through a hole in the back. I had seen some other people mount outlets on the back and I decided to do the same. When I found one on Amazon, the shipping said that it could take up to 1 month to get here. I was unwilling to wait that long, so I did what any normal person would do. I cruised ebay and other tech sites doing my best to find the outlets. After about 24 hours spent looking and buying, I had spent about 15 dollars and purchased 3 options. I wanted to ensure that one of them would work and I did not want to wait on a second one if the first one didn't etc.
I waited for 4 days and then my impatience got the better of me. I had been given a computer by my office that was running windows 7 pro, but that was being retired because the hdd had gone bad. Naturally, I took one of my older IDE hdd's and popped it in, reinstalled Win 7 and boom, free computer. That is, it was a free computer until I took a screwdriver and a pair of pliers to it and ripped the outlet off of the PSU.
The back of the thing was literally smothered in solder, so it took me about an hour to get most of the solder and copper wire off of the original terminals. I also melted the plastic a few times over around the terminals and prongs by heating them up a bit too much while desoldering, but when it was all said and done, I had this:


As you can see, unfortunately the terminals seemed pretty beat up by the time I was done cleaning them off to a usable level.
I had read on a few other threads that crimping was the way to go as opposed to soldering. Following my experience removing all that solder, I agreed wholeheartedly considering I knew I might replace the outlet with one that I had bought online that wasn't so beat up. I had bought some cruddy terminals from home depot in a starter kit with a wirecutter/crimper and so I tried those out first and made sure that the plug would still work before I bothered going through the trouble of cutting my wires and installing it for real.
It worked on my old desktop, so naturally I measured and cut a hole to mount the outlet in.


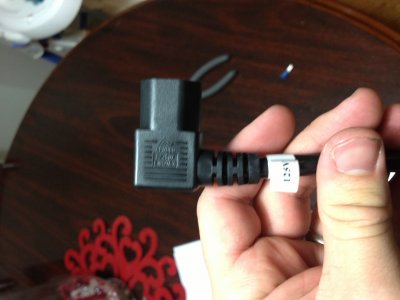
Then it was time to work on the wire itself. Due to the close confines of the back of the case, you need a right angle PSU cord. I purchased one off of monoprice. I'm fairly certain the shipping was more than the product.
This is what the head of it looks like:
The next step was to measure the length of the cable, cut it to length and stip the wires bare:


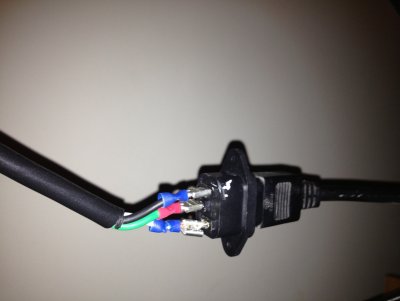
Having seen BoomR do exactly what I was trying to do successfully for his studio build, I consulted him on the terminals when I was being dumb. The pack that he got, which came from Lowes, had both male and female connectors in it. In case it isn't clear, you want to use the female connectors. They will slide over the terminals gripping them tightly like so:

After initially trying to connect the wires while the crimps were already mounted on the terminals, I realized that I should crimp securely first, then mount it. So I did. A piece of advice is to make sure that you have the heatshrink you plan on using, if you plan on using any, already threaded over the end of the cable so that it will be able to fit over the wires when you're done. Insulated the heck out of mine, but I think it was probably unnecessary to do so much. Here is the finished product minus the heatshrink being shrunk.
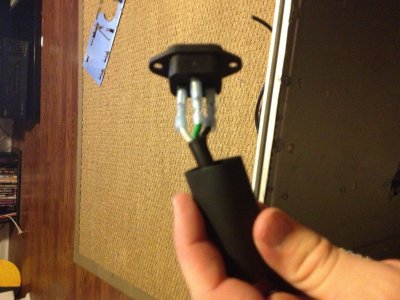
I should also note that at this point, I had already threaded the cable through the case so that when I mounted the outlet with the terminals attached the other end of the cable would be able to plug into the PSU inside the case.
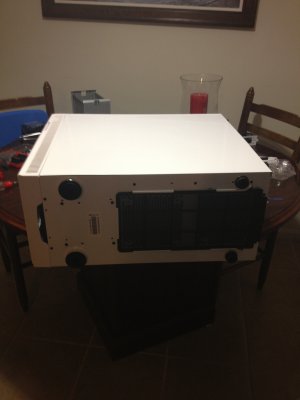
Here's a picture of the finished product from the outside.


Now that I had the cable in place, it was time to get the PSU and shelf into the box. I fitted the PSU into the mounting brackets that I had JB Welded to the steel shelf earlier and threaded the cables I would need through the hole that was already in the shelf. The modular PSU saved me a lot of space here with the cabling being relatively minimized.

Then I applied the thermal paste to the heatsink and mounted it on top of the PSU


Note, this is what it will look like with all the fans attached to it. I removed them at this point to give myself more room to work with cables and the RAM.
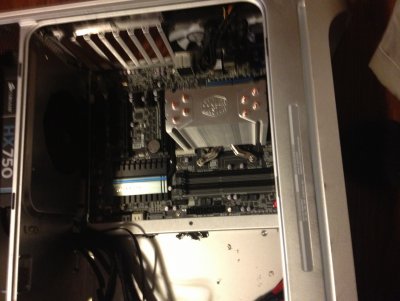
Installing the RAM. It's crazy to me that 32GB's can fit in sticks the same size as my 6 in my old computer
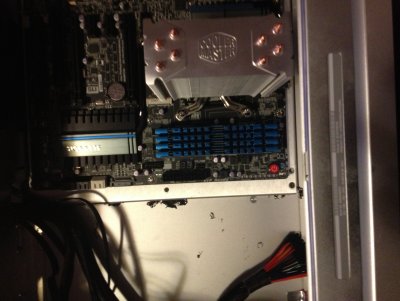

Very Very narrow clearance between the pull fan on my heatsink.

Then the moment of truth came. I plugged in the PSU, flipped the switch and gave power to my board. I didn't realize it at first, but apparently the board comes with hard boot and reset switches mounted directly onto the board itself. They were convenient because somehow I had miss connected a few of the pins when I initially wired the front I/O cable from Alohacab over at InsanelyMac.

Booted right into the UEFI and pretty white LED's lit up the inside of the case.

I actually got hung up at this point. My old MacBook Pro, which I had anticipated using would not let me download Mountain Lion because it was too old. Ridiculous that I couldn't even download it, but hey, what're you going to do? You're going to install Snow Leopard on your brand new Hackintosh Pro, update it to the App Store level at 10.6.8 and then download the retail version of Mountain Lion and then make a Unibeast Thumbdrive. Then you're going to install that stuff and never look back. (Sorry for the upcoming sideways pictures, not sure why they didn't load with the correct orientation):

Then update the Mountain Lion base install to 10.8.2 because for some reason your install that you downloaded was a 10.8.0 version of the installer, despite all that you've read.

Then, glorious success.


(I don't love that it says it's an Early 2008 Mac Pro, but that's the default definition that the installer came up with. I may try to use Multibeast to make it look brand new, since, you know, it is.)

Dual DVI Monitors.
Turned off.

And Turned on.

You may notice in the last two pictures that there is a drive bay. My office had an old server that they were getting ready to throw away. I nabbed 2 Sata HDD's and the HDD bay out of it. It has holes that will allow me to mount it in the 4 corners and will hold a total of 6 bays. (Plenty for me.) I just need to decide if I'm going to mount any additional fans in there, but time will tell once I've been able to put it under some stress loads.
Let me know what you think and I'll keep you posted as I do the cable management and mount the HDD bay.


