Contribute
Register

How to build your own iMac Pro [Successful Build/Extended Guide]

Status
Not open for further replies.
Hi Like JonJon80 I am very much a newbe to the world of Hackintosh. So go gentle on me - I have my rig up and running with Windows - cant believe how easy that was. But try as I might I cannot get past go with this build of hackintosh.

Problem 1 - If I download and unzip X229D.CAP.Zip and unzip it the MoBo refuses to recognize the file as valid - I have copied it to a FAT32 format USB. I can however flash the BIOS with files downloaded from Azus.

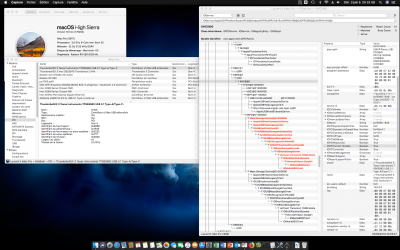
Problem 2 - Having upgraded the BIOS to 1301 using ASUZ vanilla version, if I then try the OSX installation it hang about 30 seconds in - in verbose mode This is trying to random seed *********************************

Any suggestions greatfully recieved

ad 1.) as already mentioned by @morh, you need to use EZflashback to flash your BIOS with the patched X229D.CAP firmware file!
ad 2.) if you do not patch the BIOS firmware with patches from @interferenc and do not open MSR register for system write, you need to use TSCResetAdjust.kext or VoodooTSCSync.kext and to enable xcpm_core_scope_msrs Kernel patch in config.plist.
 
Last edited:
After some difficulty (system crashed in the last update step on AppleHDA) I got the update to 10.13.5 working.
Since then my machine is running apr. 5°C colder :think: I will do some tests later this week in that one.

I am wondering if I should replace that weird HP mainboard with some thing..... better?
As the cube only has place for mATX I am not so sure which one. I was looking on the MSI X299M Gaming Pro Carbon AC
and the ASRock X299M Extreme4.
Only for the MSI I could find in the Manual that the MSR 0xE2 can be unlocked. The ASRock manual is very quiet in that point.
Before I buy stupid a few questions:

Has anyone experience with the ASRock board ?
As I can't find any thunderbolt reference in the MSI manual, does that say I can not add thunderbolt functionality?

thanks a lot for helping
All the Best
Frank
 
Has anyone experience with the ASRock board ?
As I can't find any thunderbolt reference in the MSI manual, does that say I can not add thunderbolt functionality?
I use an ASRock X299E-ITX/ac and on this board the MSR 0xE2 can be unlocked.
It is named "CFG Lock" in BIOS and the manual.

This board works quite nice as a hackintosh and it is tiny. :cool:
 
I use an ASRock X299E-ITX/ac and on this board the MSR 0xE2 can be unlocked.
It is named "CFG Lock" in BIOS and the manual.

This board works quite nice as a hackintosh and it is tiny. :cool:

That sounds like good news to me!! Back to 2 options (MSI and ASRock)
Stays the question if I might get a thunderbolt card working!?

Thanks a lot @kubusikan
 
ad 1.) as already mentioned by @morh, you need to use EZflashback to flash your BIOS with the patched X229D.CAP firmware file!
ad 2.) if you do not patch the BIOS firmware with patches from @interferenc and do not open MSR register for system write, you need to use TSCResetAdjust.kext or VoodooTSCSync.kext and to enable xcpm_core_scope_msrs Kernel patch in config.plist.

After 4 go arounds the BIOS flashing was finally succesful. However, I am in the same position, once on the bootloader screen I have to;

- Press F3 to reveal the drives,
- Then I am presented with an icon for my drive which says "Boot UEFI Internal from EFI"
- Selecting that brings me to another empty screen where I press F3 again to reveal a different colour icon with the text "Boot UEFI external from EFI"

This is a never ending loop:
- All BIOS settings are in line with the guide.
- Both the install drive (made with install disk creator) and the destiation drive are in JHFS+ format.
- Each of the drives EFI partions contain the EFI package provided by KGP (with edited config.plist for the SMBIOS)

*EDIT - I said the loader says "Install UEFI internal from EFI" when in fact it reads "Boot UEFI Internal from EFI"
 
Last edited:
After 4 go arounds the BIOS flashing was finally succesful. However, I am in the same position, once on the bootloader screen I have to;

- Press F3 to reveal the drives,
- Then I am presented with an icon for my drive which says "Boot UEFI Internal from EFI"
- Selecting that brings me to another empty screen where I press F3 again to reveal a different colour icon with the text "Boot UEFI external from EFI"

This is a never ending loop:
- All BIOS settings are in line with the guide.
- Both the install drive (made with install disk creator) and the destiation drive are in JHFS+ format.
- Each of the drives EFI partions contain the EFI package provided by KGP (with edited config.plist for the SMBIOS)

*EDIT - I said the loader says "Install UEFI internal from EFI" when in fact it reads "Boot UEFI Internal from EFI"

Which boot loader screen you are talking about, man? Clover or BIOS?

No idea what you are talking about. What you describe above appears totally weird to me. No idea what you are doing actually, sorry..

Try to provide some useful bug report and describe in detail what you did so far.

"Everything is in line with the guide and nothing works" ... Marvellous comment.. Better not to take serous what you write here.. Otherwise it would sound rather offensive.. and you seem to blame the guide for your system flaws...

No further comments from my side.. ;)
 
Last edited:
Which boot loader screen you are talking about, man? Clover or BIOS?

No idea what you are talking about. What you describe above appears totally weird to me. No idea what you are doing actually, sorry..

Try to provide some useful bug report and describe in detail what you did so far.

"Everything is in line with the guide and nothing works" ... Marvellous comment.. Better not to take serous what you write here.. Otherwise it would sound rather offensive.. and you seem to blame the guide for your system flaws...

No further comments from my side.. ;)
ad 1.) as already mentioned by @morh, you need to use EZflashback to flash your BIOS with the patched X229D.CAP firmware file!
ad 2.) if you do not patch the BIOS firmware with patches from @interferenc and do not open MSR register for system write, you need to use TSCResetAdjust.kext or VoodooTSCSync.kext and to enable xcpm_core_scope_msrs Kernel patch in config.plist.

KGP Please take no offence - none is intended - indeed mighty impressed by what you and your colleagues have accomplished - I am frustrated though with all the effort and dilligence I have applied but just not getting this to work - I know the mistake must be mine but cannot spot the problems. Not suggesting there are problems with the guide.

This is what I have done.
I have an X22D Delux with 7980XE processor and Geoforce GTX 1080Ti video card. No other hardware installed at this point except for water cooling. All working fine on WIndows 10

I have then downloaded the latest X229D patched BIOS from this site. I have now successsfully flashed the MoBo (had a faulty USB stick) to 1301 with the patches and iMacPro splash screen. Working fine.

Downloaded the X22D.......010618.zip - followed instructions to generate the SMBIOS and UUID in Clover Configurator. Saved patched config into the /EFI folder

Downloaded on a non iMacPro mac the High Siera 10.15.5 installer application from Applestore

Used Install Disk creator to creat the USB install drive HFS+ - checked the /EFI partion was empty, copied in the patched 010618 /EFI directory content into the USB /EFI folder and ensured SMBIOS & UUID present.

Then made sure the USB is bootable. Prepared a clean HDD HFS+ - again ensuring I copied the X22...........010618 /EFI directory as abpve

Boot iMacPro with USB Installer and clean system disk - all other drive removed - enter the ASUS BIOS and set up to boot from USB Installer - Boot system

Clover white screen opens with the CMD icon at the top and 4 option buttons in the middle - no intaller drives are shown - If I use F3 I can see the USB drive - clicking on it just takes me in a loop to no dive displayed

So stuck at this point - obvious I do something wrong but as a newbe I am learning tough lessons.

If there is more information I can provide please tell me what and how to find it.


many thanks again.

Alright, this information might help a bit further ;)

1.) Did you disable CSM in BIOS? Did you perform an UEFI Windows Installation with the BIOS settings optimised for OSX? I guess that apparently you did not perform a Windows UEFI installation, as otherwise at least your Windows partition would show up in the clover boot manager. Remove your Windows Legacy installation and start from scratch ;)

2.) Hopefully you also applied all BIOS settings as depicted within my guide...

3.) Now I don't know what you mean by patched 010618 /EFI directory content.. Listen.. As you patched the BIOS Firmware you might not need TXCAdjustRest.kext. Fine.. So you might be able to directly use my EFI-folder distribution without further modifications at least for the initial macOS Installation. But you need to copy my EFI-Folder to the EFI-partitions of both macOS USB Flash Drive Installer and future macOS 10.13 system disk! If the 10.13 system disk has no EFI-Folder, it want show up in the BIOS or Clover boot manager.

4.) As you don't see the macOS USB Flash Drive Installer, I guess you did not successfully complete Section D.3). Please carefully study this part of my guide and focus especially on point D.3.3)!
Screen Shot 2018-06-03 at 20.36.41.png

Hope this helps further..

Good luck, KGP
 
:lol:

Did you adopt the ACPI path entries for your system ?

Are the TB drivers loaded under “PCI”?

@kgp

I have already finished modifying your SSDT-X299-TB3-iMacPro-KGP today for my configuration.
It was very long :beachball: and I tried 29 different :banghead: versions before reaching.
But today it was good. :)

Hootplug sleep/wake seems working.
Thanks for your work and this SSDT.
 

Attachments

  • Loloflat6_TB3_X299UD4_03_06_2018.png
    Loloflat6_TB3_X299UD4_03_06_2018.png
    1 MB · Views: 169
@kgp

I have already finished modifying your SSDT-X299-TB3-iMacPro-KGP today for my configuration.
It was very long :beachball: and I tried 29 different :banghead: versions before reaching.
But today it was good. :)

Hootplug sleep/wake seems working.
Thanks for your work and this SSDT.

Are you sure that also TB hot plug is working? If so, can you explain further details?

Cheers, man!
 
Status
Not open for further replies.
Back
Top