- Joined
- Dec 7, 2011
- Messages
- 545
- Motherboard
- Razer Blade 15 - Clover
- CPU
- i7-8750H
- Graphics
- UHD 630/GTX 1060 - 1920x1080
- Mac
- Mobile Phone
I wrote up this guide with as much detail as possible. For the experienced user, there will be a lot of what you already know how to do in this, for the inexperienced user, hopefully this makes life as easy as possible for you.
Disclaimer: I am not responsible for any damage you might cause to your system/hardware. You are assuming all responsibility for attempting everything listed in the guide.
Razer Blade 15 Base Model Users: This guide was written up for the Advanced Model, 95% of the guide still applies to you. But a few things are different. See the bottom of this guide for Base Model specific instructions after you follow the rest of the guide.
To get this laptop working it WILL Require you to Unlock your BIOS, edit your own DSDT and a bit of other leg work. Take this as a warning now before you start. It's not all that hard, but it's not that easy either. It’s a Hackintosh after all.
After months of trail & error, I feel it's time to write up a guide for others to follow. I'll do my best to keep this updated when fixes/other functionality is added in.In the current state I would put this laptop at 98/99% functionality of all OSX features and functions. This laptop is now at 100% functionality!
Update 1/11/19 (Only need to look at this if you already followed this guide. If it's your first time installing, skip to section 1 below.):
Updated Post Installation Clover file.
New config.plist for proper Framebuffer Patching as well as cleaning up some unnecessary patches. I would recommend using the newly provided config.plist for the updates and making any custom changes that you have set from your old one to that new one (custom changes such as serial number UIID and other items).
Updated Kexts:
VoodooI2C & Voodoo2CHID have been updated. These 2 kexts are a mandatory update because of a memory leak in the original ones that would cause a system crash after a few hours. Make sure you install these 2 for full system stability.
WhateverGreen
Lilu
LiluFriend - Added
AppleALC
AirportBrcmFixup (replaces the PCIID_Broadcom_WiFI kext)
No Longer needed Kexts (Please remove them from your installed kexts)
FakePCIID
FakePCIID_Broadcom_WiFi
AppleBacklightFixup
VodooPS2Controller
VoodooTSCSync
Updated Patched Folder:
Please remove all of the patched files from EFI-Clover-ACPI-Patched (except for you DSDT and SSDT-10-OptTabl) and replace them with the new versions in the Post Installation Clover file.
3 Minute Black Screen On Boot Fix:
Requires everything posted above:
The newly provided config.plist, new WhateverGreen.kext, new Lilu.kext and new LiluFriend.kext.
The new Patched SSDT files in the patched folder.
You also need to delete your current DSDT and SSDT-10-OptTabl files. You will need to dump fresh versions and repatch them after the next step.
Unfortunately, to get the fix to work properly and for you laptop to boot with the fix, you will have to unlock the portion of your BIOS that controls the DVMT settings. It's not difficult, just follow the instructions and it will go smoothly. You will need Windows installed to make this happen. So if you don't have Windows installed, stop and do so and then come back to this.
First things first:
Boot into OSX
Mount your EFI drive
Navigate to EFI-Clover-ACPI-Patched
Find your patched DSDT and SSDT-10-OptTabl file and delete it. If you don't this before unlocking the BIOS, OSX will NOT boot. You will have to dump your DSDT/SSDT files and re-patch. There is no way around this.
Then:
Updated Post Installation Clover file. New config.plist + SSDT-USBX added from proper USB Power implementation. Also updated version of WhateverGreen. I mistakenly uploaded a beta version of WhateverGreen in the last upload that can cause a non-boot issue, please use the new WhateverGreen included in this file.
If you have used the older version of my Post Installation Files, please download the new one and use the new config.plist + add SSDT-USBX to EFI-Clover-ACPI-Patched. The new config.plist has a hotpatch in there needed for the USB Power Configuration.
If you want to use your config.plist do the following:
In Clover Configurator open the APCI section:
Click the plus to add a new patch and add the following:
Comment: change EC0 to EC
Find: 4543305F
Replace: 45435F5F
What works:
WiFi & Bluetooth (After network card upgrade)
Trackpad with Gestures
Keyboard
Backlight Controls
All USB Ports including the USB C port
Native Audio (Speakers, Headphones, Microphone and Line-In)
Sleep
Shutdown
Restart
Camera
Battery Status
HDMI
Nvidia Graphics (HDMI Out ONLY)
What doesn't work:
Caps Lock light on the keyboard. (This has been solved. Use Karabiner-Elements app, explained at the bottom of the guide.)
Audio over HDMI (This has been fixed!)
Palm Rejection on Trackpad (This has been mostly solved with the new trackpad kexts. I'm calling it fixed.)
Lets start with the basics:
This guide is specifically for the Razer Blade 15 (2018 Advanced Model) with the UHD630 Integrated Graphics and i7-8750H Processor. Models with the UHD620 Graphics can follow this guide, but you will have to do some of your own work to figure out graphics issues that you will encounter.
Thanks to users blodtanner, JomanJi & RehabMan that all contributed to getting this laptop this far with being made into a Hackintosh.
I.
Prerequisites:
II.
Pre-Install:
If you followed the above process, you will not have to add any bootflags or special items, all of that leg-work is done for you, it's ready to install.
II.I
Unlocking BIOS, Disabling Fast Boot + Secure Boot and Enabling Thunderbolt.
The Install:
III.I
NEXT STEP IS OPTIONAL.
Disabling APFS Conversion. This is only if you want to use HSF instead of APFS. If you don't know what this means, skip to the next section.
IF YOU'RE INSTALL MOJAVE, SKIP THIS. THIS WILL NOT WORK FOR MOJAVE, APPLE GOT RID OF THE OPTION TO DISABLE THE APFS CONVERSION.
If you want to run Mojave and also have HFS, you need to download and run the following software after you install Mojave. You will need an external hard drive big enough to copy your entire system drive over.
https://www.paragon-software.com/us/home/apfs-hfs-converter/
That's it. Close terminal and reboot the laptop. Tap F12 again to get to the boot options and select the USB Installer again.
The following section is only if you made a USB Installer with the
IV
Post Installation:
Once you did all of the OSX set up stuff and are at the desktop:
At this point you can eject the USB Installer Flash Drive and reboot your laptop.
Your laptop should boot right into clover, but don’t select anything yet.
This next few steps is to prepare you for editing your DSDT.
Log In
This next step is ONLY if you did not install the 17G2208 with your USB Installer.
If you made your USB Installer with the 17G2208 build, skip this and move onto the DSDT & SSDT Editing section.
Now if you installed the 17G65 build and not the 17G2208 Build, you will not have working backlight controls, or working sleep, you will also not have the black screen on boot up. Before proceeding any further get a copy of the 17G2208 build.
This process of the update WILL convert your file system to APFS. This is why I recommended installed the 17G2208 build with the USB Installer from the start. You will have to run an HFS converter App to get the HFS file system back.*
V.
DSDT & SSDT Editing:
Now the fun begins.
Right now you should have functioning Brightness Control, Audio and all USB Ports.
Currently your trackpad does not work and neither does battery status. This is where we will get into some more advanced stuff. If you follow the guide you shouldn't have any issues.
You will need to patch your own DSDT to get trackpad and battery status working, here's how:
If you want the full guide on DSDT Patching go here: https://www.tonymacx86.com/threads/guide-patching-laptop-dsdt-ssdts.152573/
If not, here's a quick, summed up guide on just the things you need to do for this laptop.
Big thanks user RehabMan for the tools and the original guides.
Disclaimer: I am not responsible for any damage you might cause to your system/hardware. You are assuming all responsibility for attempting everything listed in the guide.
Razer Blade 15 Base Model Users: This guide was written up for the Advanced Model, 95% of the guide still applies to you. But a few things are different. See the bottom of this guide for Base Model specific instructions after you follow the rest of the guide.
To get this laptop working it WILL Require you to Unlock your BIOS, edit your own DSDT and a bit of other leg work. Take this as a warning now before you start. It's not all that hard, but it's not that easy either. It’s a Hackintosh after all.
After months of trail & error, I feel it's time to write up a guide for others to follow. I'll do my best to keep this updated when fixes/other functionality is added in.
Update 1/11/19 (Only need to look at this if you already followed this guide. If it's your first time installing, skip to section 1 below.):
Updated Post Installation Clover file.
New config.plist for proper Framebuffer Patching as well as cleaning up some unnecessary patches. I would recommend using the newly provided config.plist for the updates and making any custom changes that you have set from your old one to that new one (custom changes such as serial number UIID and other items).
Updated Kexts:
VoodooI2C & Voodoo2CHID have been updated. These 2 kexts are a mandatory update because of a memory leak in the original ones that would cause a system crash after a few hours. Make sure you install these 2 for full system stability.
WhateverGreen
Lilu
LiluFriend - Added
AppleALC
AirportBrcmFixup (replaces the PCIID_Broadcom_WiFI kext)
No Longer needed Kexts (Please remove them from your installed kexts)
FakePCIID
FakePCIID_Broadcom_WiFi
AppleBacklightFixup
VodooPS2Controller
VoodooTSCSync
Updated Patched Folder:
Please remove all of the patched files from EFI-Clover-ACPI-Patched (except for you DSDT and SSDT-10-OptTabl) and replace them with the new versions in the Post Installation Clover file.
3 Minute Black Screen On Boot Fix:
Requires everything posted above:
The newly provided config.plist, new WhateverGreen.kext, new Lilu.kext and new LiluFriend.kext.
The new Patched SSDT files in the patched folder.
You also need to delete your current DSDT and SSDT-10-OptTabl files. You will need to dump fresh versions and repatch them after the next step.
Unfortunately, to get the fix to work properly and for you laptop to boot with the fix, you will have to unlock the portion of your BIOS that controls the DVMT settings. It's not difficult, just follow the instructions and it will go smoothly. You will need Windows installed to make this happen. So if you don't have Windows installed, stop and do so and then come back to this.
First things first:
Boot into OSX
Mount your EFI drive
Navigate to EFI-Clover-ACPI-Patched
Find your patched DSDT and SSDT-10-OptTabl file and delete it. If you don't this before unlocking the BIOS, OSX will NOT boot. You will have to dump your DSDT/SSDT files and re-patch. There is no way around this.
Then:
- Boot into Windows
- Download Windows Bundle file attached to this.
- Extract folder named "AfuWin64" and a executable named "AMIBCP64" to the desktop.
- Open the command prompt
- Type "cd" press space and drag "AfuWin64" folder in and hit enter
- Type "afuwinx64 rzr.rom /O" hit enter
- At this point, go into the AfuWin64 folder, find the rzr.rom and make a backup of it somewhere on your computer and on an external drive. This will be your stock BIOS set up if you ever need to flash back to a locked state.
- Don't forget to do the step above.
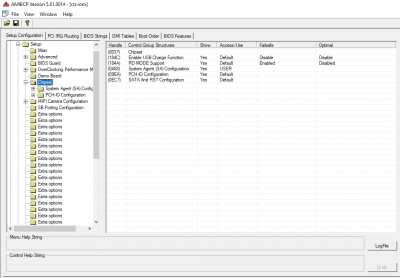
- Open the rzr.rom file with the AMIBCP64 program
- Find Chipset / System Agent (SA) configuration and change that to user (there is a screenshot labeled BIOS Unlock Screenshot attached to this post to show you what exactly you need to change)
- Save the file
- Go back to the command prompt and type "afuwinx64 rzr.rom /P /B" and hit enter
- Wait for the flash to finish.
- Reboot your computer and head into the BIOS once the flash is complete.
- Next navigate to the Chipset Tab, arrow down to System Agent (SA) Configuration and hit enter.
Then arrow down to Graphics Configuration and hit Enter.
Arrow down to DVMT Pre-Allocated
Change DVMT Pre-Allocated to 64MB. It should be at the top of the options for DVMT once you select it. - Save settings and reboot
Boot into OSX, re-patch your DSDT and you should be good to go.
Updated Post Installation Clover file. New config.plist + SSDT-USBX added from proper USB Power implementation. Also updated version of WhateverGreen. I mistakenly uploaded a beta version of WhateverGreen in the last upload that can cause a non-boot issue, please use the new WhateverGreen included in this file.
If you have used the older version of my Post Installation Files, please download the new one and use the new config.plist + add SSDT-USBX to EFI-Clover-ACPI-Patched. The new config.plist has a hotpatch in there needed for the USB Power Configuration.
If you want to use your config.plist do the following:
In Clover Configurator open the APCI section:
Click the plus to add a new patch and add the following:
Comment: change EC0 to EC
Find: 4543305F
Replace: 45435F5F
What works:
WiFi & Bluetooth (After network card upgrade)
Trackpad with Gestures
Keyboard
Backlight Controls
All USB Ports including the USB C port
Native Audio (Speakers, Headphones, Microphone and Line-In)
Sleep
Shutdown
Restart
Camera
Battery Status
HDMI
Nvidia Graphics (HDMI Out ONLY)
What doesn't work:
Lets start with the basics:
This guide is specifically for the Razer Blade 15 (2018 Advanced Model) with the UHD630 Integrated Graphics and i7-8750H Processor. Models with the UHD620 Graphics can follow this guide, but you will have to do some of your own work to figure out graphics issues that you will encounter.
Thanks to users blodtanner, JomanJi & RehabMan that all contributed to getting this laptop this far with being made into a Hackintosh.
I.
Prerequisites:
- THE MOST IMPORTANT ITEM: You need an upgraded NVMe SSD. The stock one that comes with the Razer Blade is NOT compatible with OSX. The installation will hang/fail if you try to use the stock NVMe. If you don't believe me, refer to this thread: https://www.tonymacx86.com/threads/how-to-fix-pm981-in-10-13-3-17d47.245063/ Samsung 970 EVO or Pro are the NVMe's that have been successful thus far with this laptop, but that doesn't mean others won't work too. Those 2 are just my suggestion because we know they work.
2/22/19 Update: The Samsung 970 Evo Plus NVMe is NOT compatible. Do not get this drive or you will face the same issues as the stock NVMe. Stick with the regular 970 EVO or Pro. - A USB Mouse, wired or wireless (the trackpad will not work during the installation process and for the first part of the post installation process)
- Upgraded Network card (The one that comes with the Razer Blade is not compatible with OSX). This is sort of optional, if you wanted integrated WiFi to work, you need to do this. Otherwise you will have to get a compatible USB WiFi Dongle.
Recommendation for a Network card: BCM94352Z (DW-1560) - A Mac or Hackintosh that can download Apps from the App Store (ect)
- A copy of High Sierra 10.13.6 (17G65 Build is fine for initial installation, updating to 17G2208 (special 2018 MacBook Pro build) is easy, but using 17G2208 for initial installation saves some steps) This guide should also work for any of the Mojave builds also.
If you want almost 100% functionality you NEED to end up running either 17G2208, or the 2 newest builds 17G2307 and 17G3025, or Mojave. If you stick with 17G65 build of High Sierra, you WILL NOT have functioning backlight control and sleep.
**To get a copy of the 17G2208 build use the installinstallmacos.py script found here: https://github.com/munki/macadmin-scripts
(This build is not available as a direct download from the Apple Website or the App Store, you need to use the script to get it)**
The 17G2307 build is available as an update through the Appstore after install is complete.
My recommendation is to just get yourself a copy of 17G2208 and make a bootable install of that build, saves a lot of time and headache that way. If you chose to not go this route, the guide explains how to update to that build later on. - In order to make a bootable install of 17G2208. After you download the installer using the script, open the file as if you were going to run it.
Once the install mounts, you will see the Install macOS High Sierra app inside of the mounted folder.
Drag and drop that app to your Applications folder, let it copy.
Now UniBeast will see it as an option to make a bootable install (explained below) - Download all of the files attached to this post, plus the following files:
Download the latest version of Clover from here (For post installation): https://bitbucket.org/RehabMan/clover/downloads/
Download KextBeast from here: https://www.tonymacx86.com/resources/kextbeast-2-0-1.310/
Download EFI Mounter from here: https://www.tonymacx86.com/resources/efi-mounter-v3.280/
Download Clover Configurator from here: https://mackie100projects.altervista.org/download-clover-configurator/
The latest version of Clover Configurator is 5.3.0.0 at the time of writing this guide.
Download UniBeast from here: https://www.tonymacx86.com/resources/unibeast-8-2-0.371/
II.
Pre-Install:
- Make sure Windows is installed you will need it for the second section.
- Use Unibeast or another App or terminal if you know the script to make a bootable OSX Installer with the Clover Bootloader. If you want ease, just use Unibeast.
- Once the bootable installer is made open the Install macOS High Sierra drive and make a new folder in the root of the drive and copy the Post Installation folder that you downloaded from the bottom this post + the Clover Installer + KextBeast + EFI Mounter to this folder. You will need this files after you are done with the install.
- You're not done making the bootable installer just yet so don't eject it:
You will need the EFI Mounter App that you downloaded from the section above- 4.1. Now open terminal and type:
This will give you a read out of all your drives and their Identifier. Look for the USB Drive with the name "Apple_HFS Install macOS High S..." just above that name you will see "EFI EFI" take note of the Identifier next to "EFI EFI"Code:
diskutil list
Open EFI Mounter and select the option that matches the "EFI EFI" Identifier that you just found in Terminal, click mount and follow the prompts.
- 4.1. Now open terminal and type:
- Once the USB EFI is mounted open the EFI folder, you should see the Clover Folder (If you don't, don't worry this will fix it). Download the attached file labeled Clover USB Installer. Unzip and copy and paste the CLOVER folder into the EFI Folder. When prompted click Replace. Once it's done copying, you are ready to start installing.
II.I
Unlocking BIOS, Disabling Fast Boot + Secure Boot and Enabling Thunderbolt.
- Unlocking the DVMT settings in the BIOS (You need to do this otherwise you won't boot):
- Boot into Windows
- Download Windows Bundle file attached to this.
- Extract folder named "AfuWin64" and a executable named "AMIBCP64" to the desktop.
- Open the command prompt
- Type "cd" press space and drag "AfuWin64" folder in and hit enter
- Type "afuwinx64 rzr.rom /O" hit enter
- At this point, go into the AfuWin64 folder, find the rzr.rom and make a backup of it somewhere on your computer and on an external drive. This will be your stock BIOS set up if you ever need to flash back to a locked state.
- Don't forget to do the step above.
- Open the rzr.rom file with the AMIBCP64 program
- Find Chipset / System Agent (SA) configuration and change it to user (there is a screenshot attached named BIOS Unlock ScreenShot, refer to that to make sure you're changing the correct option)
- Save the file
- Go back to the command prompt and type "afuwinx64 rzr.rom /P /B" and hit enter
- Wait for the flash to finish.
- Reboot your computer and head into the BIOS once the flash is complete.
If you don't know how:- Shut the laptop down completely.
- Turn it on and start tapping the del key on the keyboard, keep tapping it until you get to the BIOS Screen.
- Use the arrow keys to navigate to the Security Tab. At the bottom you will see Secure Boot Menu, arrow
down to it, hit enter and set Secure Boot to be disabled. - Next navigate to the Boot Tab arrow down to Fast Boot, hit enter and change it to disabled.
- Next navigate to the Chipset Tab, arrow down to System Agent (SA) Configuration and hit enter.
Then arrow down to Graphics Configuration and hit Enter.
Arrow down to DVMT Pre-Allocated
Change DVMT Pre-Allocated to 64MB. It should be at the top of the options for DVMT once you select it. - Save Changes
- Enabling Thunderbolt (Optional):
- Get back into the BIOS if you have already exited.
- Navigate to the Advanced Tab
- Select Thunderbolt (TM) Configuration
- Change the Security Level to No Security
- Save changes and reboot
That's it, you're ready for the install now.
III.The Install:
- Pop the flash drive into your Razer Blade, turn it on and start tapping F12 until you see the boot options screen.
- 1.1.Select your USB Installer and what for it to load. Once you get to the Clover screen select the Mac OS Install option and let it load. Follow the prompts in the installer.
- You will have to get into Disk Utility once the installer loads and format your drive, if you don't know here's what you need to format the drive to.
Format: Mac OS Extended (Journaled)
Scheme: GUID Partition Map- 2.1. If you plan on Dual Booting with Windows or Linux, now would be a great time to create another partition, right after you format the drive. This will make your life easier later.
- Go back and follow the install prompts, the installer will start the process. Now keep an eye on the installer because it’s going to reboot the laptop after a few short minutes.
- 3.1.Once it reboots tap F12 again until you get to the boot options screen again. Once again select your USB Installer as your boot option wait for it to load.
III.I
NEXT STEP IS OPTIONAL.
Disabling APFS Conversion. This is only if you want to use HSF instead of APFS. If you don't know what this means, skip to the next section.
IF YOU'RE INSTALL MOJAVE, SKIP THIS. THIS WILL NOT WORK FOR MOJAVE, APPLE GOT RID OF THE OPTION TO DISABLE THE APFS CONVERSION.
If you want to run Mojave and also have HFS, you need to download and run the following software after you install Mojave. You will need an external hard drive big enough to copy your entire system drive over.
https://www.paragon-software.com/us/home/apfs-hfs-converter/
- Once you get back to the clover screen you will see 2 options for "Install macOS" One will be from the USB Installer and another will be on your newly formatted main drive in your laptop. Select the USB Installer option again and wait for the installer to load.
- Once you're back into the install open terminal and type the following commands:
(Those are L's above not I's)Code:
ls -l /Volumes
The above is to remind you of the name you have your formatted drive to put OSX on. For the next few steps I'm going to use the name "Razer" for a example. Replace the word Razer with the name of your drive. If the name of your drive is 2 words with a space you must use Quotations when typing in the commands. Example Razer Drive would have to be "Razer Drive" -
Code:
cd /Volumes/RazerCode:cd "macOS Install Data"Code:/usr/libexec/PlistBuddy -c "Set :ConvertToAPFS false" minstallconfig.xml
That's it. Close terminal and reboot the laptop. Tap F12 again to get to the boot options and select the USB Installer again.
- Once back in clover, select the Install macOS that is on your newly formatted drive (Do not select the installer from the USB drive, you will just end up doing all of the work all over again for no reason).
- 1.1.There's a possibility that the screen will go black once the installer starts to load. This is okay. If it does go black, shine a flash light on the screen to see if you can see the installer. If you see the installer doing it's thing, don't worry about it, let it go.
- The installer should boot right up and continue installing without any interaction from you. Keep an eye on it because it will reboot your laptop. Once it reboots again tap F12 and select the USB Installer from the boot options screen. Once Clover boots, select the Install macOS from your main drive again. It will boot back into the installer and finish what it has to do. Once it's done it will ask you to reboot and give a count down to automatic reboot.
- Reboot your laptop and once again tap F12 and select your USB Installer from the boot options. Once in Clover select macOS from your main drive and let it start to boot.
- Once booted, follow all the prompts to set up OSX.
IV
Post Installation:
Once you did all of the OSX set up stuff and are at the desktop:
- Open the Install macOS High Sierra USB Drive and copy the folder with the files you downloaded earlier to the desktop.
- Run the Clover Installer from that folder, follow the prompts. Make sure on the Installation Type section that clover is set to install to your main drive you installed OSX to. Install it and close the installer.
- Open terminal and type:
Find the name of your main drive that you installed OSX to. Just above it will be the EFI EFI drive. Take note of the Identifier.Code:
diskutil list - Open and run the EFI Mounter app and mount the EFI Drive of your main OSX Drive that you found the Identifier to above.
- 4.1.Once mounted navigate to the Clover folder inside of the EFI Folder.
If you don't see the Clover folder when you open the EFI drive:
Navigate to the root of your main OSX drive. In there you will probably see the Clover Folder.
Copy and Paste it into the EFI drive and then Delete if off of your main drive.
Inside of the Post Installation Clover Folder that you downloaded earlier there's a config.plist file copy and paste that into your Clover folder, replace the already existing config.plist file.
- 4.1.Once mounted navigate to the Clover folder inside of the EFI Folder.
- Next find the drivers64UEFI in the Post Installation Clover Folder, copy that folder and paste it into your Clover folder, when prompted click on Replace.
- Next open the ACPI Folder that's in your Clover Folder, then open the Patched Folder it should be empty.
- 6.1.Open the Patched folder in the Post Installation Clover Folder, copy and paste those files into your empty Patched folder.
- Next open the Kexts folder inside of the Post Installation Clover Folder, copy and paste all of the kexts to your desktop. DO NOT copy the folder itself, copy all of the Kexts directly to your desktop, do not put them inside any kind of folder. (If you didn't upgrade your WiFi card you can omit the AirportBrcmFixup.kext and the 2 other Brcm kexts.
- 7.1.Open and run Kext Beast, when prompted select the option to install the kexts to Library-Extensions, click install.
- Once finished open terminal and type in this code:
Type your password in and let it finish. All of the kexts that pop up should say "Allowed" next to them if you installed them correctlyCode:
sudo kextcache -i / - Disable Hibernation. Hackintosh' are not compatiable with hibernation, so it needs to be disabled. Type in the following codes into terminal to disable it.
Code:sudo pmset -a hibernatemode 0 sudo rm /var/vm/sleepimage sudo mkdir /var/vm/sleepimage
Your laptop should boot right into clover, but don’t select anything yet.
This next few steps is to prepare you for editing your DSDT.
- Once you are in Clover tap on the F2 key and then tap the F4 key.
- 1.1.Do so again with the F2 and F4 keys, this time holding down the fn key on the keyboard.
- Now select your OSX Installation and let it boot. Your screen will go black as soon as it starts to boot. This normal and is okay.
This is the ONE AND ONLY MAJOR BUG with this laptop and is currently being worked on.
Shine a flash right on the screen to see what it's doing, you should be able to see the Apple Logo go to the login screen. Once it gets to the login screen, shut the lid/screen of the laptop and wait for the logo light to shut off and then open the lid, the backlight should be working now.
This next step is ONLY if you did not install the 17G2208 with your USB Installer.
If you made your USB Installer with the 17G2208 build, skip this and move onto the DSDT & SSDT Editing section.
Now if you installed the 17G65 build and not the 17G2208 Build, you will not have working backlight controls, or working sleep, you will also not have the black screen on boot up. Before proceeding any further get a copy of the 17G2208 build.
This process of the update WILL convert your file system to APFS. This is why I recommended installed the 17G2208 build with the USB Installer from the start. You will have to run an HFS converter App to get the HFS file system back.*
- installinstallmacos.py script found here: https://github.com/munki/macadmin-scripts
- Once it downloads the installer, open and and run it.
- It will ask you to reboot the laptop
- 3.1 Insert your USB Installer before rebooting
- Reboot
- Tap F12 once it reboots
- 5.1. Chose your USB Installer as your boot device wait for clover to boot.
- At the Clover screen choose Install macOS from your main boot drive (it will be an option again) let the installer boot
- 6.1. The screen will probably go black during the install, this is fine. Just keep an eye on it for when it decides to reboot.
- When it reboots, tap F12 while rebooting, again choose your USB Installer as the boot device and again pick Install macOS from your main drive again. It will boot back up and finish the install. It might reboot once more and you will have repeat this step (G).
- Once the installer is done and asks to reboot, you can let the laptop boot off of your main drive and chose your macOS from your main drive in clover and let it boot.
- You should be good to continue now.
V.
DSDT & SSDT Editing:
Now the fun begins.
Right now you should have functioning Brightness Control, Audio and all USB Ports.
Currently your trackpad does not work and neither does battery status. This is where we will get into some more advanced stuff. If you follow the guide you shouldn't have any issues.
You will need to patch your own DSDT to get trackpad and battery status working, here's how:
If you want the full guide on DSDT Patching go here: https://www.tonymacx86.com/threads/guide-patching-laptop-dsdt-ssdts.152573/
If not, here's a quick, summed up guide on just the things you need to do for this laptop.
- You should have WiFi working now in some way, so download these files:
iasl.zip from https://bitbucket.org/RehabMan/acpica/downloads/
MaciASL from: https://bitbucket.org/RehabMan/os-x-maciasl-patchmatic/downloads/
Big thanks user RehabMan for the tools and the original guides.
- Open the EFI Mounter app and mount your EFI Folder.
- 1.1.Go to EFI-Clover-ACPI copy the Origin folder to your Desktop.
- Unzip the iasl file if it didn't do so automatically, leave it in the downloads folder.
- Open terminal and copy and paste this code in and hit enter:
Then copy and paste this codeCode:cd ~/Downloads
Type your password in and hit enter. You won't see anything happen, but as long as you don't get an error, you're fine.Code:sudo cp iasl /usr/bin - Next type cd (put a space after cd) and then drag and drop the Origin folder from your desktop into Terminal and hit enter.
- Copy and paste this code in:
(You might need to remove the "-da" from that line of code depending on what version of the BIOS you have. If you get errors while disassembling the files remove the -da, try again and you should be good.)Code:iasl -da -dl DSDT.aml SSDT*.aml
You will see terminal do a bunch of stuff, as long as you don't get any errors, you're good to go. - Unzip the MaciASL if it wasn't done so automatically.
- Open the Origin Folder on your desktop and find the file: DSDT.dsl (There will be 2 DSDT files, the one you need must have the .dsl at the end of it). Open in it in MaciASL.
- Once opened in MaciASL click on the Patch button at the top middle of the app.
- Copy and paste the following patch into the Patch Text window and click Apply.
Trackpad Patch (Thanks to user JomanJi):
Paste the following code into the window and click Apply.
Code:into method label _STA parent_label GPI0 replace_content begin Return (0x0F) end; into_all method label _CRS parent_label TPD0 replace_content begin ConcatenateResTemplate (SBFB, SBFI) end;
- 10. Then copy and paste this patch into the same window and click Apply.
Battery Status Patch (Thanks to user RehabMan)
Full code for patch here: https://github.com/RehabMan/Laptop-DSDT-Patch/blob/master/battery/battery_Razer-Blade-2014.txt
- 10. Then copy and paste this patch into the same window and click Apply.
-
Code:
into method label B1B2 remove_entry;

into definitionblock code_regex . insert

begin

Method (B1B2, 2, NotSerialized) { Return(Or(Arg0, ShiftLeft(Arg1, 8))) }\n

end;


into device label EC0 code_regex BIF1,\s+16, replace_matched begin IF10,8,IF11,8, end;

into device label EC0 code_regex BIF2,\s+16, replace_matched begin IF20,8,IF21,8, end;

into device label EC0 code_regex BIF3,\s+16, replace_matched begin IF30,8,IF31,8, end;

into device label EC0 code_regex BIF4,\s+16, replace_matched begin IF40,8,IF41,8, end;


into device label EC0 code_regex BST0,\s+16, replace_matched begin ST00,8,ST01,8, end;

into device label EC0 code_regex BST1,\s+16, replace_matched begin ST10,8,ST11,8, end;

into device label EC0 code_regex BST2,\s+16, replace_matched begin ST20,8,ST21,8, end;

into device label EC0 code_regex BST3,\s+16, replace_matched begin ST30,8,ST31,8, end;


into method label _BIF code_regex \^\^EC0\.BIF1, replaceall_matched begin B1B2(^^EC0.IF10,^^EC0.IF11), end;

into method label _BIF code_regex \^\^EC0\.BIF2, replaceall_matched begin B1B2(^^EC0.IF20,^^EC0.IF21), end;

into method label _BIF code_regex \^\^EC0\.BIF3, replaceall_matched begin B1B2(^^EC0.IF30,^^EC0.IF31), end;

into method label _BIF code_regex \^\^EC0\.BIF4, replaceall_matched begin B1B2(^^EC0.IF40,^^EC0.IF41), end;


into method label _BST code_regex \^\^EC0\.BST0, replaceall_matched begin B1B2(^^EC0.ST00,^^EC0.ST01), end;

into method label _BST code_regex \^\^EC0\.BST1, replaceall_matched begin B1B2(^^EC0.ST10,^^EC0.ST11), end;

into method label _BST code_regex \^\^EC0\.BST2, replaceall_matched begin B1B2(^^EC0.ST20,^^EC0.ST21), end;

into method label _BST code_regex \^\^EC0\.BST3, replaceall_matched begin B1B2(^^EC0.ST30,^^EC0.ST31), end;


# added for Razer Blade 15 (2018), per JomanJi

into device label EC0 code_regex BIF0,\s+16, replace_matched begin IF00,8,IF01,8, end;

into method label _BIF code_regex \(\^\^EC0.BIF0, replaceall_matched begin (B1B2(\^\^EC0.IF00,\^\^EC0.IF01), end;


# utility methods to read/write buffers from/to EC

into method label RE1B parent_label EC0 remove_entry;

into method label RECB parent_label EC0 remove_entry;

into device label EC0 insert

begin

Method (RE1B, 1, NotSerialized)\n

{\n

OperationRegion(ERAM, EmbeddedControl, Arg0, 1)\n

Field(ERAM, ByteAcc, NoLock, Preserve) { BYTE, 8 }\n

Return(BYTE)\n

}\n

Method (RECB, 2, Serialized)\n

// Arg0 - offset in bytes from zero-based EC\n

// Arg1 - size of buffer in bits\n

{\n

ShiftRight(Add(Arg1,7), 3, Arg1)\n

Name(TEMP, Buffer(Arg1) { })\n

Add(Arg0, Arg1, Arg1)\n

Store(0, Local0)\n

While (LLess(Arg0, Arg1))\n

{\n

Store(RE1B(Arg0), Index(TEMP, Local0))\n

Increment(Arg0)\n

Increment(Local0)\n

}\n

Return(TEMP)\n

}\n

end;


# buffer fields

into device label EC0 code_regex (ECCM,)\s+(256) replace_matched begin ECCX,%2,//%1%2 end;

into method label _BIF code_regex \(\^\^EC0.ECCM, replaceall_matched begin (^^EC0.RECB(0x60,256), end;
- 11. Once both of those are patched, click on the close button.
- 11.1.Then click on the Compile button and make sure you don't get any errors. If you don't, then move on to saving.
- 12.Go to File-Save As in MaciASL and change the save destination to your Desktop and change the File Format to ACPI Machine Language Binary. Make sure the name is just DSDT and click on save.
- 13.Navigate to EFI-Clover-ACPI-Patched and copy and paste the new patched DSDT file you just saved to your desktop and copy and paste it into the Patched folder.
- 14.Reboot your laptop. Same as before, once the laptop starts to boot, it will go to a black screen, use a flash light to see when the log in screen pops up, shut the lid, wait for the Razer logo to shut off and then open it and backlight will be back.
- 11. Once both of those are patched, click on the close button.
- Now you should have working battery status and trackpad!
VI.
Nvidia Graphics:
In order to use the HDMI out and the Nvidia card you need to install the Nvidia Web Drivers. But the Web Drivers available for download off of the Nvidia site will not install because of the special build number of High Sierra.
11/9/18 Update: It looks like Nvidia has released updated drivers to support up build # 17G3025 (The latest version of High Sierra at the time of writing this. These drivers might also work for Mojave).
Download the latest Nvidia Drivers from here before trying to install them with the method below:
https://www.tonymacx86.com/nvidia-drivers/
If the above works, skip the steps below and continue on to Disabling Nvidia Graphics.
To download a patched version and install the Nvidia drivers you need to do the following:
- Download the Nvidia Update script from here: https://github.com/Benjamin-/Dobell/nvidia-update
- Once downloaded drag and drop the nvidia-update.sh into terminal and hit enter. Follow the prompts, let it install and then reboot when prompted.
Now you should the Nvidia card working with HDMI out. (The Nvidia card is only used/can work when using an external display, it will not/can not work with the internal display.)
Disabling Nvidia Graphics:
Here's the fun with the Nvidia card, even when it's not being used, it's still on and running as if it was being used. This contributes to excess heat and battery usage.
The solution (and it's optional) to this issue is to used a patched SSDT to disable the Nvidia card in the ACPI-Patched Folder. When you want to use the Nvidia card, you just remove the patched SSDT from the Patched folder and reboot.
In order to disable it, you have to patch the SSDT file that controls the Nvidia card. Patching your DSDT from above did a good chunk of the work for you already.
All you have to do is:
- Go to the Origin folder on your desktop and find the SSDT-10-OptTabl.dsl file. Open it in MaciASL. Once again, there will be 2 SSDT-10-OptTabl files make sure you’re working with the .dsl file only.
- Find this header:
\_SB.PCI0.PEG0.PEGP and expand it, click on _OFF - The find this line of code:
Code:Method (_OFF, 0, Serialized) // _OFF: Power Off - Just above that code, paste this line of code in:
Code:Method (_INI) {_OFF() } // added to call _OFF - Once that is pasted in, click on the patch button and copy and paste this code into the Patch Text window:
-
Code:
into method label _INI parent_label \_SB.PCI0.GFX0 insert

begin

//added to turn nvidia/radeon off\n

External(\_SB.PCI0.PEG0.PEGP._OFF, MethodObj)\n

\n

end;
- Now hit compile, if you don't get any errors then great, you're done and you can move onto saving it as an ACPI file.
- If you get this error:
[Unknown ASL Compiler exception ID] (TGPC [Integer])
Do the following to correct: Use the search function and search for TGPC, hit enter a few times until you see this:Code:External (_SB_.PCI0.PEG0.TGPC, IntObj) // (from opcode)- 7.1.After you find it, select it and then delete it. When you hit compile now you shouldn't get any errors.
- Now that you can compile with no errors click on File-Save As, change the destination to your desktop and change the File Format to ACPI Machine Language Binary. Make sure the name is SSDT-10-OptTabl and click on save.
- Mount your EFI drive again, navigate to EFI-Clover-ACPI-Patched and copy and paste the new patched SSDT-10-OptTabl into that folder.
- 10.Reboot.
- 11.Once booted, go to About this Mac and click on System Report.
Click Graphics/Displays
If you only see Intel UHD630 in the list, then you're good to go! The Nvidia card is disabled. Enjoy the extra battery life from it.
- When you want to use HDMI, just mount the EFI Drive and go to EFI-Clover-ACPI-Patched and remove the SSDT-10-OptTabl from the folder and reboot, the card will then be enabled again.
VII.
Final Stretch:
- Mount your EFI drive again. Navigate to EFI-Clover.
- Open the config.plist in the Clover Configurator app that was downloaded way at the beginning of this guide.
- Click on SIMBIOS.
- 3.1.Under System where it says Serial Number click on Generate New a few times to get a serial number. Do the same for the SmUUID. Go to File-Save and save the config.plist.
- Close Clover Configurator and it will give you a message, click Okay.
If you want iMessages and iCloud and other things to work follow this guide:https://www.tonymacx86.com/threads/an-idiots-guide-to-imessage.196827/
Start from the part of the guide that explains generating a new serial number.
VIII.
Backup:
- Back up your patched DSDT and patched SSDT-10-OptTabl to a safe location incase you need them again in the future.
- It's also a good idea to back up your entire EFI folder to a safe location at this point too.
- IX.
Options and Fixes:
- If you want to map out your keyboard for volume controls and what not without using the FN key this app will do just that: https://pqrs.org/osx/karabiner/
This app will also enable the Caps Lock light.- Open Karabiner-Elements preferences.
- Click the Devices TabFind the Razer Blade (Razer) option with the Keyboard Icon underneath the Type column.
- Check the Manipulate LED box. You will get a warning, just click "Enable LED Manipulation".
- Save the profile and enjoy the working caps lock light!
There's a possibility that you could get a MirrorDisplays Error in the Console App System Log that can cause some system instability. If you see a MirrorDisplays Error popping up over and over again every 30 seconds or so this is the fix:In terminal copy and paste this
Hit EnterCode:sudo vi /System/Library/LaunchAgents/com.apple.preference.displays.MirrorDisplays.plistArrow down toCode:<string>Aqua</string>Type the letter IChange the above code to
Code:<!-- <string>Aqua</string> -->Hit the escape key to get out of insert mode. Then type :wq and hit enter to quit.Open Preference - Mission Control - Uncheck: Displays have separate SpacesReboot Laptop. MirrorDisplays Error should now be gone from the console.
This fix is no longer needed
If you ever update VoodooI2C kext, you will have to:Right click - Show Package Contents - ContentsOpen Info.plist in Xcode or PlistEditorFine: IOKitPersonalities - VoodooI2CPCIController - IONameMatch
Add the following as a string: pci8086,a368Save and close XcodeIf you update this Kext and don't do the above, your trackpad will not work.
The VoodooI2C Kext edit are no longer needed. The newer versions have the needed string coded into them by default.
- To change the color the keyboard in OSX use the following link: https://github.com/boo-dev/osx-razer-blade (Thanks to @Elemxnt for this!)
The readme has most of the info needed but to make things simple:
1. Download the Repo
2. Open Xcode Project
3. Open main.m in Xcode
4. Scroll down to "// Change Light Mode"
5. Adjust values of rgb [0] [1] [2] to get the color you want. It will take some trial and error if you're looking for a specific color thats not just Red, Green or Blue.
6. Build the project either using the Xcode Build button or terminal.
7. Open the RazerBlade Unix executable file in the Release folder. That's it. The color will save across reboots and shutdowns. To change the color again, repeat the above process in Xcode and open the Unix executable file again and it will overwrite the previous saved color.
- If you want to map out your keyboard for volume controls and what not without using the FN key this app will do just that: https://pqrs.org/osx/karabiner/
Razer Blade 15 Base Model Instructions:
If you have the Base Model version and have gotten this far you probable do not have working sound, trackpad or ethernet.
As of writing this the trackpad is still being worked on. The trackpad does not work for the basic model right now.
For sound and ethernet here's what you need to do.
Sound:
Mount your EFI Drive:
Navigate to EFI-Clover and open the config.plist in either XCode or Plist Editor
Then navigate to Devices-Properties-PciRoot(0x0)/Pci(0x1f,0x3)
Change the layout-id to 28
Save
Reboot
You should now have working audio.
Ethernet (Credit Razeriste):
Delete any kext that you might have tried to use to get ethernet working. (If you haven't tried to do so yet, don't worry about this first step.)
Download the Realtek Kext from here - https://www.tonymacx86.com/resources/realtekrtl8111.327/
Use Kextbeast or some other Kext installer to install it to Library-Extensions
Rebuild kextcache in terminal with this code:
Navigate to System Preferences-Network and delete any wired network connections that show up. (eg. en0) WiFi connections can stay.Code:sudo kextcache -i /
Reboot
You should have working Ethernet now.
That should be everything. I did this all from memory, so if I missed something please let me know. If you have any issues, feel free to ask questions.
Before posting an issue, please create Problem Reporting Files outlined in the following guide:
https://www.tonymacx86.com/threads/tool-generate-proper-problem-reporting-files.235953/
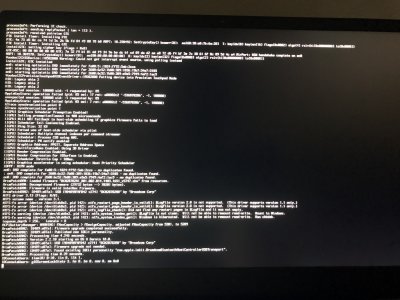
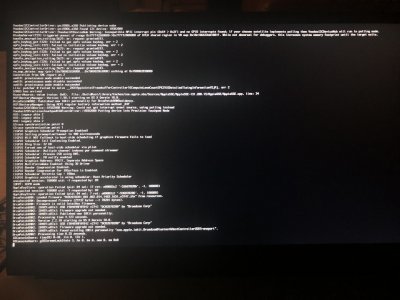
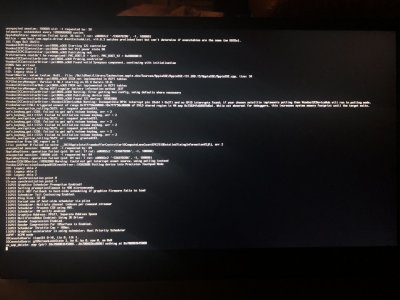
At the very least if you can’t boot, boot with the -v bootleg and take a picture of the text on the screen and post it with a description of the issue.
Good luck and hopefully this helps you out!
Attachments
Last edited:
")