Overview
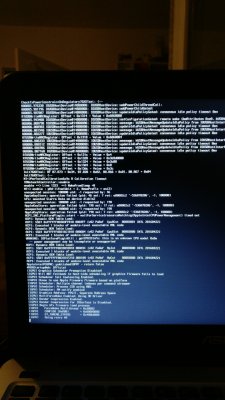
If you have a dual-GPU (Intel+Nvidia or Intel+AMD Radeon), you may have trouble reaching the macOS High Sierra installer. It is a new bug in the system somewhere that stalls boot if the VESA drivers try to connect to the secondary (discrete) graphics device.
There are essentially three methods you might employ to avoid this:
- disable the card in BIOS (but not all laptop BIOS implementations provide such an option)
- disable the card in in ACPI as per this guide:
https://www.tonymacx86.com/threads/guide-disabling-discrete-graphics-in-dual-gpu-laptops.163772/
OR
- inject a few properties on the graphics device that prevent the base VESA drivers from loading
It is the third/last method mentioned that this guide will cover.
Background information:
https://www.tonymacx86.com/threads/...-on-haswell-intel-4600hd.231800/#post-1582114
Determine ACPI path
In order to inject the needed properties using an add-on SSDT, you must first determine the ACPI path of the device. If you have an ioreg (from a working Sierra install, for example), you can determine the path from that ioreg (if someone has such an ioreg, please attach it, for an example in this post).
But you can also determine it by looking at extracted ACPI files.
The process:
- use Clover F4 to extract native ACPI files to ACPI/origin
- disassemble the files
- search for a method named _OFF
- examine the resulting files to determine the ACPI path
For this guide, we will use the files from the discrete disable guide:
https://www.tonymacx86.com/threads/guide-disabling-discrete-graphics-in-dual-gpu-laptops.163772/
Download the attachment so you can follow along.
First, we disassemble all the files (see ACPI patching guide for more information on iasl and disassembly):
Code:
iasl -dl DSDT.aml SSDT*.aml
Next, we search for Method definitions with method name _OFF:
Code:
grep -l Method.*_OFF *.dsl
For these set of files, we have this result:
Now we know what files to look at to find the _OFF method. Because once we find the _OFF method, it is easy to see the ACPI path that the _OFF method resides.
Opening SSDT-10.dsl, we find the _OFF method there is in a PowerResource macro, therefore is not the one we want:
Code:
        PowerResource (PC05, 0x00, 0x0000)
        {
            Name (_STA, One)  // _STA: Status
            Method (_ON, 0, Serialized)  // _ON_: Power On
            {
...
            }

            Method (_OFF, 0, Serialized)  // _OFF: Power Off
Looking at SSDT-11.dsl, we find the _OFF method we want:
Code:
        Method (_OFF, 0, Serialized)  // _OFF: Power Off
        {
            If (LEqual (CTXT, Zero))
            {
                \_SB.PCI0.LPCB.EC0.SPIN (0x96, Zero)
                If (LNotEqual (GPRF, One))
                {
                    Store (VGAR, VGAB)
                }

                Store (One, CTXT)
            }

            SGOF ()
        }
If you click within the method, you will see the MaciASL status bar shows the ACPI path:
View attachment 281456
This corresponds to the code in the file that defines this method in that scope:
Code:
    Scope (\_SB.PCI0.RP05.PEGP)
    {
...
        Method (_OFF, 0, Serialized)  // _OFF: Power Off
        {
...
So, now we have the path: _SB.PCI0.RP05.PEGP, it is time to create the SSDT that matches.
Creating the spoof SSDT
The original code provided in the reference post:
Code:
// save as SSDT-DiscreteSpoof.aml
DefinitionBlock ("", "SSDT", 2, "hack", "spoof", 0)
{
    Method(_SB.PCI0.PEG0.PEGP._DSM, 4)
    {
        If (!Arg2) { Return (Buffer() { 0x03 } ) }
        Return (Package()
        {
            "name", Buffer() { "#display" },
            "IOName", "#display",
            "class-code", Buffer() { 0xFF, 0xFF, 0xFF, 0xFF },
        })
    }
}
But our path is different, so:
Code:
// save as SSDT-DiscreteSpoof.aml
DefinitionBlock ("", "SSDT", 2, "hack", "spoof", 0)
{
    Method(_SB.PCI0.RP05.PEGP._DSM, 4)
    {
        If (!Arg2) { Return (Buffer() { 0x03 } ) }
        Return (Package()
        {
            "name", Buffer() { "#display" },
            "IOName", "#display",
            "class-code", Buffer() { 0xFF, 0xFF, 0xFF, 0xFF },
        })
    }
}
To create the SSDT-DiscreteSpoof.aml, run MaciASL, select File->New, paste the code into the resulting window, choose File->Save As, set format: ACPI Machine Language Binary, give the file name as SSDT-DiscreteSpoof.aml, and save to somewhere you know how to find (such as the desktop).
Then place that file at EFI/Clover/ACPI/patched/SSDT-DiscreteSpoof.aml.
Other considerations
This method uses a _DSM method in an SSDT to inject the properties. If your native ACPI has an existing _DSM method at that path, you will need to rename it, because otherwise the native _DSM conflicts with the _DSM the SSDT is adding. Typically, this is done by entering a _DSM->XDSM patch in your config.plist/ACPI/DSDT/Patches. This patch is provided in all my guide plists, but is disabled.
This is how it looks in Xcode once it is enabled:
View attachment 281459
Also, if you're using SortedOrder in your config.plist (not likely for a Clover setup for the installer), you will need to be certain to add SSDT-DiscreteSpoof.aml to it. If SortedOrder is specified, Clover only loads the SSDTs specified in it. If it is not listed, it will not load even though present in ACPI/patched.
Problem Reporting
Read FAQ, "Problem Reporting". Carefully. Attach all requested files/output.
https://www.tonymacx86.com/threads/faq-read-first-laptop-frequent-questions.164990/

