
- Joined
- Nov 25, 2010
- Messages
- 1,211
- Motherboard
- AsRock X570M Pro4
- CPU
- Ryzen 3700x
- Graphics
- RX 580
I enjoyed my first G5 project so much (using my existing ATX hardware) that less than a week later I embarked upon a complete upgrade with a second G5. My i5-750 G5 build taught me several lessons that could be applied in another project, so I figured "why wait?".
The goals of the project would be :
1. Performance -- Increased speed using current hardware
2. Quiet -- Little if any noise in normal operation
3. Aesthetics -- A clean uncluttered build
4. Capacity -- Storage of four SSD/HDD for a dual boot system
5. Practicality -- Have common use of my 27" Cinema Display and Apple Keyboard on both machines
Hardware in the Build:
- MSI Z77MA-G45 Micro ATX motherboard
- i7 3770k 3.5 GHz over-clocked to 4.3 @ default VCore
- 8GB 2133 RAM
- Corsair Hydro Series H80i Liquid CPU cooler
- 2x120GB SSD & 2x500GB HDD's (HDD LED indicator above G5 Power LED)
- Apple Branded Bluetooth & Infrared
- Syba Firewire 400/800 PCI-E 1x card (for G5 Front Panel ground)
- 2x120 Corsair, 2x92 Noctua, 1x80 Noctua Fans
- PowerColor 6870 Radeon
- Antec 520w modular PSU
Work Done:
- Virtually silent performance via H80i cooler and Noctua PWM fans
- Cable Management behind aluminum single cut backplate
- PSU was left intact and dropped 23mm below the case in a breathable cradle.
- LaserHive mATX 120mm backplate kit
- Original G5 PCI slots at rear were preserved
- Original rear exhaust assembly was used at Front of Case
- Optical Drive was removed (use a USB DVD when required)
- All 4 SSD/HDD behind aluminum plate cover on top tray
- Clean install of Mountain Lion and Windows 7
G5 Hardware Used:
- Late 2005 G5 Case
- 2004 Front Power Panel
- Rear Fan Assembly (at front of case)
- 80mm Fan Assembly in top tray
- Original PCI slots
- Apple HDD rack in top tray
- Apple G5 PSU enclosure (gutted)
- Apple G5 Glass Cover
The Result:
The completed build worked out as good or better than I had planned. By using a Micro ATX format board and removing the Apple DVD drive, all SSD/HDD storage could be placed hidden on the top tray. Combined with an H80i liquid cooler, this enabled a simple & clean final presentation. The cooler's onboard BIOS saves the settings without the need for Windows beyond the initial setup. Mountain Lion 10.8.2 went in without a hitch, and has not kernel panicked at all since the initial install. This machine is as quiet as a church mouse. Even with no other ambient noise, the only way to tell if the system is actually running or not is by looking at the Power LED. Bluetooth and Infrared work great. Its GeekBench 64 Score is a hair under 17000, over double what the i5-750 system pushes out. The Kanex SnapX switch works terrific. One 27" Cinema Display, One Apple Wired Keyboard running for both G5's.
Completed Build Photos:
With G5 Glass Cover installed
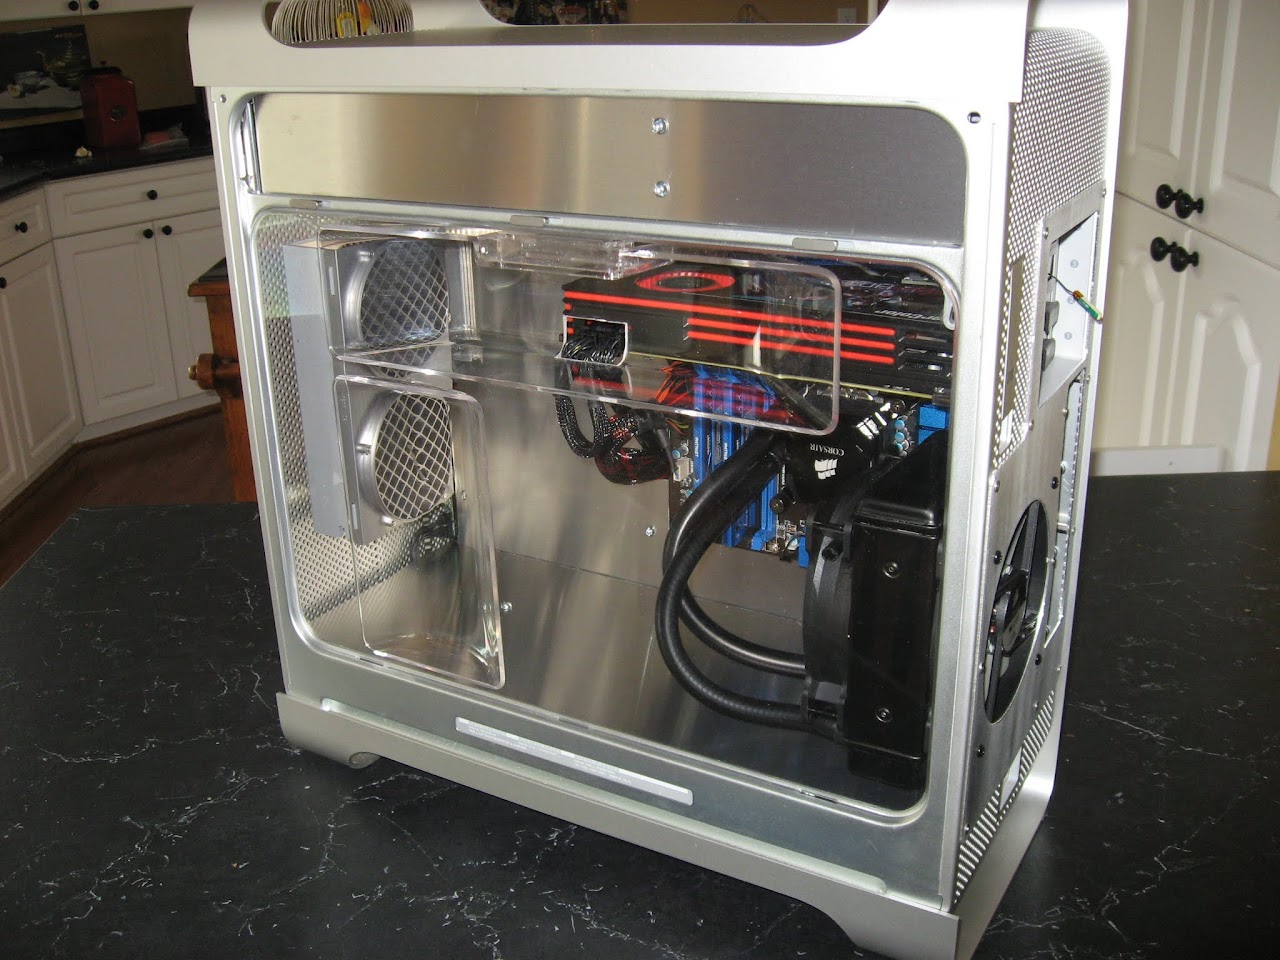
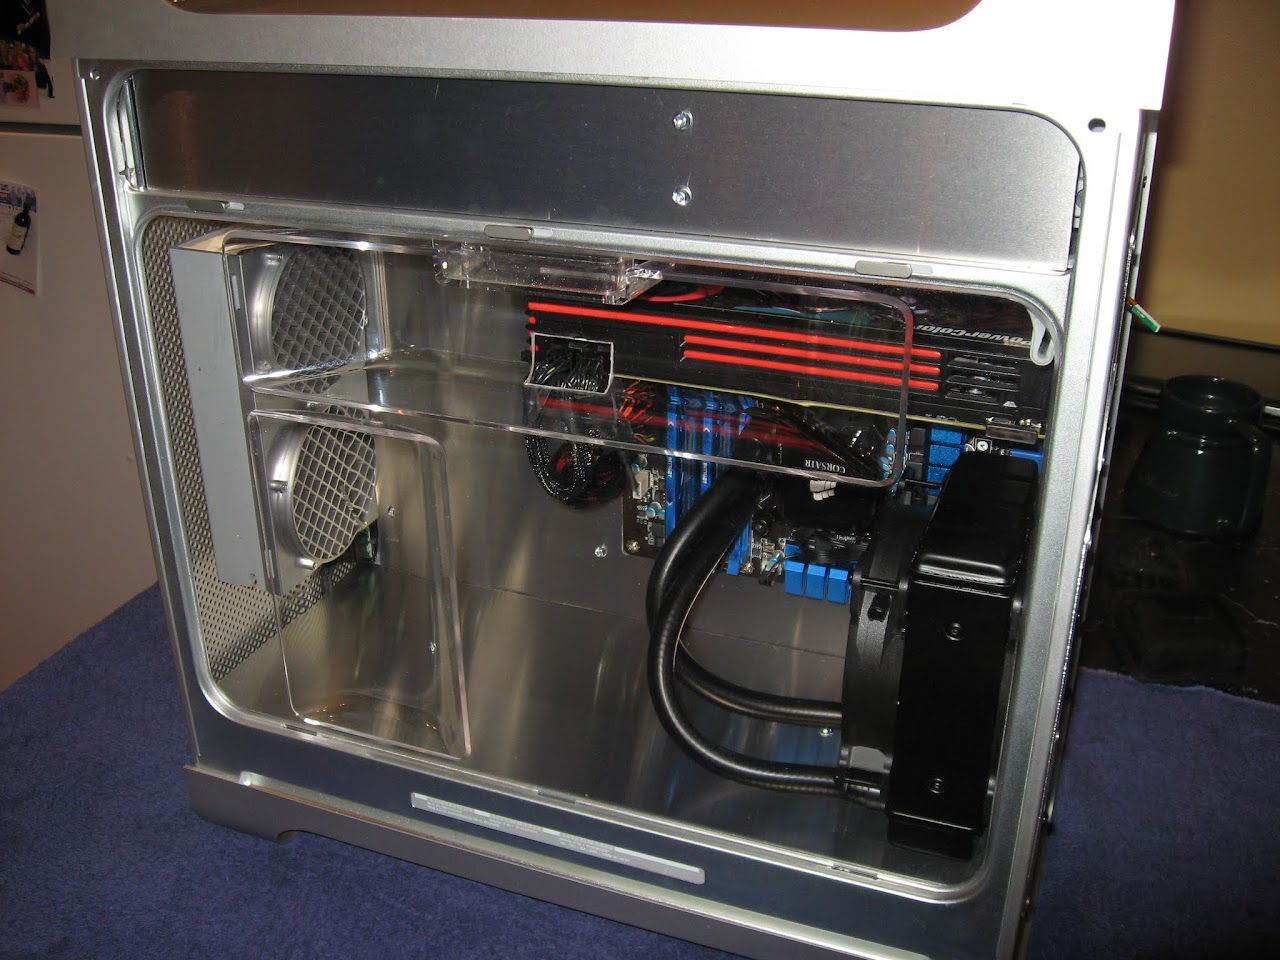
With Glass Cover removed

Side View

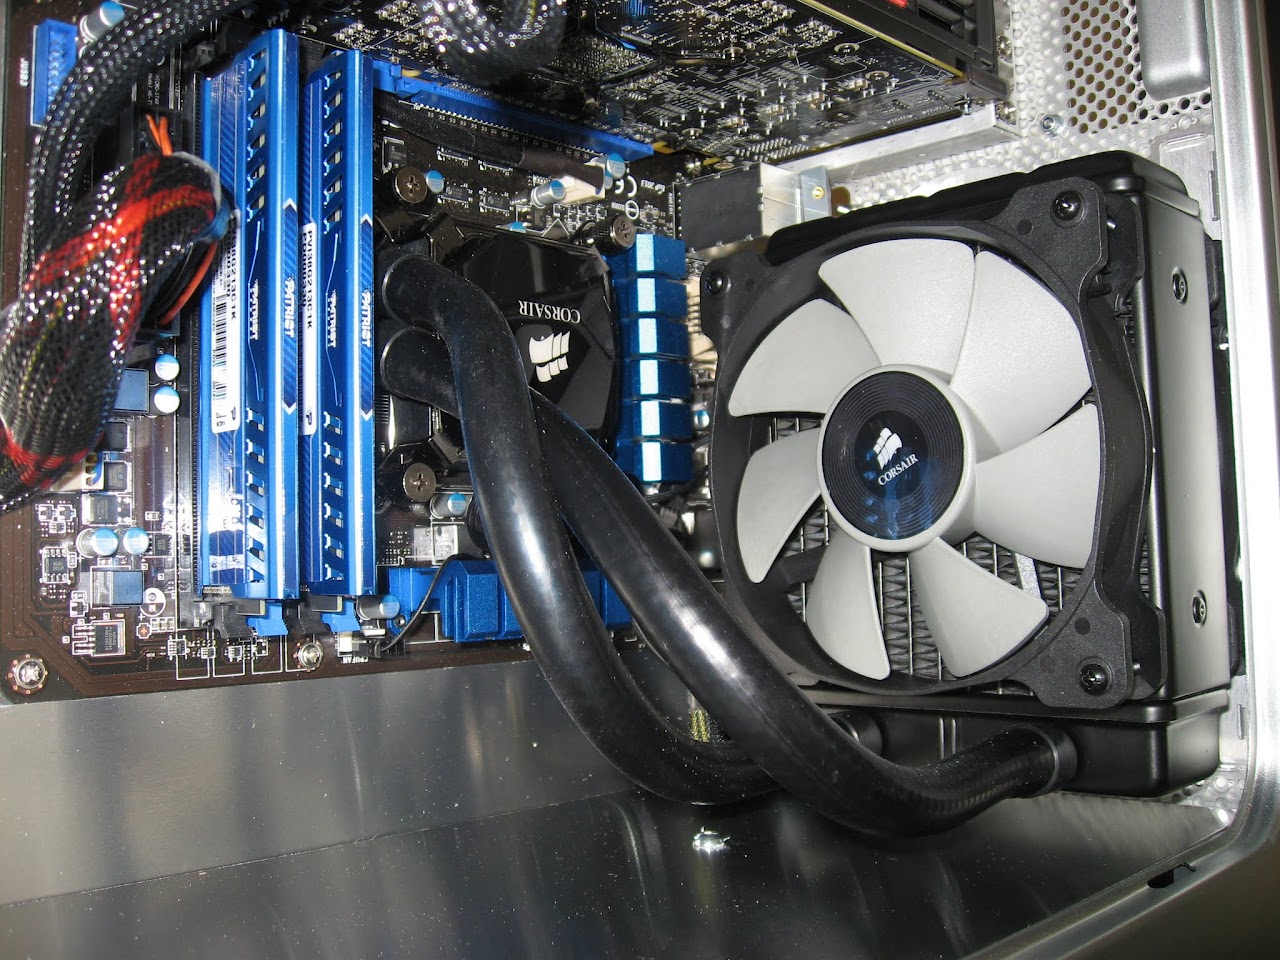
View of motherboard flush-mounted with surrounding metal

Corsair Hydro Series H80i
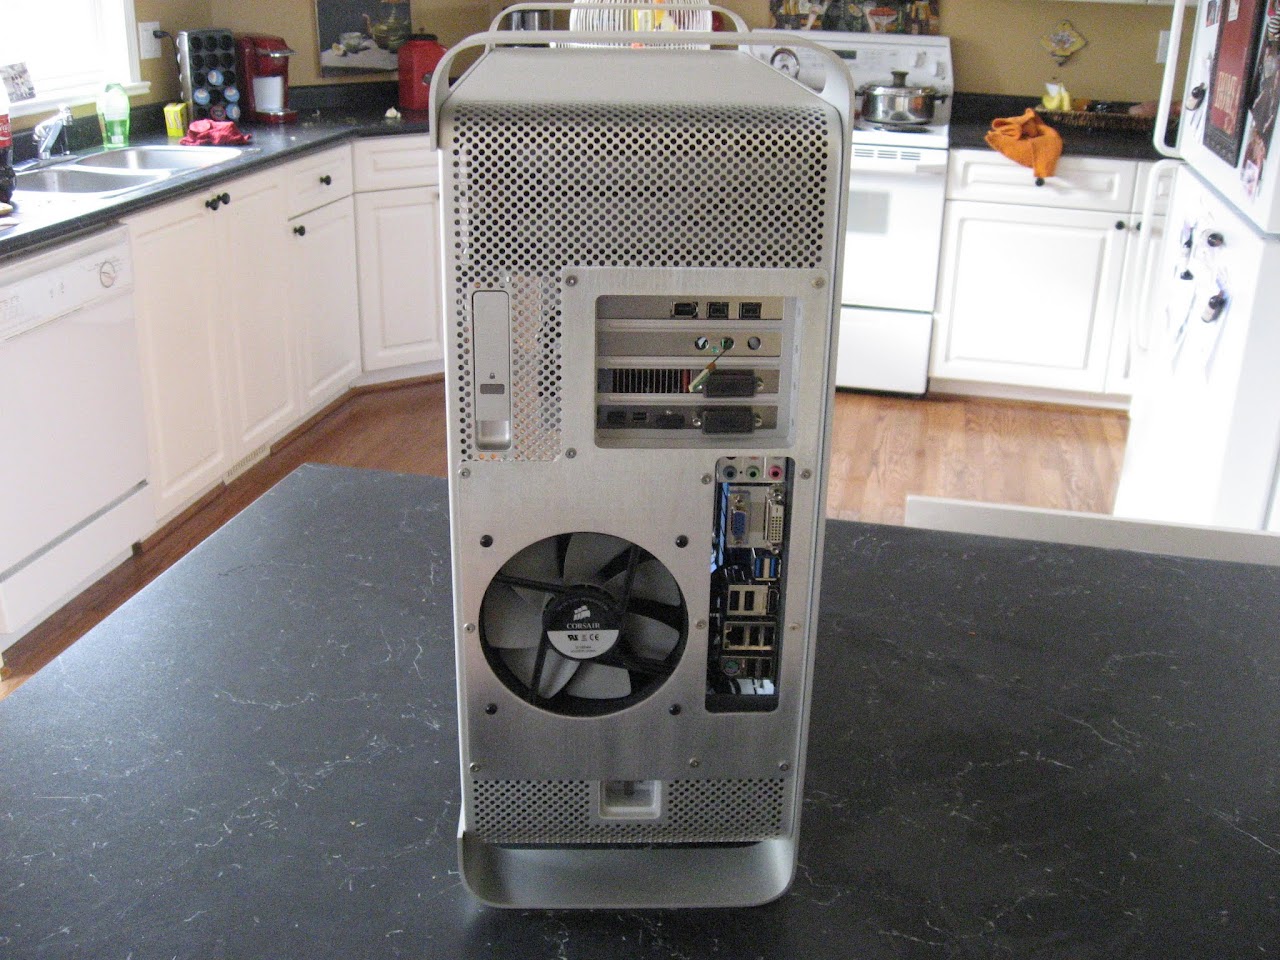
Apple G5 Rear Fan Assembly mounted in front of case

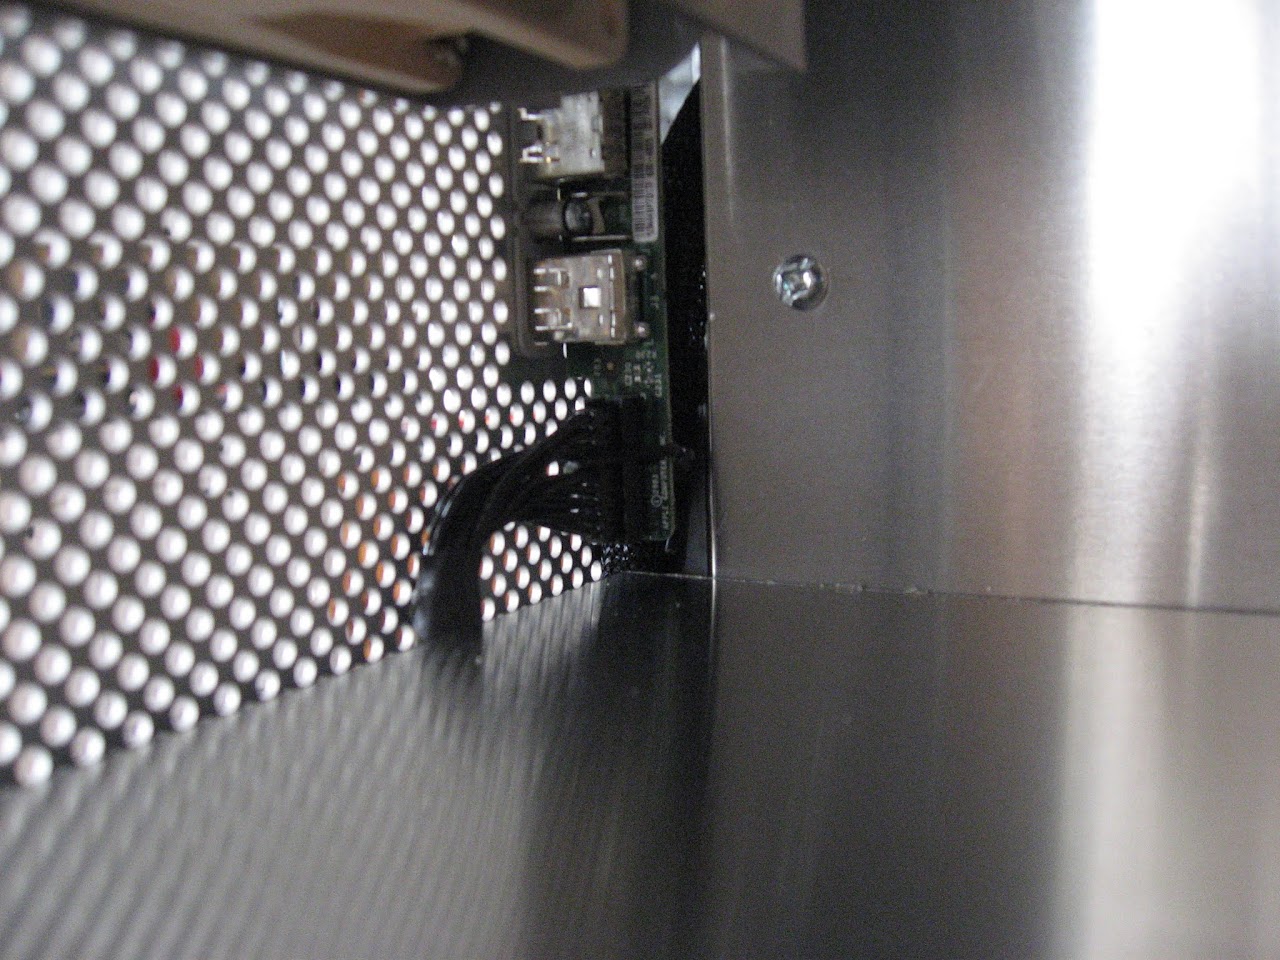
2004 G5 Front Power Panel
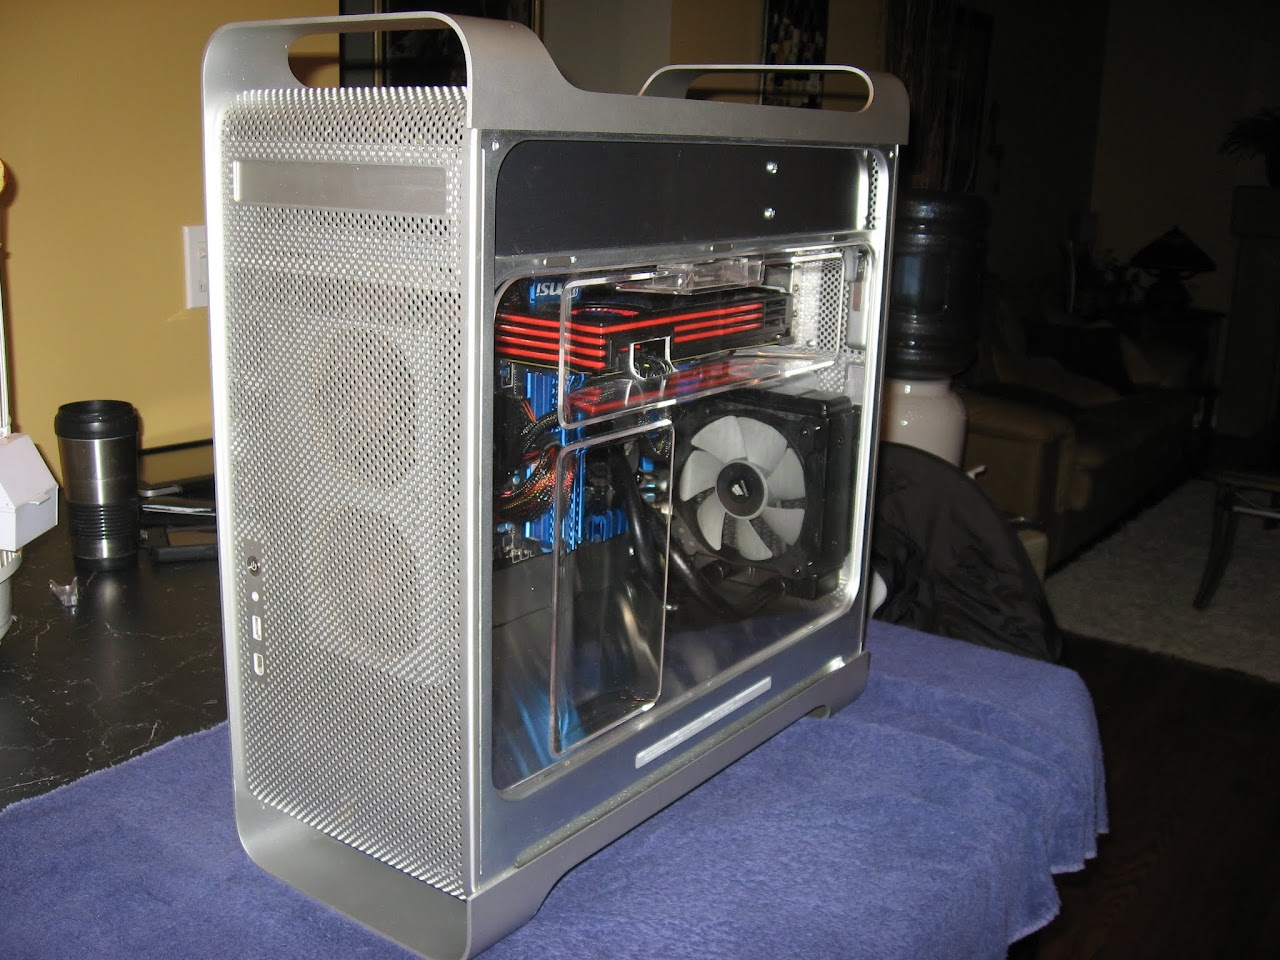
Front/Side Perspective
Glass Cover on
Front Perspective

Rear Perspective of Laser Hive mATX 120 kit
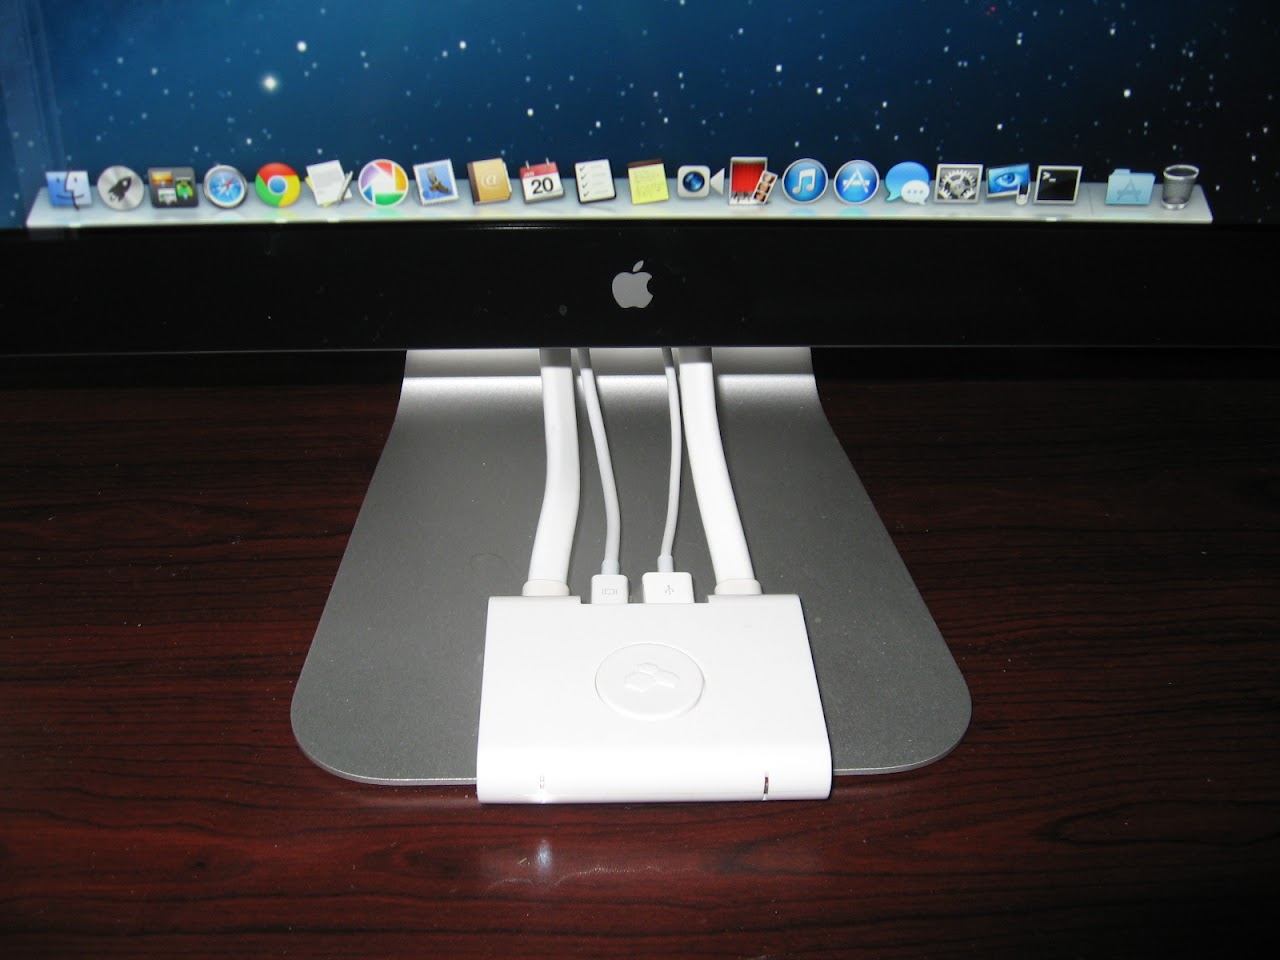
Kanex SnapX switch for Cinema Display sharing
(note the left side LED indicator is lit up)
Double Trouble!

That's All Folks...
Cheers!
-Ersterhernd
The goals of the project would be :
1. Performance -- Increased speed using current hardware
2. Quiet -- Little if any noise in normal operation
3. Aesthetics -- A clean uncluttered build
4. Capacity -- Storage of four SSD/HDD for a dual boot system
5. Practicality -- Have common use of my 27" Cinema Display and Apple Keyboard on both machines
Hardware in the Build:
- MSI Z77MA-G45 Micro ATX motherboard
- i7 3770k 3.5 GHz over-clocked to 4.3 @ default VCore
- 8GB 2133 RAM
- Corsair Hydro Series H80i Liquid CPU cooler
- 2x120GB SSD & 2x500GB HDD's (HDD LED indicator above G5 Power LED)
- Apple Branded Bluetooth & Infrared
- Syba Firewire 400/800 PCI-E 1x card (for G5 Front Panel ground)
- 2x120 Corsair, 2x92 Noctua, 1x80 Noctua Fans
- PowerColor 6870 Radeon
- Antec 520w modular PSU
Work Done:
- Virtually silent performance via H80i cooler and Noctua PWM fans
- Cable Management behind aluminum single cut backplate
- PSU was left intact and dropped 23mm below the case in a breathable cradle.
- LaserHive mATX 120mm backplate kit
- Original G5 PCI slots at rear were preserved
- Original rear exhaust assembly was used at Front of Case
- Optical Drive was removed (use a USB DVD when required)
- All 4 SSD/HDD behind aluminum plate cover on top tray
- Clean install of Mountain Lion and Windows 7
G5 Hardware Used:
- Late 2005 G5 Case
- 2004 Front Power Panel
- Rear Fan Assembly (at front of case)
- 80mm Fan Assembly in top tray
- Original PCI slots
- Apple HDD rack in top tray
- Apple G5 PSU enclosure (gutted)
- Apple G5 Glass Cover
The Result:
The completed build worked out as good or better than I had planned. By using a Micro ATX format board and removing the Apple DVD drive, all SSD/HDD storage could be placed hidden on the top tray. Combined with an H80i liquid cooler, this enabled a simple & clean final presentation. The cooler's onboard BIOS saves the settings without the need for Windows beyond the initial setup. Mountain Lion 10.8.2 went in without a hitch, and has not kernel panicked at all since the initial install. This machine is as quiet as a church mouse. Even with no other ambient noise, the only way to tell if the system is actually running or not is by looking at the Power LED. Bluetooth and Infrared work great. Its GeekBench 64 Score is a hair under 17000, over double what the i5-750 system pushes out. The Kanex SnapX switch works terrific. One 27" Cinema Display, One Apple Wired Keyboard running for both G5's.
Completed Build Photos:
With G5 Glass Cover installed
With Glass Cover removed
Side View
View of motherboard flush-mounted with surrounding metal
Corsair Hydro Series H80i
Apple G5 Rear Fan Assembly mounted in front of case
2004 G5 Front Power Panel
Front/Side Perspective
Glass Cover on
Front Perspective
Rear Perspective of Laser Hive mATX 120 kit
Kanex SnapX switch for Cinema Display sharing
(note the left side LED indicator is lit up)
Double Trouble!
That's All Folks...
Cheers!
-Ersterhernd
")