Contribute
Register

Dell Optiplex 3020/7020/9020 High Sierra Installation

Status
Not open for further replies.
Can someone please help me. I´m stucked in Installation.

My System:
Optiplex 9020
Intel Core i3 4130
Intel(R) HD Graphics 4400
Samsung EVO 860
8 GB Ram

My Bios Settings:
- reseted to default
- UEFI
- disabled RAID

Tools:
- Clover Configurator 5.4.4.0
- UniBeast 9.0.0 (1)
- USB-Drive created from an real mac

While starting the installer it stucking at
Code:
Unsupported CPU
Unsupported PCH
kext stall[0], (240s): `AppleACPICPU`
kext stall[1], (240s): `AppleACPICPU`
kext stall[2], (240s): `AppleACPICPU`
kext stall[3], (240s): `AppleACPICPU`

IOConsoleUsers: time(0) 0->0 lin 0, llk 1,
IOConsoleUsers: gIOScreenLockState 3, hs 0, bs 0, now 0, sm 0x0

after the second "kext stall[3]" I mostly get to the installation screen. When the installation is rebooting, i get the same thing again. When the installation is done and the User-Setup should follow it´s stucking at these errors completely.

My config.plist is attached to this file.

Note: In CloverConfigurator there was an option Acpi > Drop Tables > "MATS" first tries where with this option and "BGRT". The attached file is only with "BGRT". But the error is the same.


--edit:
I found the error, i had an older version of UniBeast. Downloaded the v9.2.0 and it worked like charm.
----

1. please use latest cloverBOOTLOADER https://sourceforge.net/projects/cloverefiboot/
2. please refer my config.plist
3.Correct DSDT Patch / Kext + Kernel Patch
4.you need necessary kext to put in CLOVER/KEXT/OTHERS
-APPLE ALC.kext
-USBINJECTALL
-LILU
-WHATEVERGREEN
-VIRTUALSMC OR FAKESMC WHATSOEVER
**GOODLUCK**
 

Attachments

  • config.plist
    28.7 KB · Views: 211
Hi, I followed this guide to install macOs on my Optiplex 9020 and everything worked fine except it reboots on shutdown. I tried the slide=0/EmuVariableUefi-64-efi fix but it didn't work for me. Can someone advice me any other fix that you're aware of?

Thank you!
 

Attachments

  • EFI.zip
    16.7 MB · Views: 197
I use a Gt710 graphics card and the HDMI carries audio perfectly. Not expensive and better than the built in graphics.

Hi, can you control the volume when using the HDMI with builtin speaker from monitor?

In my case, I use RX 560 and LG Monitor with builtin Speaker. I am using HDMI to connect the Monitor. The sound is OK carried by HDMI but Mac OS said that it can't control the volume for this output.

Volume control is working fine with Line out.
 
Not as such, the HDMI port is Digital and therefore fixed level. I tend to watch Youtube a lot which has its own volume control. VLC and other media players have their own volume controls so I don't a problem.

You could try adding Soundflower app which gives a lot of control.
 
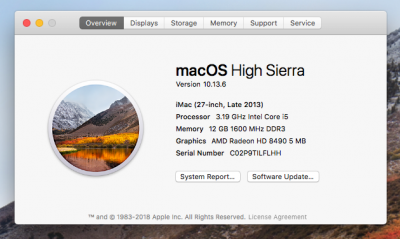
Updated March 4, 2019 to change sound setup to AppleALC. This guide also works for Mojave.

This works on the two i3 Dell Optiplex 3020's and one i5 7020 I have. I don't have a 9020, but it looks like it has the same chip set as the 7020 (it is reported below that the 9020 works also).

Computer Preparation

Optional - Update BIOS to the latest Dell BIOS without using Windows

Download latest BIOS Update Utility .exe file from Dell

From http://www.freedos.org/download/ get the USB “Full” installer. The Lite disk image doesn’t leave enough space for the BIOS update file.

Use Etcher (https://etcher.io) to create a bootable USB drive with the FreeDOS image.

Copy the BIOS update .exe file to the bootable USB drive. Then eject the drive.

Start the computer and press F12 to load the one-time boot menu. The FreeDOS drive needs the Legacy Boot option to run. When FreeDOS boots to its installer, select the language. When asked “Do you want to proceed?”, select No - Return to DOS.

Type DIR to list the files. Type the BIOS Update Utility filename (e.g., O3020A17.exe) to run the BIOS Update Utility.


Create A Bootable USB Drive

Follow the Installation Guide through STEP 2: Create a Bootable USB Drive with UniBeast. Select UEFI Boot Mode.

Once the UniBeast has completed, use Clover Configurator to edit the config.plist file at EFI/CLOVER/config.plist.

In Clover Configurator SECTIONS left column:

Acpi: Find the section on Drop Tables. Click the + button and add BGRT.​

Cpu: Add 0x0306C0 to the Type field. (Not needed with Mojave)​

Devices: USB section: Check Inject and FixOwnership​

Save the file and quit Clover Configurator.

Copy Clover Configurator to the Bootable USB Drive.

Copy MultiBeast to the Bootable USB Drive. You will need this after the installation of macOS.

Eject the Bootable USB Drive. Select Eject All to also eject the EFI partition.


Starting the Installer

Put the Bootable USB Drive in one of the USB 2.0 ports. Start the computer and press F2 to enter the BIOS setup. Select Load Defaults and Exit to restart. Press F2 to enter setup again.

Under Settings->General->Boot Sequence, check that the Boot List option is set to UEFI.

Under Settings->General->Date/Time check that the date and time are close to current time in UTC.

Select Apply for any changes. Then select Exit to restart.

Press F12 to load the one-time boot menu. Use UEFI Boot and select the Bootable USB drive.

In Clover, select the External drive. The system should boot to the installer.

Use Disk Utility to erase the internal drive. Select the View menu in the upper left to Show All Devices. Select the Internal drive device and Erase it as Mac OS Extended (Journaled) with GUID Partition Map. Quit Disk Utility to return to the install menu.

Install macOS - It will start installing and after a few minutes it will reboot and continue installing. After another few minutes, it will restart again and come back to the Clover menu. This time, select the internal drive called Boot macOS Install from <DRIVE NAME>. The installation will continue to the Welcome screen. Do the standard macOS setup.


MultiBeast Setup

The system booted using Clover from the Bootable USB drive. Use MultiBeast to install Clover on the internal drive. In MultiBeast:

QuickStart - select UEFI Boot Mode

Drivers

Audio - select AppleALC​
Dell 3020: Network->Intel - select RealtekRTL8111 v2.2.2​
Dell 7020/9020: Network->Intel - select IntelMausiEthernet v2.4.0​

USB - select 7/8/9 Series USB Support (these Dells are series 8)​

Bootloaders - select UEFI

Customize - select Core Graphics Fixup AKA WhateverGreen

Build - select install.


Clover Configurator

Use Clover Configurator to make the same changes as before to config.plist in the EFI partition on the internal drive.

Use Clover Configurator to edit the config.plist file at EFI/CLOVER/config.plist (make sure it is the one on the internal drive).

In Clover Configurator SECTIONS left column:

Acpi: Find the section on Drop Tables. Click the + button and add BGRT.​
Acpi: Patches - from List Of Patches add: change EHC1 to EH01, change EHC2 to EH02, and change SAT0 to SATA​

Cpu: Add 0x0306C0 to the Type field. (Not needed for Mojave)​

Devices: USB section: Check Inject and FixOwnership​
Devices: Audio section: Inject 13​

Save the file and quit Clover Configurator.


Shutdown the system and remove the Bootable USB drive. Start the system. It should boot to the login screen.


To Do

On my 7020, the USB3 ports don't work correctly with USB3 drives. I have the reboot on wake from sleep issue still to solve.
Hi @westyd1982 Thank you for your details. I installed high sierra successfully on my dell optiplex 3020.

But I have one issue with graphics. I have AMD Radeon HD 8490 and with help of multibeast I can see it from Graphics card.

But it's showing like this. Graphics AMD Radeon HD 8490 5MB. So it seems it's not installed correctly.
Anyone can help with me to my graphics card working?

Thank you
 
Hello,

Here is my details. It's very strange. Anyone can help me?
 

Attachments

  • Screen Shot 2019-07-18 at 6.31.20 PM.png
    Screen Shot 2019-07-18 at 6.31.20 PM.png
    170.4 KB · Views: 277
Anyone can help me the way to fix sleep wake —> reboot?
 
At least I could in my case finish my install, I had 3 problems in my case:

1) I try to used my Intel HD 4600, for used this I need 2 things, this configuration additional in the Clover EFI Graphics config
- Inject EDID
- Inject Intel
- ig-platform-id: 0x0D220003

2) Due to I had used Intel Grapichs the VGA Output didn´t work, I used an DP - HDMI adaptador, I bought a DP - VGA adaptador but it hasn't arrived at least for next week

3) When I had my Hack ok, I created a second partition for Windows and the CLOVER EFI entire desapear from my UEFI start list, but I used this tutorial y now its everything OK (its in Spanish sorry)

https://tar.mx/archivo/2017/recuperar-entrada-a-clover-en-uefi.html

When I arrived at home I will edit this post and add my EFI files configuration. Its works for me with a Dell MT 3020 i5 4590

Which OsX did you install?

I have the same spec. Dell Optiplex 3020, i5, Intel HD 4600, Ram 16.
But when I
- Inject EDID
- Inject Intel
- ig-platform-id: 0x0D220003

Screen goes black middle of the boot.
 
Hi everyone,

So far so good, thanks for the tuto BUT … can't get the wifi nor the ethernet working ...
I installed the DLINK DWA121 installer pkg, it connects great to my network but keeping telling me "no internet" … I tried with a wire with the ethernet port and same thing … WTF … ?
Any ideas ?
Thanks
OPTIFLEX 3020 SFF Inside ;)
 
Status
Not open for further replies.
Back
Top