pastrychef
Moderator
- Joined
- May 29, 2013
- Messages
- 19,460
- Motherboard
- Mac Studio - Mac13,1
- CPU
- M1 Max
- Graphics
- 32 Core
- Mac
- Classic Mac
- Mobile Phone
Dell Latitude 3450 i5-5200u HD5500
(This is an updated and vastly simplified guide. Original guide can be found here.)
(This is an updated and vastly simplified guide. Original guide can be found here.)
Comments
My laptop needs are very basic, I always return to my desktop for any heavy lifting. I lived with an ancient 2009 MacBook all the way to 2017. What finally triggered my decision to get a replacement was the 8GB RAM limitation. I was experiencing way too much memory swapping which would bog down the entire system to an utter crawl.
I wanted to keep things as simple as possible. I didn't need any exotic features such as high end GPU, Thunderbolt, Retina resolutions, etc. My hope was, that by avoiding exotic features, it would also simplify installation.
I had a very simple set of criteria.
- It had to be cheap. If I wanted to spend a lot of money, I would have just bought a new MacBook.
- Support for at least 16GB RAM!!
- Decent battery life (decent for me would be ~4 hours).
- Decent screen resolution. By this I mean better than 1366x768 or 1280x800.
- 13-14" screen. I did not want a ginormous monster laptop.
- Haswell or Braodwell because of performance, TDP, price.
- Easily replaceable WiFi/Bluetooth card
- It was cheap enough.
- Supported 16GB RAM.
- Battery life was weak but I knew I could switch to a higher capacity one which I did and it gives me about 4-5 hours.
- Screen resolution was 1366x768 but I was confident I could swap it for a better one if/when I successfully install macOS.
- 14" size. Overall dimensions were quite similar to the MacBook I was coming from.
- Intel i5-5200u Broadwell. Well documented and supported by the hackintosh community.
- M.2 based WiFi/Bluetooth.
Installation
Prerequisites
You should have access to a working Mac or hackintosh.
The stock Wi-Fi/Bluetooth card should be replaced with a Dell DW1560. (Other cards may work, but I've only used the DW1560.)
At least one USB flash drive. Personally, I like to stick to 16 or 32GB USB 3 flash drives due to an old FAT32 limit.
A USB mouse may come in handy
BIOS Settings
General > Boot Sequence > UEFI
System Configuration > SATA Operation > AHCI
System Configuration > USB Configuration > Enable Boot Support
System Configuration > USB Configuration > Enable USB3.0 Controller
SYstem Configuration > USB Configuration > Enable External USB Port
Performance > Enable Multi Core Support
Performance > Intel SpeedStep > Enable Intel SpeedStep
Performance > C-Stats Control > C states
Performance > Intel TurboBoost > Enable Intel TurboBoost
Performance > HyperThread control > Enabled
Virtualization Support > Virtualization > Enable Intel Virtualization Technology
Virtualization Support > VT for Direct I/O > Enable Intel Virtualization Technology
Wireless > Wireless Devices Enable > WLAN
Wireless > Wireless Devices Enable > Bluetooth
Set the DVMT Prealloc and unlock MSR
1. Download the EFI Shell and unZip it.
2. Copy the EFI folder to the EFI partition of your USB flash drive.
3. Boot from the USB flash drive.
4. At the Grub prompt, enter:
Code:
setup_var 0x15B 0x3
Code:
setup_var 0x37 0x06. Done.
*Note: If/when you update BIOS or clear CMOS, these steps will need to be repeated.
Create USB Installer And Install macOS
On your working Mac or hackintosh, create your USB Catalina installer.
1. Download the full Catalina installer from the Mac App Store.
2. Plug in your USB flash drive.
3. Launch Disk Utility and initialize the USB flash drive as Mac OS Extended (Journaled)/GUID with the name Untitled.
4. Launch Terminal and enter:
Code:
sudo /Applications/Install\ macOS\ Catalina.app/Contents/Resources/createinstallmedia --volume /Volumes/Untitled -- /Applications/Install\ macOS\ Catalina.app6. Copy the EFI Folder to the EFI partition of your USB flash drive.
7. Boot from the USB flash drive.
8. Install macOS.
9. Mount the EFI partition of your USB flash drive and the EFI partition of your main system drive.
10. Copy the EFI folder from the EFI partition of your USB flash drive to the EFI partition of your main system drive.
11. Done.
EFI Configuration Notes
- MacBookAir7,2 system definition is used.
- All hackintosh kexts are install in EFI and injected by bootloader.
- SIP is enabled.
Post Installation
1. Open your config.plist with Clover Configurator and populate the Serial, Board Serial, and UUID.
2. (Optional) Go to System Preferences > Trackpad and enable "Tap to click". Trust me. This trackpad works a million times better with Tap to click!!
3. (Optional) Go to System Preferences > Accessibility > Pointer Control > Trackpad Options... > Enable dragging. I find this to greatly improve usability.
4. (Optional) Install Karabiner. Karabiner is a utility that can help you map different functions to different keys on your keyboard. It can be very useful for mapping things like volume control, Mission Control, etc. to Function Keys.
What Works/Doesn't Work
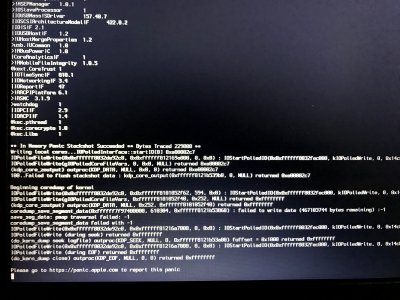
FileVault works. You may see weird verbose texts, just ignore it.
Sleep/wake works. Wake by pressing power button.
Battery level indicator works.
Screen brightness adjustment works.
HDMI out works. HDMI audio works.
Trackpad functions such as swiping, pinch-to-zoom, etc. work.
Wake-On-LAN doesn't work.
DRM doesn't work.
SD card reader doesn't work.
Epilogue
When I wrote my original guide, the tools available made hackintoshing laptops quite difficult (at least, to me, it did). Over the past year or so, the fellas from the acidanthera team have made the entire process much, much, much simpler with their fantastic tools and kexts. This is why I felt it was time to do an update and rewrite. Again, much props to the acidanthera team!!
This is a very basic laptop but it meets all my needs perfectly. The price is extremely difficult to argue agains. On my personal Latitude 3450, I've upgraded the screen to one with 1600x900 resolution and to a higher capacity battery. Of course, RAM and SSD were also upgraded. After living with this for about three years, I still don't feel a need to upgrade yet.
Attachments
Last edited: