
Leesureone
Moderator
- Joined
- Feb 21, 2010
- Messages
- 3,885
- Motherboard
- Asus Z790 Maximus Hero
- CPU
- i9-13900K
- Graphics
- RX 6950 XT
- Mac
- Mobile Phone
Leesureone's Asus Z590i Gaming Wifi - i7-11700K - Radeon RX 6800 XT Graphics
ComponentsAsus Z590i Gaming Wifi Motherboard
https://www.amazon.com/dp/B08VL2GRS9/?tag=tonymacx86com-20
https://www.newegg.com/asus-rog-strix-z590-i-gaming-wifi/p/13-119-377
Intel Core i7-11700K Rocket Lake Processor
https://www.amazon.com/dp/B08X6ND3WP/?tag=tonymacx86com-20
https://www.newegg.com/p/N82E16819118233
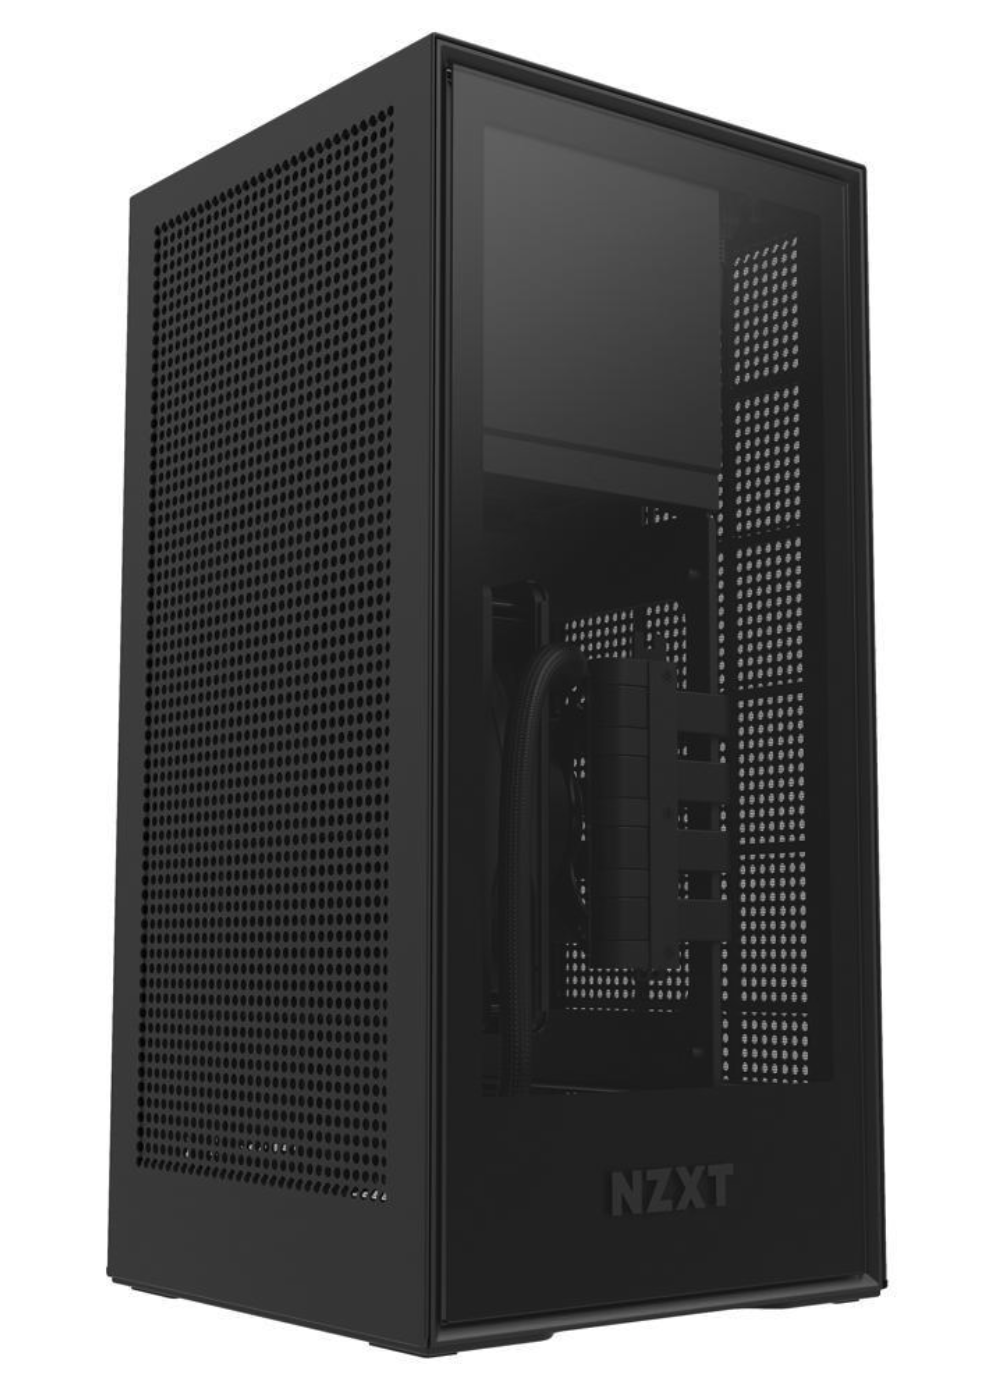
NZXT H1 Case 650 Watt PSU and AIO H2O Cooler Included
Unavailable at Amazon
https://www.newegg.com/matte-black-nzxt-h1-mini-itx/p/N82E16811146331
Alternative Case, PSU and AIO
SSUPD Meshlicious Mini-ITX Small Form Factor (SFF) Case - Full Mesh Side Panel with PCIe 4.0 Riser Cable - Black Color, Tool-Free and Easy Accessibility
Unavailable at Amazon
https://www.newegg.com/black-ssupd-meshlicious-mini-itx/p/2AM-030R-00004
SF750 CP-9020186-NA 750W SFX 80 PLUS PLATINUM Certified Full Modular Power Supply
https://www.amazon.com/dp/B07M63H81H/?tag=tonymacx86com-20
https://www.newegg.com/corsair-sf750-cp-9020186-na-750w/p/N82E16817139080
ARCTIC COOLING Liquid Freezer II - 280 ACFRE00066A Multi Compatible All-In-One CPU Water Cooler
https://www.amazon.com/dp/B07XLM5FV8/?tag=tonymacx86com-20
https://www.newegg.com/arctic-cooling-liquid-freezer-ii-280-liquid-cooling-system/p/35-186-248
AMD Radeon RX 6800 XT Graphics Card
Well, you know the story. Tough to find any new AMD graphics card
G.SKILL Ripjaws V Series 64GB (2 x 32GB) 288-Pin DDR4 SDRAM DDR4 3200 (PC4 25600) Intel XMP 2.0 Desktop Memory Model F4-3200C16D-64GVK
Not available on Amazon at this time
https://www.newegg.com/g-skill-64gb-288-pin-ddr4-sdram/p/N82E16820232943
Linkup Ultra PCIe 4.0 x 16 Riser Cable
https://www.amazon.com/gp/product/B08XN2LWM2/?tag=tonymacx86com-20
https://www.newegg.com/p/1DK-012G-01DY0
WD_BLACK 500GB SN750 NVMe Internal Gaming SSD WDS500G3X0C x 2
https://www.newegg.com/western-digital-black-sn750-nvme-500gb/p/N82E16820250109
BCM94360NG 802.11ac Bluetooth 4.0 WiFi Card
https://www.amazon.com/gp/product/B083YXS7VF/?tag=tonymacx86com-20
https://www.newegg.com/fenvi-bcm94360ng-pcie-half-mini-card-m-2/p/0XM-00JK-00083
Comments
The NZXT H1 case I’m using in this build is well designed. The fit and finish is excellent and one of the easiest cases to set up in this size. It comes with a 650 Watt PSU, a NZXT AIO cooler and the cables are sized and perfectly pre-routed. The downside, and google this if you were unaware, the Pcie riser cable the original models came with have been known to short and catch fire! Talk about high case temps! (this actually happened to me but no harm done in the end, just a nice burnt up smell).
NZXT has issued a fix for it and newer cases should already address the issue. On older model cases once you show proof of purchase on their website they will send you a replacement cable free of charge. On this build I decided to try a Pcie 4.0 riser cable instead and saved the replacement cable for some other build. I’ve found the older version of this case on Ebay for under $200, new they retail around $350.
If you aren’t interested in a a potentially problematic case I’ll add an alternate link to a SSPUD ITX case but you’ll also then need a power supply and some kind of CPU cooling solution. The SSPUD case is what I use for my AMD daily driver that's listed in my signature.
Motivation for this build was came from my curiosity about how a Rocket Lake based hackintosh would perform. Unless Apple suddenly changes it business plan it might be the last generation of intel CPUs that are compatible. Could be the last hurrah.
The caveats of working with Rocket Lake are:
1. A discreet graphics card is required, the iGPU is not supported and probably won't be ever
2. From the reviews I’ve read I was expecting some high CPU and case temperatures
3. The chipset is new enough that getting the system to play nice with Mac OS could be an issue
4. To get the Pcie 4.0 M2 slot working on the motherboard a Rocket Lake CPU is required, Comet Lake CPUs are supported but will only enable the one Pcie 3.0 M2 slot.
Installation
Creating the USB Boot Drive
I used my Macmini to create the USB Boot/ Big Sur Install drive but you can also follow the instructions on the Dortania Install Guide to be able to use Windows or Linux.
Download the Big Sur Install Media Using The App Store then:
1. Insert a 16 GB USB drive
2. Open /Applications/Utilities/Disk Utility
3. Highlight the USB drive in left column
4. Click on the Partition tab
5. Click Current and choose 1 Partition
6. Click Options...
7. Choose GUID Partition Table
8. Under Name: type USB (You can rename it later)
9. Under Format: choose Mac OS Extended (Journaled)
10. Click Apply then Partition
11. Open /Applications/Utilities/Terminal
12. Type the following, enter password and hit enter. This command completely erases the USB, then creates native installer media from the Install macOS Big Sur Application.
sudo /Applications/Install\ macOS\ Big\ Sur.app/Contents/Resources/createinstallmedia --volume /Volumes/MyVolume
Once the create media command completes then download a utility created by Headcraze (Hackintool Author) named EFI Agent. You will have to open System Preferences/ Security and Privacy/ General and click Allow to Run. Then use the utility to mount the hidden EFI partition of the USB drive and copy my EFI Folder over. At some point you will want to add serial numbers, UUID etc. I use another utility, this one by Corpnewt, named GenSMBIOS to do that.
I’m using MacPro7,1 as the SYMBIOS for this board for several reasons, no functioning iGPU and it helped simplify USB Port Mapping (No ACPI Patches Needed and other issues described later). I recommend you do the same although be aware the MacPro7,1 system definition requires the use of the RestrictEvents.kext to avoid having to configure your memory profile in the config.plist. If you don’t use the kext or define your memory you will be greeted with an error once Big Sur finishing loading. It won't stop you from using the system but its annoying.
On a side note this boot configuration will more than likely work with a variety of the Asus Z590 boards although USB Port Mapping will need to be redone. It’s also possible Network and Audio will require different configuration depending on the board specs.
Bios Settings
Bios settings for this board are very typical
Disable
- Fast Boot
- Secure Boot
- VT-d (can be enabled if you set DisableIoMapper to YES)
- CSM
- Above 4G decoding
- EHCI/XHCI Hand-off
- OS type: Windows 8.1/10 UEFI Mode
Booting the USB Drive
If you successfully created the install media you should now be able to boot by hitting the F8 key to reach the boot menu. Select the UEFI partition on the USB Drive and cross your fingers. Once the install completes you can use EFI Agent to process the mounting of the hard drive EFI hidden partition, then copying over the same EFI folder from your boot drive.
Rocket Lake EFI Configuration Overview
The files and kexts used are very similar to a Comet Lake configuration, I’ve added descriptions to each of the following within the config.plist to help explain what each does. The Dortania Install Guide also has excellent descriptions of what each does. Below are the SSDT’s, Drivers and Kexts I used. The list is pretty basic compared to some builds, Ethernet is defined in the DeviceProperties of the config.plist.
Something else of note, because of the reduced cores from Comet Lake 's10 to Rocket Lake's 8, in both the i7 and i9 processors, its necessary to spoof the CPUID. That's is done in the Kernel Quirk/ Emulate section of the config.plist.
EDIT: Confirmed even with an 11th generation i5-11600K CPU Emulation is necessary to boot so its not just the core count that is the issue.
What works
- Shutdown, restart
- iCloud, App Store
- Handoff / Continuity, Unlock with Apple Watch, AirDrop
- FaceTime, Messages
- Sleep and wake
- WiFi / Bluetooth
- Ethernet
- Quick Look, Preview
- USB-C hot plug
- Thunderbolt 4 with Hot Plug Capability courtesy of @CaseySJ
What Doesn’t
ITs a short list, I think everything is working now
USB Port Mapping
What took me longer than expected was mapping the USB Ports, Hackintool (which has completely spoiled me) just could not get the job done. It would constantly miss internal ports needed for Wireless/ Bluetooth, Aura LED controller and USB Sound. I am guessing it Hackintool doesn’t recognize the chipset or I just missed something along the way.
Just by way of reference I tried adding XHCI-unsupported.kext and then running Hackintool, I tried adding ACPI patches to different SYMBIOS with the same result. Then I tried corpnewts USB Mapping Tool which is pretty cool, I got most of the ports identified and working but sleep was broken (meaning some of the ports weren’t mapped correctly, probably my fault).
Eventually I gave in and manually mapped the ports using IORegistryExplorer.app and a plist editor. In the config.plist I turned on USBInjectAll.kext, turned of USBPorts.kext and enabled the XchiPortLimit kernel quirk and then rebooted. That enabled all of the available USB ports should I could test them using the IORegistryExplorer.app. I tested each port using a USB2 and USB3 device to capture each ports capabilities correctly.
Once I had all that information I used the USBPorts.kext Hackintool created and edited it's info.plist to add, delete or change port capabilities. When I thought I was finished I copied the kext back into the EFI/ OC/Kexts folder and then turned off the XchiPortLimit kernel quirk and USBInjectAll.kext and turned on USBPorts.kext. The I rebooted and tested until everything worked, including sleep.
Dortania has a nice section in the Install Guide on USB port mapping that helped me as did the original Beginners Guide to Creating a Custom USB ssdt by @UtterDisbelief. (shout out!)
A Beginner's Guide to Creating a Custom USB SSDT
If the prospect of reading through complex guidance to configure your USB ports gives you the heebie-jeebies then this guide is for you. We’ve pared it to the bone, researched the facts and tried to present them in a way that makes this complex subject easier to understand for someone just...
Here are the ports on the board available and the ones I mapped by location and type.
Benchmarks and Sytem Temperatures
Geekbench results for the processor scored a 1616 for single core and 9251 multicore, better single core than my Ryzen 5900X but multicore scores were worse which makes sense. Under stress CPU temperatures hit 65 to 70 degrees celsius, similar to the 5900X, and at idle around 35 degrees which is pretty respectable.
Update
As of this posting I'm running OpenCore version 7.2 but will update to 7.3 soon and upload the result
9/20/21 Uploaded Asus590i OpenCore Version 7.3
10/1/21 Update: Thanks to @CaseySJ the onboard Thunderbolt 4 controller now had Hot Plug capability using his custom SSDT. In this latest EFI I also tweaked the USB port Mapping to more accurately reflect what IORegistryExplorer was showing.
10/2/21 With a thunderbolt device attached sleep stopped working, reworked the USBMap.kext and now sleep works again and Thunderbolt devices are still active on wake.
11/2/21 Added AsusZ590i OC7.5. I'm still running Big Sur, Thunderbolt Hot Plug Still Working Nicely
11/13/21 Uploaded Monterey Ready OC7.5 with a new USB Map, Monterey broke sleep so one or more ports were configured incorrectly. Getting USB down has been the hardest part of this build, using USBToolBox for Windows helped tome get here.
1/17/22 Added AsusZ590i OC7.7 Monterey Ready
Attachments
-
 NZXT H1.png586.9 KB · Views: 9,233
 -
 DeviceProperties .png50.2 KB · Views: 249
 -
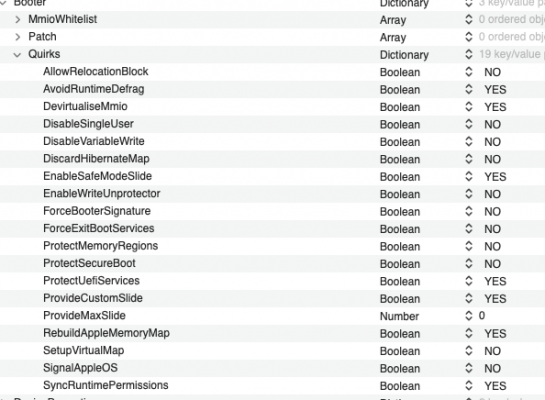 Booter Quirks.png74.5 KB · Views: 262
 -
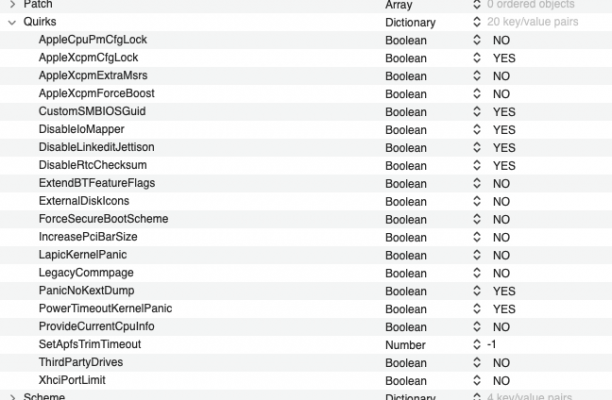 Kernel Quirks.png75.4 KB · Views: 249
 -
AsusZ590i OC.7.3.zip7.9 MB · Views: 265
-
Asus Z590iw:TB OC7.3.zip8 MB · Views: 274
-
ASUSZ590i OC7.5EFI.zip10.5 MB · Views: 249
-
AsusZ590i OC7.5 Monterey.EFI.zip10.9 MB · Views: 250
-
AsusZ590i OC7.7 Monterey Ready.EFI.zip11.5 MB · Views: 483
Last edited:
")