UtterDisbelief
Moderator
- Joined
- Feb 13, 2012
- Messages
- 9,624
- Motherboard
- Gigabyte B760 Gaming X AX
- CPU
- i5-14600K
- Graphics
- RX 560
- Mac
- Classic Mac
- Mobile Phone
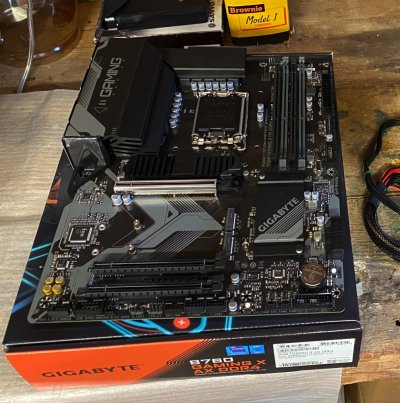
Gigabyte B760 Gaming X AX with Intel i5-14600K, 64GB DDR4 RAM and RX560 GPU
Above: During the build.
Above: The motherboard being Flashed.
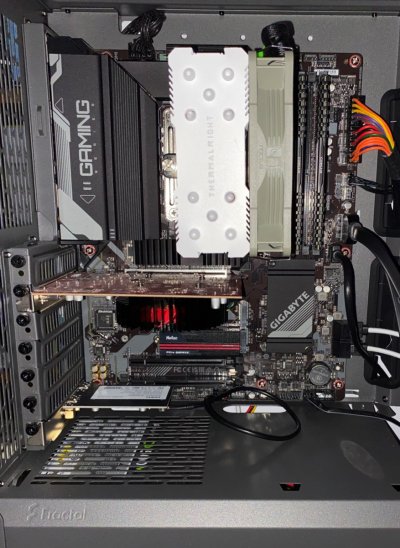
Above: Basic build updated for Sonoma - See details below.

Above: During the build.

Above: The motherboard being Flashed.

Above: Basic build updated for Sonoma - See details below.
Components:
Intel i5-14600K CPU:
https://www.amazon.co.uk/dp/B0CHBGVFHP?tag=tonymacx86-21
Gigabyte B760 Gaming X AX DDR4 motherboard
https://www.amazon.co.uk/dp/B0BPMKWQ5Q?tag=tonymacx86-21
Corsair Vengeance LPX 64GB 3200 DDR4 RAM kit:
https://www.amazon.co.uk/dp/B07Y4ZZ7LQ?tag=tonymacx86-21
Fractal Design North White/Oak PC Case
https://www.amazon.co.uk/dp/B09Y9FJDG9?tag=tonymacx86-21
Thermalright Assassin CPU cooler
https://www.amazon.co.uk/dp/B0B8ZCHQ8Y?tag=tonymacx86-21
Noctua NF-P12 redux-1300 PWM, Quiet Fan, 4-Pin, 1300 RPM 120mm
https://www.amazon.co.uk/dp/B07CG2PGVG?tag=tonymacx86-21
Fenvi FV-T919 Wireless/Bluetooth combo card:
https://www.amazon.co.uk/dp/B07W92MZGF/?tag=tonymacx86-21
Crucial MX500 500GB SATA SSD 2.5-inch
https://www.amazon.co.uk/dp/B0786QNS9B/?tag=tonymacx86-21
**See Update entry for Sonoma below:
Netac NV7000 NVMe SSD
Already Owned:
Dell RX 560 2GB Graphics Card:
Apple Magic Mouse 1 - Prefer AA battery version to the rechargeable, but if you must …
https://www.amazon.co.uk/dp/B09BV7YYG3/?tag=tonymacx86-21
Apple Wired USB Keyboard - The classic with USB ports. I have a boxed spare too. No longer available new.
Acer 24” R241Y HD Monitor - No longer available new but I love it’s almost bezel-less design.
Comments
After building/owning several small form-factor PCs for the last few years I decided time was ripe to go large again. ATX was chosen. Jumping straight to a 14th Generation Intel CPU was a bit of a risk, I admit, but I’m glad to say all has worked-out nicely.
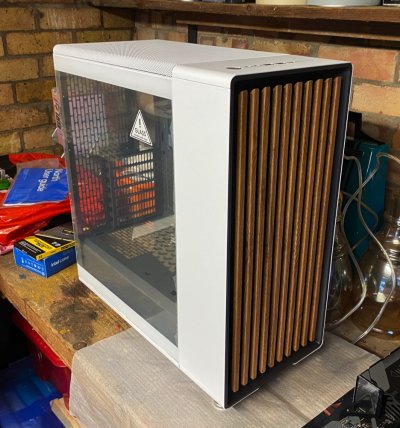
For a case I went for the Fractal Design North midi-tower in White and Oak. It’s a real high-quality item.
The motherboard is a B760-based model using DDR4 RAM. This offered all I needed from a motherboard for this build. There is a DDR5 version with a few subtle extra differences, but I didn’t need the speed or expense of DDR5. It has 3x m.2 SSD slots and 4x SATA ports. There’s the usual full compliment of USB ports, but only 1x Type-C fed from a motherboard header. Interestingly, the DDR5 version has a second Type-C port on the back-panel in place of one of the Type-A’s.
The CPU could have been any of the 12th, 13th or 14th generation Intel models, but price and availability drew me to the i5-14600K. The “K” suffix” i5 models have usually been a sweet-spot in the line-up. But would I make it work?
NOTE: You will likely need to Flash the motherboard before assembly, to accept a 14th Gen CPU. You need BIOS version F8 or higher. I flashed F9 using the Q-Flash-Plus option. No memory or CPU in place during the procedure.
The CPU cooler is a Thermaltake Assassin 120mm 5-heatpipe model in white. If I’m honest though it works very well I may change it in the near future. I did change the supplied LED fan for a silent Noctua model.
For RAM I went with a safe 64GB of Corsair Vengeance LPX 3200GHz DDR4 in a 2x 32GB kit.
For boot storage I chose a Crucial MX500 SSD. It may only be SATA but it is fine for macOS. Those with Pro needs may want to upgrade.
For a GPU I initially went with my old Dell RX560 card. If you check the Deals of the Day forum thread - https://www.tonymacx86.com/threads/oldies-but-goldies-gpu-wireless.328493/ - you will see I have bought a new Asus GPU, but that only happened once I’d got this PC together, so I’ll update at a later time once I’ve installed it. Again Pros will need something beefier.
The PSU is an old-faithful that I genuinely expect to conk out any day, but it constantly surprises me. It’s a semi-modular Corsair CX500M. It's seen a few builds. Power output is a concern, and I'll go bigger if I change the GPU for a beefier one. For this build it has been fine, and very quiet.
Installation:
I chose to install Monterey, a good compromise between modern features, current security updates and compatibility. Yes, I will no doubt edge up to Ventura come the next macOS upgrade, staying clear of Sonoma as long as I can.
NOTE: I have now upgraded to Sonoma 14.2.1 as most people will want this. There is a new EFI folder at the bottom of this post. Please check the Update entry below.
The following is my standard practice for installing macOS and was used here:
First create a correctly formatted 16GB USB2.0 Memory Stick. Here we call it “USB”:
With the Monterey installer file - Install macOS Monterey.app - in your Applications folder, build your Monterey installation media using the following Terminal command from our Monterey Installation Guide:
Code:
sudo /Applications/Install\ macOS\ Monterey.app/Contents/Resources/createinstallmedia --volume /Volumes/USB /Applications/Install\ macOS\ Monterey.app --nointeractionOnce complete copy the EFI folder attached to this post into the hidden EFI partition on the installer stick. To check which the correct drive is, if you have more than one in your system, use Disk Utility to identify it. If you identify your USB drive as “disk3s2” for example, then your EFI partition should be at “disk3s1” and show in the list.
To access this load the EFI Mounter v3.1 app from our Downloads section and select your drive from the list.
BIOS settings:
I have included a Saved Profile of the BIOS settings used. Attached to this post.
NOTE: In the included BIOS profile Port 4 of the SATA stack is where the boot drive is located. There are three others. If you connect via a different SATA or m.2 port then double-check it is active etc.
Bascially, to access BIOS Setup, press and hold the Delete key on a USB Keyboard while the system boots. Once at the BIOS screen these are the main changes -
1) Boot Menu - Secure Boot Disabled
2) CFG-Lock = Disabled
3) VT-d = Enabled
4) Above 4G = Enabled
5) CPM = Disabled
6) XMP = Enabled - and your memory should be auto-detected.
7) DVMT 64MB (Although we are not using the iGPU. Just for safety).
8) Press F10 to Save and exit.
To load the included Profile, copy it to a FAT32 USB stick, insert it and then go to the Boot tab and choose the option to Load Profile from the external drive.
Now on reboot, by pressing the BIOS boot selector key F12 you can choose to boot the USB installer from the list. Once loaded, use the Disk Utility option to format your destination drive as APFS, then back-out of Disk Utility, choose Install macOS, select your destination drive and let it run its course.
Post Installation
The work has already been done in the EFI I have uploaded. To make the new main drive independent of the USB stick for booting just copy the same EFI folder used before, into the EFI paritition of the main drive, making sure you pick the correct drive again, as explained above.
We are using OpenCore bootloader v 0.9.7
Here are the basics about what is used in the EFI if you wish to modify it or create your own:
System-Definition = iMacPro1,1
ACPI:
SSDT-RTCAWAC.aml - needed to boot reliably around RTC
SSDT-USBX.aml - USB Power
SSDT-PLUG.aml - CPU power management
SSDT-USBW.aml - USB Wake assistance for USBWakeFixup.kext
Kexts:
Lilu.kext - Vital plug-in manager
VirtualSMC.kext - Vital System kext
SMCProcessor.kext - companion kext
SMCSuperIO.kext - companion kext
Whatevergreen.kext - Graphics plug-in for Lilu
CPUFriend.kext / CPUFriendDataProvider.kext -
RestrictEvents.kext - Useful for 12th gen and later.
USBPorts.kext - USB port configuration file
USBWakeFixup.kext - Combines with SSDT-USBW.aml to assist sleep/wake.
AppleALC.kext - audio-out activation
LucyRTL8125Ethernet.kext - Realtek Ethernet
Audio
Audio out is available via the back-panel green port and HDMI to monitor.
USB - Configuration
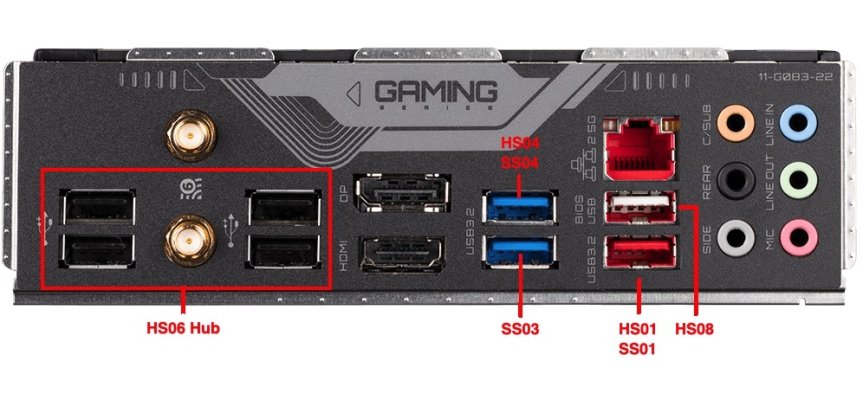
The included USBPorts.kext configures the ports to make best use of everything we have. A limitation being one back panel USB3 port which will only recognise USB3 devices, not USB2. This is to keep us within the 15-port limit. Which one, is clear in the attached diagram. So that sleep/wake and Bluetooth works properly the 4x internal port USB2 hub that is HS11 only has the Bluetooth connection to it.
Here is the result of the USBPorts.kext included in the EFI folder:
USB Port mapping:
What Works:
USB2, USB3 and USB-C
Audio - HDMI/Line Out
Ethernet
Fenvi - WiFi & BT
Video out - HDMI/DP
Sleep/Wake/Shutdown
iCloud / iMessage / Facetime / Music / App Store / Handoff & Continuity / AirDrop
What Doesn’t Work:
Just the built-in wireless … Actually this needs more detail as it’s confusing.
If you get a v1.0 motherboard it features an AMD RZ608 wireless chipset. This is actually a MediaTek MT7921K.
If you get a v1.1 motherboard, this has an Intel AX210 chipset, compatible with the OpenIntelWireless and Bluetooth drivers.
If you get a v1.2 motherboard, this has an Intel AX211 chipset, and again works with the OpenIntelWireless and Bluetooth drivers.
If you get a v1.3 motherboard, this one features a Realtek RTL8852CE WiFi 6E chipset.
How confusing could they make it? So if you can, probably best to go for the AX210 or AX211 model … I didn’t get the choice.
Note: The Ethernet is set at en0: as it should be. Wifi is at en1: as it should be. System Report/Network gets this wrong. Probably because of the dormant motherboard wireless controller.
Conclusion:
In use the 14th gen Intel PC is very well behaved as a hackintosh. It is very quiet if you take the trouble to reduce the default speed of the front case fan in BIOS. We may not be getting the full Performance core to Efficiency core ratios Windows OS might give us, but in use the PC seems very powerful when needed. I took BIOS screengrabs for temperature after running Windows and macOS for some time:
I have to thank two other mods for their User Builds as they were very useful for this project:
@CaseySJ
https://www.tonymacx86.com/threads/...ltex-4-i5-12600k-sapphire-plus-rx-580.325634/
@Stork
https://www.tonymacx86.com/threads/gigabyte-z690-aero-g-i5-12600k-amd-rx-6800-xt.317179/
**The serial-numbers in the attached EFI folder are dummies. Please generate and use your own unique ones.**
Update: 22 Jan 2024 - Added note re. BIOS Profile and SATA ports.
Update: 24 Jan 2024 - Update to Monterey 12.7.3
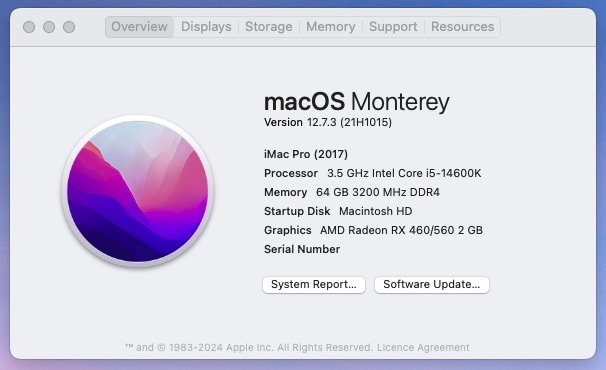
1) As can be seen seen in the above, we now have the year next to the system-definition. So, it's looking even more realistic.
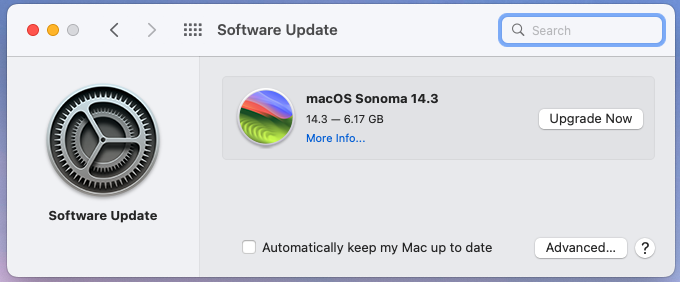
2) Also note that after this update I am now being offered Sonoma as the smaller, Intel-specific 6GB download:
3) The BIOS-Settings archive has been updated.
Update: 29 Jan 2024 - Update to Ventura 13.0
Yes, this is an early version of Ventura but as I have already posted about a preliminary Sonoma install (post #22) I didn't download a newer version than I already had. Ventura gets classed as a full upgrade though because everything is working - including wireless - using the original EFI and BIOS settings.
To perform the upgrade I actually created a Ventura USB installer as per our guide and used a new, blank SSD to install on. That way I have a ready-made Monterey installation to fall back on if necessary:
It certainly feels a bit "smoother" than Sonoma too. Hard to quantify. So, for that to become the next step in the upgrade cycle I will need to decide whether to use OCLP to activate my Fenvi wireless, or switch to an Intel AX210 pcie card I have. That will come in another Update.
Update: 31 Jan 2024 - Update to Sonoma 14.2.1
As per notes above, I updated the build to Sonoma. While doing this I changed SSD from a Crucial SATA to a Netac NVMe. The part is listed in the component section above. (See third photo).
To install follow our standard Sonoma Guide and create a new USB installation memory stick:
Code:
sudo /Applications/Install\ macOS\ Sonoma.app/Contents/Resources/createinstallmedia --volume /Volumes/USB /Applications/Install\ macOS\ Sonoma.app --nointeractionYou can use the original EFI folder or the new one. If done over your original install it should update without data loss.
As stated, the original EFI folder for Monterey will still work for Sonoma, but I've made changes in the latest with regards to patching wireless and the new SSD.
Included now is the NVMeFix.kext, from Acidanthera, to maintain correct power-management on the SSD. Also there are the necessary kexts and patches to allow OpenCore Legacy Patcher to activate the Broadcom wireless on the Fenvi card. (Broadcom wireless cards have been depricated by Apple for Sonoma, as you probably realise).
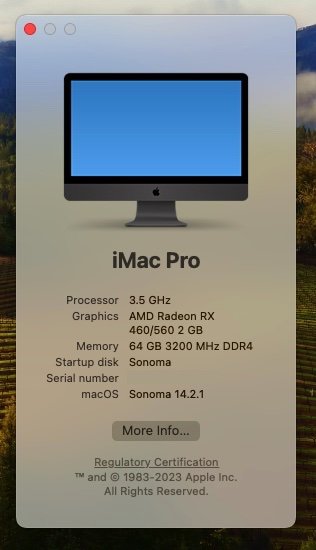
Remember the included serial-numbers and UUIDs are Dummies. Change them for your installation.
------------------------------
Attachments
Last edited:

