
- Joined
- May 31, 2012
- Messages
- 5
- Motherboard
- Motherboard or system make & model > See Rules!
- CPU
- i5-3570K
- Graphics
- HD 4000
- Mac
- Mobile Phone
kidnebraska's HTPC/Server build: Core i5-3570K - GA-B75M-D3P - 8GB RAM - HD-4000 - OS X 10.8
Components
Components
Case
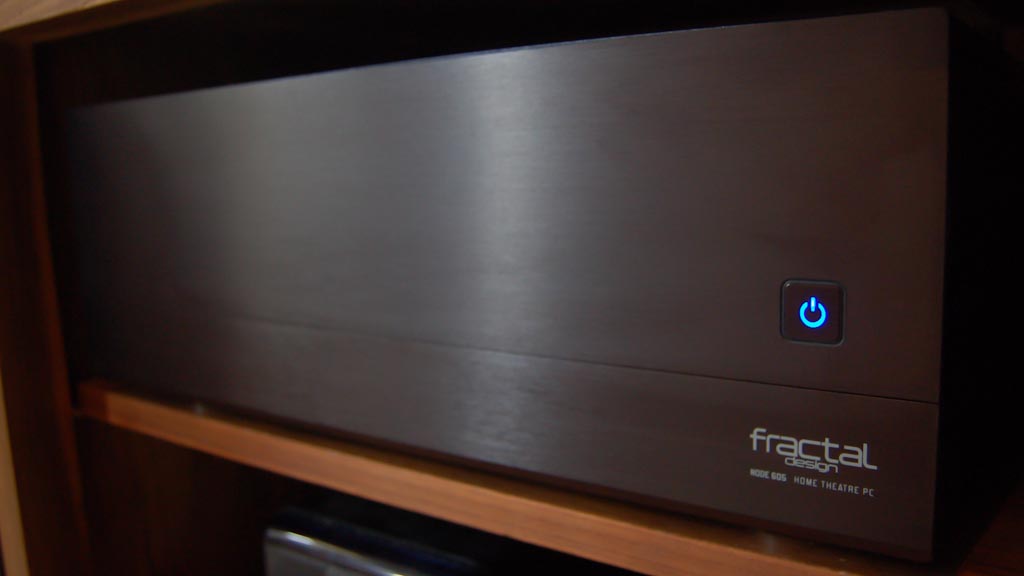
Fractal Design Node 605
PSU
Kingwin Stryker 500W Platinum 80+ 500W fanless
Motherboard
Gigabyte GA-B75M-D3P
CPU
Intel Core i5-3570K
CPU cooler
Noctua NH-L12
GPU
Intel HD Graphics 4000
RAM
Crucial Ballistix Sport 8GB kit (4GBx2) DDR3-1600
SSD
Samsung 840 Pro 128 GB
ODD
Silverstone 12.7 mm SATA Interface Slot Load 8X CD/DVD RW Drive
Wi-Fi
TP-Link PCI Express*Wifi Adapter (TL-WDN4800)
Bluetooth
IOGear Bluetooth 4.0 Adapter
RAID
HighPoint RocketRAID 2720SGL
HighPoint Internal Mini-SAS to 4SATA
WD Red 3 TB NAS Hard Drive (x4)
OS
OS X 10.8.3 Mountain Lion
OS X Server
MISC
Apple Wireless Keyboard
USB Mouse
Comments
This was my first Hackintosh build and it went very smoothly. Thanks to all who provided early feedback in the advice threads, both here and at SPCR. It's been running for two months now without so much as a hiccup.
As background, this machine was designed to serve as both an HTPC and an NAS. On the HTPC side, its primary use is encoding (Handbrake) and playing media (Plex). On the server side, it runs Plex Media Server and hosts shared volumes for the rest of the household network (OS X Server).
I was first attracted to the Node 605 case because the server sits in our living room media center and I was looking for a case that both looked good and would be nearly silent. I was a bit weary about the Node 605 at first because several reviews found it to have somewhat limited thermal headroom. For my purposes, which does not include gaming, I am completely satisfied on both counts. It is beautiful and quieter than the stupid Comcast DVR*. (* How quiet depends on the case fan speed, which is controlled by a switch on the side. It's inaudible on the lowest and middle of the three settings. When set to the fastest, which I never use, the fans are audible.)
The case does have a few limitations. The optical bay only supports slimline drives, and even then, it can only be used with a micro-ATX motherboard. Similarly, both HDD mounting trays will only fit if your other components aren't too big, in particular the PSU and video card. Because I used both HDD mounting trays for the RAID array, the PSU cannot be deeper than the 170mm and this build does not have room for a full-length video card. Also, because I used all 4 drive bays for the RAID, I mounted the SSD to the front of the case using adhesive velcro.
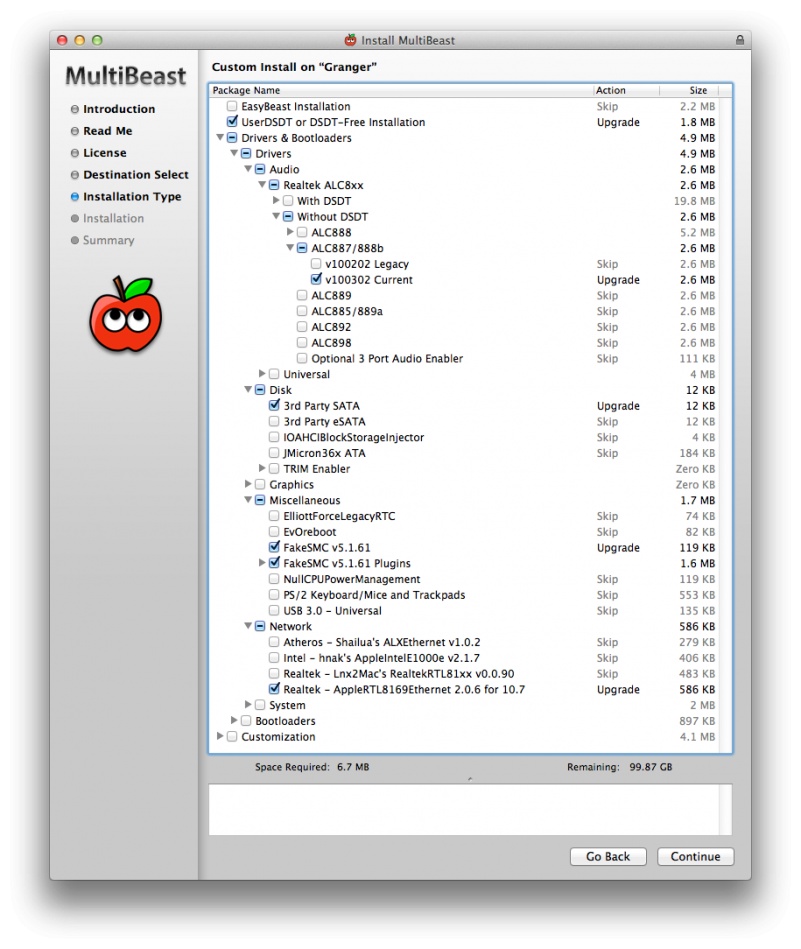
For the initial installation, I did not install the wi-fi card, Bluetooth adapter, or RAID array. ML installed without a hitch. I followed the 10.8 Installation Guide. I referenced djfreak121's B75M-D3P build (which itself builds upon Moarfish's build) for BIOS and MultiBeast configuration (see below). In addition, I installed FakeSMC so iStatMenus could use the sensor data. Everything worked first time. As others have noted, the front-panel USB3 ports do not work with USB2 devices.
MultiBeast Configuration
The machine is silent and fast. Gory details about the build and some performance stats are below. Thanks to all!
-Chris
Build Details
1. Empty case
Empty case
2. Insert ODD
Clearances are very tight in this case, especially with all the components I intended to cram in. I found (the hard way, alas) that I needed to install the ODD before the PSU.

ODD installed
3. Install PSU
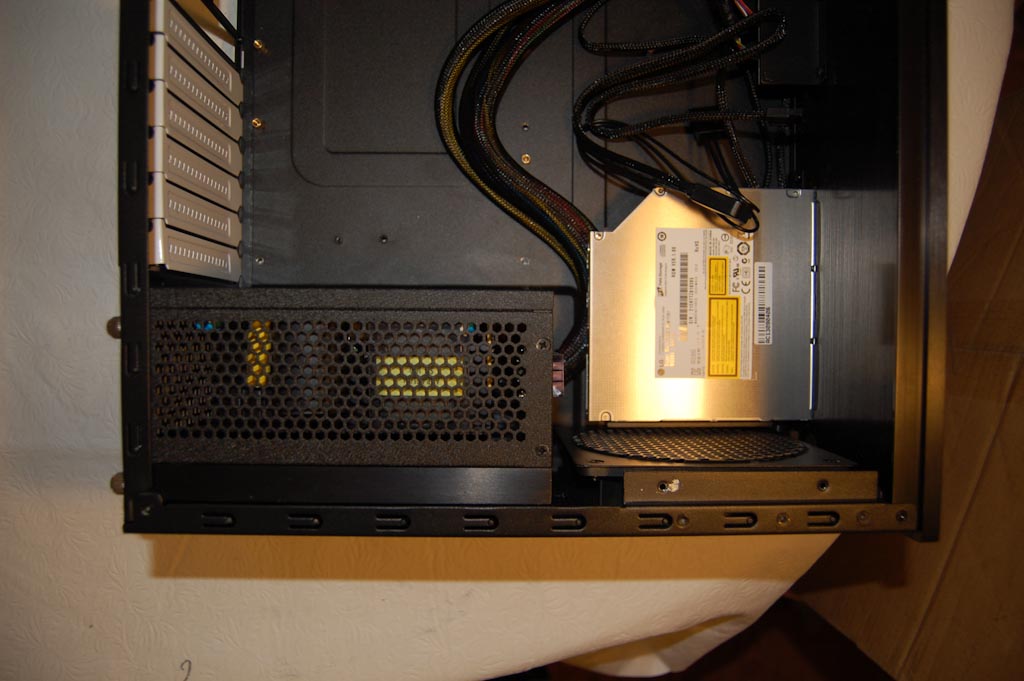
PSU installed
Very tight clearance!
4. Install components on the motherboard
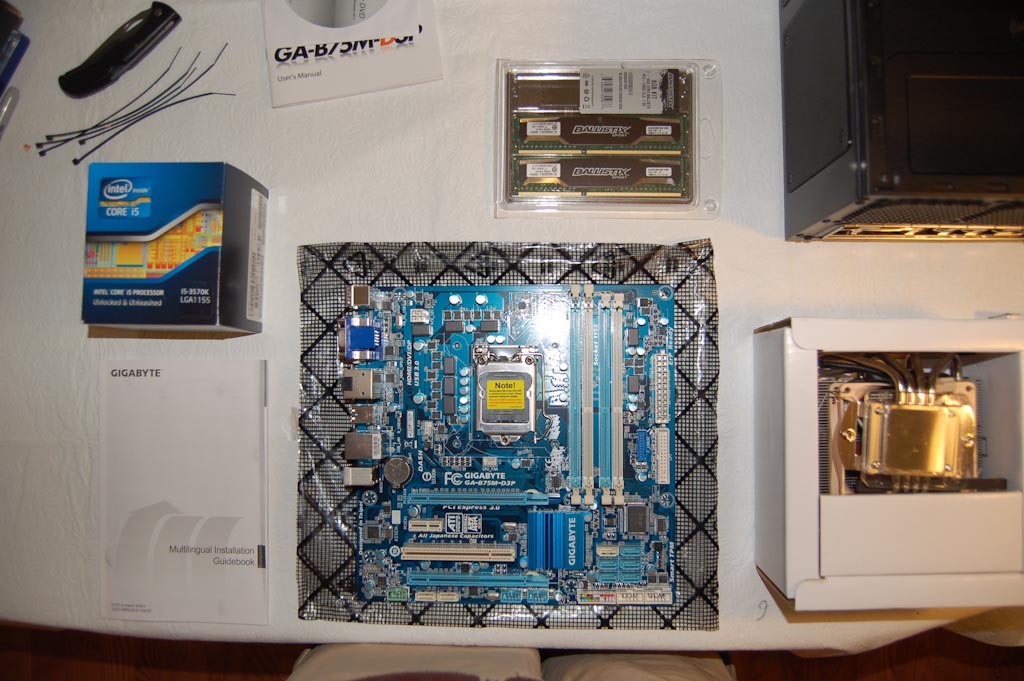
Components ready for installation
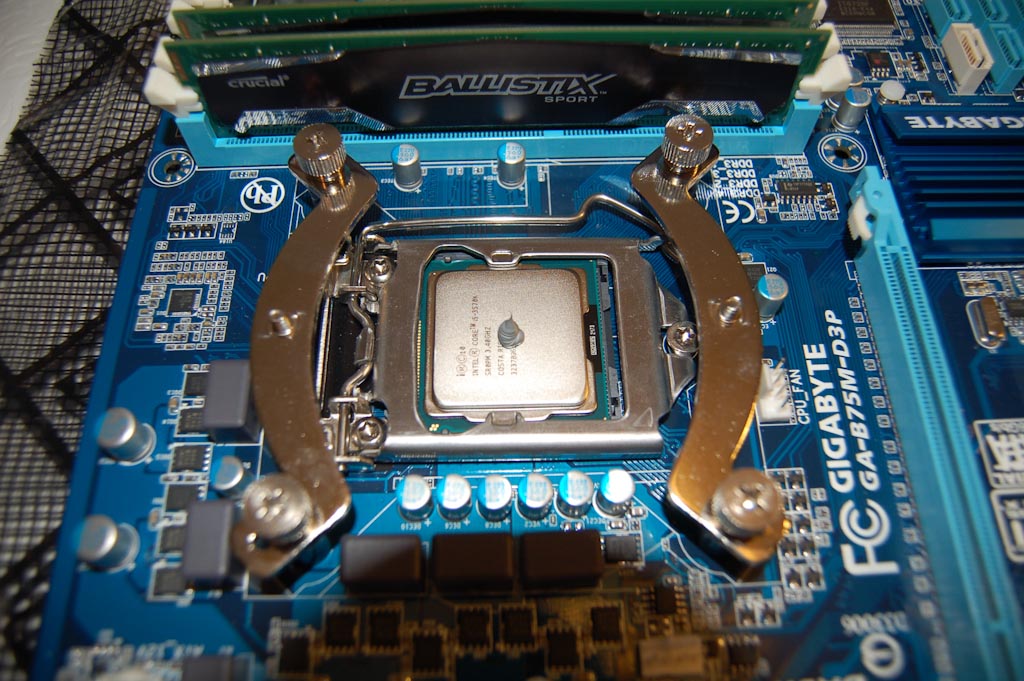
RAM, CPU (with thermal paste), and cooling fan mount installed
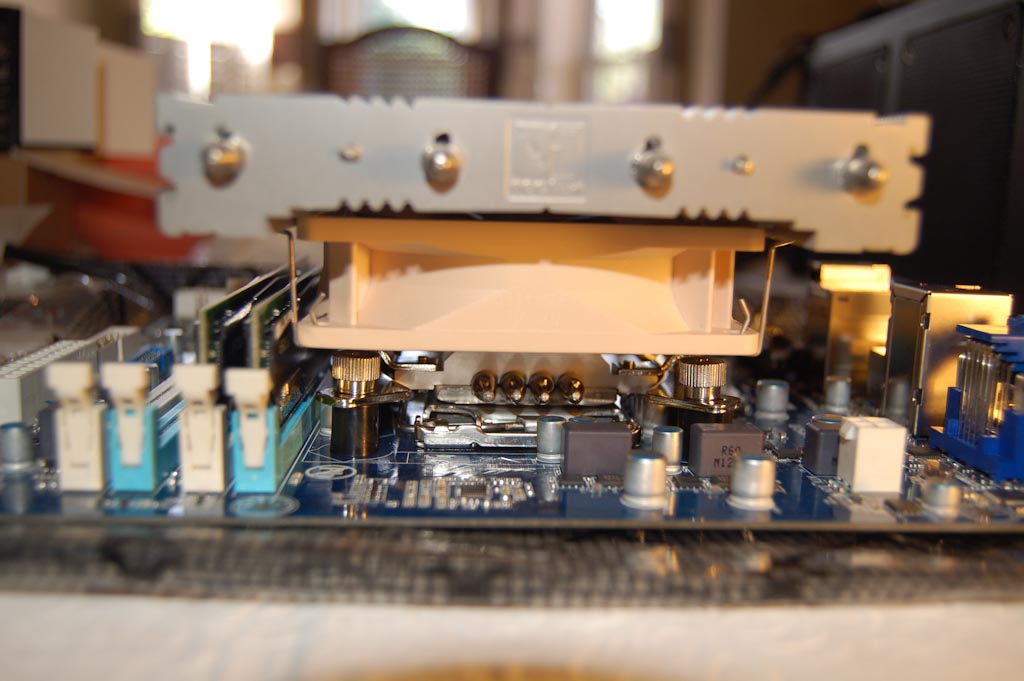
Tight clearance between CPU fan and RAM
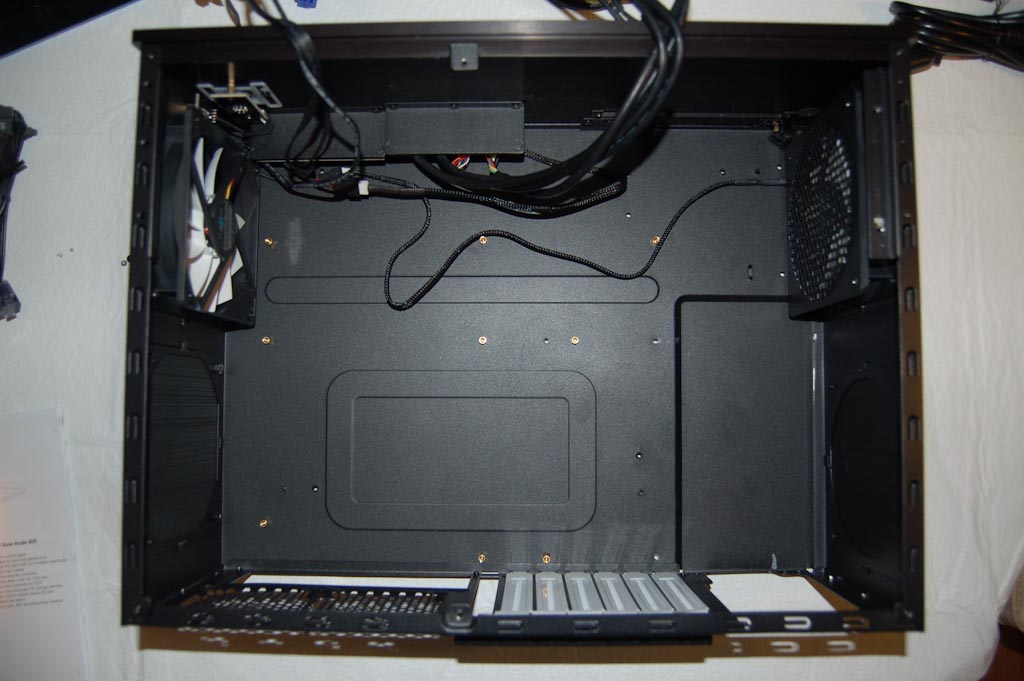
5. Mount motherboard in case
Mounting the motherboard was fairly easy. Don't forget the I/O backplate.
Motherboard mounted in case
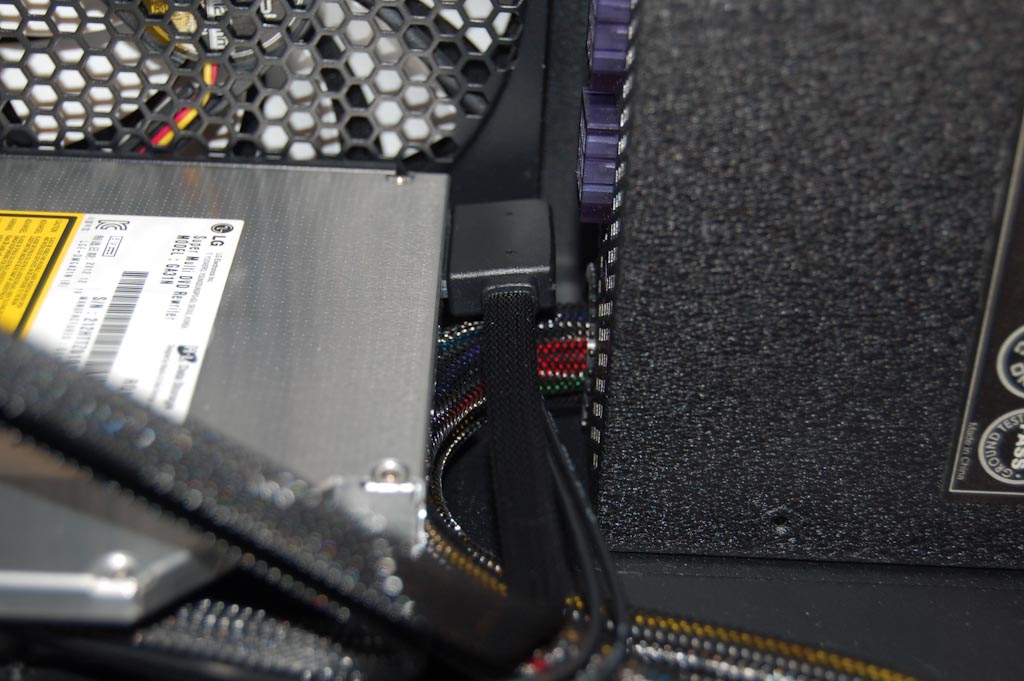
6. Modify HDD cage
I ran into my first problem at this stage. My PSU was just a bit too deep to fit with both HDD mounting trays installed. But I needed both trays to fit all 4 hard drives. What to do?

Ruh roh, no room for power connections
I got out of this jam by turning the mounting tray around, where there was just enough clearance for the power cables. Unfortunately, there was a lip on one side of the hanger, which I had to saw off with a hacksaw!
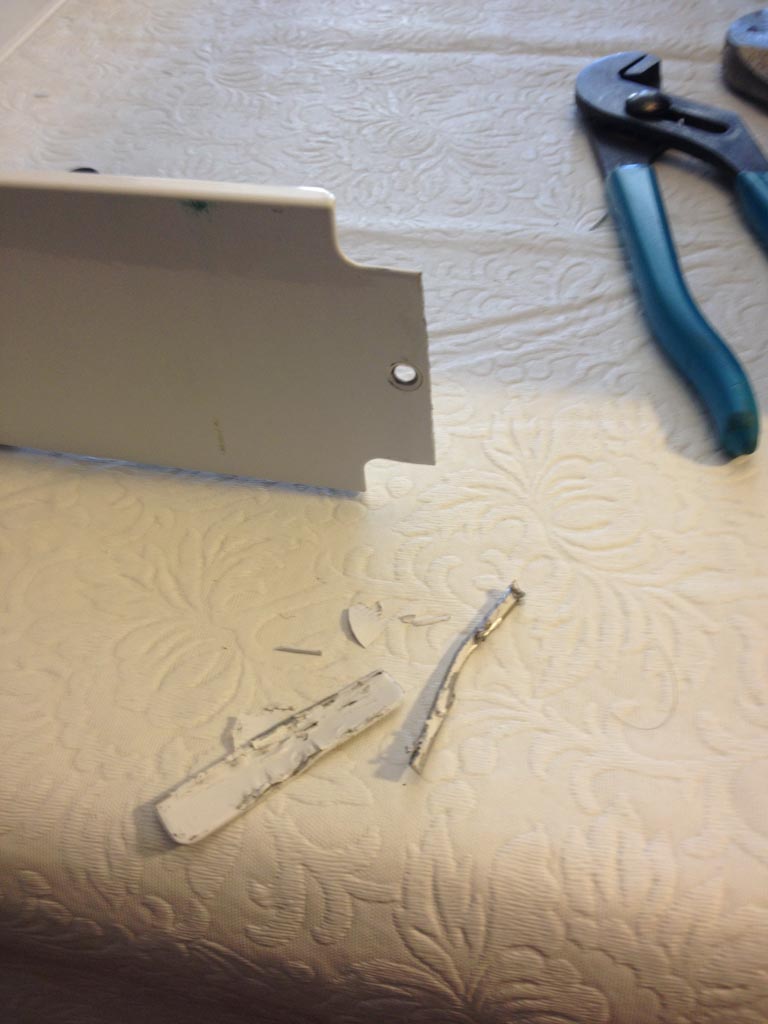
Modified drive cage
There was a bit of tight cabling to get all 4 drives mounted. They had to be cabled outside the case, then moved into position as a unit.
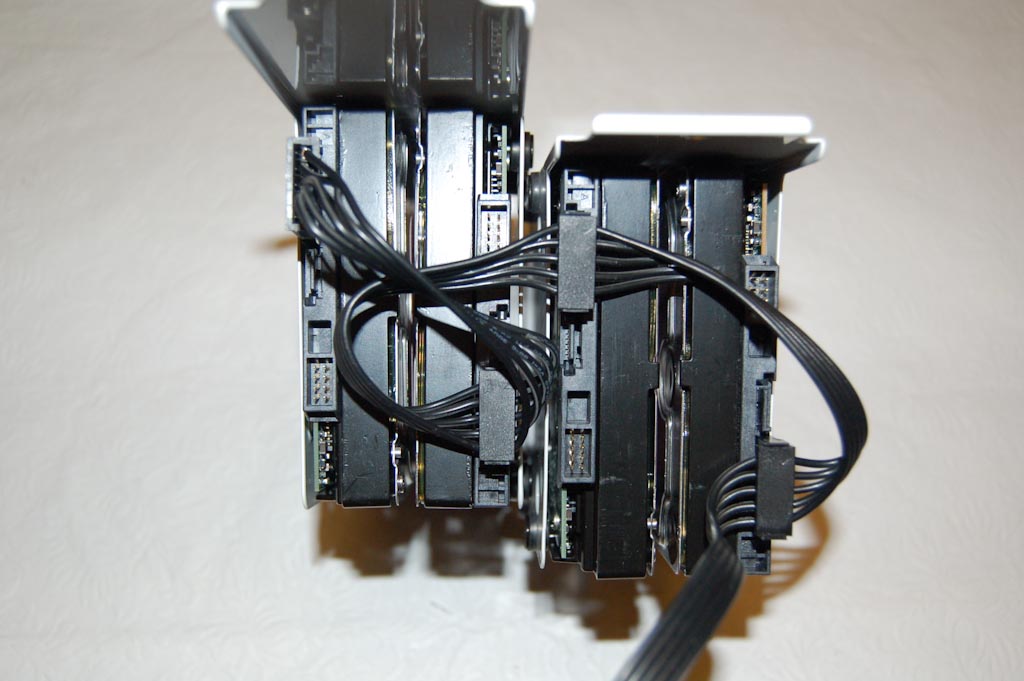
Tricky cabling with the HDDs
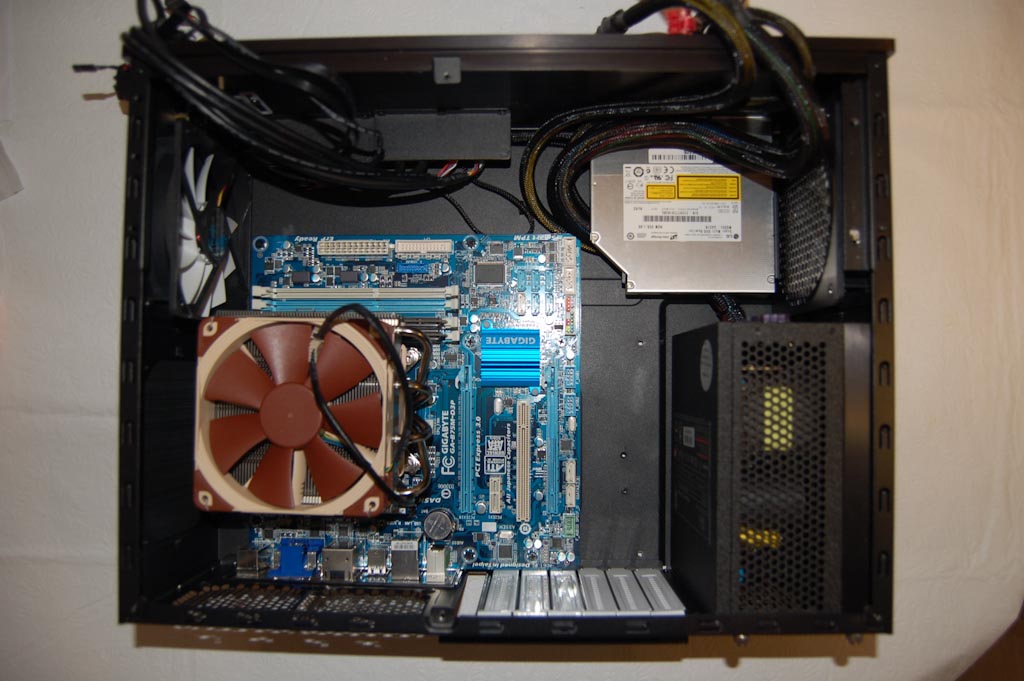
7. Final cabling and assembly

Everything installed
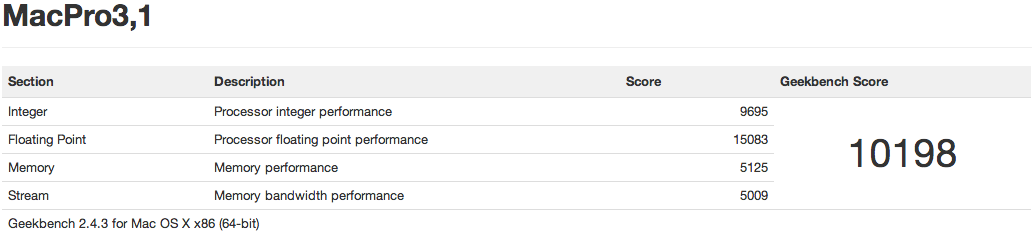
Performance
Geekbench
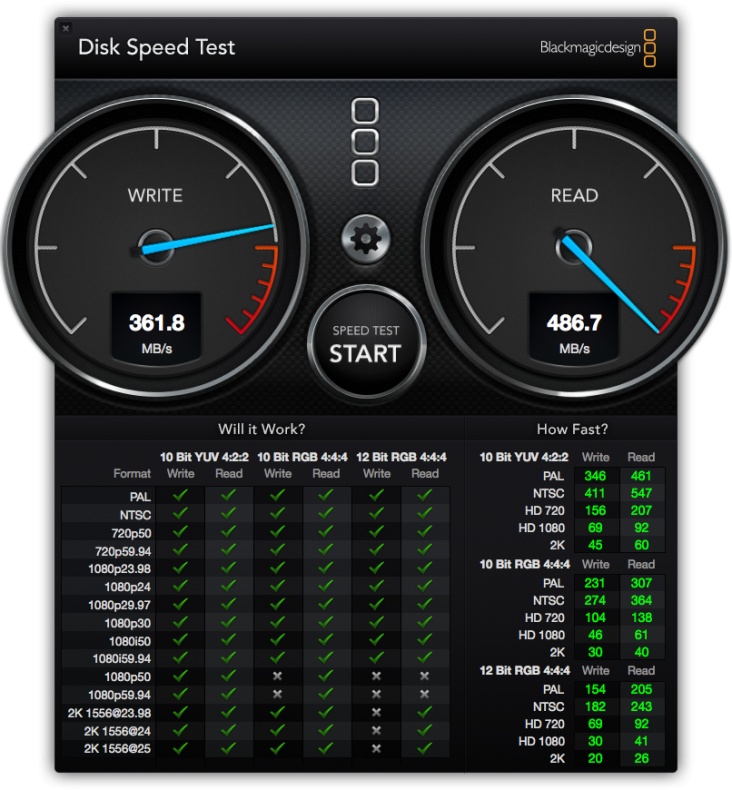
SSD disk speed test
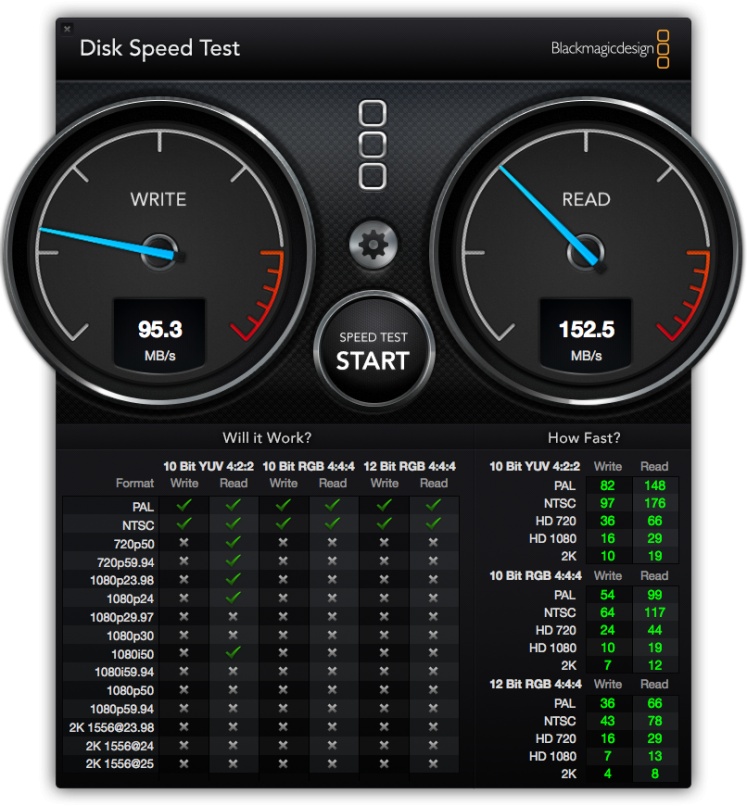
RAID disk speed test
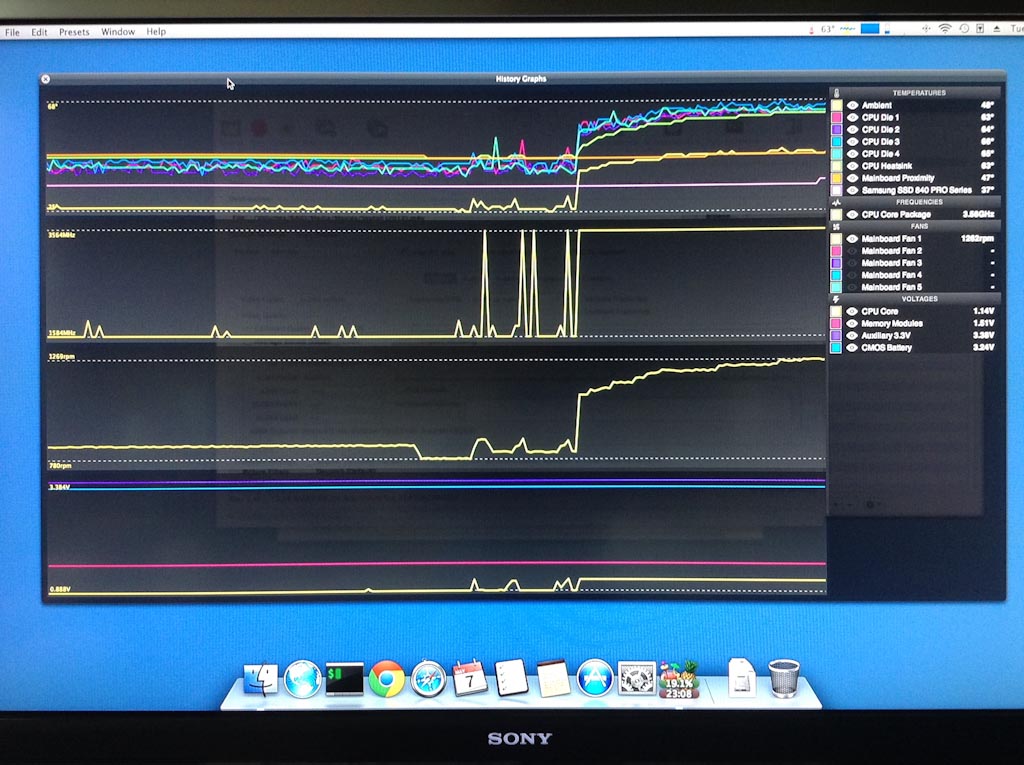
Thermals during media encode. Cooler than my MBA under moderate load.
Last edited:

 Why?
Why?