- Joined
- Feb 10, 2014
- Messages
- 47
- Motherboard
- Gigabyte GA-Z490M Gaming X
- CPU
- i9-10850K
- Graphics
- RX 580
- Mac
- Classic Mac
- Mobile Phone
Afuera's Gigabyte Z490m Giman X Hackintosh (Video Editing FCPX and Adobe Suite Machine)
*UPDATED TO OPENCORE 0.8.5 Monterrey 12.6
Gigabyte Z490m Gaming X - i9-10850K - AORUS Radeon RX 580 8GB

Components:*UPDATED TO OPENCORE 0.8.5 Monterrey 12.6
Gigabyte Z490m Gaming X - i9-10850K - AORUS Radeon RX 580 8GB
- MB: Gigabyte Z490M Gaming X *Small, cheap, well built, really compatible - Cons: Just 3 PCIEX
- CPU: Intel i9 10850K *Cheaper than 10900k but as powerful
- GPU: Gigabyte AORUS Radeon RX 580 8GB (Already Owned) *Cheaper than the 5700XT - Not as powerful, good for now
- Disk: Sabrent Rocket Q 500GB M.2 NVME
- RAM: 32GB G.SKILL Ripjaws V Series 32GB 3200Mhz *32GB is enough for video
- WiFi: Fenvi T919 *Made the AIRDROP possible
- Bluetooth: IOGEAR Bluetooth 4.0 USB Micro (Already Owned)
- Power Supply: Corsair RM750W (Already Owned)
- CPU Cooler AIR: Noctua NH-L12S *I wanted a silent build, disappointed with this noisy cooler
- Keyboard: Wireless Keyboard - Seenda *As Good as the Mac but 1/4 the price. (Not bluetooth but wireless)
- Mouse: Apple Magic Bluetooth Wireless Laser Mouse (Already Owned)
Comments:
Believe me, I was scared of switching from Clover to a completely "unknown world" of OpenCore. With this build I Updated/replaced my Ga-X56a-Ud5 Intel Xeon W3680 (6 cores) Hack from 2010. I wanted a not too expensive upgrade and to be able to have a fast stable machine to edit FCPX 4k video, Photos and Design. Something more powerful than my imac i9-9900K 2019 and a m1 Apple Mini.
Reading and trying to understand OpenCore took me a couple of weeks and I thought it was going to be a long process with many tries. But this end up being a less than a day project of understanding and doing it... It was completely worth it and easy. WHAT A CHANGE! Everything works as expected and this machine is faster than my 2019 Imac!
BIOS:
Disable:
- Fast Boot
- Secure Boot
- VT-d (can be enabled if you set DisableIoMapper to YES)
- CSM
- CFG Lock (MSR 0xE2 write protection)(This must be off, if you can't find the option then enable both AppleCpuPmCfgLock and AppleXcpmCfgLock under Kernel -> Quirks. Your hack will not boot with CFG-Lock enabled)
- VT-x
- Above 4G decoding
- Hyper-Threading
- Execute Disable Bit
- EHCI/XHCI Hand-off
- OS type: Windows10
- DVMT Pre-Allocated(iGPU Memory): 64MB
- SATA Mode: AHCI
- Primary Graphics Adapter: PCIE
- Share Memory: 64MB
- IGPU Multi-Monitor: Enabled (this keeps the iGPU enabled even when a graphics card is detected)
Installation Notes:
I chose this parts because I read on the forums that they are really compatible to run MacOS. This Motherboard/CPU/GPU/WIFI combo work with almost any tweaking. The process was really easy.
Installation:
Dortania's Guide made this process posible. Follow this, is long (for some is new) but it is super detailed, clear and easy to follow. https://dortania.github.io/OpenCore-Install-Guide/
USB MAP had to be mapped again after
Once you have Downloaded BIGSUR, created a bootable USB, Edited the EFI, added the EFI (you can use mine attached IF YOU HAVE THE SAME MOTHERBOARD/GPU/CPU will have no issues) in the installing USB.
Insert the USB you have created following the Dortania's Guide, at the boot picker chose "instal...mac os.." wait until the installer, watch the verbose mode run through... and wait for the installer menu, Format you SSD m.2 with disk utility (m.2 should be GUID partition Scheme and APFS). Install and wait for the first RESTAR, after the first Restart pick "Your disc name" on the boot menu and not the "Installer... macOS..." the installation will continue, then it will restart again, some more verbose and patience and the Boom you are in. Don't freak out with the 2-3 restarts the process does.
Post Installation:
After the installation, the Post installation is incredibly easy, basically: Mount you USB EFI, copy your USB´s EFI (with all your opencore work) and place it on the desktop. Eject the USB´s EFI and then mount your system EFI, copy the EFI folder to you System's EFI. That's it.
UPDATE 09/23/2021
* Big Sur 11.6 update. I updated OpenCore to 0.7.3 and Updated to Bigsur 11.6 Through System Update.
UPDATE 05/19/2021
* Big Sur 11.3.1 update breaks USB on Gigabyte Z490m Giman X. I updated and mapped my USB ports again. Added USBPorts.kext in config.plist.
UPDATE 02/03/2022
* Big Sur 11.6.2 updated through System Preference as a normal Mac would after UPDATE OpenCore 0.7.7 with udated KEXTs
UPDATE 10/15/2022
* Update to Monterrey with OpenCore to 0.8.5 and Through System Update like a normal mac.
UPDATE 04/25/2023
* Update to Ventura with OpenCore to 0.9.1 and Through System Update like a normal mac.
EFI IS UPDATED TO OpenCore 0.9.1
Summary:
Running OpenCore 0.9.1 on VENTURA 13.3.1
This build is fast and reliable enough to be my main Editing/Working machine. No complaints whatsoever, not too fancy, not too expensive and with that fluidity of a powerful built that allows you concentrate on your creativity.
What Works:
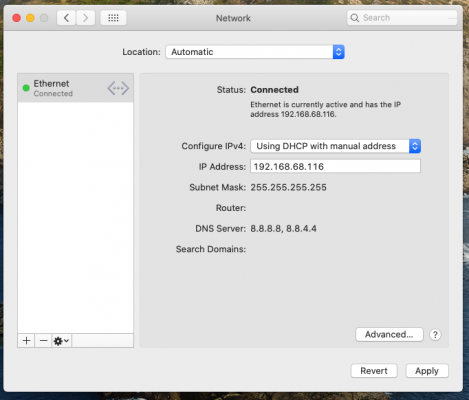
- Ethernet via IntelMausi.kext
- Intel onboard audio
- GPU: Hardware Acceleration
- Airdrop
- Imessagge/Facetime/Icloud
- Sleep / Wake / Shutdown
- Wifi / BT
- USB3.2 / USBC / FRONT USB3 at full speed
- Dual Monitor
- SSD m.2
Can't find anything really
Attachments
Last edited: