- Joined
- Jul 28, 2010
- Messages
- 143
- Motherboard
- 10.11 and Windows 10
- CPU
- Core i5 4690k
- Graphics
- ASUS GTX 970 Mini 4GB
- Mac
- Classic Mac
- Mobile Phone
This was truly a hack and slash job. I had some old parts I wanted to throw together (from a previous rig which I upgraded), and I had a case someone had given me (thanks shadowvox from ******!). So here is the parts list:
Motherboard: Gigabtye EP43-UD3L Rev 1.3
CPU: Intel Core 2 Quad Q9650 @ 3.0 Ghz
RAM: 8GB of Patriot Extreme Gaming 800 Mhz DDR2
Graphics: Zotac Geforce GTX 560 1024MB (new part)
PSU: Corsair 600W Builder (new part)
The hard drive is a spare I had lying around, I plan on upgrading it and dual booting this in the future.
IMG_0501.jpg
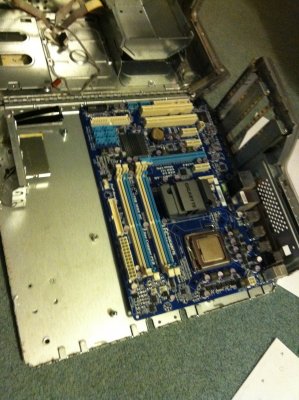
Here I laid down the motherboard to make sure I could see how it aligned roughly. From this, and a ton of reading through other mod threads, I had a feel for the alignment.
IMG_0505.jpg
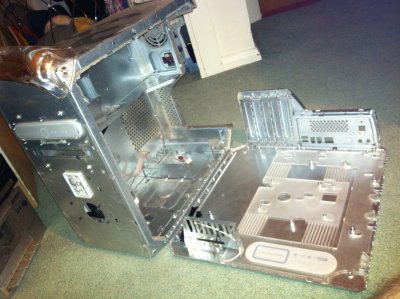
Here is the case with all the sides removed. Sorry I didn't get a pre-mod pic, I was in a bit of an excited hurry.
IMG_0510.jpg
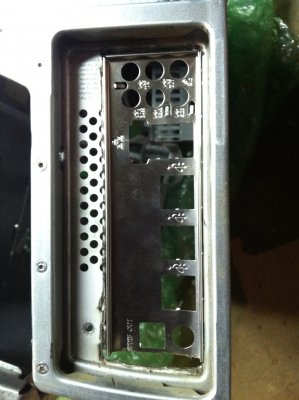
Did quite a rough cut on this. I wanted to keep the audio ports, and to do so I had to give up my PS/2 Mouse and Keyboard ports (not a big loss). I also did this so the graphics card would line up nicely.
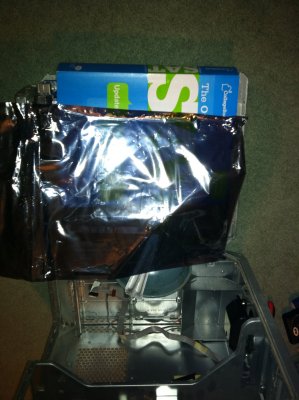
IMG_0512.jpg
JB-Weld! Time to let this sit overnight. I used the weight to help it stay in place. Unfortunately two of the five screws did not stay, but then again they were not properly mounted it turned out. No worries, there is plenty holding this board in place!
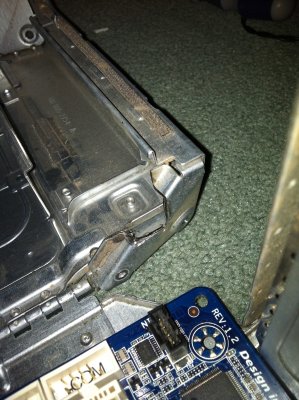
IMG_0518.jpg
I had a debate in another thread on how to solve this problem. I made the right choice and trimmed the case and not the motherboard (YAY!). Now, when I close the case, the motherboard does not get caught there in the corner.
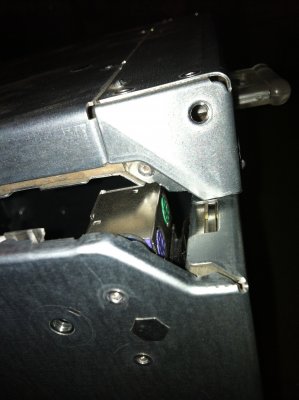
IMG_0521.jpg
Because of the alignment of the motherboard, I had to bend the case in a little at the top so as to make clearance for the PS/2 ports even though I am not using them.
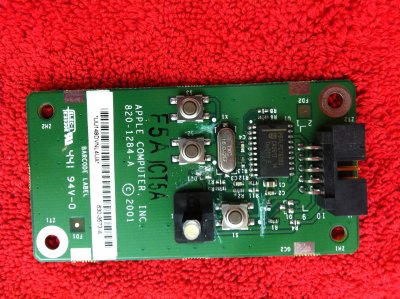
IMG_0522.jpg
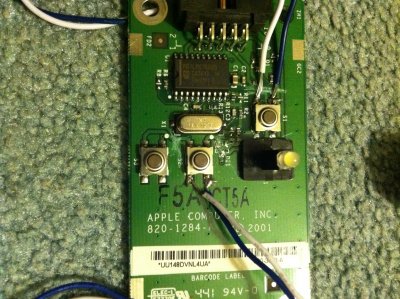
Here is the front panel board. I have to cut the connections to prevent shorts, and I have to solder the proper buttons.
IMG_0524.jpg
Soldering and cutting done! I think I messed up on the top power button, later testing revealed it didn't work. No worries, I just switched the plugs for the reset button plugs, worked like a charm. I think white is positive and blue is negative.
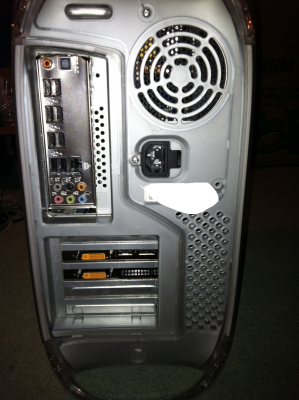
IMG_0528.png
Here is the back of the case after all the parts were cleaned and reassembled. Closes and opens just fine. The only small issue I have with opening it is that it needs a little jimmying, but that is ok.
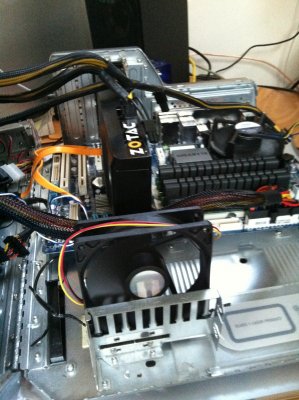
IMG_0533.jpg
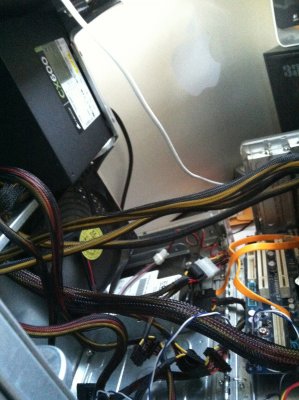
This is the final (mostly) pic of the inside. This power supply is not modular, so I have a mess of cables that I will have to "clean up" later.
Overall, this was a very straight forward and easy mod. The only downside are the temps. Man, they do get a little higher than I like. Nothing is overclocked, but it is poor design to have the PSU directly across from the CPU. Even with fans pushing air towards the CPU (I have one mounted in the CD bay) it is still warm in there. When I opened up the case to check everything, I could feel the heat leaving the case. Without keeping the beautiful design, I could put wholes everywhere. However, I like the design too much to do anything =p.
Motherboard: Gigabtye EP43-UD3L Rev 1.3
CPU: Intel Core 2 Quad Q9650 @ 3.0 Ghz
RAM: 8GB of Patriot Extreme Gaming 800 Mhz DDR2
Graphics: Zotac Geforce GTX 560 1024MB (new part)
PSU: Corsair 600W Builder (new part)
The hard drive is a spare I had lying around, I plan on upgrading it and dual booting this in the future.
IMG_0501.jpg
Here I laid down the motherboard to make sure I could see how it aligned roughly. From this, and a ton of reading through other mod threads, I had a feel for the alignment.
IMG_0505.jpg
Here is the case with all the sides removed. Sorry I didn't get a pre-mod pic, I was in a bit of an excited hurry.
IMG_0510.jpg
Did quite a rough cut on this. I wanted to keep the audio ports, and to do so I had to give up my PS/2 Mouse and Keyboard ports (not a big loss). I also did this so the graphics card would line up nicely.
IMG_0512.jpg
JB-Weld! Time to let this sit overnight. I used the weight to help it stay in place. Unfortunately two of the five screws did not stay, but then again they were not properly mounted it turned out. No worries, there is plenty holding this board in place!
IMG_0518.jpg
I had a debate in another thread on how to solve this problem. I made the right choice and trimmed the case and not the motherboard (YAY!). Now, when I close the case, the motherboard does not get caught there in the corner.
IMG_0521.jpg
Because of the alignment of the motherboard, I had to bend the case in a little at the top so as to make clearance for the PS/2 ports even though I am not using them.
IMG_0522.jpg
Here is the front panel board. I have to cut the connections to prevent shorts, and I have to solder the proper buttons.
IMG_0524.jpg
Soldering and cutting done! I think I messed up on the top power button, later testing revealed it didn't work. No worries, I just switched the plugs for the reset button plugs, worked like a charm. I think white is positive and blue is negative.
IMG_0528.png
Here is the back of the case after all the parts were cleaned and reassembled. Closes and opens just fine. The only small issue I have with opening it is that it needs a little jimmying, but that is ok.
IMG_0533.jpg
This is the final (mostly) pic of the inside. This power supply is not modular, so I have a mess of cables that I will have to "clean up" later.
Overall, this was a very straight forward and easy mod. The only downside are the temps. Man, they do get a little higher than I like. Nothing is overclocked, but it is poor design to have the PSU directly across from the CPU. Even with fans pushing air towards the CPU (I have one mounted in the CD bay) it is still warm in there. When I opened up the case to check everything, I could feel the heat leaving the case. Without keeping the beautiful design, I could put wholes everywhere. However, I like the design too much to do anything =p.
Attachments
-
 IMG_0501.jpg2.1 MB · Views: 3,557
 -
 IMG_0505.jpg1.6 MB · Views: 3,610
 -
 IMG_0510.jpg1.7 MB · Views: 3,122
 -
 IMG_0512.jpg1.4 MB · Views: 2,559
 -
 IMG_0518.jpg2.4 MB · Views: 2,496
 -
 IMG_0521.jpg1.7 MB · Views: 2,413
 -
 IMG_0522.jpg2.4 MB · Views: 2,418
 -
 IMG_0524.jpg2.5 MB · Views: 2,420
 -
 IMG_0533.jpg2 MB · Views: 2,542
 -
 IMG_0528.png5.9 MB · Views: 5,844