Contribute
Register

pastrychef's Asus ROG Strix Z370-G Gaming (WI-FI AC) build w/ i9-9900K + AMD 6600 XT

Sorry for the slow reply, I've been out of state at the conference.
1) 10.15.7
2) I put CodecCommander there during my attempts to fix the problem, already removed it.
3) Clover from you post version 5146
4) In your 5146 EFI folder USBInjectAll.kext is include, so I will then include uia_exclude

Yeah. The functions of CodecCommander should already be baked in to AppleALC now.
 
Alright, I think I have fixed the problem with the the output device disappearance after wakeup. Frankly, I'm not sure what exactly helped, but I fixed the USBs and took care of the power management.

I now have another annoying issue tho lol.
While I was trying to find a solution for DP\HDMI fix I've purchased speakers and connected them via 3.5 jack, they work fine but all MacOS sounds (email notification, trash bin etc sounds) still go via DP\HDMI.
 
In Sound preferences, "Sound Effects" tab, ensure "Play sound effects.." is set to what you want.
 
In Sound preferences, "Sound Effects" tab, ensure "Play sound effects.." is set to what you want.
Oh, now I feel stupid :) Thank you very much!!
 
Alright, I think I have fixed the problem with the the output device disappearance after wakeup. Frankly, I'm not sure what exactly helped, but I fixed the USBs and took care of the power management.

I now have another annoying issue tho lol.
While I was trying to find a solution for DP\HDMI fix I've purchased speakers and connected them via 3.5 jack, they work fine but all MacOS sounds (email notification, trash bin etc sounds) still go via DP\HDMI.

Screen Shot 2022-06-20 at 10.08.23 PM.png
 
Yeah, I figured.. thank you very much! And sorry for the naive question
 
My quest for fast, reliable external storage...

My original plan was to use an old 4 bay external enclosure with USB3 and eSATA to add external storage to my Mac Studio... I first tried using the eSATA connection via a Thunderbolt to eSATA adaptor. This proved to be a failure as transfer speeds degraded steadily on large transfers to the point if approx 20mb/s before I aborted.

Next I decided to give the USB3 connection a shot. Performance was fine and it maintained approx 130-160mb/s throughout a large transfer. Unfortunately, the drives would disconnect when the Mac Studio went to sleep and resulted in, at times, dozens of "Did not eject properly" notifications. I tried all sorts of suggestions found on the internet including purchasing an app called Jettison. None of the fixes worked 100%...

I finally threw in the towel and decided to transplant all the internals of my NAS from an enclosure with 8 hot swap bays to an enclosure with 12 hot swap bays and put the remaining 4 unused SATA ports to work. I would use these four SATA ports to create a storage pool with three volumes (1) iTunes, (2) Time Machine, and (3) Downloads/Junk. I would then use an app called AutoMounter to automatically mount these shares on the desktop. Since I will be putting four hard drives in to an array, performance will exceed that of single hard drives. It will also provide redundancy in the event any of the drives died. Having 10GBase-T means there won't be any bottlenecks for transfer speeds.

View attachment 547885

The most difficult part of this is the transferring of all the hardware from one case to another. The Synology DSM made setup very easy. If I didn't already have a NAS in place, I would probably have attempted something similar using a Raspberry Pi 4. The only caveat being that transfer speeds would be limited to the 1GBase-T on the Pi. I plan on testing this setup anyway to see how fast speeds are in real world use.

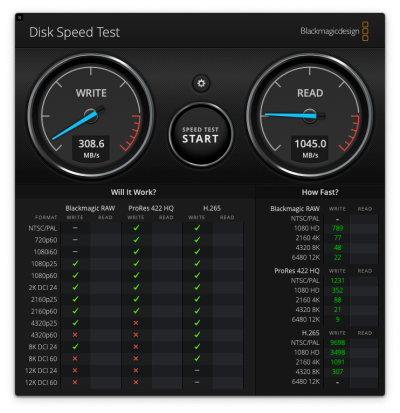
It took a while for me to move the drives to my NAS because I wanted to retain the data on them. So I had to start the new shared volume with just two drives, then transfer data, then add a drive to the NAS, etc... Well, I finally finished everything and it's working great.

Screen Shot 2022-06-22 at 9.40.41 AM.png

This is from the new shared volume built on the old 3.5" drives from my hack. Best part is, no more "Did not eject properly" notifications!

I also tested setting up a Raspberry Pi 4 as a NAS using OpenMediaVault and an old 2.5" HDD. It was pretty easy to set up (under an hour) and performance wasn't too bad. I got approx 70-90MB/s writes and 100MB/s reads. Very respectable for a little Raspberry Pi and an old, slow 2.5" HDD over 1GBase-T.
 
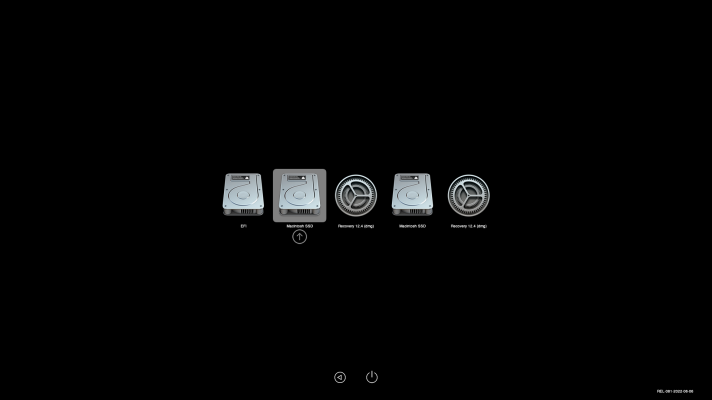
Hi Pastrychef. I noticed with 0.81 OC EFI there is no option to reset the nvram, which I wanted to do as you reccomend after updating to a new one.

I have also realized that pressing the keyboard spacebar does not bring booster options, I think this has never worked for me.
Is there another key combination?
My EFIS are always the ones you upload only adding my serials and ROM...
 

Attachments

  • 20074707.png
    20074707.png
    67.8 KB · Views: 22
I noticed with 0.81 OC EFI there is no option to reset the nvram

 
Hi Pastrychef. I noticed with 0.81 OC EFI there is no option to reset the nvram, which I wanted to do as you reccomend after updating to a new one.

I have also realized that pressing the keyboard spacebar does not bring booster options, I think this has never worked for me.
Is there another key combination?
My EFIS are always the ones you upload only adding my serials and ROM...

Add "ResetNvramEntry.efi" to config.plist > UEFI > Drivers.
 
Back
Top