neilhart
Moderator
- Joined
- May 25, 2010
- Messages
- 2,686
- Motherboard
- ASRock Fatal1ty Z270 Gaming - ITX/ac
- CPU
- i7-7700T
- Graphics
- GTX960
- Mac
- Mobile Phone
Fans and Cooling:
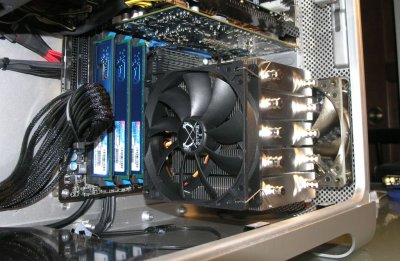
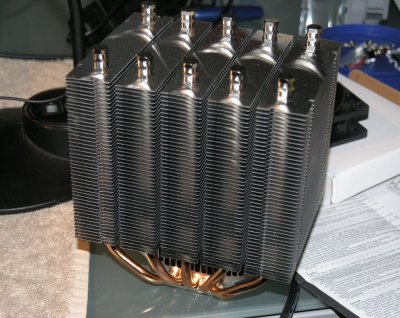
The Intel i7-950 rating Max TDP of 130 watts influenced my choice of CPU cooler. Bigger is better (probably not) but I choose the Scythe Mugen ? 2B which is huge. The cooler comes with on Scythe “Slip Stream” high airflow 120 mm fan which I used on the cooler.
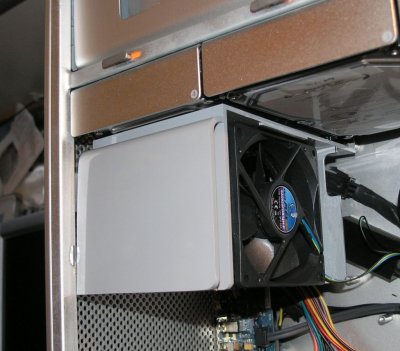
I chose two SiLenx 120 mm fans, one for the front and one for the rear. I purchased a late model Mac Pro Processor Cage from an Ebay seller and cut it a part to use the top, front and bottom portions. I installed the front SiLenx fan into this cage and added a 1/16 acrylic window. The rear SiLenx fan is attached directly to the Apple rear fan grill.
This forms a three fan tunnel for cooling the CPU.
I cut down the original dual front fan plastic tower and reconfigured it to house a 92mm Scythe Kama-Flex fan.
These fans are all powered by the MSI motherboard which has BIOS level speed control capability. I am not sure yet how much speed control actually is present running in OS X Lion. But the point of these selections was to keep the noise down.
Total fan count is 6 (way too many and will surely require service at some point).
The Intel i7-950 rating Max TDP of 130 watts influenced my choice of CPU cooler. Bigger is better (probably not) but I choose the Scythe Mugen ? 2B which is huge. The cooler comes with on Scythe “Slip Stream” high airflow 120 mm fan which I used on the cooler.
I chose two SiLenx 120 mm fans, one for the front and one for the rear. I purchased a late model Mac Pro Processor Cage from an Ebay seller and cut it a part to use the top, front and bottom portions. I installed the front SiLenx fan into this cage and added a 1/16 acrylic window. The rear SiLenx fan is attached directly to the Apple rear fan grill.
This forms a three fan tunnel for cooling the CPU.
I cut down the original dual front fan plastic tower and reconfigured it to house a 92mm Scythe Kama-Flex fan.
These fans are all powered by the MSI motherboard which has BIOS level speed control capability. I am not sure yet how much speed control actually is present running in OS X Lion. But the point of these selections was to keep the noise down.
Total fan count is 6 (way too many and will surely require service at some point).