- Joined
- May 2, 2019
- Messages
- 56
- Motherboard
- Gigabyte Z390 AORUS Pro Wifi
- CPU
- i7-8700K
- Graphics
- RX 580
- Mac
- Mobile Phone
Apologies in advance for my ignorance. This is my first Hackintosh, and while I do webdev for work, this is all foreign to me.
I almost feel like there's some information missing from the beginner's guide (ok, so from troubleshooting I know that I need kexts, but where exactly do I put them, and when, and how? It sounds like maybe on the installation thumb drive... or maybe also onto the machine after OSX is installed? Or both? I haven't seen a single clear guide on this yet)... Anyway, here's my hardware:
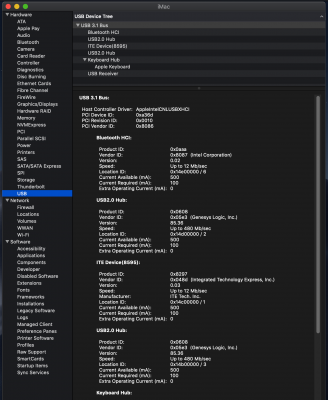
While my mobo does have a set of onboard USB2 ports, and I also have some case-mounted USB2 ports, I ended up having to use a USB3.1 (its interior is red) port to boot the install drive -- nothing else works. (It may be worth mentioning that thanks to this case's previous life being shared with kids, one of those case-mounted USB2 ports is quite destroyed and the other wouldn't boot the install drive. Should I unplug them from the mobo?)
I didn't realize it at first, but I seem to be getting a kernel panic near the end of Phase 1 of the install. Through various searches here in the forums, I found advice to turn on verbose mode, which I did in the options found by hitting the spacebar at the clover bootloader, and (based on common sense, haven't seen it mentioned anywhere in here) I also turned on the option to not reboot after a kernel panic in the same options list. Before doing so, phase 1 of the installer would get down to about 2 minutes left and then reboot without warning. At first I thought this was just normal behavior, but after turning on verbose mode and no-reboot-on-panic, I see the following error:

Sorry, but the only monitor I have available for this install is pretty wide and my phone doesn't want to focus on one lone line of white text on a black screen, so the above shows the left side, and the "panic" line that's cut off about mid-height says:
Other things that I remember that I've tried:
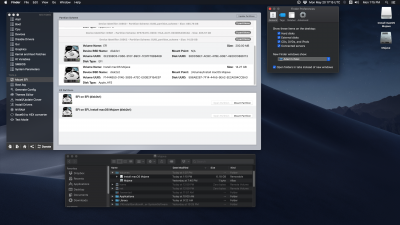
After many failed attempts, I have yet to get a single phase 1 install to complete, and the clover screen on boot initially looks like this:

The label for the middle volume is, "Boot macOS Install Prebooter from Preboot", and the right volume label says, "Boot macOS Install from Mojave" (Mojave is the name I gave to my SSD, as suggested by the guide).
If I try to boot from the right volume (again using spacebar to go to options and set verbose and no-reboot-on-panic), I initially get what I'm guessing is Phase 2 of the installer with a progress bar that says "15 minutes remaining" and then it pretty quickly ends up in a kernel panic similar to the one described above. Only the numbers seem different to me. Here it is (emphasis added to what's different)...
Help please? I will try to be as responsive as I can, but I have to work away from the Hackintosh all day on Friday and Saturday, so if I don't get any advice tonight I probably won't get another chance until Sunday.
I almost feel like there's some information missing from the beginner's guide (ok, so from troubleshooting I know that I need kexts, but where exactly do I put them, and when, and how? It sounds like maybe on the installation thumb drive... or maybe also onto the machine after OSX is installed? Or both? I haven't seen a single clear guide on this yet)... Anyway, here's my hardware:
- Gigabyte Z390 AORUS PRO WiFi
- Intel i7 8700K CPU
- Sapphire 11265-05-20G Radeon Pulse RX 580
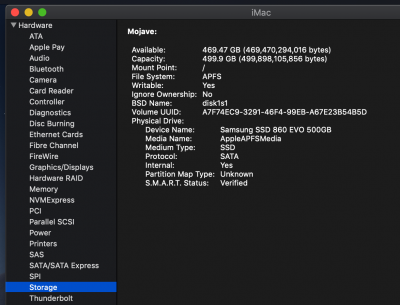
- Samsung 860 EVO 500GB 2.5 Inch SATA III Internal SSD
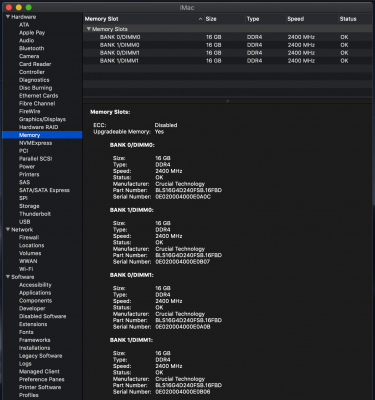
- 64GB of RAM
- Installing using a Sandisk 16gb USB2 thumb drive
While my mobo does have a set of onboard USB2 ports, and I also have some case-mounted USB2 ports, I ended up having to use a USB3.1 (its interior is red) port to boot the install drive -- nothing else works. (It may be worth mentioning that thanks to this case's previous life being shared with kids, one of those case-mounted USB2 ports is quite destroyed and the other wouldn't boot the install drive. Should I unplug them from the mobo?)
I didn't realize it at first, but I seem to be getting a kernel panic near the end of Phase 1 of the install. Through various searches here in the forums, I found advice to turn on verbose mode, which I did in the options found by hitting the spacebar at the clover bootloader, and (based on common sense, haven't seen it mentioned anywhere in here) I also turned on the option to not reboot after a kernel panic in the same options list. Before doing so, phase 1 of the installer would get down to about 2 minutes left and then reboot without warning. At first I thought this was just normal behavior, but after turning on verbose mode and no-reboot-on-panic, I see the following error:
Sorry, but the only monitor I have available for this install is pretty wide and my phone doesn't want to focus on one lone line of white text on a black screen, so the above shows the left side, and the "panic" line that's cut off about mid-height says:
"TLB invalidation IPI timeout, unresponsive CPU bitmap: 0x40, NMIPI acks: 0x0, now: 0x1, deadline: 5806539393909"@/BuildRoot/Library/Caches/com.apple.xbs/Soruces/xnu/xnu-4903.251.3/osfmk/x86_64/pmap.c:2940
Other things that I remember that I've tried:
- This is basically the same motherboard, so I've been using the bios settings described in this post.
- Initially I formatted the drive with GUID partition map, but then I saw someone in this thread suggest using APFS instead. I have been trying that instead, but haven't seen any change.
- Initially I was using a vanilla Unibeast-built image, but that was also not working (I can go back to that and show the panic from that if needed), so many forum searches later, I cobbled together a few kexts that seemed reasonable for my hardware, but I'm not certain that they're right. (And I am only partly confident that I put them in the right place: When I create the installer with Unibeast, I'm left with two volumes mounted, one of which is called "EFI", and I browsed that and put them into Clover/kexts (I think))...
After many failed attempts, I have yet to get a single phase 1 install to complete, and the clover screen on boot initially looks like this:
The label for the middle volume is, "Boot macOS Install Prebooter from Preboot", and the right volume label says, "Boot macOS Install from Mojave" (Mojave is the name I gave to my SSD, as suggested by the guide).
If I try to boot from the right volume (again using spacebar to go to options and set verbose and no-reboot-on-panic), I initially get what I'm guessing is Phase 2 of the installer with a progress bar that says "15 minutes remaining" and then it pretty quickly ends up in a kernel panic similar to the one described above. Only the numbers seem different to me. Here it is (emphasis added to what's different)...
"TLB invalidation IPI timeout, unresponsive CPU bitmap: 0x100, NMIPI acks: 0x0, now: 0x1, deadline: 103889285715"@/BuildRoot/Library/Caches/com.apple.xbs/Soruces/xnu/xnu-4903.251.3/osfmk/x86_64/pmap.c:2940
Help please? I will try to be as responsive as I can, but I have to work away from the Hackintosh all day on Friday and Saturday, so if I don't get any advice tonight I probably won't get another chance until Sunday.
")