
You are using an out of date browser. It may not display this or other websites correctly.
You should upgrade or use an alternative browser.
You should upgrade or use an alternative browser.
Hector (H97N-WIFI / i5-4690 / 16GB RAM) with New Gigabyte 750 TI 2GB Graphics Card
- Thread starter Stork
- Start date
- Status
- Not open for further replies.
- Joined
- Sep 21, 2010
- Messages
- 13,416
- Motherboard
- HP 17" 17-by3053cl
- CPU
- i5-1035G1
- Graphics
- Intel UHD Graphics, 1920x1080
- Mac
- Classic Mac
- Mobile Phone
I don't know the answer to your question. I recommend you post the problem in a new thread in this forum section. However, IIRC, there's no native power management for the 760 in OS X. Try searching on 760 and power management.Okay, I've gotten my 760. I installed it, did what you said, and I can boot and use the computer.
But the fans are running at 1140/1170 RPM all the time (really loud) and I don't seem to be getting better performance...
- Joined
- Nov 19, 2014
- Messages
- 6
- Motherboard
- GA-Z97M-D3H
- CPU
- i5-4460
- Graphics
- EVGA 750 Ti
- Mac
- Classic Mac
- Mobile Phone
So someone might know what's going on here...
I get my EVGA 750 SC up and running, everything works fine, full 2560x1440 resolution on my Dell U2515H monitor. I marvel at the beautiful display. I restart, everything's good, and restart a few times over the course of the next couple of hours, and everything is still good. Then, for no reason, I get the exclamation mark on the Apple boot screen, and booting with -v gives me "Still waiting for root device".
Does anyone have any idea?!
Hi chris7418,
Can I ask some detail about your configuration?
I've same card and monitor but i'm stuck with 2048x1152 with HDMI,
and the displayport doesn't seem enabled, after boot sequence my dell go in powersafe
Can you give me some indication?
Thank you
- Joined
- Sep 21, 2010
- Messages
- 13,416
- Motherboard
- HP 17" 17-by3053cl
- CPU
- i5-1035G1
- Graphics
- Intel UHD Graphics, 1920x1080
- Mac
- Classic Mac
- Mobile Phone
I finally got around to updating to the latest nVidia Web driver for Yosemite 10.10.3 (build 14D136) WebDriver 346.01.02f04 pkg (see OP for link). I don't know the reason, but I can't just update from the nVidia System Preference pane - the system freezes. Also freezes if I try to update from the pkg in a normal, Desktop environment. So, I have to boot -v -x nv_disable=1 and then run the pkg. Reboot, and all is well. YMMV.
BTW, I added a Reference link in the OP for the MacVidCards site which has a list (with links) of all the past and current Web driver pkgs. Links to the CUDA pkg are also at that MacVidCards link.
BTW, I added a Reference link in the OP for the MacVidCards site which has a list (with links) of all the past and current Web driver pkgs. Links to the CUDA pkg are also at that MacVidCards link.
- Joined
- Sep 21, 2010
- Messages
- 13,416
- Motherboard
- HP 17" 17-by3053cl
- CPU
- i5-1035G1
- Graphics
- Intel UHD Graphics, 1920x1080
- Mac
- Classic Mac
- Mobile Phone
Like 10.10.3, the update to 10.10.4 went a whole lot smoother than 10.10.1 & 10.10.2. Here's what I did.
Preparation
 Download the nVidia Web Drivers for 10.10.4 (14E46) > WebDriver 346.02.02f03 pkg*
Download the View attachment 133392 file and unzip.**
Repair Permissions using the Disk Utility on the drive to be updated***
Backup your current installation using Carbon Copy Cloner or SuperDuper - Do This!!
Installation of 10.10.4 Update
Update your system using the Software Update functionality App Store program, and reboot your system - but when it reboots use the boot flags "-x nv_disabler=1" (no quotes)
Upon returning to the Yosemite Desktop, install the updated Web Driver - but don't reboot, yet
After the Web Driver installation is complete and before rebooting, run caches_rebuild.command
Reboot
Post Installation
Run MultiBeast for Yosemite and just select your audio driver to install and, optionally, the 10.10.x TRIM patch or using the new "trimforce" Terminal command.****
Reboot
That's it!
Notes
* Although I try to keep this link up to date, this may not be the latest driver for 10.10.3. See Post #1 for the latest version.
** Thanks to giacomoleopardo for this handy AppleScript command. It contains:
*** You can use the Terminal instead of Disk Utility if you feel comfortable with a UNIX command:
**** To enable TRIM, use the following Terminal command. You will need to reboot for TRIM to be activated.
Preparation
Download the nVidia Web Drivers for 10.10.4 (14E46) > WebDriver 346.02.02f03 pkg* Download the View attachment 133392 file and unzip.** Repair Permissions using the Disk Utility on the drive to be updated*** Backup your current installation using Carbon Copy Cloner or SuperDuper - Do This!!Installation of 10.10.4 Update
Update your system using the Software Update functionality App Store program, and reboot your system - but when it reboots use the boot flags "-x nv_disabler=1" (no quotes) Upon returning to the Yosemite Desktop, install the updated Web Driver - but don't reboot, yet After the Web Driver installation is complete and before rebooting, run caches_rebuild.command RebootPost Installation
Run MultiBeast for Yosemite and just select your audio driver to install and, optionally, the 10.10.x TRIM patch or using the new "trimforce" Terminal command.**** RebootThat's it!
Notes
* Although I try to keep this link up to date, this may not be the latest driver for 10.10.3. See Post #1 for the latest version.
** Thanks to giacomoleopardo for this handy AppleScript command. It contains:
Code:
#!/bin/bash
#
sudo nvram -c
sudo diskutil repairPermissions /
sudo touch /System/Library/Extensions/
sudo chown -R root:wheel /System/Library/Extensions/
sudo chmod -R 755 /System/Library/Extensions/
sudo kextcache -system-prelinked-kernel
sudo kextcache -system-caches
Code:
sudo diskutil repairPermissions /
Code:
sudo trimforce enable- Joined
- Jun 28, 2015
- Messages
- 11
- Motherboard
- ASUS ROG Maximus XI Extreme Z390
- CPU
- i9-9900KS
- Graphics
- RX 5700 XT
- Mobile Phone
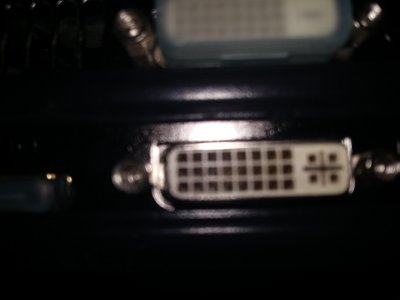
Hello i managed to get my hackintosh running on my Z97X-UD3H-BK with a GTX 750 ti, i created a usb boot from a os x 10.10.4, used unibeast and then installed multibeast, chamileon,then i followed your guide but i still can't get the 1920x1080 resolution.
Here some screenshots


What can i do to get that resolution? Maybe i should re install everything? I'm using a vga monitor that connects to the GTX via DVI adapter

Thanks for advance
Here some screenshots
What can i do to get that resolution? Maybe i should re install everything? I'm using a vga monitor that connects to the GTX via DVI adapter
Thanks for advance
Attachments
- Joined
- Sep 21, 2010
- Messages
- 13,416
- Motherboard
- HP 17" 17-by3053cl
- CPU
- i5-1035G1
- Graphics
- Intel UHD Graphics, 1920x1080
- Mac
- Classic Mac
- Mobile Phone
I'm not surprised that you're having trouble. First, try this:
- Open the System Preference Display pane and select the "Best for Display" button.
- Hold down the Option key (like you would the Shift key) and selection the "Scaled" button.
- If you see more resolution options, like 1920x1080, then select it.
- If you don't see more resolution options, shut down your system and move the adapter to the other DVI connector and repeat the above.
- Joined
- Jun 28, 2015
- Messages
- 11
- Motherboard
- ASUS ROG Maximus XI Extreme Z390
- CPU
- i9-9900KS
- Graphics
- RX 5700 XT
- Mobile Phone
I'm not surprised that you're having trouble. First, try this:
If none of the above work, you'll need a newer monitor or, possibly, an "active" DVI to VGA adapter.
- Open the System Preference Display pane and select the "Best for Display" button.
- Hold down the Option key (like you would the Shift key) and selection the "Scaled" button.
- If you see more resolution options, like 1920x1080, then select it.
- If you don't see more resolution options, shut down your system and move the adapter to the other DVI connector and repeat the above.
Hello Stork and thank you for your help, first on my display preferences it doesnt not say Best for Display it says "Default for display", then i followed your guide and now i think i got "almost" 1920x 1080:
This is what happens after i hit 1920x1080:

As u can see the the sceen is moved to the left, on windows when this happens you usually go to auto adjust image and thats all, here thats what i get even when i auto adjust.
Then my display has this option to move the image to the top bottom left right, i moved all that i can to the left and i got this:

As u can see it doesnt allow me to move more to the left, as result i got this:

You can see that there is a major margin from left than right, then i tried the POSITION option and i pulled all to the left like this

As you can see there is still a right and left margin, im better now but i dont know if there is a way to fill the whole width.
Thank you so much for advance.
PS: I tried using a HDMI cable now that i got all installed and it starts (got in to boot on verbose mode) it shows the whole verbose thing but when is about to launch the login screen monitor says not signal and i have to turn off the pc via power button on the CASE. There is no support for HDMI right?
- Joined
- Sep 21, 2010
- Messages
- 13,416
- Motherboard
- HP 17" 17-by3053cl
- CPU
- i5-1035G1
- Graphics
- Intel UHD Graphics, 1920x1080
- Mac
- Classic Mac
- Mobile Phone
My Gigabyte card has 2xDVI and 2xHDMI. After I initially installed it, I hooked up 4 monitors which all 4 had the Desktop displayed. BTW, what's the make/model of your GTX 750 Ti?...
PS: I tried using a HDMI cable now that i got all installed and it starts (got in to boot on verbose mode) it shows the whole verbose thing but when is about to launch the login screen monitor says not signal and i have to turn off the pc via power button on the CASE. There is no support for HDMI right?
- Joined
- Jun 28, 2015
- Messages
- 11
- Motherboard
- ASUS ROG Maximus XI Extreme Z390
- CPU
- i9-9900KS
- Graphics
- RX 5700 XT
- Mobile Phone
My Gigabyte card has 2xDVI and 2xHDMI. After I initially installed it, I hooked up 4 monitors which all 4 had the Desktop displayed. BTW, what's the make/model of your GTX 750 Ti?
Its a Gigabyte NVidia GeForce GTX 750ti 2GB DDR5
- Status
- Not open for further replies.
Copyright © 2010 - 2024 tonymacx86 LLC