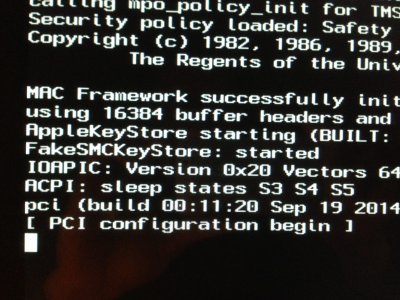
After a few abortive tries encountering pretty much every error described in this thread, I now have a happy Hackintosh with a rocky OSX.

Wifi, Bluetooth, Ethernet, USB3, Trim, iCloud, App store all go.
I learnt a few things that may help folks having trouble.
1) Pay attention to the footnote in the backup guide.
Taking an image of your current OS X hard drive with SuperDuper is normally OK for upgrading, but NOT if there is a change to Chimera. After SuperDuper has done it's job and backed up your drive, load up the OLD version of Multibeast that you used to create your current OS X install, and use it to install the version of Chimera you are currently using onto your backup drive (in the old version of Multibeast, just select Chimera under bootloaders, then Build, then your backup drive. Then make sure you can boot into that drive. That way you always have a computer to return to.
http://www.tonymacx86.com/173-backup-solutions-your-mac-customac.html
(Info here implies that the newer versions of Chimera should be fine to add to an old system image, but that wasn't my experience)
2) If you reset your BIOS to the optimised defaults, make sure that in addition to the settings in the Fresh Install guide, you select ACHI under Peripherals/SATA Mode Selection (Gigabyte motherboards, maybe others).
3) Be careful which USB slot you insert your Unibeast stick into, as installing mucks around with USB availablity. It must be in a USB 2.0 slot directly on the motherboard. No hubs, USB3 slots, front panel slots etc.
4) Here's the biggie. It is crucial to control which drive your computer boots into during the install process. Control it manually
every time. So once you have backed up, and created your UniBeast USB, boot your computer holding down F12 (or your BIOS boot options key) to get boot options. Select the USB drive to boot. Then select the USB again when Chimera starts (Chimera is the bootloader which displays the cute TonyMac cartoon icons before launching OS X). Failure to do this will get you the dreaded "can't locate Mach kernel" error. This is routine...
However... Once this gets you into the Install OS X screens, perform the install, but PAY ATTENTION TO THE TIMER as
you must be ready to catch the mid install reboot. I reckon this is what is catching out 90% of the folks having problems. It is automatic, and if you are not ready, you can stuff your installation.
When your computer reboots automatically after the main install process, hold F12 again, select boot to your USB , and
only when Chimera opens, press a key and select your OS X hard drive. If you don't, your PC may try to boot via your OS X hard drive, where the old version of Chimera is still lurking to stuff it all up. You must initially boot through the USB stick version of Chimera until you install the new Chimera on your hard drive in (5) below.
(it makes me wonder if it would be better to install new Chimera on your old version OS X hard drive before installing Yosemite from Unibeast, but I have not tried).
Once you have booted into Yosemite the second time, be patient. Give it 5 mins to sort out various internal optimisations. Don't allow the App store to update anything yet. You must not allow the computer to reboot until stage 5 is done. This is crucial.
5) Apply the new Chimera to your OS X hard drive using Multibeast (open Multibeast, click Bootloader Tab, select Chimera, click Build, select your hard drive, then click Install).
My recommendation is to apply each Multibeast option one at a time, and reboot each time, so you'll know which one b*ggers your system if there is a problem (and note from the Multibeast description the change being made, so you can manually roll it back if needed). However, the Chimera update must be first, as without it your computer cannot boot via the hard drive. Once new Chimera is installed, remove the Unibeast USB and reboot. This time, use F12 to select your OSX hard drive to boot from, and also select the hard drive from Chimera. From now on, you should just be able to let it go automatically.
6) For my rig, I used Multibeast options...
Easybeast
1080p Display
ALX Ethernet 1.02
Trim Enable
Notes: the Trim Enable option broke my system initially, and forced a reinstall. Trying again later (probably after Easybeast install), it works fine.
Until Easybeast was installed, the App store would not recognise my Apple ID, but this cleared after the Easybeast install. Recommend doing App updates and iCloud logins and setup last.
The USB3 patch in Multibeast didn't work for me.
USB3 now working after deleting the kext, thanks to the Mighty God of Thunder himself. Thanks Thor!
Edit: Trim and USB3
Hope this helps someone.


 Wifi, Bluetooth, Ethernet, USB3, Trim, iCloud, App store all go.