As there´s no updated Mojave guides here on tonymacx86 for my laptop i decided to make one.
(Bear with me as this is first time i try to make a new thread and my native language is not English)
My laptop specs.
Dell XPS 9350 QHD+
I7 6560U
Intel Iris 540 (3200x1800)
16GB 1867 Mhz DDR3 Ram
512GB SK Hynix M.2 Sata HD
DW1560 Wifi – bluetooth 4.0
Bios version 1.9
Bios Settings
As a minimal requirement change RAID to AHCI and disable Secure Boot
But you should check out bozma88´s settings though it´s for 9360 i’m using many off them beside that I also disabled Touchscreen
https://www.tonymacx86.com/threads/...a-10-12-x-lts-long-term-support-guide.213141/
Whats working
Everything beside Cardreader and USB-c hotplug
This guide is based on work done by maz-1 who forked the-darkvoid´s 9360 Repo
https://github.com/the-darkvoid/XPS9360-macOS
And tweaked it to fit the 9350 model
https://github.com/hackintosh-stuff/XPS9350-macOS
You should check his repo frequently for updates as it´s a work in progress.
Issues here:
https://github.com/syscl/XPS9350-macOS/issues/218
All tool´s mentioned not provided with a link is availabel from ”Downloads” Section here.
Download attached CLOVER folder and edit like this:
Open config.plist from attached CLOVER folder in CloverConfigurator
Clover Configurator (Global Edition)
and generate a new SMbios (use drop up/down menu just under the big ?)
View attachment 371645
Use either MB 9,1 - MBP 13,2 or MBP 14,1
( I'm using MB 9,1)
(I have not tested MBP 14,1 but it should work)
Choose one of the 3 Product Models and generate a new Serial Number and new SmUUID
(SmUUID is needed for iMessage and iCloud to work)
DO NOT CHANGE ANYTHING ELSE IN CONFIG.PLIST
Unless you have a FHD version
Then you need to change UIScale from 2 to 0
View attachment 371646
And maybe apply this fix:
https://github.com/xzhih/one-key-hidpi
After install
Now use that Clover folder for a fresh install
(recommended)
Make a Mojave USB Installer:
https://www.tonymacx86.com/threads/how-to-create-a-macos-mojave-public-beta-installation-usb.254626/
Download latest Clover installer
https://sourceforge.net/projects/cloverefiboot/
and install to created USB installer
Settings:
Clover for UEFI booting only
Install Clover in the ESP
UEFI Drivers
(Only that)
View attachment 371647
Then replace Clover folder in USB/EFI folder with the one you edited
After instal
Boot from usb and choose your system disk
When booted to that you need to run Clover installer again with same settings as above (0ptional check Install Clover Preference Pane) but this time you install to your system disk and copy/paste CLOVER folder from USB installer to there.
Hibernation
To disable Hibernation run attached disablehibernate.sh
drag to terminal and execute
Wifi should work OOB if you have a DW 1560/1830
Bluetooth
For Bluetooth to work you need to install BrcmFirmwareRepo.kext and
BrcmPatchRAM2.kext (attached) to S/L using KextBeast
ComboJack Installer
(attached)
Drag ComboJack_Installer/install.sh in Terminal to install a daemon that fixes several audio issues including headset
USB
It is a known bug that usb disks get ejected unexpectedly upon sleep/wake, run (attached) syscl-USBFix/install.sh (drag to Terminal) to install a daemon that safely unmount usb disks before sleep and remount after wake.
Note: there's some commercial aps like Jettison that do similar
Powermanegement
For propper powemanegement you need to create a CpuFriendDataProvider.kext
I provided 3 Board-ID plist´s (i7 6500u/i7 6560u) (attached) for each of the sys.def choices to use when making that using ResourceConverter
Download here:
https://github.com/acidanthera/CPUFriend
CpuFriend.kext here:
1.1.5.RELEASE.zip 9.68 KB
Open Terminal and drag ResourceConverter.sh to Terminal
Type --kext and press spacebar once
Then drag the Board-ID.plist (matching your sys.def choice) to Terminal
Then type Create
I should look something like this
View attachment 372035
It will be created in your Home folder
View attachment 371652
Guide here:
https://github.com/acidanthera/CPUFriend/blob/master/Instructions.md
(just don´t pay attention to what it says about IOPlatformPluginFamily.kext
Use attached Board-ID plists optimized for best Powermanegement)
Then mount EFI partition using EFI Mounter v3 and copy CpuFriendDataProvider.kext and CpuFriend. Kext to EFI/CLOVER/Kexts/Other
If you don´t like the new unified Sleepslider Bar ( i don´t ) in System Preferences/EnergySaver
then before making the CpuFriendDataProvider.kext you open the Board-ID plist for your choice of sys.def. in PlistEdit Pro and change UnifiedSleepSliderPref to NO
View attachment 371653
Undervolting
I undervolted my system to achieve lower temp. and much better battery life without drop in performance
Actually it raised using this completly safe methode:
( it´s working flawlesly)
View attachment 371843
View attachment 371844
Download VoltageShift from here:
https://sitechprog.blogspot.com/2017/06/voltageshift.html
and move it from downloads to the root of your HD
Open Terminal and type cd and pres spacebar once
then drag VoltageShift folder in to Terminal
Then type (or copy/paste)
sudo chown -R root:wheel VoltageShift.kext
(only needed first time)
./voltageshift info
(it should display -0 for all)
Then
./voltageshift offset -XXX -XX -XXX
Replace X´s with your settings
I´m using -100 -30 -100 and it´s stable but you have to test whats optimal for your cpu
If you go to low only ”risk” is that system freeze and you just force shutdown and when booted again all values are reset to -0
And you can just start over
No risk of damage to hardware
When you are satisfied then
sudo ./voltageshift buildlaunchd -XXX -XX -XXX 0 0 0 2
Then it will launch/work after every cold boot – reboot and wake from sleep
If you later want to change settings you have to remove the launchd
./voltageshift removelaunchd
And Shut Down (important) not just reboot
And remember that every time you wanna check/change settings you have to open terminal and type cd and pres spacebar once and then drag VoltageShift folder in to Terminal
There´s also a monitor funktion
./voltageshift mon
To exit monitoring press Ctrl + C keys
View attachment 371710
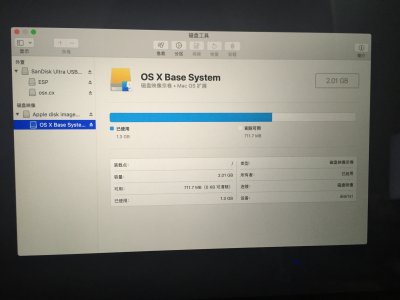
APFS/HFS+
In Mojave it´s not longer posible to avoid APFS convertion but jaymonkey discovered a workarround:
https://www.tonymacx86.com/threads/using-hfs-instead-of-apfs-for-mojave-update.264001/
I´m using that methode and accomplished much faster bootup time and lower HD temp.
Actually APFS is a drawback to non Apple disks that in some cases makes them slower.
Apple order their disks from manufactures with specified requirements such as special sockets and other things optimized
for APFS.
So I hope that Apple won't implement that future updates prevents it running on HFS+
Or a genius find a workaround like in "the good old days" where Trim only was supported on Apple disks.

")