A guide in setting up your USB installer using OpenCore,
To start:
A USB stick / flash drive or whatever you want to call them, USB2.0 16GB is preferred, possibly a USB3.0 *may* work. Sandisk makes a good USB installer, no I don’t have shares in them, they just seem to work well.
Kexts Required
These are just going to be the basic kexts to get your machine up and running, you can add your audio and any other kexts after installation
VirutalSMC:
https://github.com/acidanthera/VirtualSMC/releases
Lilu:
https://github.com/acidanthera/Lilu/releases
Whatevergreen:
https://github.com/acidanthera/WhateverGreen/releases
VoodooPS2Controller:
https://github.com/acidanthera/VoodooPS2/releases
Network card:
https://www.tonymacx86.com/resources/categories/kexts.11/
Creating the USB installer
If using a mac to create your installer, a nice video can be found here:
When your Mac is ineligible to download Catalina or Newer macOS versions If your Intel Mac is from approximately 2011/12 or older (see post #2) you won't be able to download Catalina from the Mac App Store. Follow the instructions in these videos to enable the download of Catalina or newer...

www.tonymacx86.com
As we will be using Windows to create the installer, we are going to need to download and install Python before we start the USB installation:
The official home of the Python Programming Language

www.python.org
After installing Python, we will be using gibMacOS. A nice handy tool that can create your USB installer using Windows or a Mac machine. Head over to
https://github.com/corpnewt/gibMacOS and click the green "Clone or download" button and then choose Download as Zip.
We will be using Windows for this tutorial, only the recovery will be installed to the USB stick, this means that when you boot to the installation, it will require internet access to be able to download and install macOS
Open up the gibMacOS-master folder and find gibMacOS batch file, right click and Run As Administrator
This will download a 6mb or so file and you will be presented with the following:
View attachment 464050
We will be downloading the Recovery, so press r and then enter and you should see something like this:
View attachment 464049
Now, this is important, we will be needing to find the latest Catalina that ends with FULL install, in this case it is option 4. In later versions of macOS, this number may change. So choose 4 and then press enter and wait for the download to complete, depending on your internet speed, this could take awhile. After the download has finished, press enter and you will be back to the main menu.
As we have finished with this command, we can now close this window.
Now we have the files we need, we can now create the USB, right click Makeinstall and Run as Administrator. This will download a small file and you will be presented with the following:
View attachment 464052
This is important, do not format your wrong drive!
As above, the program has detected the USB stick as drive 2 (your machine may list this as drive 1 or 3 etc) As we are going to be installing OpenCore, we will type in 2o
2: being the selected USB stick
o: being OpenCore boot loader
Then you will see this:
View attachment 464055
Yes! we will continue. This will now format the USB installer for us and then ask us:
View attachment 464056
Now we navigate back to our gibMacOS-master folder and go to the macOS Downloads folder that was generated when we downloaded the recovery above. Navigate through the folders until you find RecoveryHDMetaDmg.pkg file.
Hold shift button and right click the file and choose "copy as path" Then right click in the cmd windows and the full path to the file will be populated:
View attachment 464057
Then press enter and wait for the files to be copied to your USB. We have now finished with this tool and now close it.
Under Windows Explorer, you should have a new drive called BOOT with a folder called EFI
Now, important, delete the EFI folder and use the one attached in this post instead.
This setup if for a Skylake system, you will need to change a few details if you do not own a Skylake
You will need to download a copy of ProperTree from here:
Cross platform GUI plist editor written in python. - corpnewt/ProperTree

github.com
Click the Clone or Download green button and Download ZIP, extract and then run ProperTree
Click File -> Open and find your config.plist and scroll down to DeviceProperties:
View attachment 464175
You will be wanting to change:
AAPL,ig-platform-id
device-id
model
Read post 2 for configurations
Next, you may need to change the network kext, scroll down to Kernel and change name of the ExecutablePath to the name of your network kext:
View attachment 464179
(Making sure you have the correct kext in your kexts folder)
Then scroll further down until you find SystemProductName. This is currently set to MacBookPro13,1 which is for a Skylake laptop, read post 2 for configurations
Once you have made those changes, save your config.plist and reboot your machine into your BIOS.
You will want to make some changes here, if you can change these options:
Turn off Secure Boot
Turn the TPM off
Disable VT-D
Graphics DVMT-Prealloc set to 64MB or 128MB (You may not have this option, but the config.plist has a patch for this)
SATA - Set to AHCI
Disable Fast Boot
Disable Wake on Lan
Disable any fingerprint or sdcards if possible
Booting
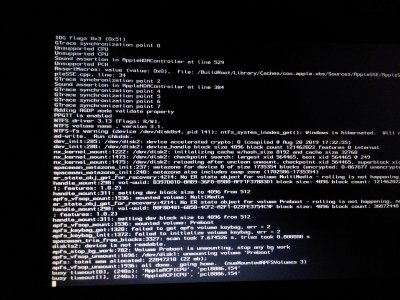
Now, boot with your USB stick, the config.plist has verbose enabled so you can see what is going on. It may look like it has frozen in some places, but boot from USB can be slow, so please be patient.
Once you have reached the installer, choose Disk Utility and then click on view and then show all devices
Then you want to erase the drive and start the installation
Leave the USB plugged in as you will need to reboot from this a few times while macOS is installing
Once you have reached the macOS desktop, you will need to mount your EFI partition to then copy over your EFI folder from your USB disk.
Download and run Hackintool:
and navigate to Disks and click the icon to mount your EFI partition:
View attachment 464196
Once the EFI has been mounted, delete the EFI folder within and then copy your EFI folder from your USB installer.
Reboot your laptop..... Done......


