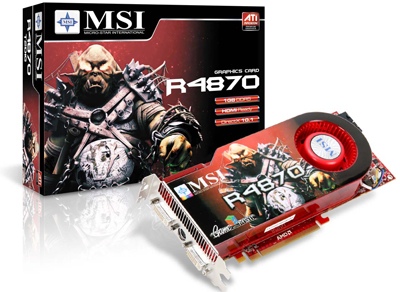
I won't go any further on how you build the Computer but you can see a PC Building Series on youtube http://www.youtube.com/watch?v=YRe4G0al5Gw)
After you have everything ready we can proceed on the Installations.In order to install Snow Leopard on this Build we will need:
->iBoot Legacy burned to a CD( 1010110101/iBoot-Legacy.zip )
->Multibeast downloaded on a USB Disk/Drive/CD ( 1010110101/MultiBeast.zip )
->Combo Update 10.6.7 ( http://support.apple.com/kb/DL1361 )
->Our Motherboard's DSDT ( DSDT/Database/DSDT-ASUS-P7P55-LX-1102.aml )
[The links i gave are direct downloads.Note that if an updated version is released,the links might not work,You can find though what you need in the download section here ( viewforum.php?f=69/ ) and the DSDT Database here ( dsdt.php )]
BIOS SETTINGS
First you need to change your bios settings.Please follow the steps combined with the pictures below:
On the first BIOS screen, arrow down to the entry labeled Storage Configuration, hit Enter, and change "Configure SATA as" to AHCI. Press Escape once.
Now arrow over to the Power section and set Suspend Mode to S3 only.
MAC OS X INSTALLATION
1. Insert iBoot Legacy and press F8 to get to the boot menu.(Or previous on bios,arrow over to the Boot tab, hit Enter on Boot Device Priority, and set your first boot device to boot first from your DVD drive, then set your second boot device as your primary hard drive.)
2. At Chameleon Boot Screen,eject iBoot Legacy and insert the Snow Leopard retail disk.At this point press F5.
3. Then select the Snow Leopard Install DVD and boot in safe mode.You can do this by typing
-x and then hit enter to enter the setup. After a couple of minutes you should be already at the Mac OS X Installation screen AKA Language Selection. If not try again same steps but this time at Chameleon try something like
-x PciRoot=1 or
-x PCIRootUID=1
.
4. Select the desired language and hit enter.Now at this point
DO NOT hit continue.We need first to Partition our hard drive disk.To do that we must go up to the menu bar,Click Utilities and then Disk Utility.. Just like the screenshots below:
Now you need to select your Hard drive from the list (left),then click on the partition tab and create 1 Partition if you want to install only Mac or 2 if you also want to install Windows.The MAC Partition has to be "Mac OS Extended (Journaled) and the Windows Partition has to be MS-DOT (FAT).
ALSO you must click the options button and make sure
GUID is selected.
Hit apply and exit Disk Utility...
5. Now we will Proceed with the Installation.Click next/continue until you reach the Disk Destination Selection.At the Disk Selection Screen click "Customize" on the left down corner of the Window.Deselect everything and hit Ok.Now Start the installation.
6. After the install finish,the computer will restart.At this point,insert iBoot Legacy again and press F8.Now at Chameleon Screen,select the hard disk partition named MAC or whatever you called it,it has to be the partition which contains the Mac OS Installation!! Write again the same flags you used before the installation and hit enter.
7.You will enter the last part of the installation where you have to fill some information and such things(Just like Windows install).Now you should be already inside Mac, congratulations

But the critical part begins now.Insert the usb drive which has the ComboUpdate,Multibeast and our custom DSDT.Copy the P7P55LXDSDT.aml file and paste it on the desktop.Rename it to DSDT (do not change the .aml ,just the name) Then copy Combo Update and Multibeast to Documents.
8. Run the Combo Update.Wait few minutes until it is done.Then open multibeast and select according to the picture below... ( Since my ATI Worked out of the box i didn't select any Graphic Kexts. You should select though if your Graphics Card differs or if it isn't recognized by the system).
After Multibeast installation finish Lnx2Mac's install window will pop up.Follow the Lnx2Mac installation for the ethernet and when done restart the PC.
9. And that should be it,everything should be working now,you should have a good Mac Machine running! Have Fun!
WINDOWS
I used a 64-bit Version of Windows 7 because of the CPU and the Memory.
1. Insert your Windows Install DVD and press F8 when the Computer starts to get to the boot menu.Select the disk and wait for the installation to begin.
2. Now Select Language,Region and Keyboard and click next.Then Click the Customize option(if i'm correct) not the upgrade one.
3. What we have to do now is select the partition of the drive that we want to install windows in it.
MAKE SURE YOU SELECT THE PROPER DISK AND NOT THE DISK WITH THE SNOW LEOPARD INSTALL OR ELSE YOU'RE SCREWED!!!Select the proper disk and click format to format it to NTFS otherwise windows can't be installed.Then the setup will go on...
4. Now you will enter the last part of Windows Installation where you have to fill some information.You should now be on Windows.Make sure you install the motherboard's DVD with all the drivers first and then do the updates.
5. Like my previous guide,in order to have the option to boot between Mac and Windows,i use a very nice freeware program i found on the internet.It's called EasyBCD,and you can find it here (
http://neosmart.net/downloads/software/ ... 02.0.2.exe )
6. Install it and open the program.You need to select "Add new entry" from left,then select the Mac tab then enter name "Mac" and select "MBR" in Mode.Finally click Add entry.Please Check image below:
And this is it.If you followed EXACTLY what I said you should have your machine running perfect and stable with Mac + Windows 7 in the same Hard Drive.
If this helped you say a "Thank You!" 
For any further help send me a private message or post a reply here
Have fun and don't forget to support tonymacx86 for this amazing and easy method of installing Mac on a PC!


