- Joined
- Apr 28, 2011
- Messages
- 909
- Motherboard
- Asus Prime Z690M-Plus D4
- CPU
- i7-12700KF
- Graphics
- RX 6600
- Mac
- Mobile Phone
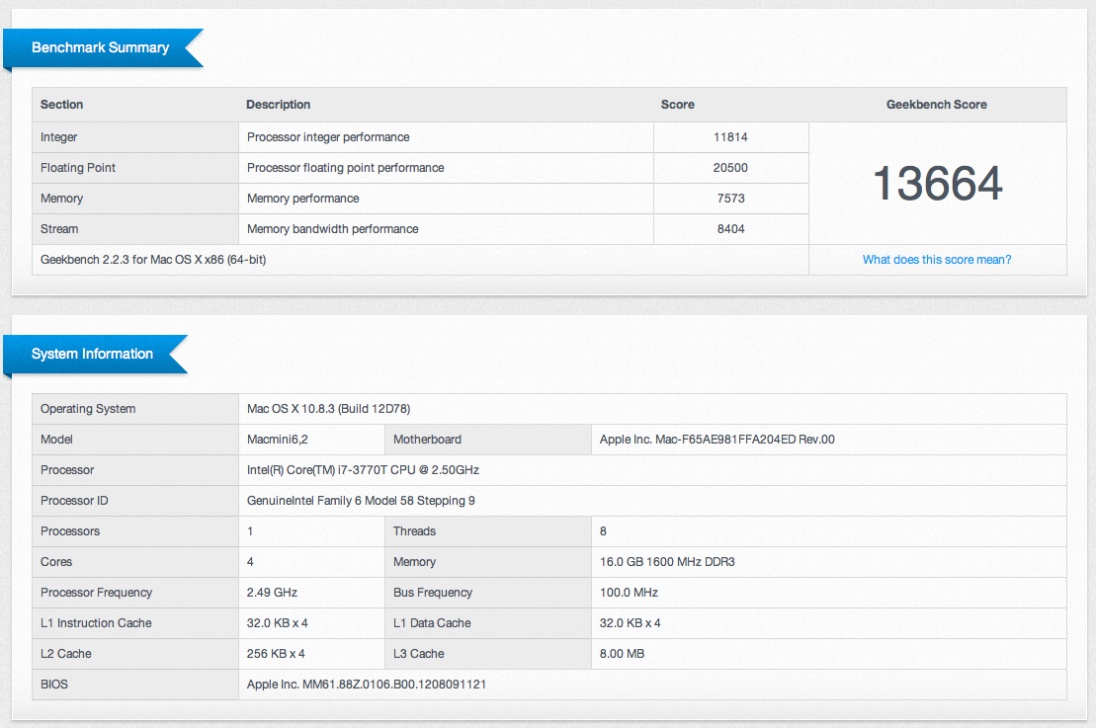
Giacomoleopardo's Build - ZOTAC Z77-ITX WiFi - Core i7-3770T - MacMini 6,2
Intel® Core™ i7-3770T Processor 8M Cache, up to 3.70 GHz
[AMAZON-uk]http://www.amazon.co.uk/dp/B008ACVF9A/[/AMAZON-uk]
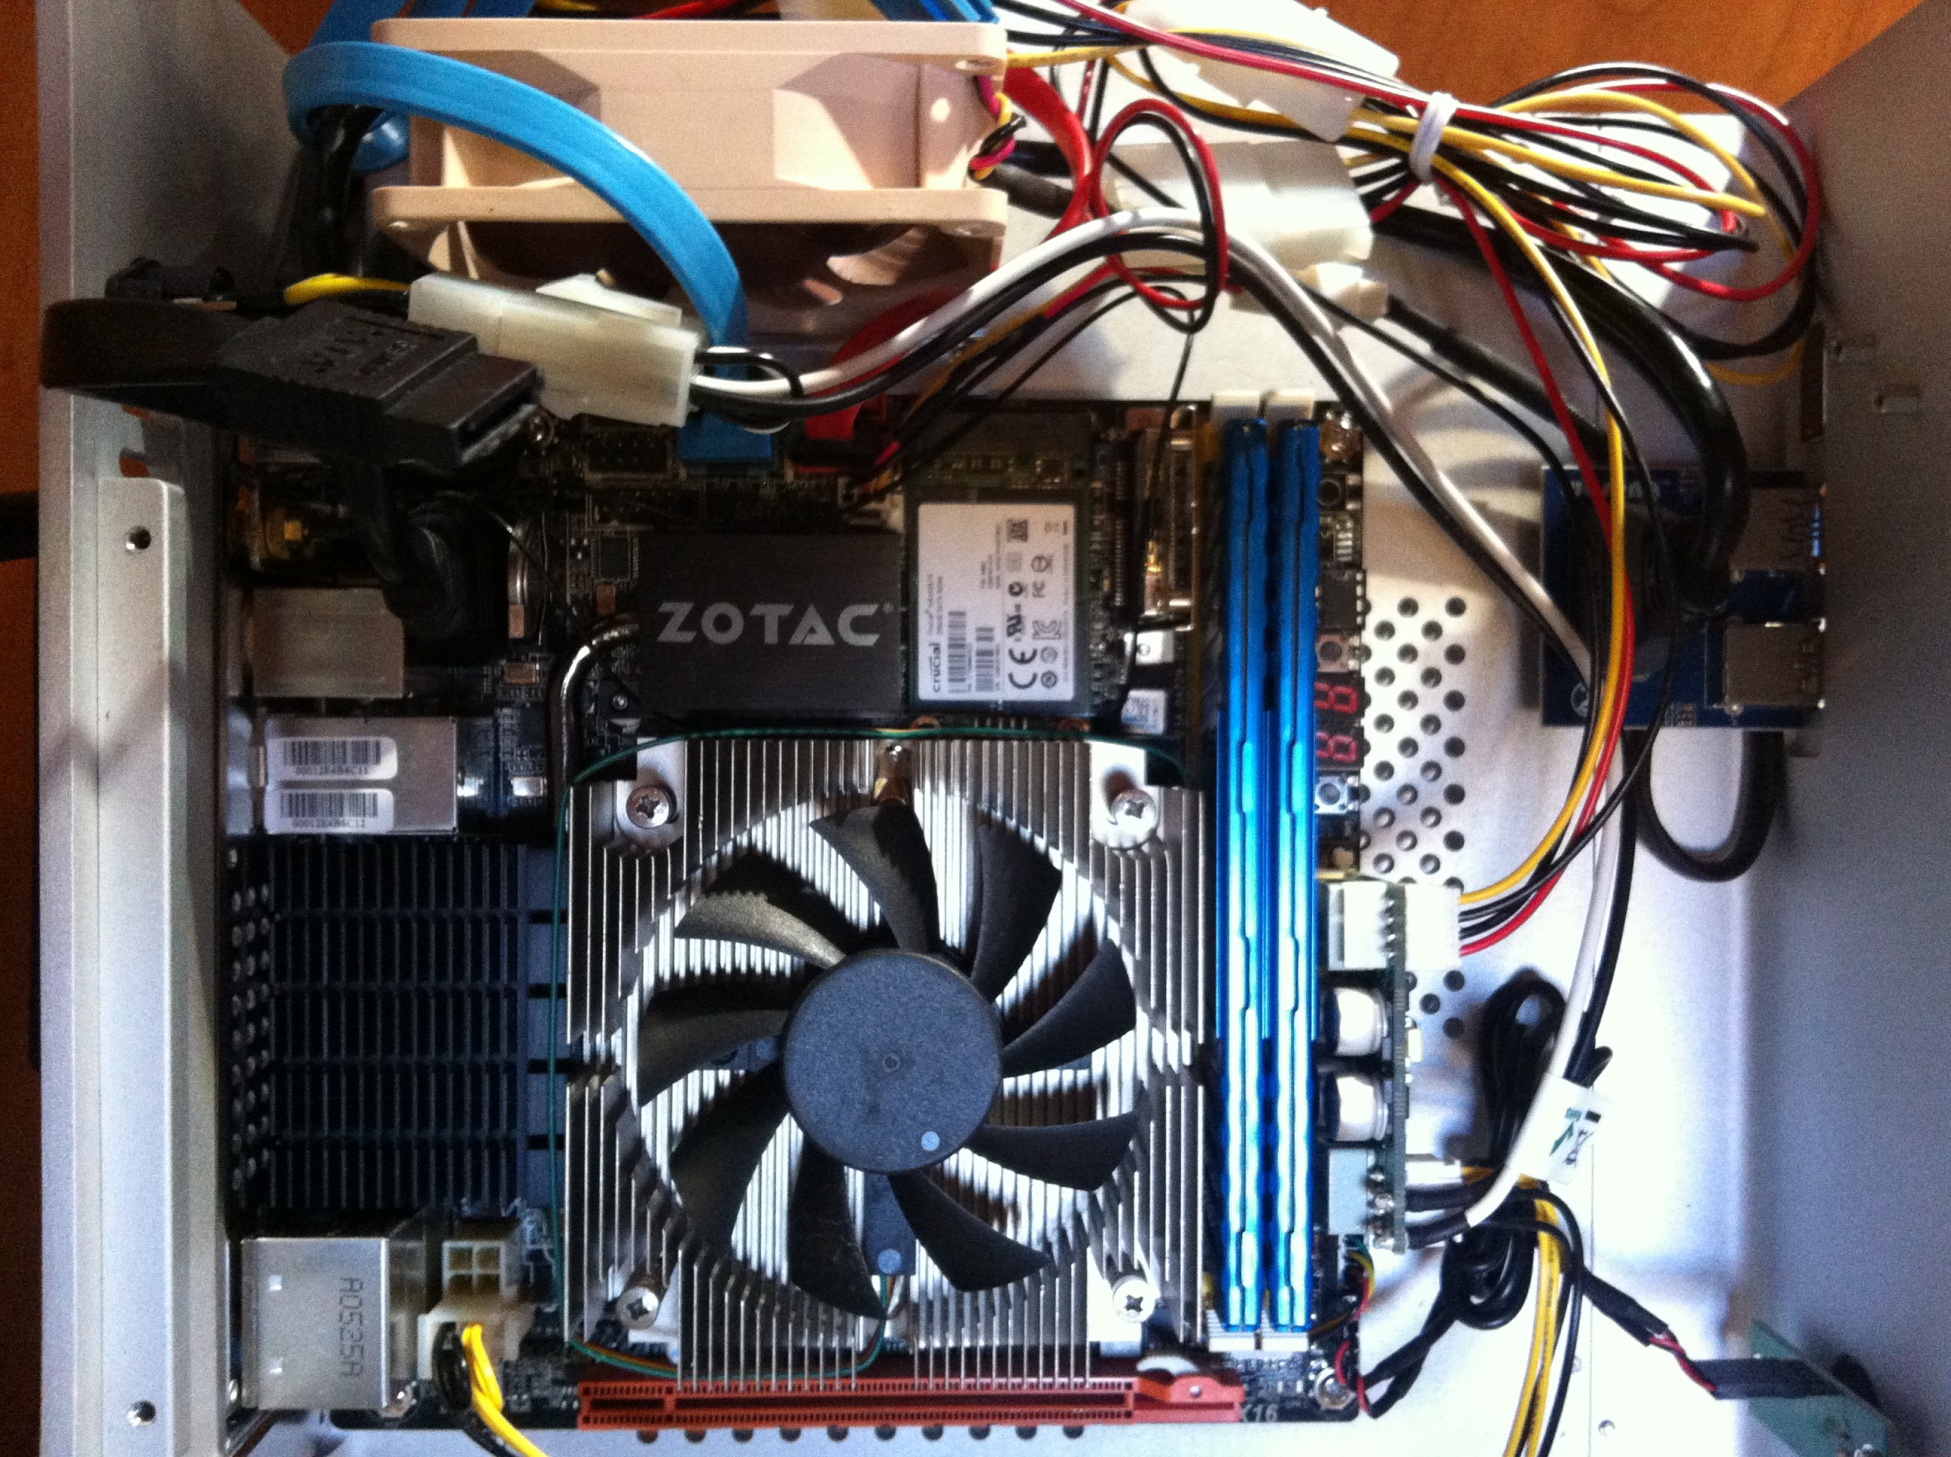
Zotac Z77 ITX WiFi
http://www.amazon.com/dp/B0089OJHBW/
Corsair Vengeance LP Blue 16 GB (2x8 GB) DDR3 1600MHz
http://www.amazon.com/dp/B009M0TCHQ/
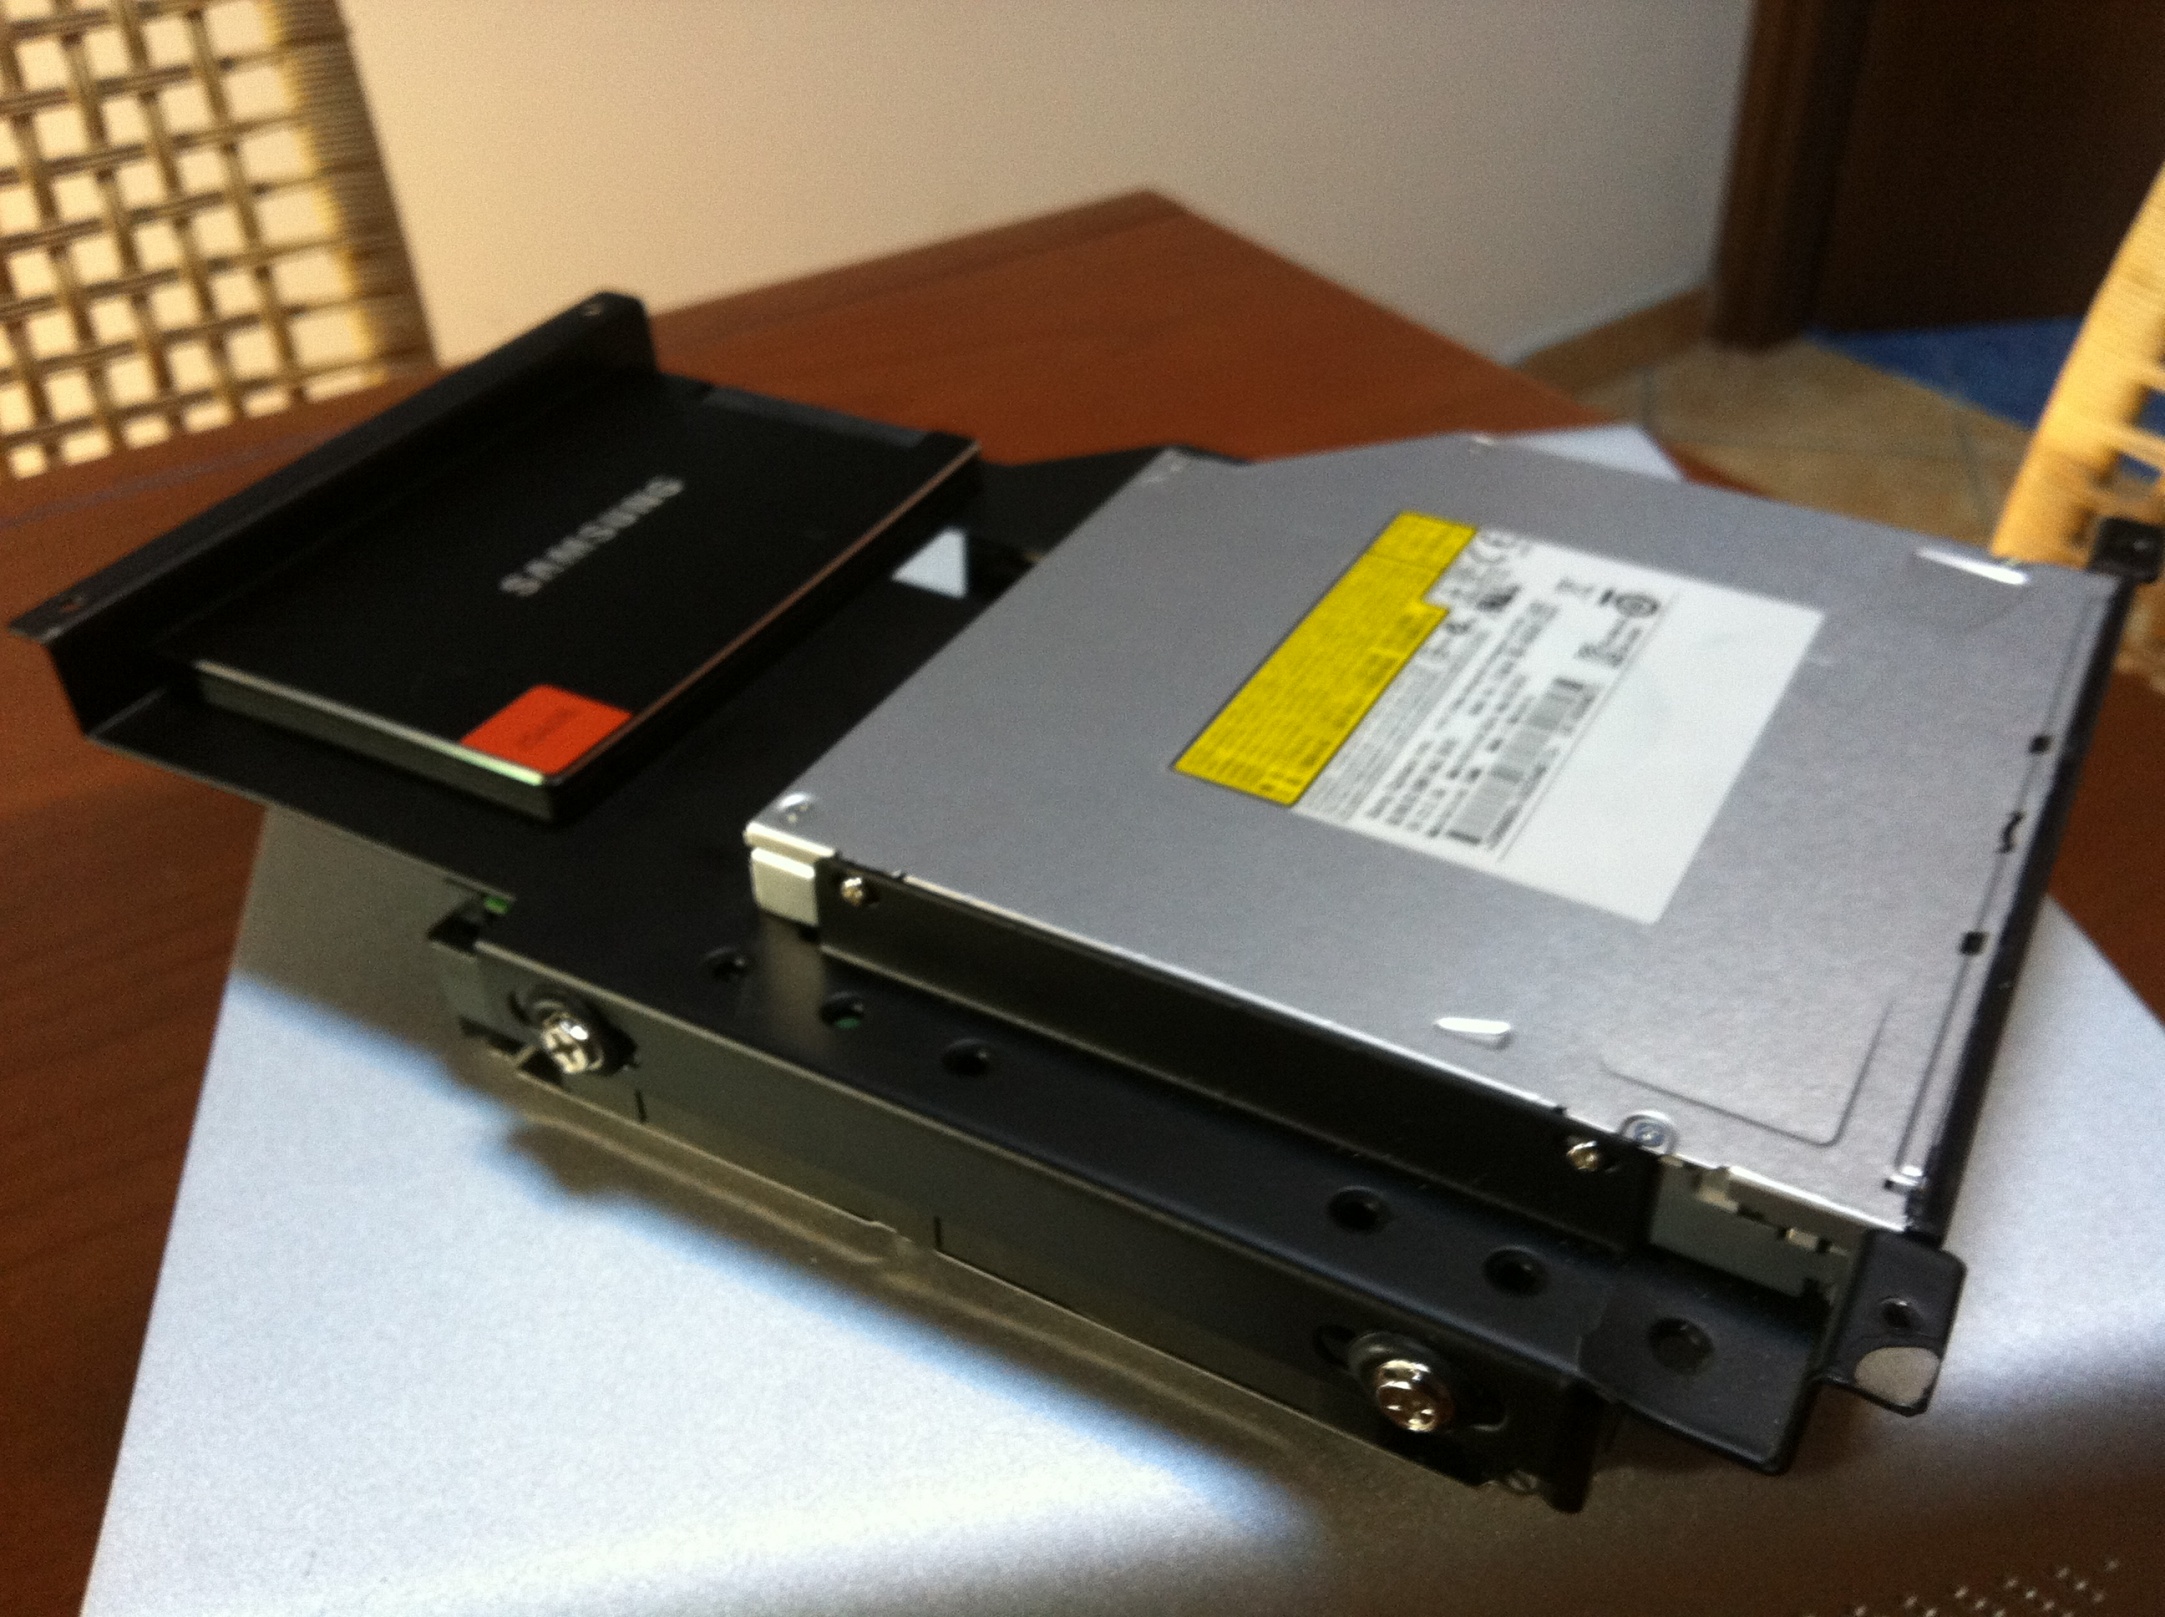
SAMSUNG 830 Series 2.5-Inch 256GB
http://www.amazon.com/dp/B0077CR66A/
Crucial m4 256GB mSATA Internal Solid State Drive
http://www.amazon.com/dp/B0085J17UA/
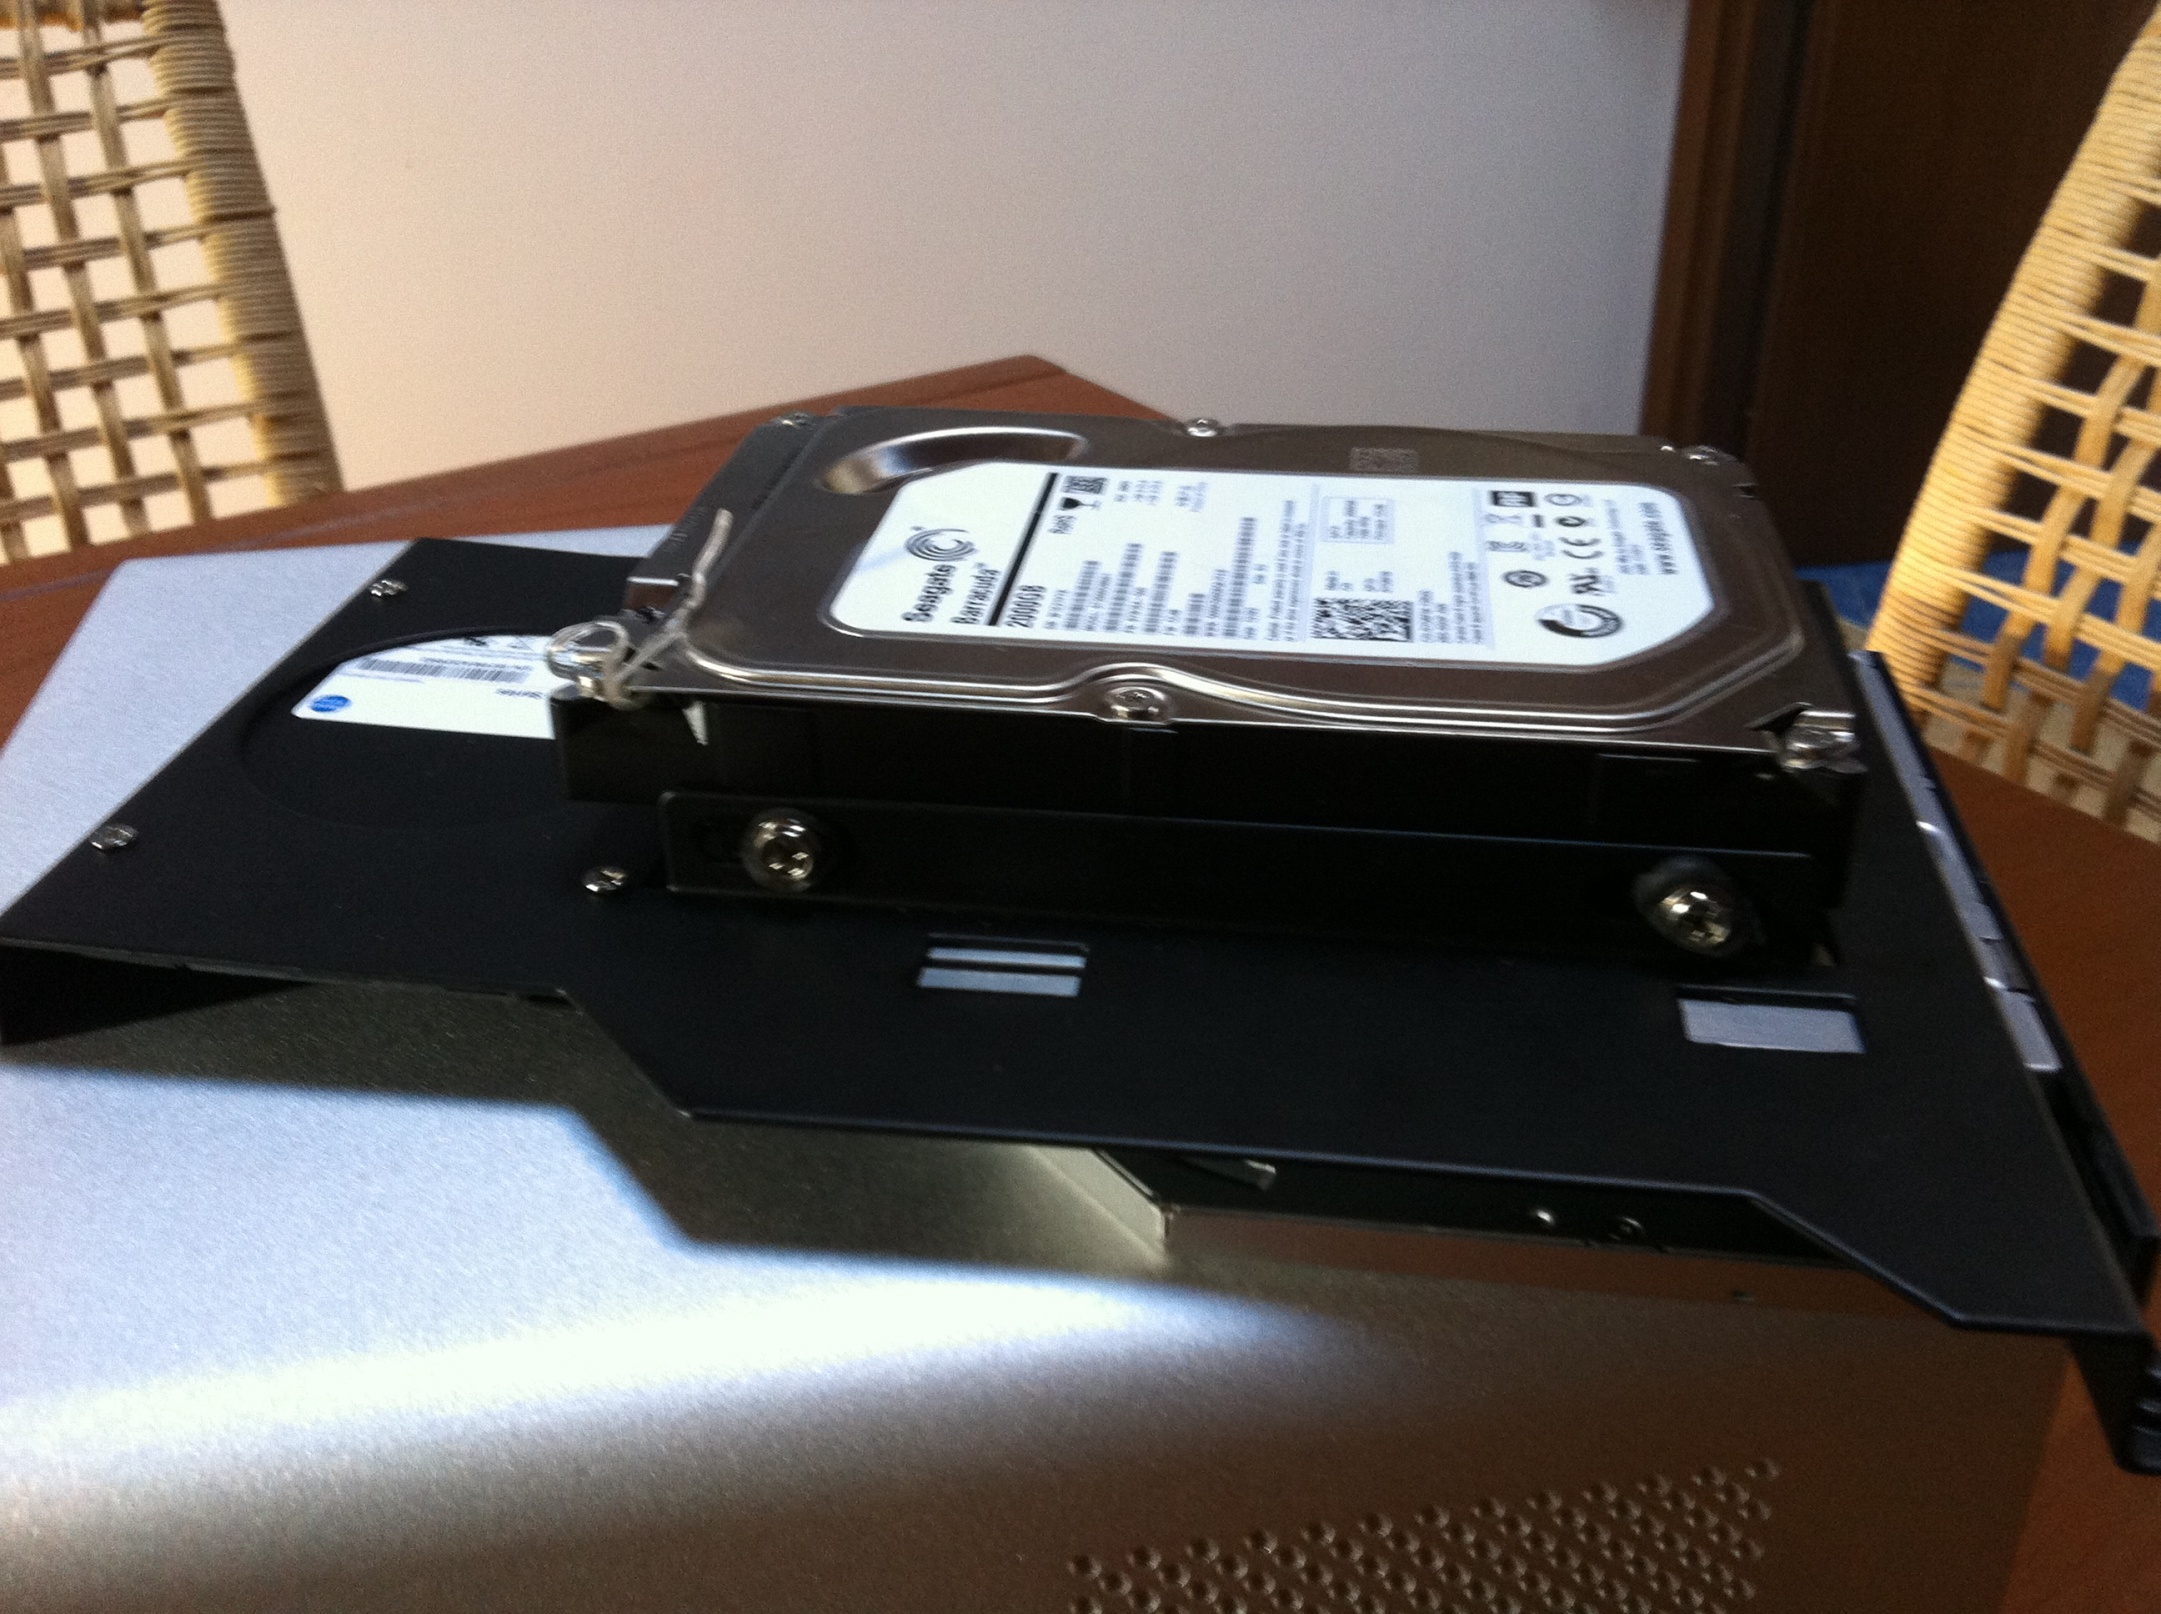
Seagate ST2000DM001 Barracuda 7200RPM 2 TB SATA 6 GB/s
http://www.amazon.com/dp/B005T3GRN2/
Gelid Slim Silence I-Plus CPU Cooler
http://www.amazon.com/dp/B0058W3IUO/
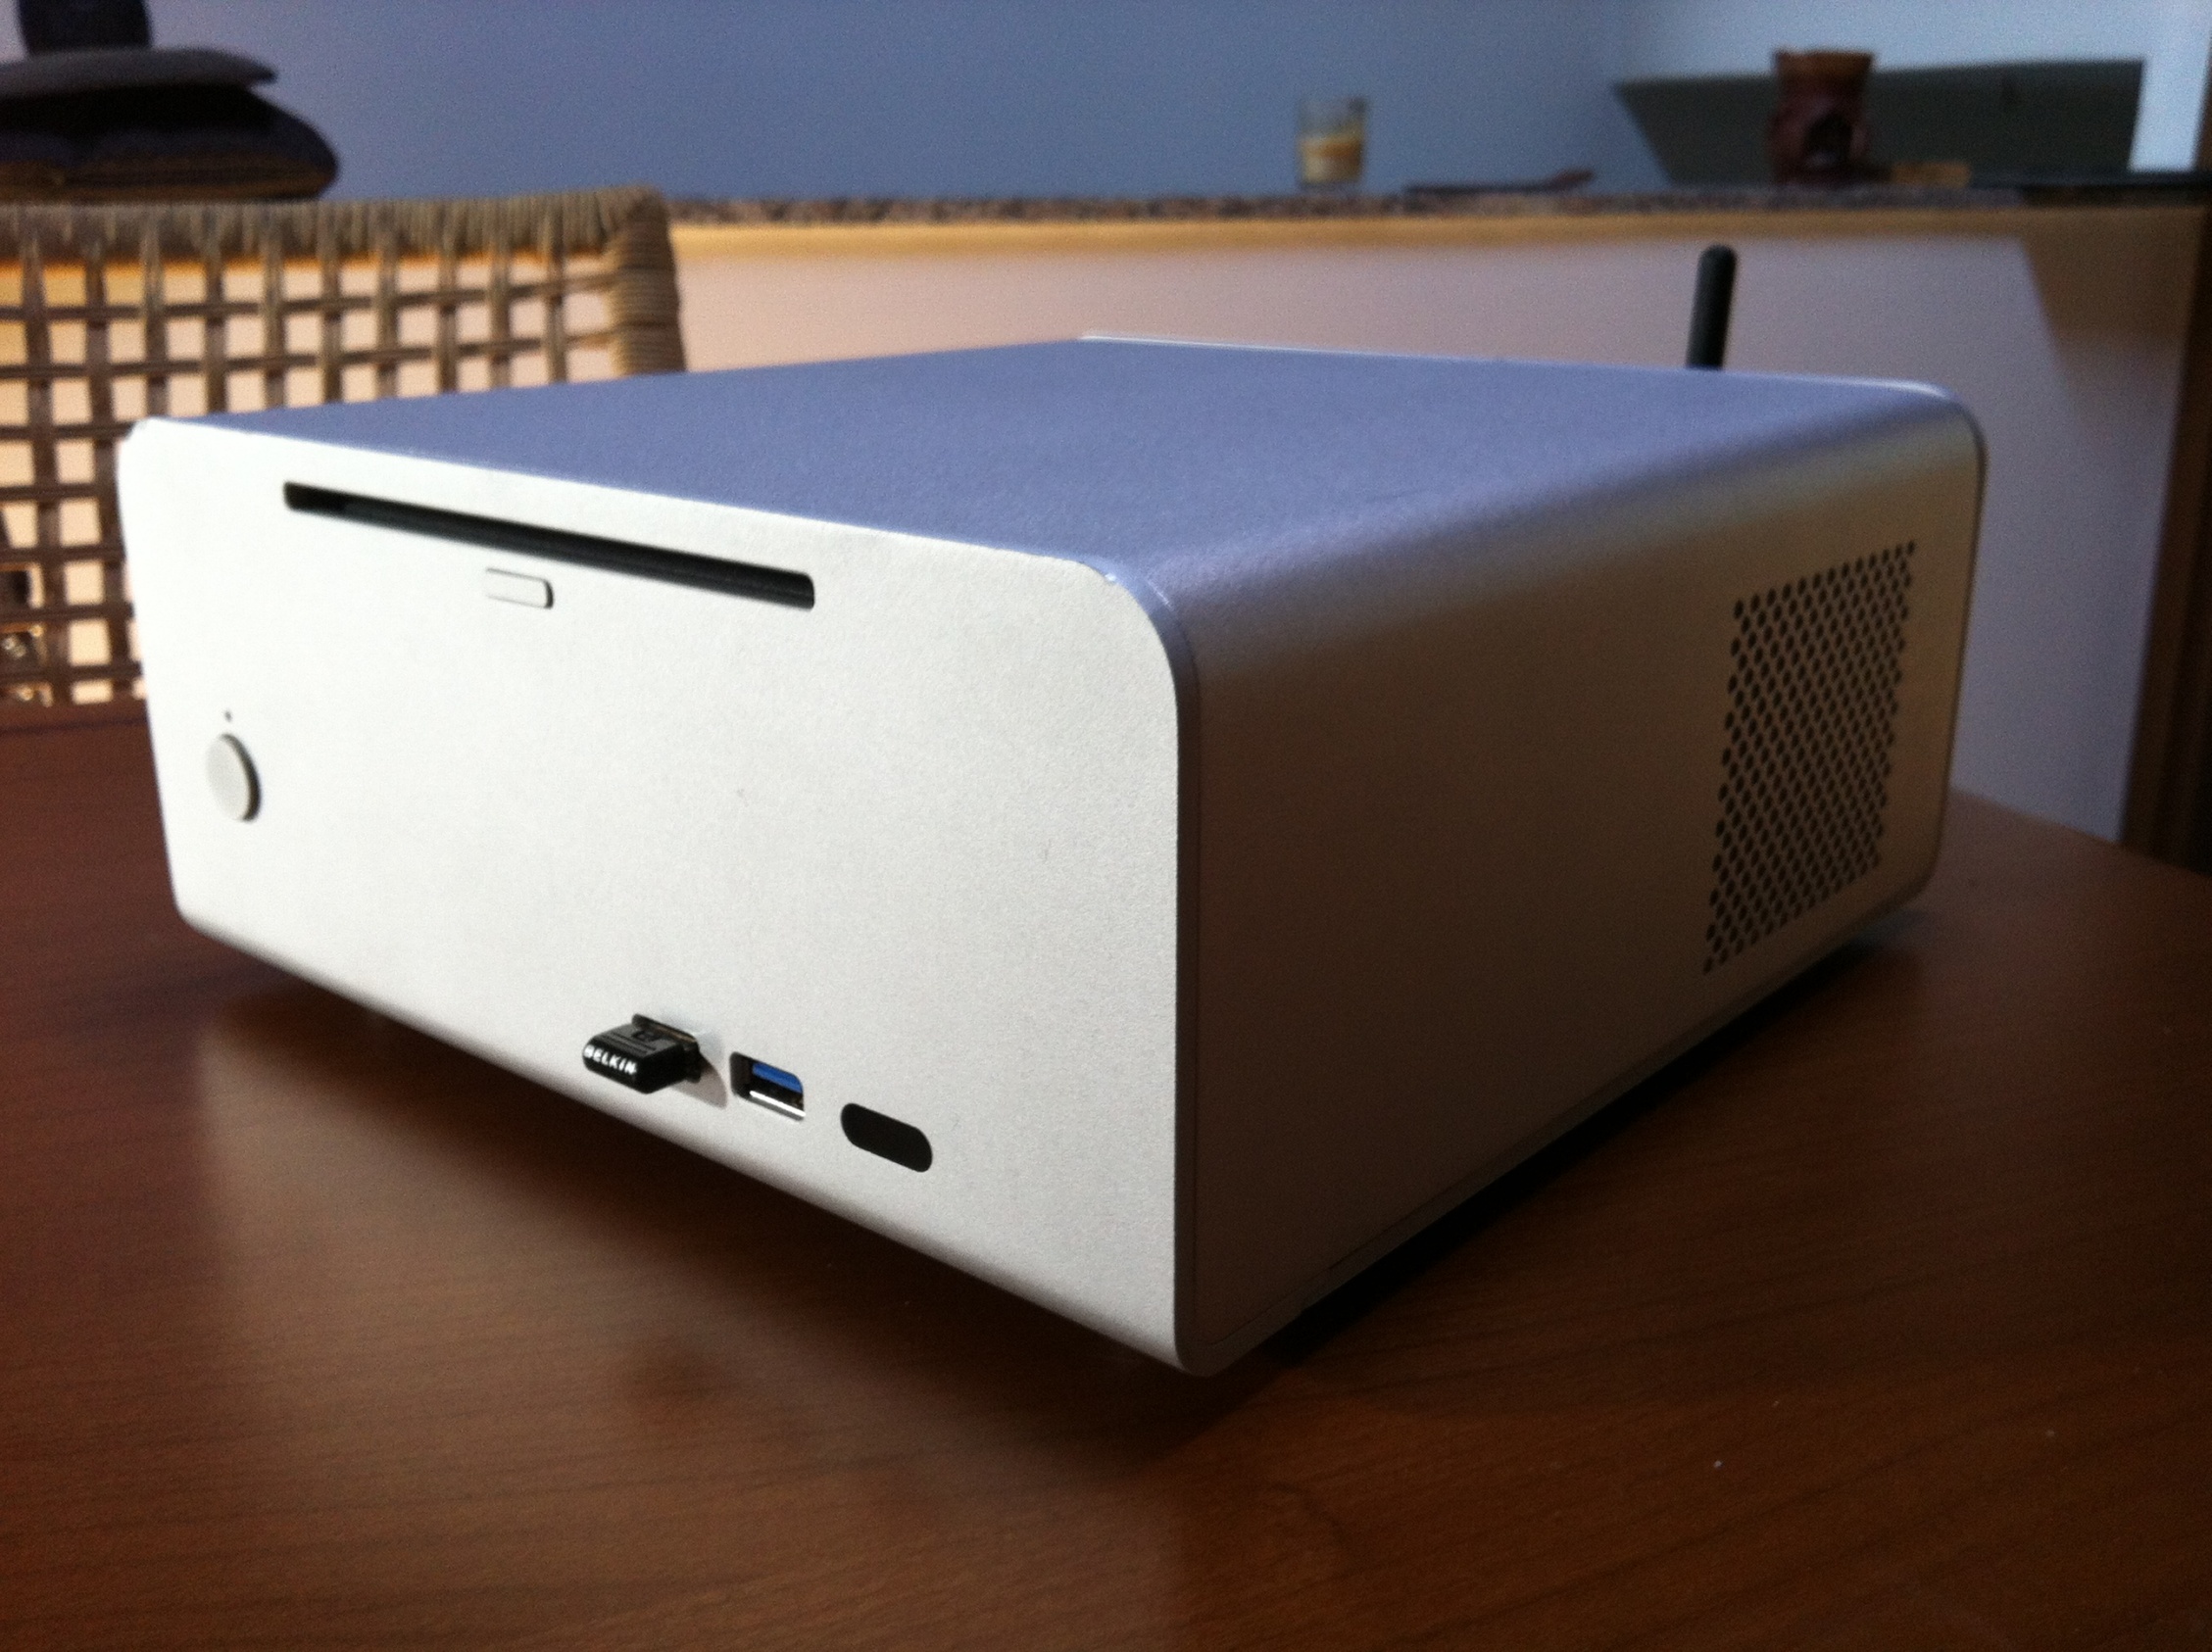
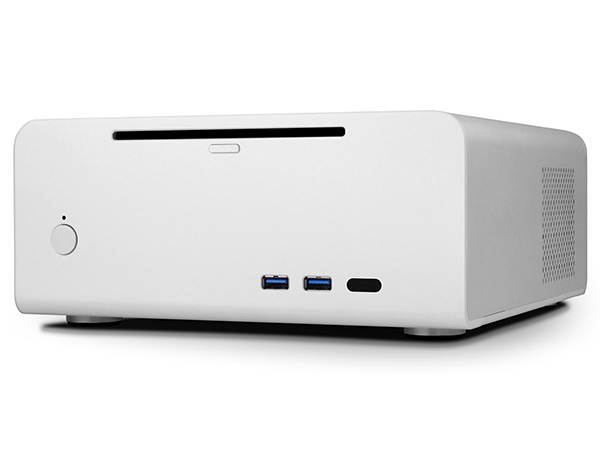
Streacom F7C EVO Chassis
[AMAZON-uk]http://www.amazon.co.uk/dp/B00958DA5K/[/AMAZON-uk]
PicoPSU-160-XT High Power 24 Pin Mini-ITX Power Supply
http://www.amazon.com/gp/product/B005TWE6B8/
192w AC-DC Power Adapter, 12v 16A
http://www.amazon.com/dp/B00905I1TI/
Sony Optiarc Blu Ray Slim RW BD5850H
http://www.newegg.com/Product/Product.aspx?Item=N82E16827118072
Belkin F8T016 Mini Bluetooth Adapter
http://www.amazon.com/dp/B001E96JBK/
Noctua NF-R8 PWM Cooling Fan
http://www.amazon.com/dp/B006GD30UC/
Apple Wireless Keyboard
http://www.amazon.com/dp/B005DLDO4U/
Apple Magic Mouse
http://www.amazon.com/dp/B002TLTGM6/
Apple Infrared Remote Control
http://www.amazon.com/dp/B002TPFNXS/
MacBook Pro Infrared board
http://www.powerbookmedic.com/MacBook-Pro-Infrared-board-p-18041.html
nVidia Quadro NVS 295 PCIe x16 (Optional - see Comments)
http://www.amazon.com/dp/B008RY5LO6/
OSX Mountain Lion 10.8.5
http://www.apple.com/osx/
Comments
This machine was assembled for HTPC use and audio editing. No need powerful graphic card, HD 4000 is totally enough to me.
This board is really amazing, it has all the stuff I need, except:
Beside that, everything is working fine:
I've tried to make this guide as simple and detailed as possible. Please feel free to make it better with tips and tricks I've missed.
Installation
Tools:
Step 1 - Bios patch
Step 2 - Bios configuration
Step 3 - Mountain Lion Installation
We're not done yet! See you in post #4
Giacomoleopardo Build - ZOTAC Z77-ITX WiFi - Core i7-3770T - MacMini 6,2
ComponentsAttention! New thread opened with full install guide based on OS Mavericks!
Giacomoleopardo Build - ZOTAC Z77-ITX WiFi - Core i7-3770T - MacMini 6,2 on Mavericks
This build description is now closed
Giacomoleopardo Build - ZOTAC Z77-ITX WiFi - Core i7-3770T - MacMini 6,2 on Mavericks
This build description is now closed

Intel® Core™ i7-3770T Processor 8M Cache, up to 3.70 GHz
[AMAZON-uk]http://www.amazon.co.uk/dp/B008ACVF9A/[/AMAZON-uk]
Zotac Z77 ITX WiFi
http://www.amazon.com/dp/B0089OJHBW/
Corsair Vengeance LP Blue 16 GB (2x8 GB) DDR3 1600MHz
http://www.amazon.com/dp/B009M0TCHQ/
SAMSUNG 830 Series 2.5-Inch 256GB
http://www.amazon.com/dp/B0077CR66A/
Crucial m4 256GB mSATA Internal Solid State Drive
http://www.amazon.com/dp/B0085J17UA/
Seagate ST2000DM001 Barracuda 7200RPM 2 TB SATA 6 GB/s
http://www.amazon.com/dp/B005T3GRN2/
Gelid Slim Silence I-Plus CPU Cooler
http://www.amazon.com/dp/B0058W3IUO/
Streacom F7C EVO Chassis
[AMAZON-uk]http://www.amazon.co.uk/dp/B00958DA5K/[/AMAZON-uk]
PicoPSU-160-XT High Power 24 Pin Mini-ITX Power Supply
http://www.amazon.com/gp/product/B005TWE6B8/
192w AC-DC Power Adapter, 12v 16A
http://www.amazon.com/dp/B00905I1TI/
Sony Optiarc Blu Ray Slim RW BD5850H
http://www.newegg.com/Product/Product.aspx?Item=N82E16827118072
Belkin F8T016 Mini Bluetooth Adapter
http://www.amazon.com/dp/B001E96JBK/
Noctua NF-R8 PWM Cooling Fan
http://www.amazon.com/dp/B006GD30UC/
Apple Wireless Keyboard
http://www.amazon.com/dp/B005DLDO4U/
Apple Magic Mouse
http://www.amazon.com/dp/B002TLTGM6/
Apple Infrared Remote Control
http://www.amazon.com/dp/B002TPFNXS/
MacBook Pro Infrared board
http://www.powerbookmedic.com/MacBook-Pro-Infrared-board-p-18041.html
nVidia Quadro NVS 295 PCIe x16 (Optional - see Comments)
http://www.amazon.com/dp/B008RY5LO6/
OSX Mountain Lion 10.8.5
http://www.apple.com/osx/
Comments
This machine was assembled for HTPC use and audio editing. No need powerful graphic card, HD 4000 is totally enough to me.
This board is really amazing, it has all the stuff I need, except:
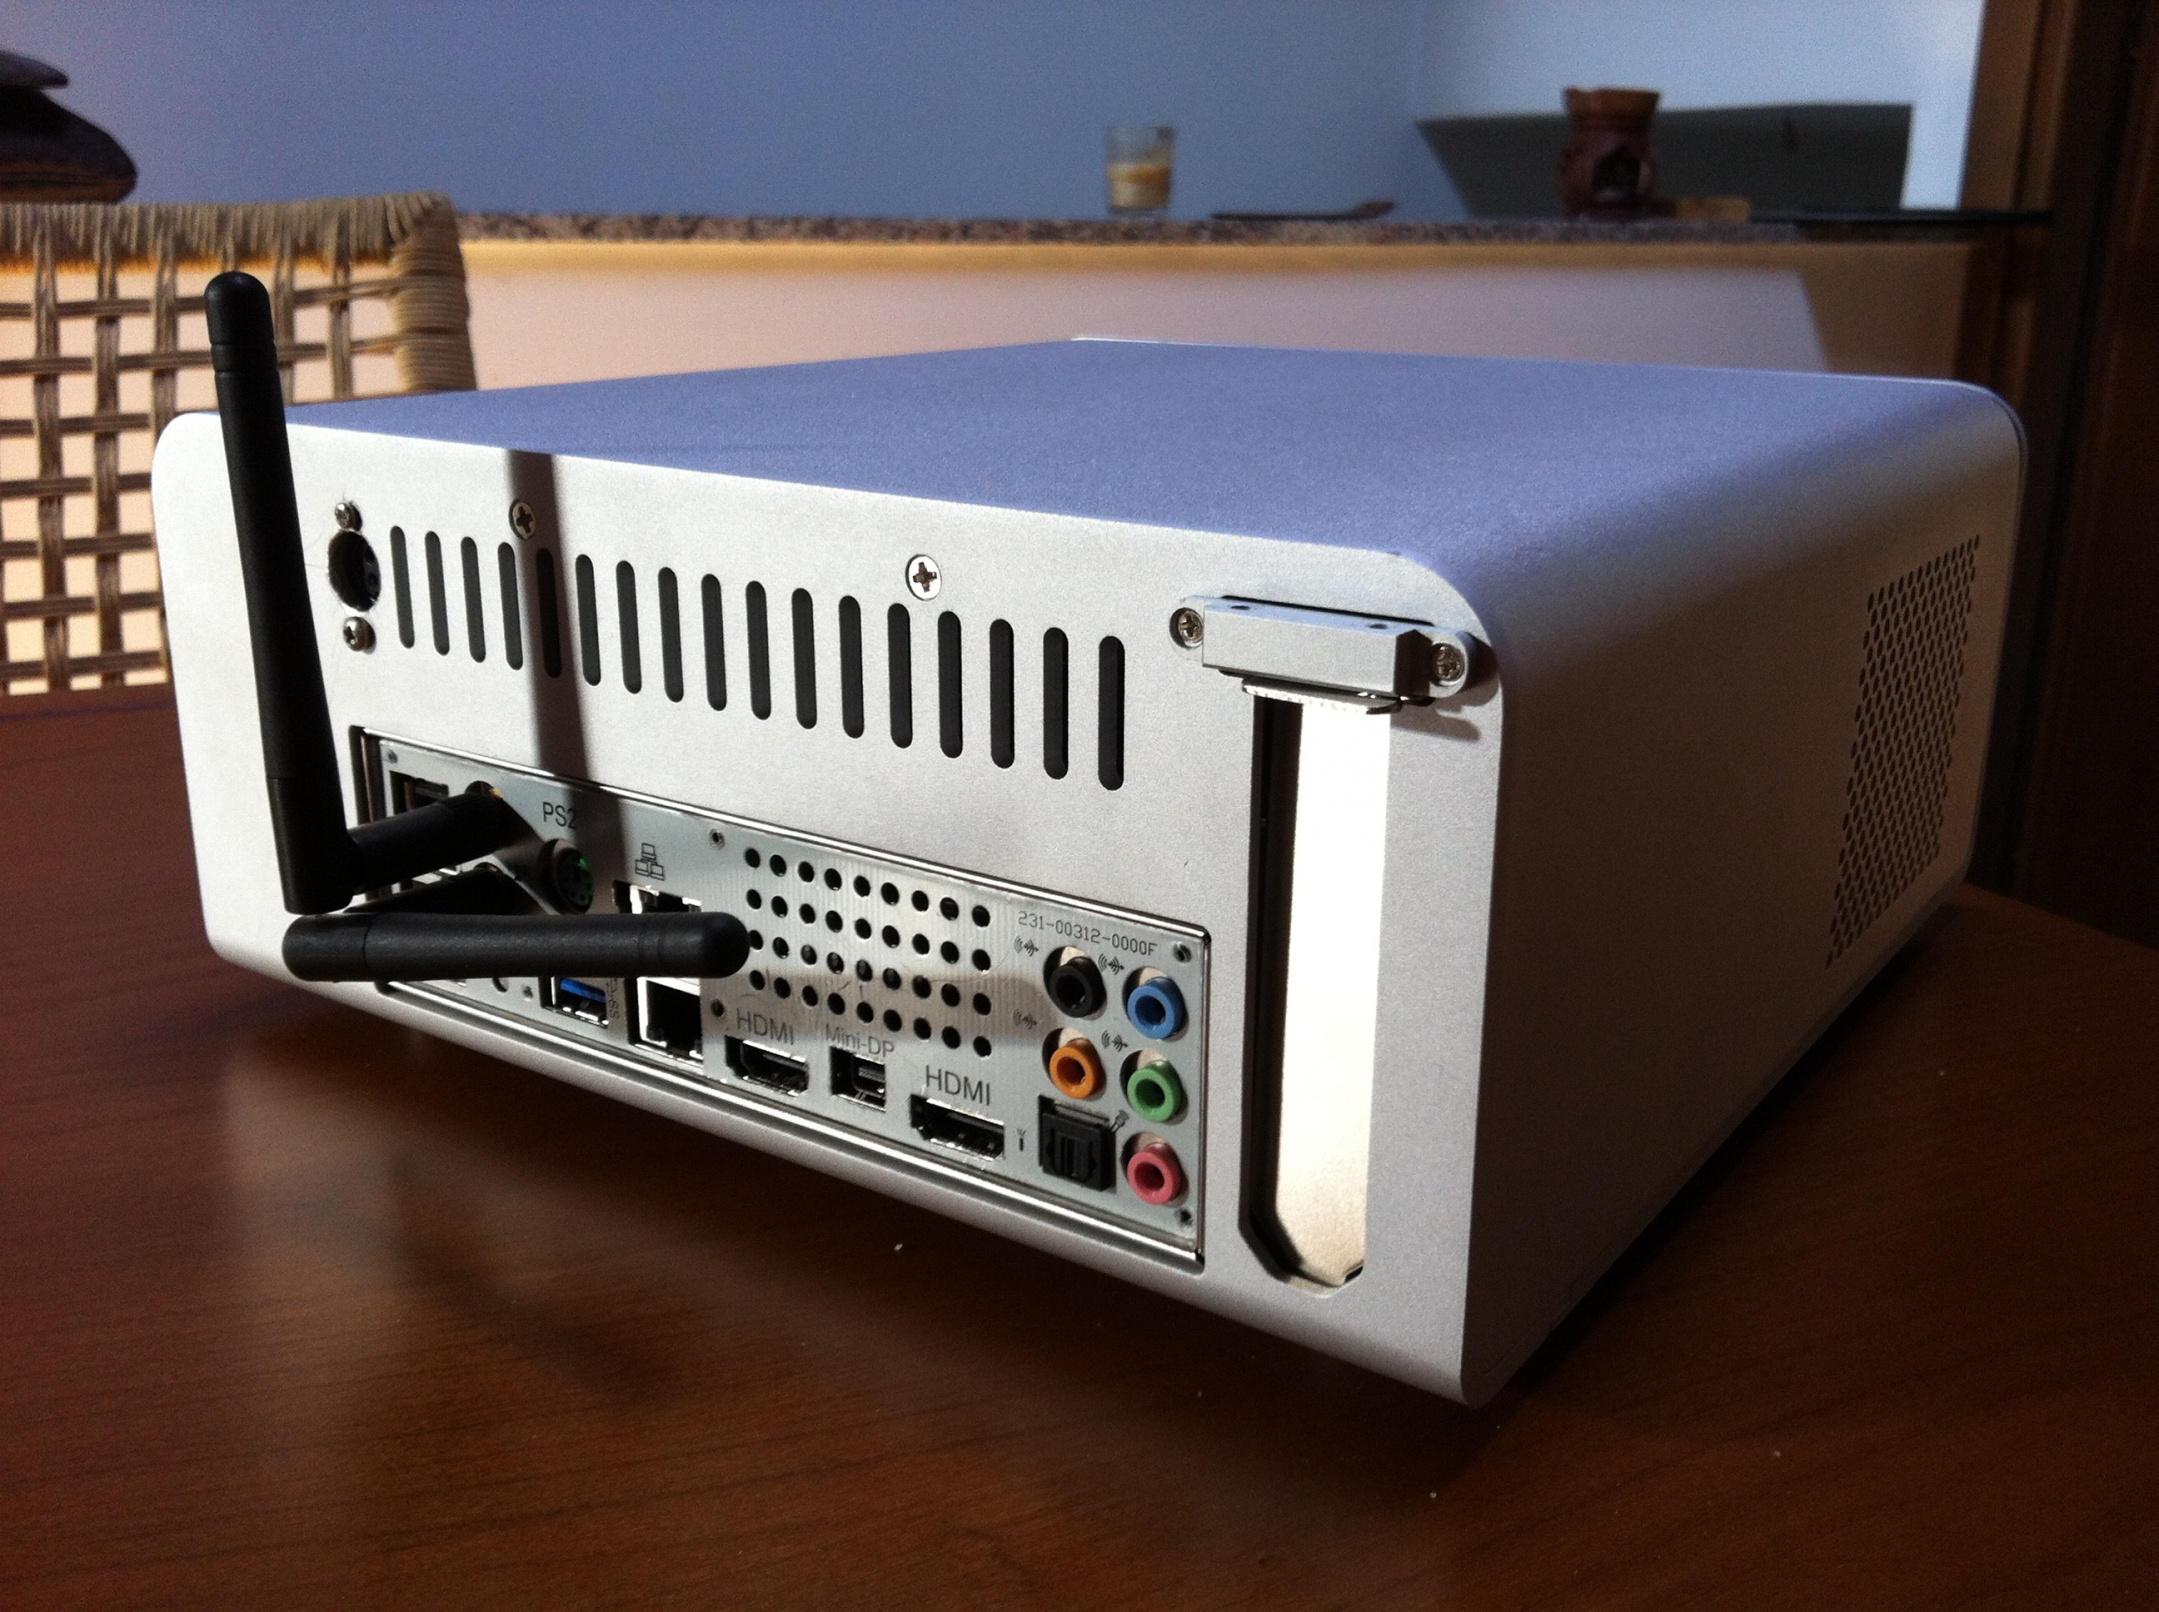
- MiniDisplay Port: it doesn't support 27" Apple Cinema Display (non thunderbolt). This explain nVidia Quadro NVS 295 gfx card.
- DVI port: not there!
- USB 3.0: don't recognize usb 2.0 sticks see UPDATE #5 and #7
- DVI port: not there!
- USB 3.0: don't recognize usb 2.0 sticks see UPDATE #5 and #7
Beside that, everything is working fine:
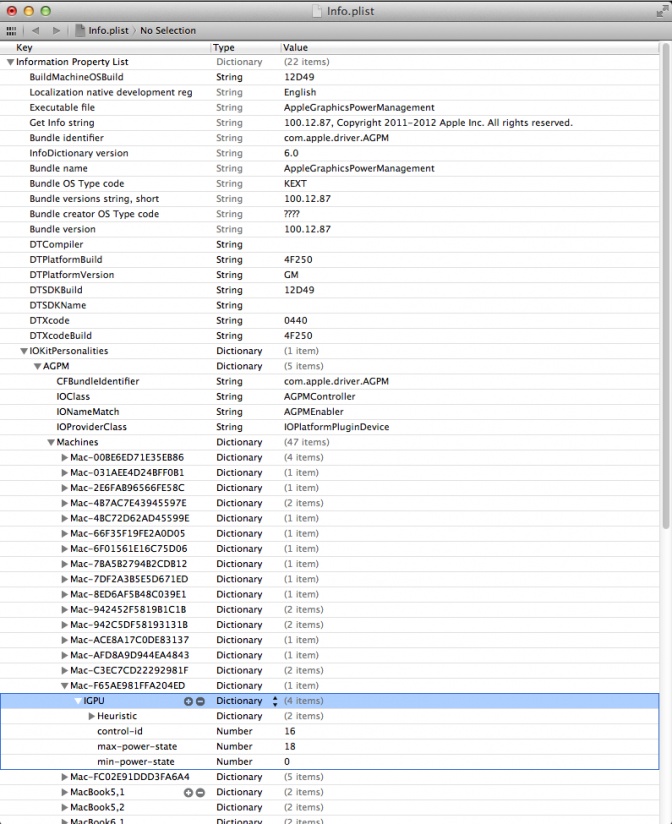
- Full native Ivy Bridge Power Management with custom SSDT ---> see UPDATE #3
- Auto and manual sleep
- HDMI audio (all video ports)
- WiFi on board (Atheros AR9285, DSDT editing required - onboard AR3001 Bluetooth not working)
- Both Ethernet fully functional
- Belkin 2.0 Bluetooth dongle (either in usb 2.0 and 3.0) Working in BIOS and Chimera bootloader
- Wake on LAN ---> see UPDATE #4
I've tried to make this guide as simple and detailed as possible. Please feel free to make it better with tips and tricks I've missed.
Installation
Tools:
- PMPatch and FPT for patching and flashing Bios (registration required) by CodeRush
- Latest Zotac bios
- UniBeast for Mountain Lion and MultiBeast for Mountain Lion
- MaciASL Open Beta for editing .aml files (registration required)
- HexEdit
- KextBeast
- IORegistryExplorer attached by toleda in his post#1
- Trim Enabler by Groths
- Combo Update to Mountain Lion 10.8.5
- A working Mac or Hackintosh machine
Step 1 - Bios patch
- Place PMPatch and the original latest bios on the desktop
- Open up Terminal (from Applications>Utilities folder)
- Drag the bios into the terminal window twice (for the input and output locations). Type PATCHED to the end of the second bios filename. This isn’t necessary but it helps to identify whether or not the bios has been patched.
- Hit enter, and your patched bios will be generated on desktop
- Rename patched bios with original bios name and replace it into the flash utility.
- I patched my bios using Zotac utility for Windows. It seems to be safer if you use FPT by CodeRush as it involves no OS, just a bootable dos USB: your choice.
- Reboot and set the new patched bios as below reported
Bios patching is no longer needed - see UPDATE 11- Open up Terminal (from Applications>Utilities folder)
- Drag the bios into the terminal window twice (for the input and output locations). Type PATCHED to the end of the second bios filename. This isn’t necessary but it helps to identify whether or not the bios has been patched.
- Hit enter, and your patched bios will be generated on desktop
- Rename patched bios with original bios name and replace it into the flash utility.
- I patched my bios using Zotac utility for Windows. It seems to be safer if you use FPT by CodeRush as it involves no OS, just a bootable dos USB: your choice.
- Reboot and set the new patched bios as below reported
Step 2 - Bios configuration
- Press Del key to gain bios settings
- Press F9 to load Optimized Defaults
- Leave Main section by default
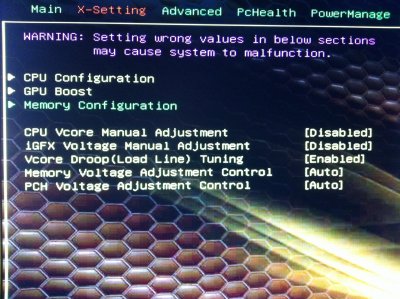
- X-Settings main window
- Press F9 to load Optimized Defaults
- Leave Main section by default
- X-Settings main window
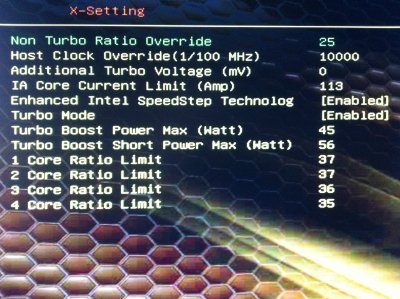
- X-Settings/CPU Configuration - Core Ratio Limits as default
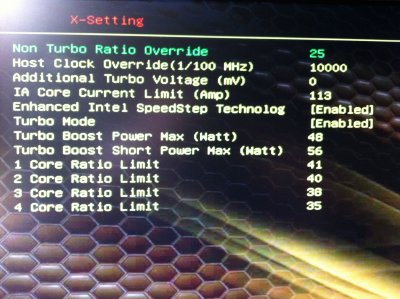
- X-Settings/CPU Configuration - Core Ratio Limits modified ---> see SSDT script
- X-Settings/Gpu Boost: leave default
- X-Settings/Memory Configuration: Load XMP-Profile 1 if supported by your RAM
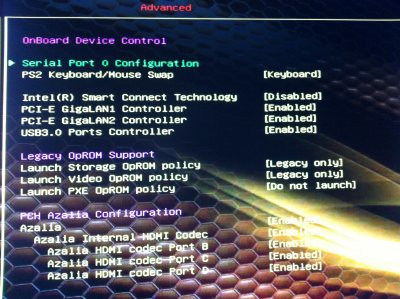
- Advanced/onBoard Device
- X-Settings/Memory Configuration: Load XMP-Profile 1 if supported by your RAM
- Advanced/onBoard Device
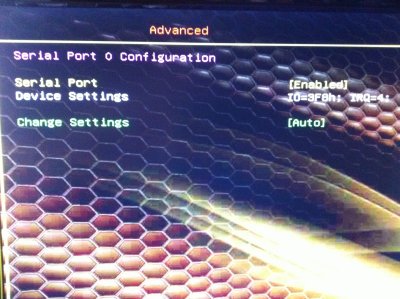
- Advanced/onBoard Device/Serial Port 0 Configuration
- Advanced/Storage Configuration
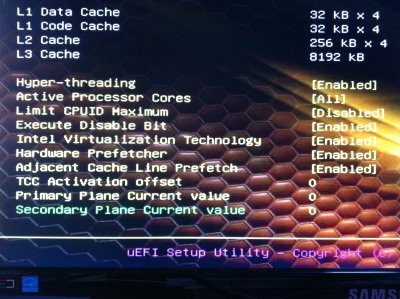
- Advanced/Cpu Configuration
- Advanced/USB Configuration
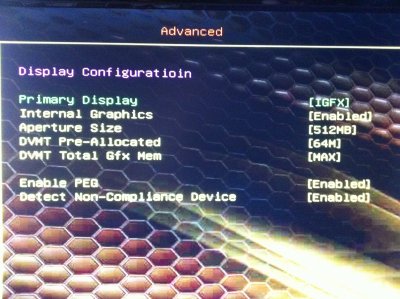
- Advanced/Display Configuration ----> Note: this config is for HD4000 integrated graphics, for discrete graphics set Primary Display [PEG]
- PcHealt: leave default
- PowerManage
- PowerManage
- Boot: set this section at your convenience.
- Press F10 key to Save and Reboot
- Press F10 key to Save and Reboot
Step 3 - Mountain Lion Installation
- Install Mountain Lion with UniBeast method as explained in Tonymac's guide Note: at step #4 you'll probably have to type -x before hitting enter, otherwise you won't reach installation screen. Take your time, install process will take 15-20 minutes.
- Reboot from Unibeast and at Chimera screen choose your new OSX installed partition (still typing -x)
- Now it's time to edit DSDT
UPDATE 8
Thanks to the massive work of forum moderator PJALM, and the support of forum moderator SJ_Underwater, now only two patches are necessary to make this board fully functional. Simply follow these steps (the red ones are not necessary anymore, but basically are the same job that PJALM patch does).
- Download MaciASL from here, unzip it and open it. It automatically will open a "clean" DSDT. It's important to know that these patches can be applied just one time, so if you want re-patch dsdt you'll have to start from a clean dsdt.aml again. So my advice is: save a backup copy of this file just in case you need to re-patch it. To do that just go to MaciASL menu bar click on File/Save as, choose the directory where you want to keep your backup clean dsdt, select Disassembled ASL file as File Format and name it "clean dsdt".
- in Menu bar open MaciASL\Preferences and select Sources in Preferences window
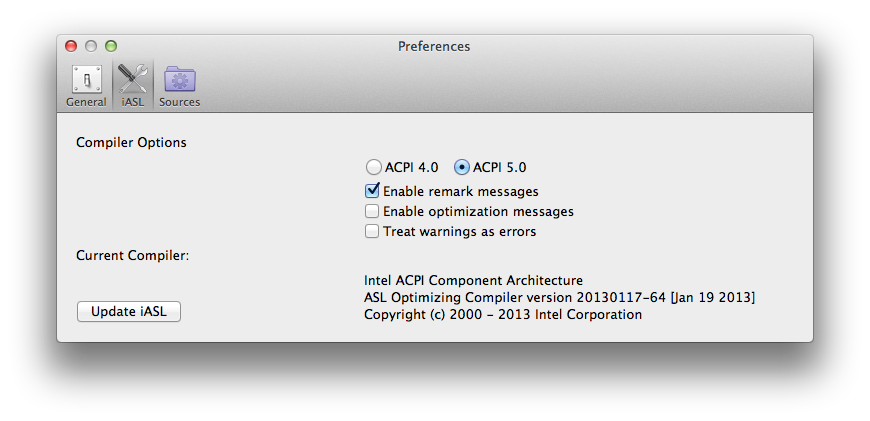
- set iASL as ACPI 5.0 as in the following picture
 - select sources icon, click on "+" to add Name and URL of the patches that you need: in my case they are
- Close completely MaciASL and re-open it: again a clean DSDT will appear as before, click on Patch command: now in the left side of the Patch window you should see all the patches we've just added like this
 - Under PJALM Zotac choose your motherboard's patch, click on Apply, then Close. Now click on Compile command: no Errors, Warnings nor Remarks should appear, but some Warnings may stay: they won't affect your installation; the mandatory thing is NOT TO HAVE ERRORS when compiling a DSDT! Go on
- Re-open patch windows and under PJALM Graphics select
- Go to MaciASL menu bar click on File/Save as, choose desktop as directory, select ACPI Machine Language Binary as File Format and name it "dsdt.aml" (add extension manually).
The next red steps are not necessary anymore. I leave them in the thread 'cause they're still valuable infos.
END UPDATE 8
The next red steps are not necessary anymore. I leave it here çause they're still valuable infos.
-Maybe 1 Warning will appear, probably concerning (GDSV); if so, find
and below that you'll see this
That must be replaced with this
- Compile again, and the Warning should disappear
- Re-open patch windows and under Audio HDMI Ivy Bridge/HD4000/7 Series select
rather than
- Apply your right patch and check compile: now you should have 0 Errors, 0 Warnings, 0 Remarks, XX Optimizations.
- If you have Ralink WiFi card on your board, you have to change it with a OSX friendly WiFi card such as Atheros AR9280 (OOB). If Atheros AR9285 is on your board, to make it work (only the WiFi part - Bluetooth doesn't work) you have to find in DSDT Device (RP01) wich should look like this
and add this part
and the risults will be
- Compile DSDT as usual (checking 0 Errors, 0 Warnings, 0 Remarks, XX Optimization) and this editing will make Atheros AR9285 working.
- to fix the "Unknown SATA controller" in system profiler find
Change it to this:
- later (when post-installation will be done) if for some reason System Profiler won't show the right Intel 7 Series Chipset, take a look at this thread (post #9) to make it work.
UPDATE #7 ---> see post #16 and #17 for reference
- this patch allows Intel USB 3.0 Controller to work properly with ANY Usb devices (3.0, 2.0, 1.0). Apply USB Multiplex from PJALM Intel7 patch, this method is based on Forum member Mieze's work
This method will work for any Ivy Bridge System Definition. /end UPDATE #7.
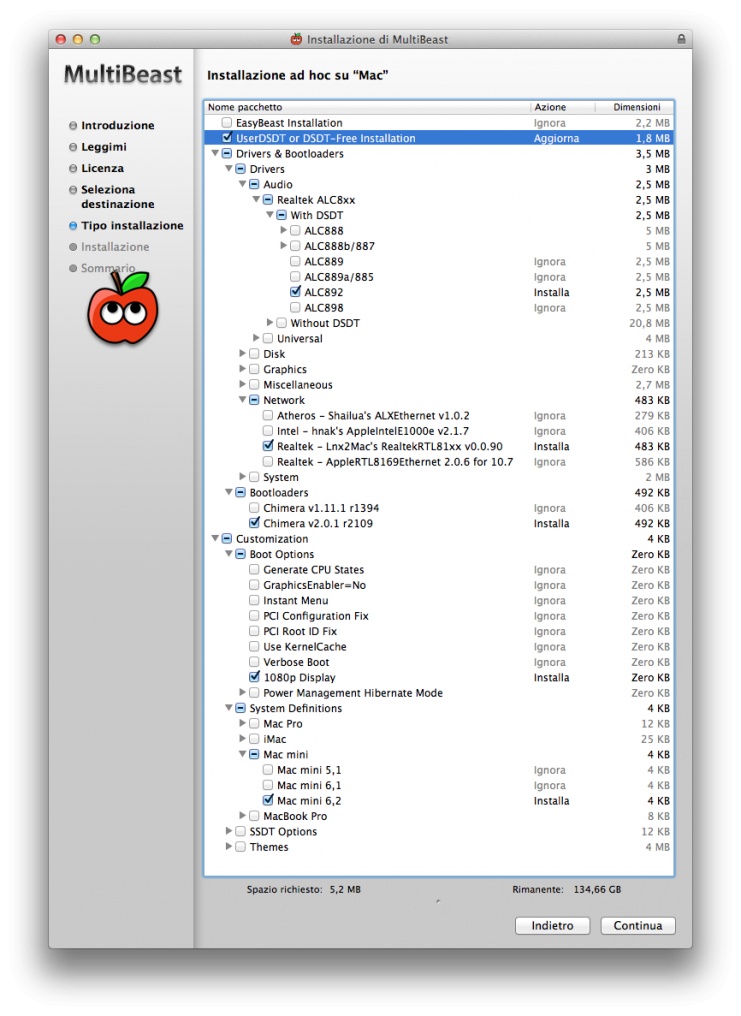
- Restart from HD and Type again -x (last time!)
- Open org.chameleon.Boot.plist in HD/Extra and add this
to avoid AppleACPIPlatform.kext Rollback installation and save it.
- Restart and the system will boot properly.
- Reboot from Unibeast and at Chimera screen choose your new OSX installed partition (still typing -x)
- Now it's time to edit DSDT
UPDATE 8
Thanks to the massive work of forum moderator PJALM, and the support of forum moderator SJ_Underwater, now only two patches are necessary to make this board fully functional. Simply follow these steps (the red ones are not necessary anymore, but basically are the same job that PJALM patch does).
- Download MaciASL from here, unzip it and open it. It automatically will open a "clean" DSDT. It's important to know that these patches can be applied just one time, so if you want re-patch dsdt you'll have to start from a clean dsdt.aml again. So my advice is: save a backup copy of this file just in case you need to re-patch it. To do that just go to MaciASL menu bar click on File/Save as, choose the directory where you want to keep your backup clean dsdt, select Disassembled ASL file as File Format and name it "clean dsdt".
- in Menu bar open MaciASL\Preferences and select Sources in Preferences window
- set iASL as ACPI 5.0 as in the following picture

- PJALM Zotac ------> http://pjalm.info/repos/zotac
- PJALM Graphics ---> http://pjalm.info/repos/graphics
- Close completely MaciASL and re-open it: again a clean DSDT will appear as before, click on Patch command: now in the left side of the Patch window you should see all the patches we've just added like this

- Re-open patch windows and under PJALM Graphics select
- Generic Discrete Graphics (AMD/nVidia) to enable HDMI Audio if you have a discrete graphic card or
- Intel HD4000 to enable HDMI Audio if you have ONLY Intel HD 4000 onboard graphic)
- Go to MaciASL menu bar click on File/Save as, choose desktop as directory, select ACPI Machine Language Binary as File Format and name it "dsdt.aml" (add extension manually).
The next red steps are not necessary anymore. I leave them in the thread 'cause they're still valuable infos.
END UPDATE 8
The next red steps are not necessary anymore. I leave it here çause they're still valuable infos.
-Maybe 1 Warning will appear, probably concerning (GDSV); if so, find
Code:
Method (GDSV, 1, Serialized)
Code:
                    Return (Package (0x01)
                    {
                        One
                    })
Code:
                    }
                    Else
                    {
                    Return (One)
- Re-open patch windows and under Audio HDMI Ivy Bridge/HD4000/7 Series select
- AMI-AMD-Nvidia-7_Series-A1 (to enable HDMI Audio if you have a discrete graphic card) or
- AMI-HD4000-7_Series-A3 (to enable HDMI Audio if you have ONLY Intel HD 4000 onboard graphic)
Code:
Buffer (0x04)\n
                {\n
                    0x01, 0x00, 0x00, 0x00\n
                }, \n
Code:
Buffer (0x04)\n
                {\n
                    0x03, 0x00, 0x00, 0x00\n
                }, \n
- If you have Ralink WiFi card on your board, you have to change it with a OSX friendly WiFi card such as Atheros AR9280 (OOB). If Atheros AR9285 is on your board, to make it work (only the WiFi part - Bluetooth doesn't work) you have to find in DSDT Device (RP01) wich should look like this
Code:
Device (RP01)
            {
                Name (_ADR, 0x001C0000)
                Name (_HPP, Package (0x04)
                {
                    0x08,
                    0x40,
                    One,
                    Zero
                })
                OperationRegion (PXCS, PCI_Config, 0x40, 0xC0)
                Field (PXCS, AnyAcc, NoLock, Preserve)
                {
                            Offset (0x10),
                    L0SE,   1,
                            Offset (0x11),
                            Offset (0x12),
                        ,   13,
                    LASX,   1,
                            Offset (0x14),
                        ,   6,
                    HPCE,   1,
                            Offset (0x1A),
                    ABPX,   1,
                        ,   2,
                    PDCX,   1,
                        ,   2,
                    PDSX,   1,
                            Offset (0x1B),
                            Offset (0x20),
                            Offset (0x22),
                    PSPX,   1,
                            Offset (0x98),
                        ,   30,
                    HPEX,   1,
                    PMEX,   1
                }

                Field (PXCS, AnyAcc, NoLock, WriteAsZeros)
                {
                            Offset (0x94),
                        ,   1,
                    EIFD,   1,
                            Offset (0x95),
                            Offset (0x9C),
                        ,   30,
                    HPSX,   1,
                    PMSX,   1
                }

                Device (PXSX)
                {
                    Name (_ADR, Zero)
                    Name (_PRW, Package (0x02)
                    {
                        0x09,
                        0x04
                    })
Code:
Method (_DSM, 4, NotSerialized)
                    {
                        Store (Package (0x0B)
                            {
                                "AAPL,slot-name",
                                Buffer (0x08)
                                {
                                    "AirPort"
                                },

                                "device-id",
                                Unicode ("0"),
                                Buffer (0x08)
                                {
                                    "AirPort"
                                },

                                "model",
                                Buffer (0x35)
                                {
                                    "Atheros 928x 802.11 a/b/g/n Wireless Network Adapter"
                                },

                                "subsystem-id",
                                Buffer (0x04)
                                {
                                    0x8F, 0x00, 0x00, 0x00
                                },

                                "subsystem-vendor-id",
                                Buffer (0x04)
                                {
                                    0x6B, 0x10, 0x00, 0x00
                                }
                            }, Local0)
                        DTGP (Arg0, Arg1, Arg2, Arg3, RefOf (Local0))
                        Return (Local0)
                    }
                }
and the risults will be
Code:
Device (RP01)
            {
                Name (_ADR, 0x001C0000)
                Name (_HPP, Package (0x04)
                {
                    0x08,
                    0x40,
                    One,
                    Zero
                })
                OperationRegion (PXCS, PCI_Config, 0x40, 0xC0)
                Field (PXCS, AnyAcc, NoLock, Preserve)
                {
                            Offset (0x10),
                    L0SE,   1,
                            Offset (0x11),
                            Offset (0x12),
                        ,   13,
                    LASX,   1,
                            Offset (0x14),
                        ,   6,
                    HPCE,   1,
                            Offset (0x1A),
                    ABPX,   1,
                        ,   2,
                    PDCX,   1,
                        ,   2,
                    PDSX,   1,
                            Offset (0x1B),
                            Offset (0x20),
                            Offset (0x22),
                    PSPX,   1,
                            Offset (0x98),
                        ,   30,
                    HPEX,   1,
                    PMEX,   1
                }

                Field (PXCS, AnyAcc, NoLock, WriteAsZeros)
                {
                            Offset (0x94),
                        ,   1,
                    EIFD,   1,
                            Offset (0x95),
                            Offset (0x9C),
                        ,   30,
                    HPSX,   1,
                    PMSX,   1
                }

                Device (PXSX)
                {
                    Name (_ADR, Zero)
                    Name (_PRW, Package (0x02)
                    {
                        0x09,
                        0x04
                    })
                    Method (_DSM, 4, NotSerialized)
                    {
                        Store (Package (0x0B)
                            {
                                "AAPL,slot-name",
                                Buffer (0x08)
                                {
                                    "AirPort"
                                },

                                "device-id",
                                Unicode ("0"),
                                Buffer (0x08)
                                {
                                    "AirPort"
                                },

                                "model",
                                Buffer (0x35)
                                {
                                    "Atheros 928x 802.11 a/b/g/n Wireless Network Adapter"
                                },

                                "subsystem-id",
                                Buffer (0x04)
                                {
                                    0x8F, 0x00, 0x00, 0x00
                                },

                                "subsystem-vendor-id",
                                Buffer (0x04)
                                {
                                    0x6B, 0x10, 0x00, 0x00
                                }
                            }, Local0)
                        DTGP (Arg0, Arg1, Arg2, Arg3, RefOf (Local0))
                        Return (Local0)
                    }
                }

                Method (HPME, 0, Serialized)
- Compile DSDT as usual (checking 0 Errors, 0 Warnings, 0 Remarks, XX Optimization) and this editing will make Atheros AR9285 working.
- to fix the "Unknown SATA controller" in system profiler find
Code:
Device (SAT0)
        {
            Name (_ADR, 0x001F0002)
        }
Change it to this:
Code:
Device (SAT0)
        {
            Name (_ADR, 0x001F0002)
            Method (_DSM, 4, NotSerialized)
            {
                Store (Package (0x02)
                    {
                        "device-id",
                        Buffer (0x04)
                        {
                            0x03, 0x1E, 0x00, 0x00
                        }
                    }, Local0)
                DTGP (Arg0, Arg1, Arg2, Arg3, RefOf (Local0))
                Return (Local0)
            }
}UPDATE #7 ---> see post #16 and #17 for reference
- this patch allows Intel USB 3.0 Controller to work properly with ANY Usb devices (3.0, 2.0, 1.0). Apply USB Multiplex from PJALM Intel7 patch, this method is based on Forum member Mieze's work
This method will work for any Ivy Bridge System Definition. /end UPDATE #7.
MultiBeast configuration

- Restart from HD and Type again -x (last time!)
- Open org.chameleon.Boot.plist in HD/Extra and add this
Code:
<key>Kernel Flags</key>
<string>dart=0</string>- Restart and the system will boot properly.
We're not done yet! See you in post #4
Last edited by a moderator:

