Contribute
Register

G4 Cube PSU Re-Stuffed

Status
Not open for further replies.
Build Log 2 - NUC Base and Motherboard Mounting

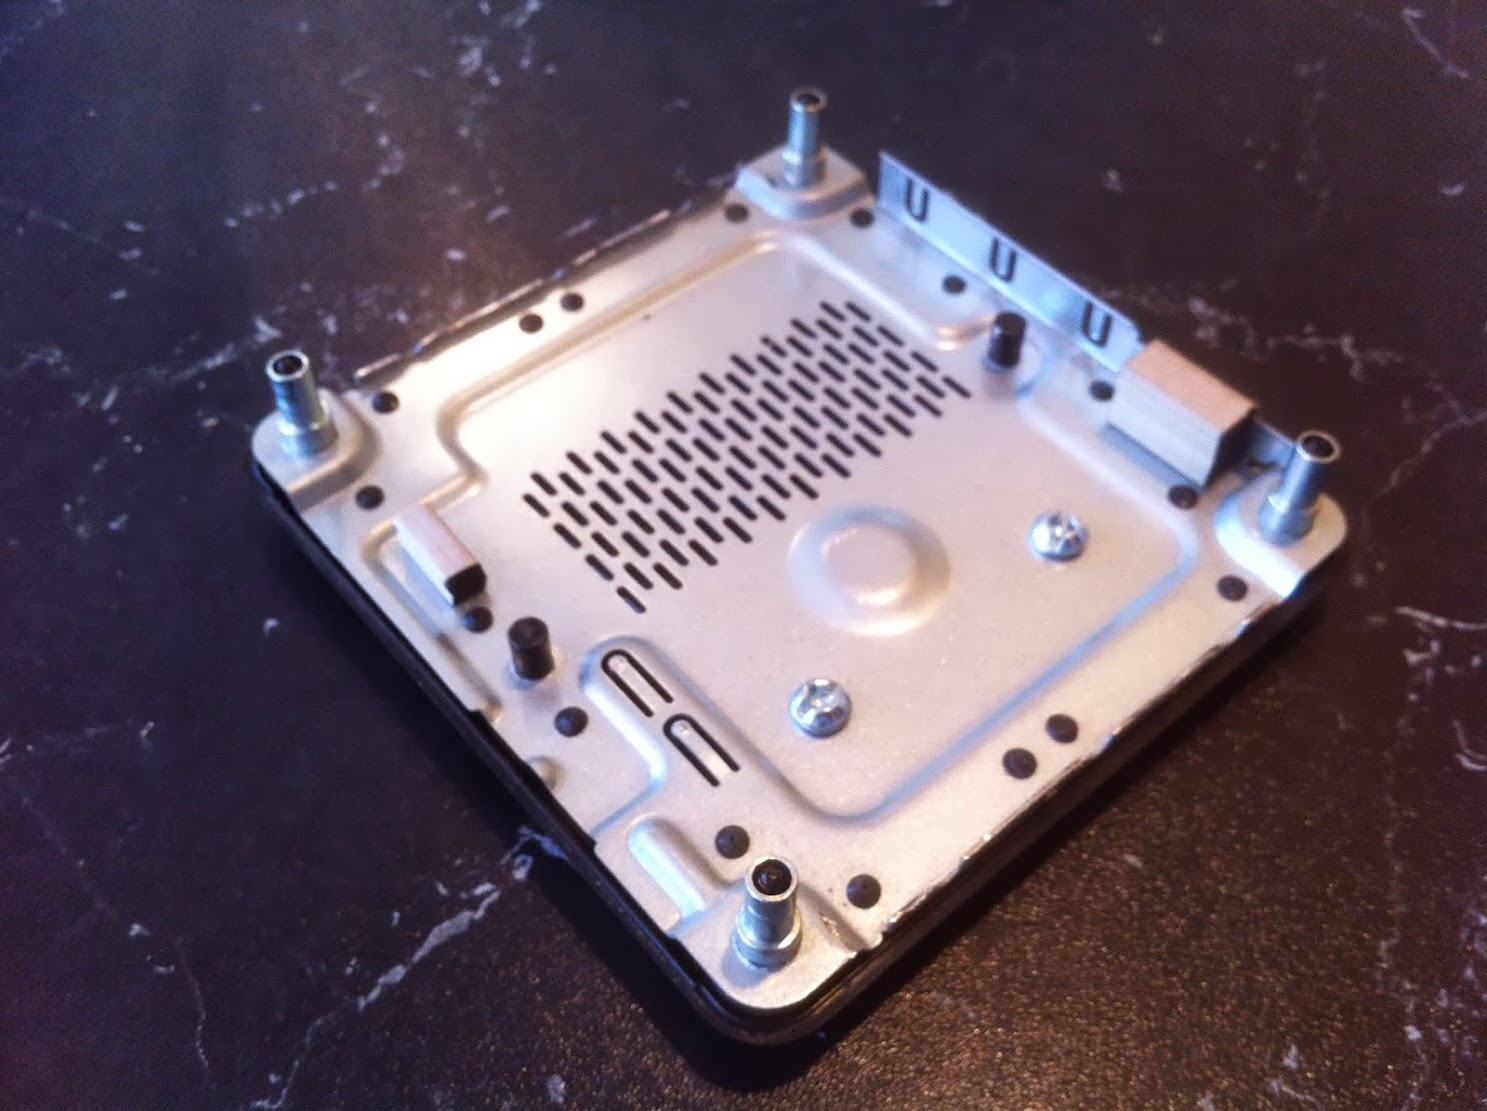
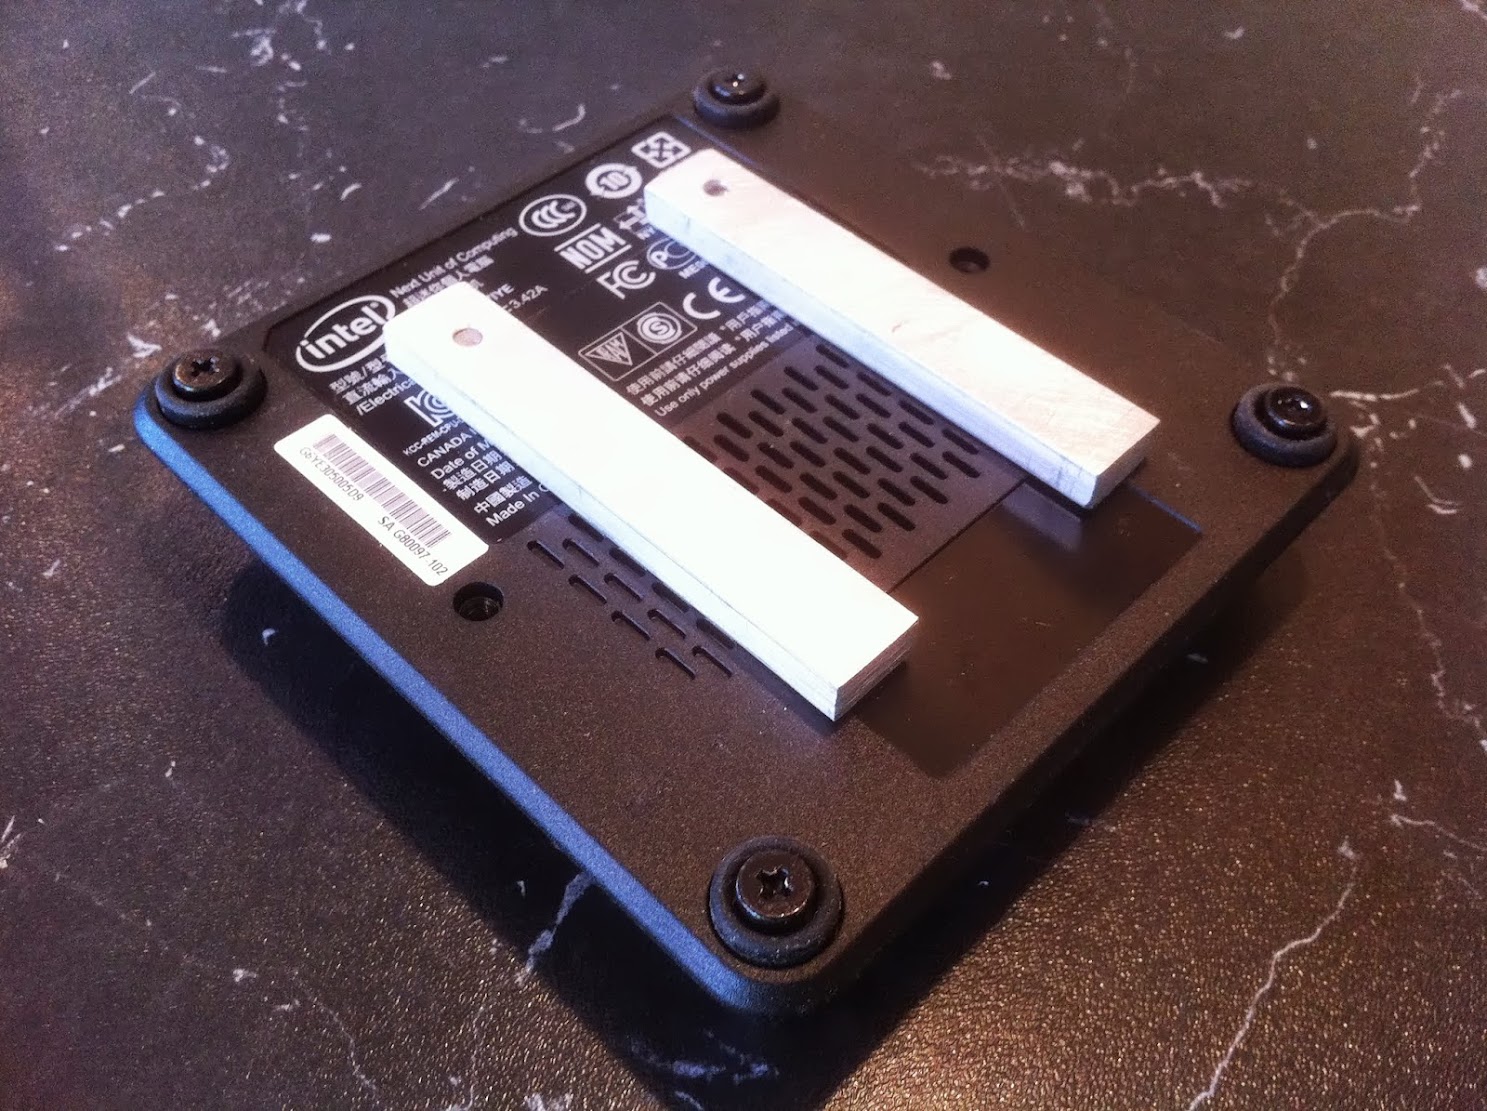
The Intel NUC case contains a base with four integrated motherboard standoffs. It is a solid piece that provided a perfect means of mounting the board inside the Cube PSU. To mount it to the case floor, two holes were drilled in it (see the 2 bolt heads). Two 3/8 x 1/2" aluminum bars (each with one threaded hole) were JB Welded to the Case floor. The entire NUC base was then bolted to the bars to secure it down.


The NUC Base

IMG_3764.JPG


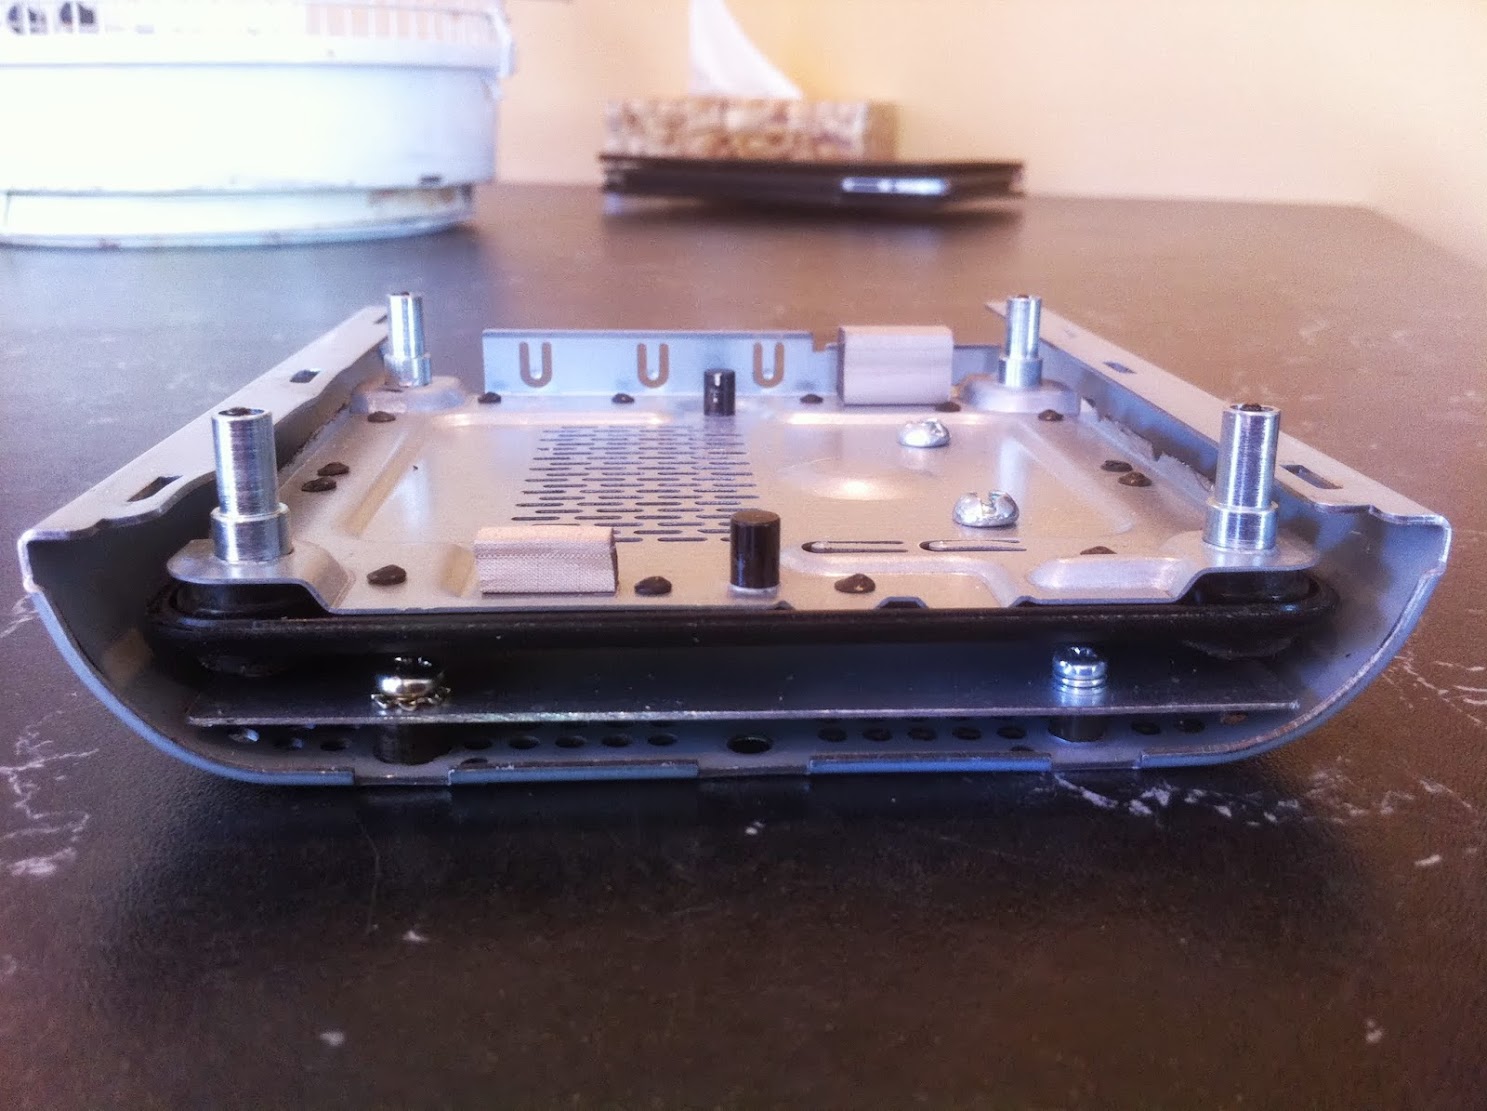
Mounting Bars bolted to NUC base. The two bars are not yet JB Welded to the Case floor.

IMG_3766.JPG


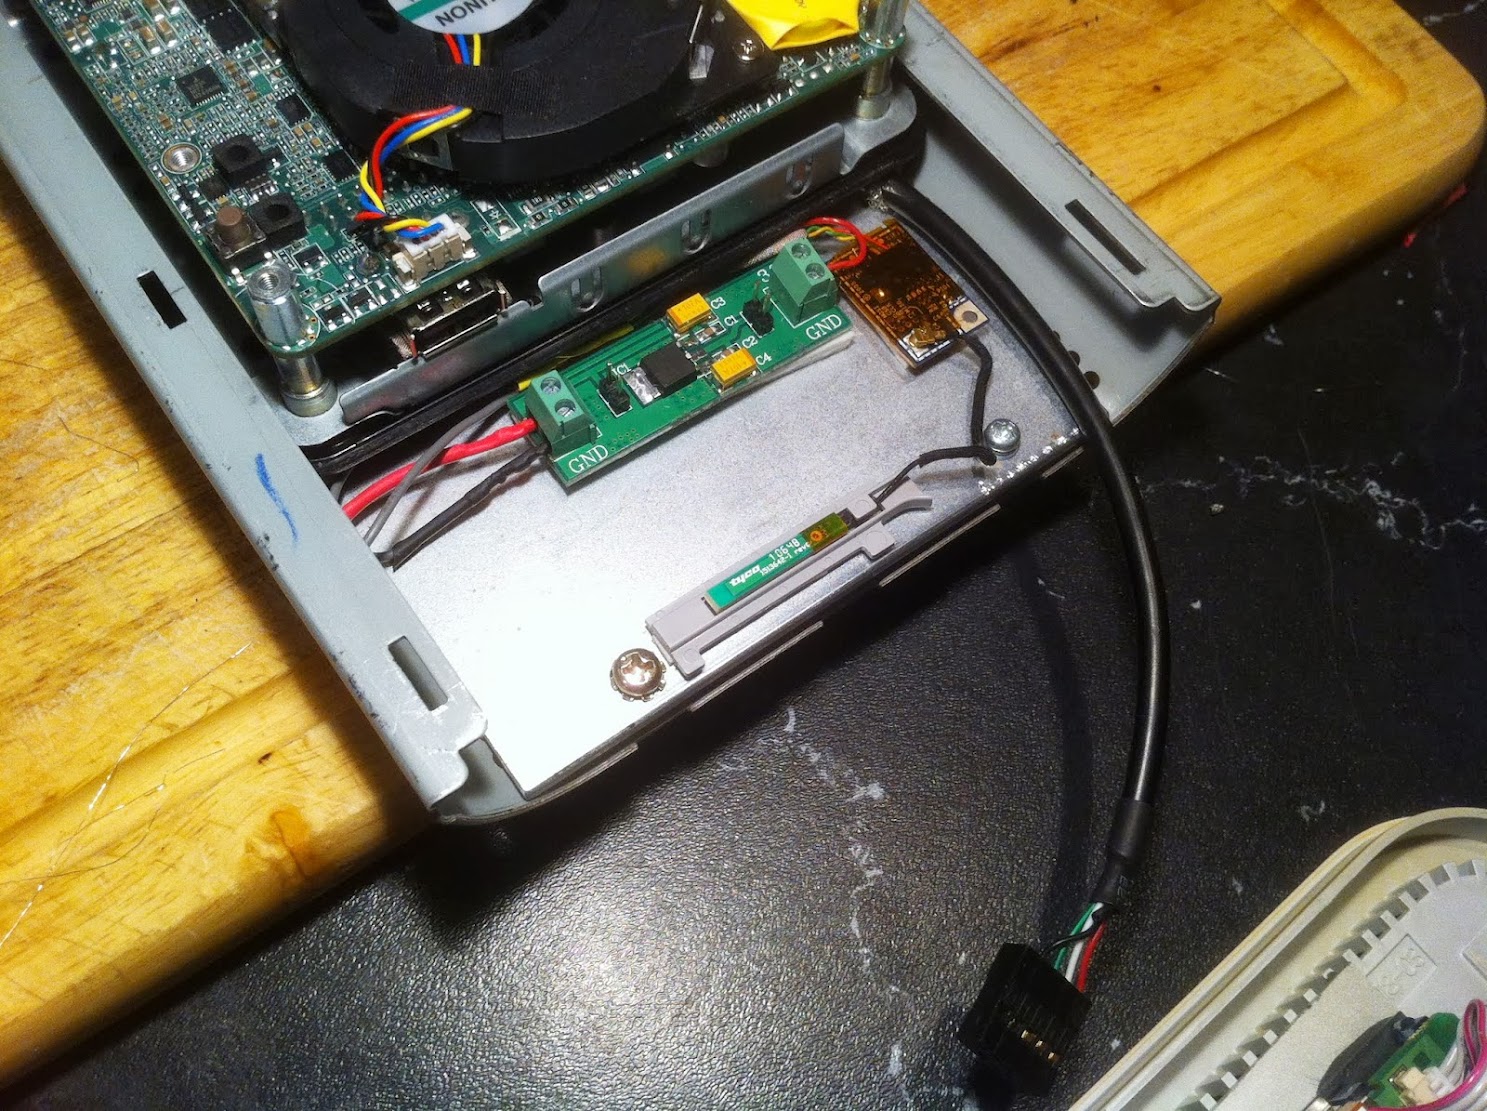
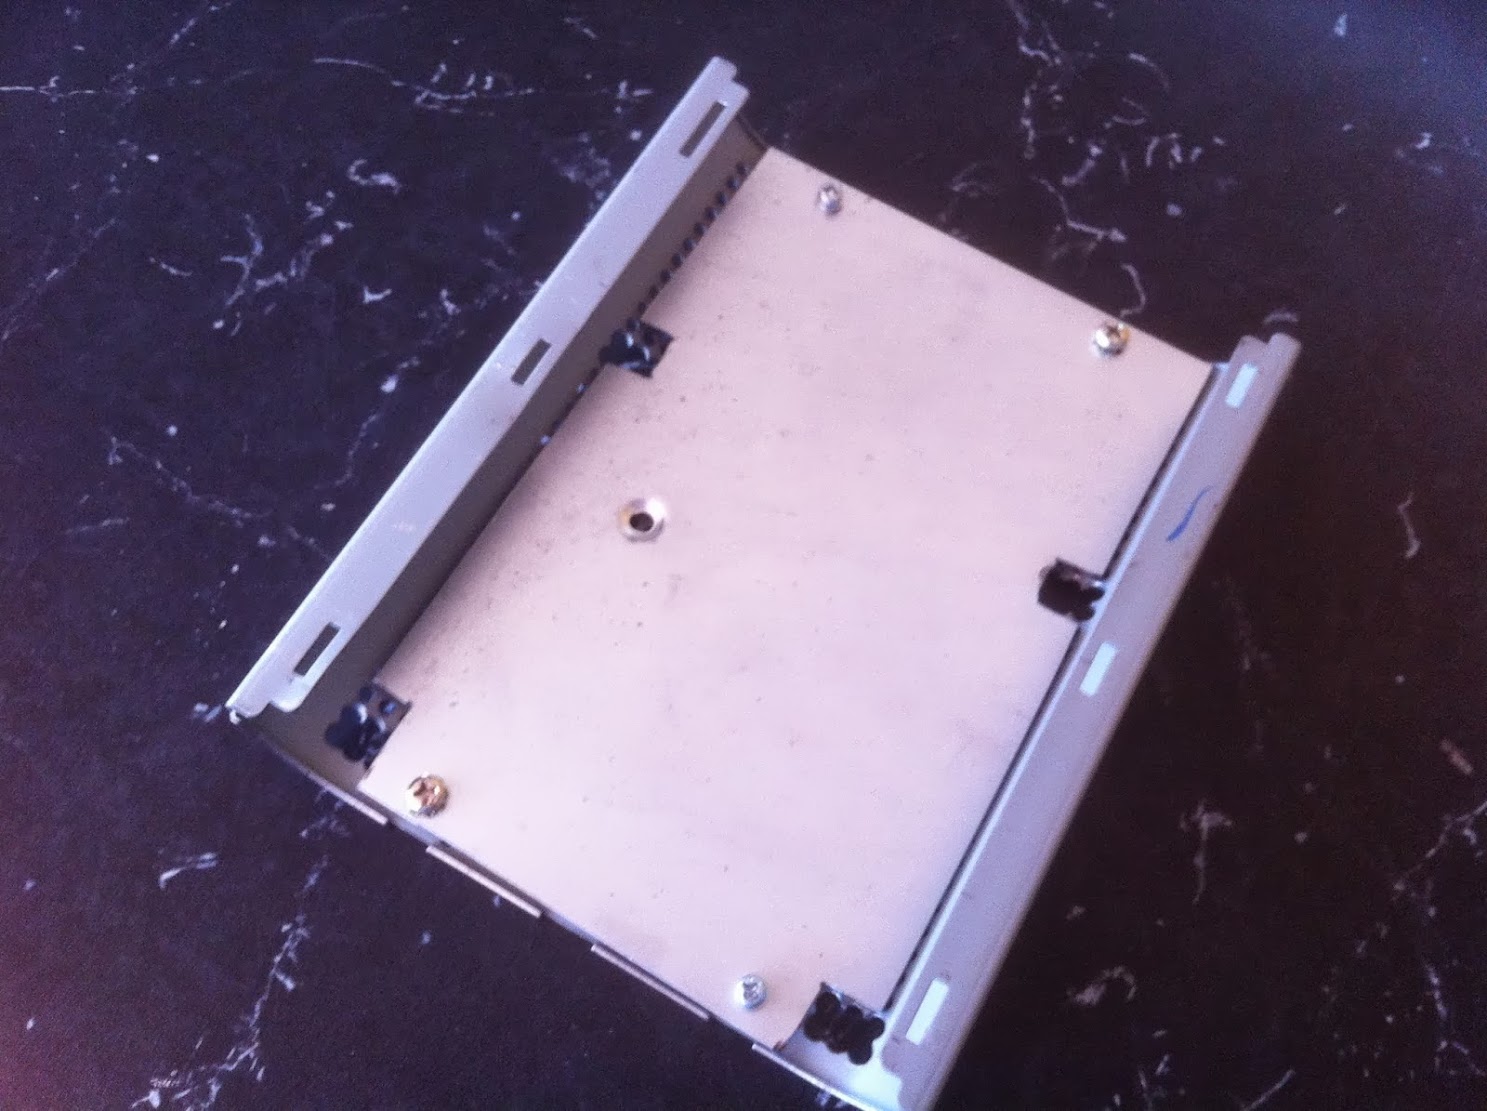
Two photos of the NUC Base test fitted to the Cube PSU floor, not yet JB Welded. Four holes need to first be cut into the bottom of the PSU metal shell and also the aluminum case floor to allow screwdriver access for tightening down the motherboard.

IMG_3768.JPG


IMG_3769.JPG


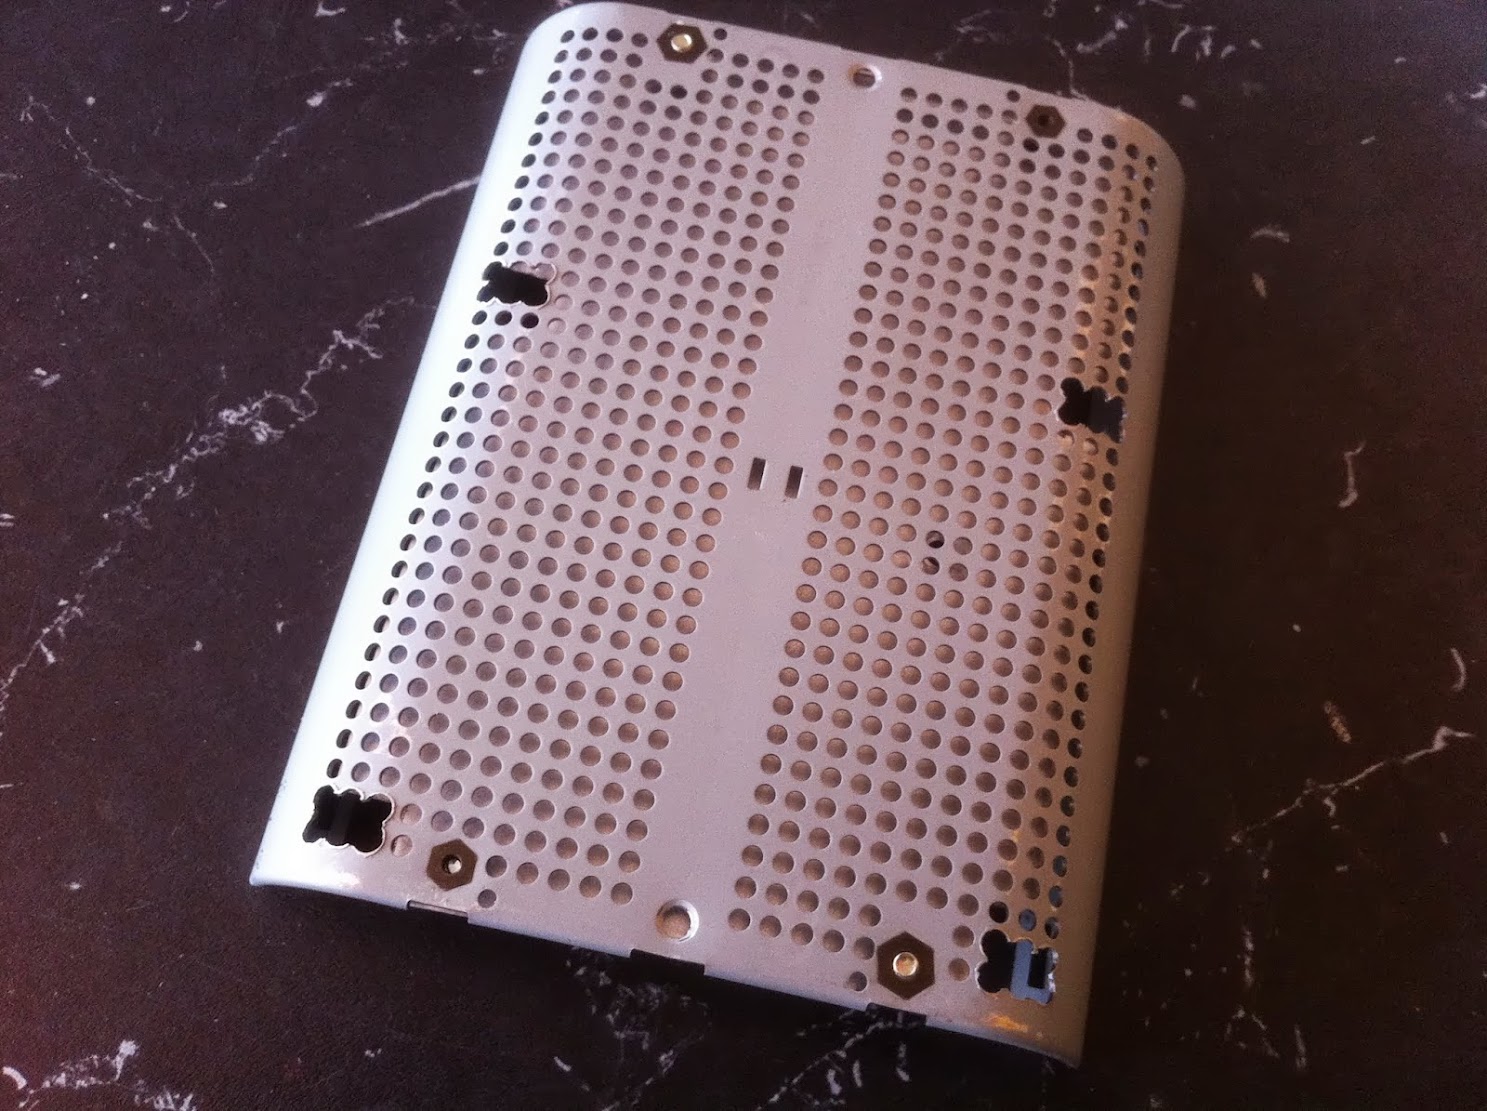
Screwdriver Access Holes cut into the case floor and inner metal shell, this will allow tightening of the standoff screws in the NUC base.

IMG_3770.JPG


IMG_3771.JPG


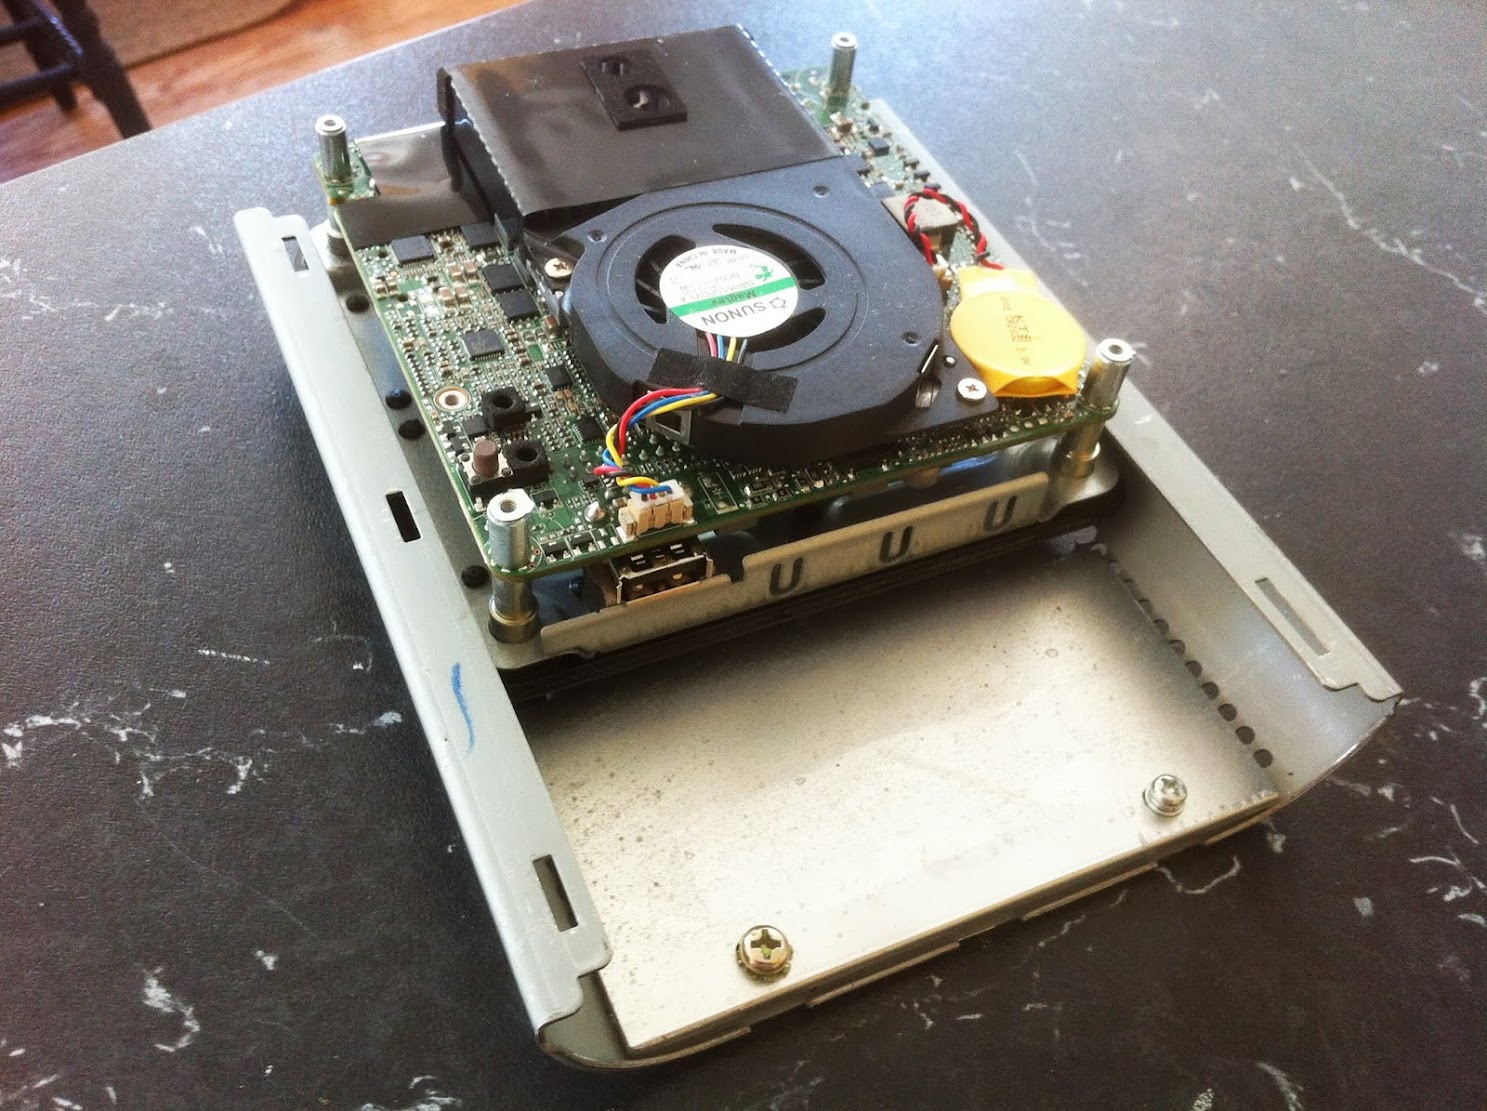
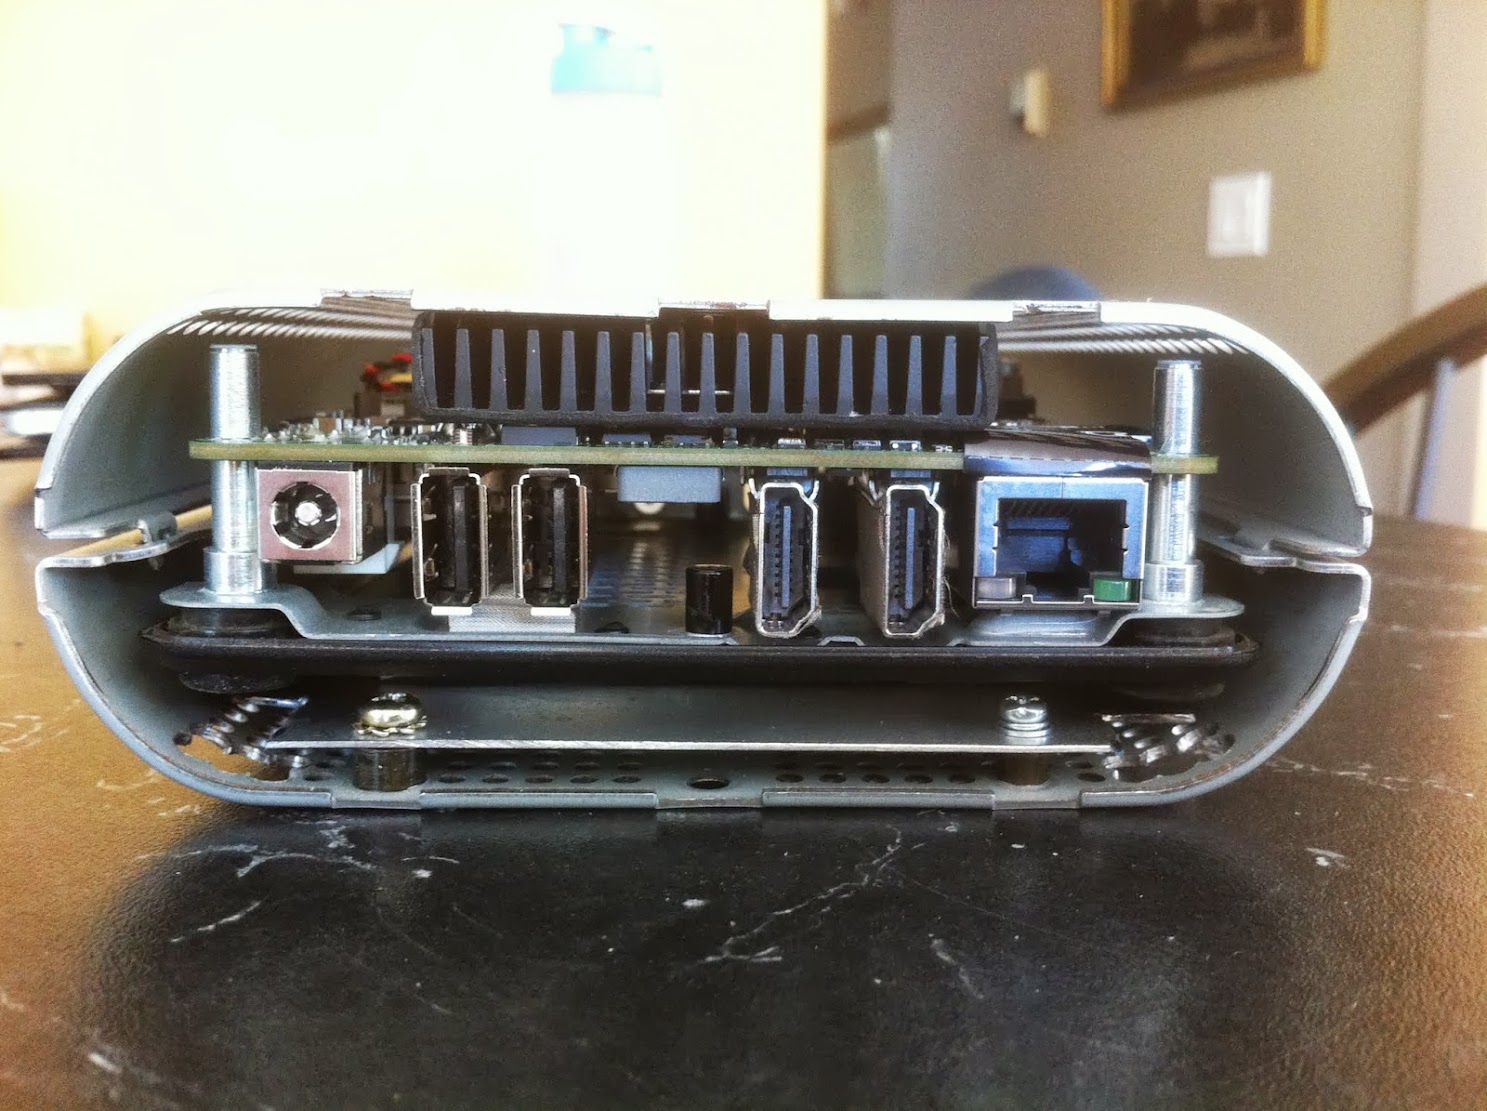
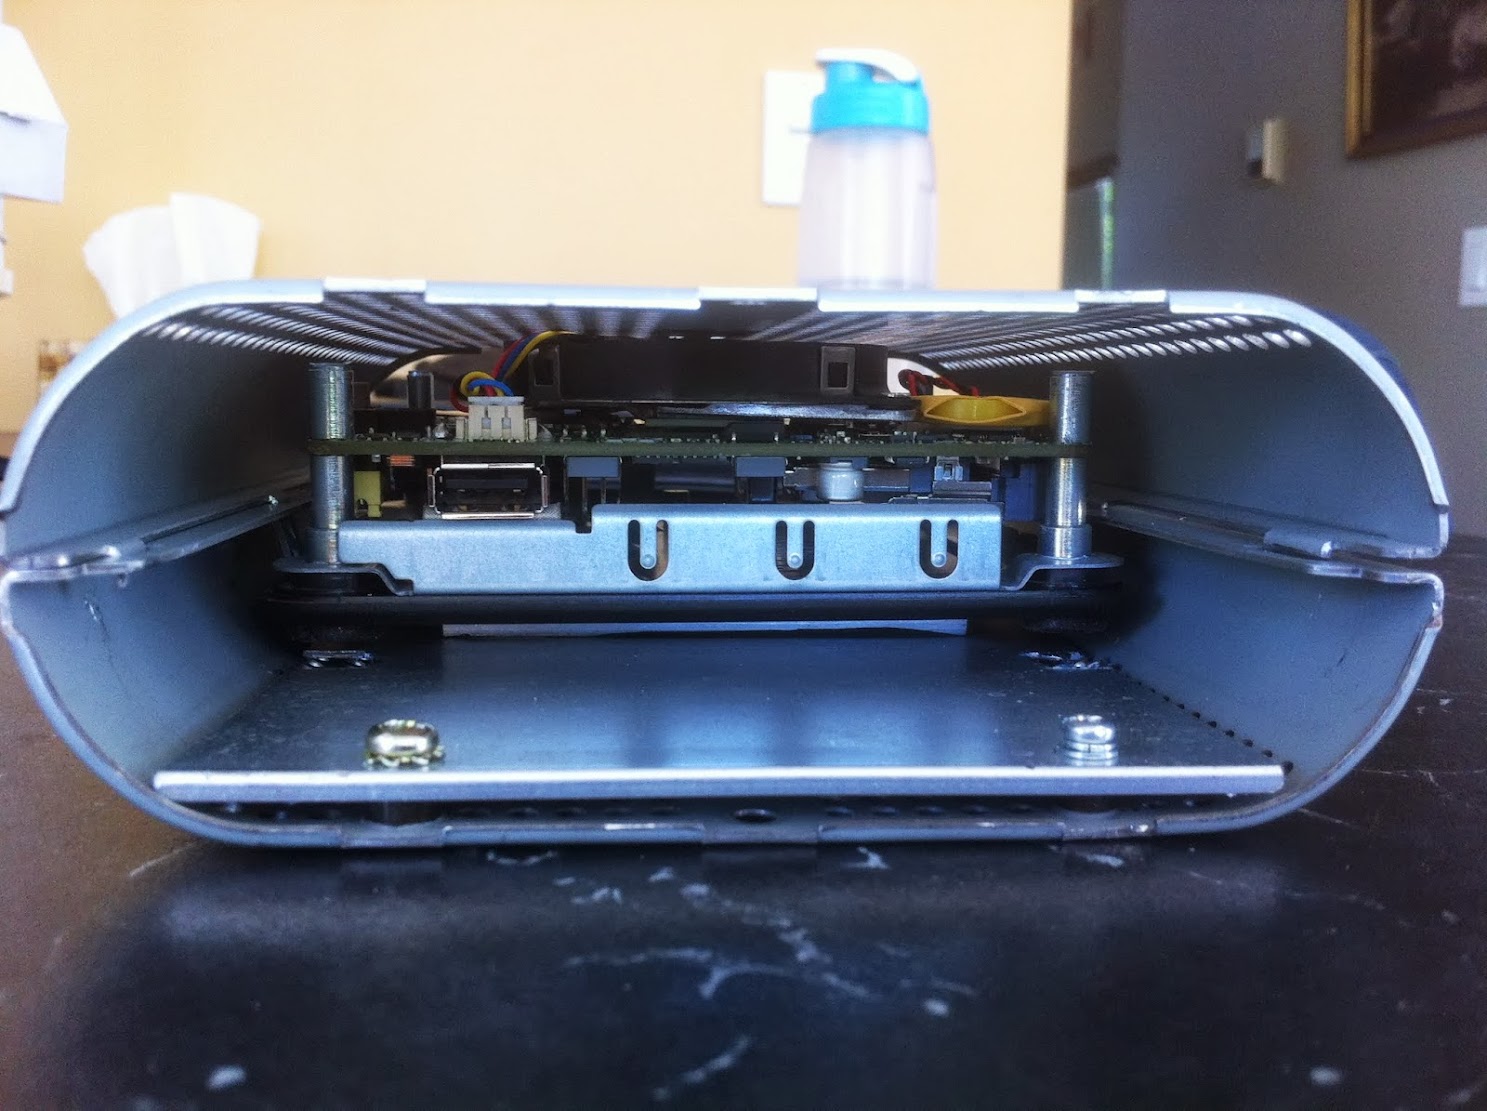
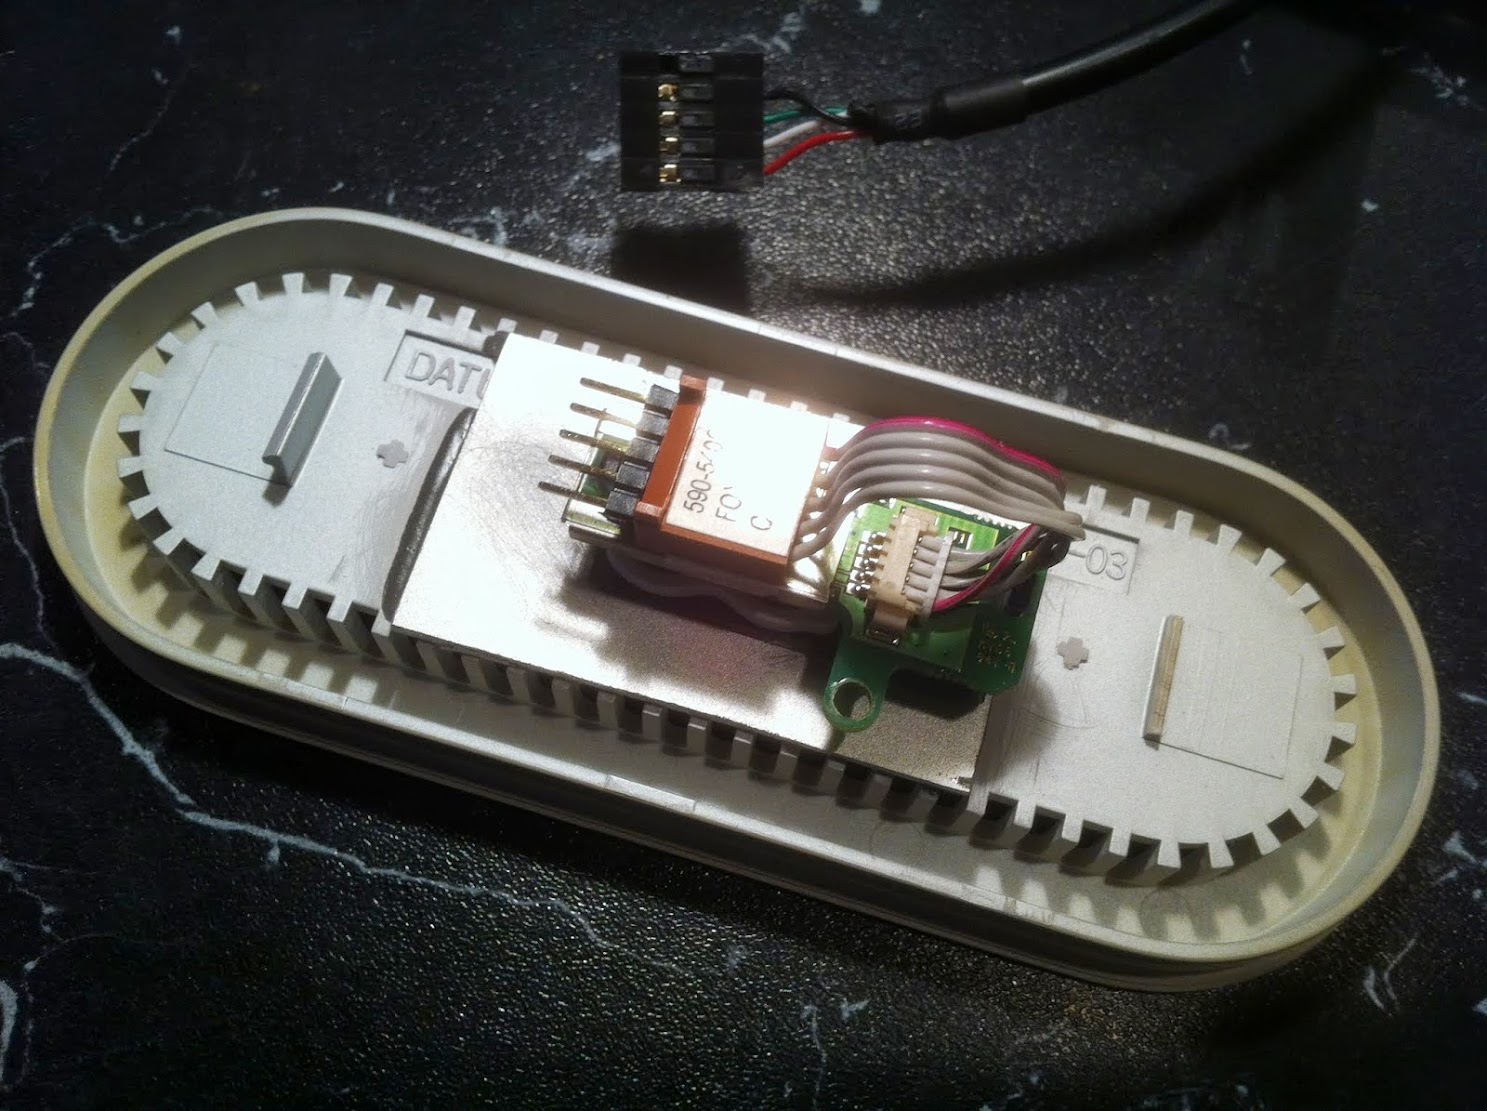
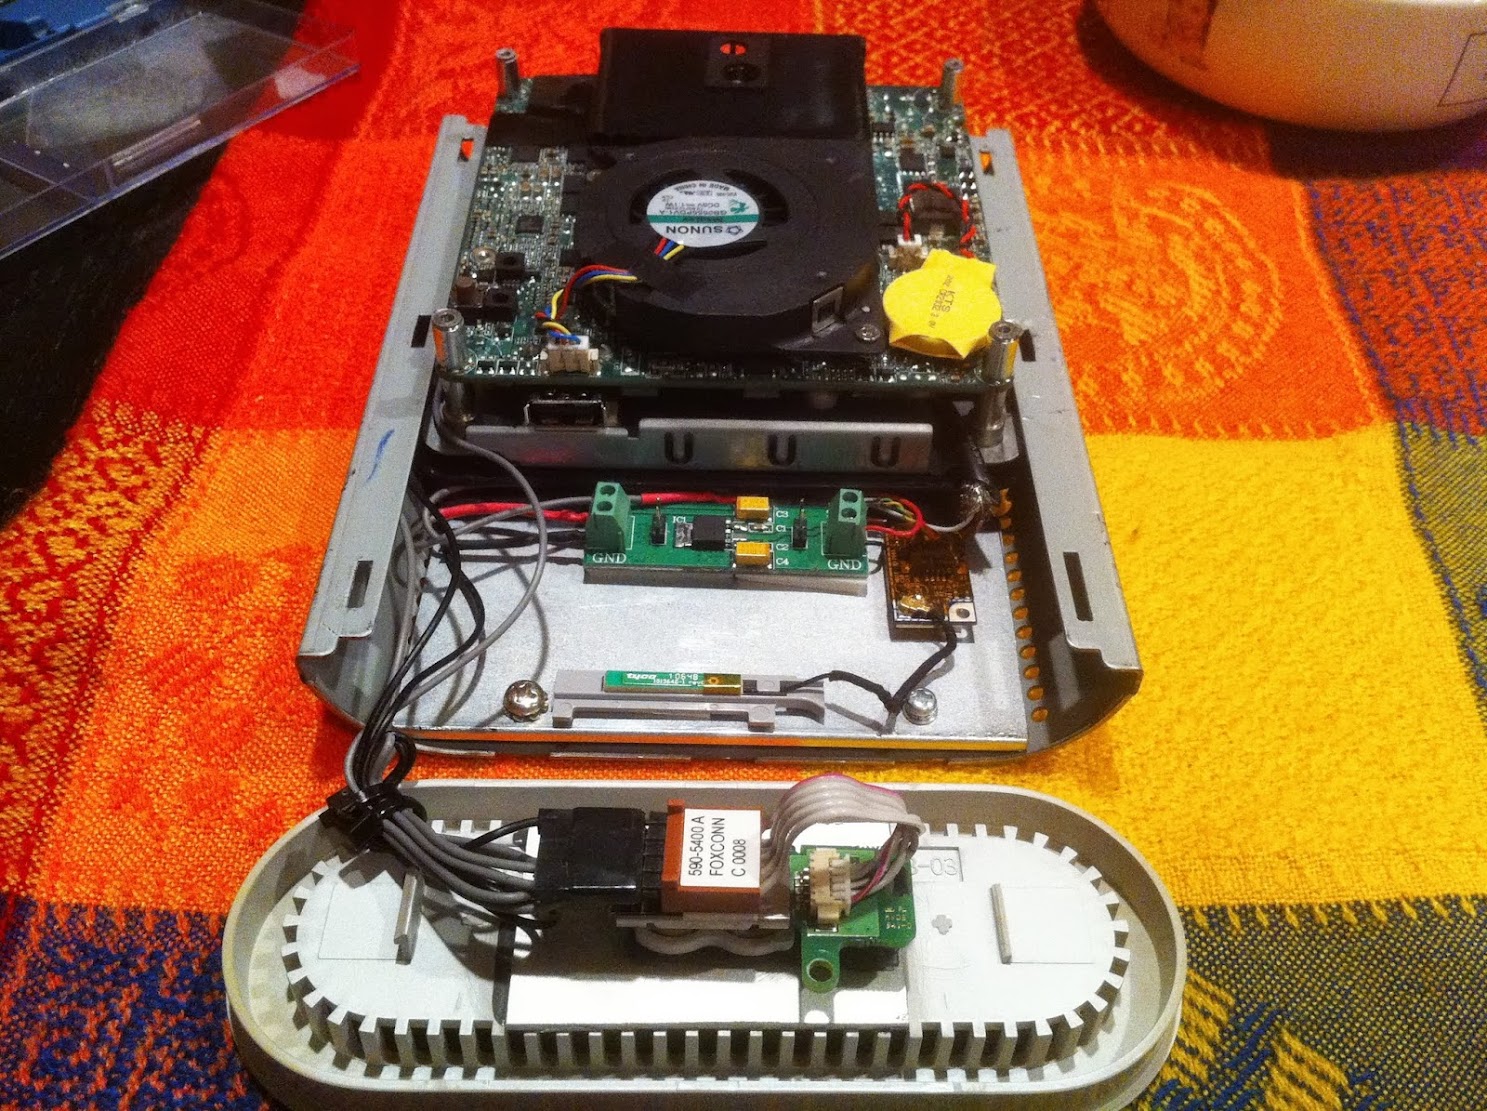
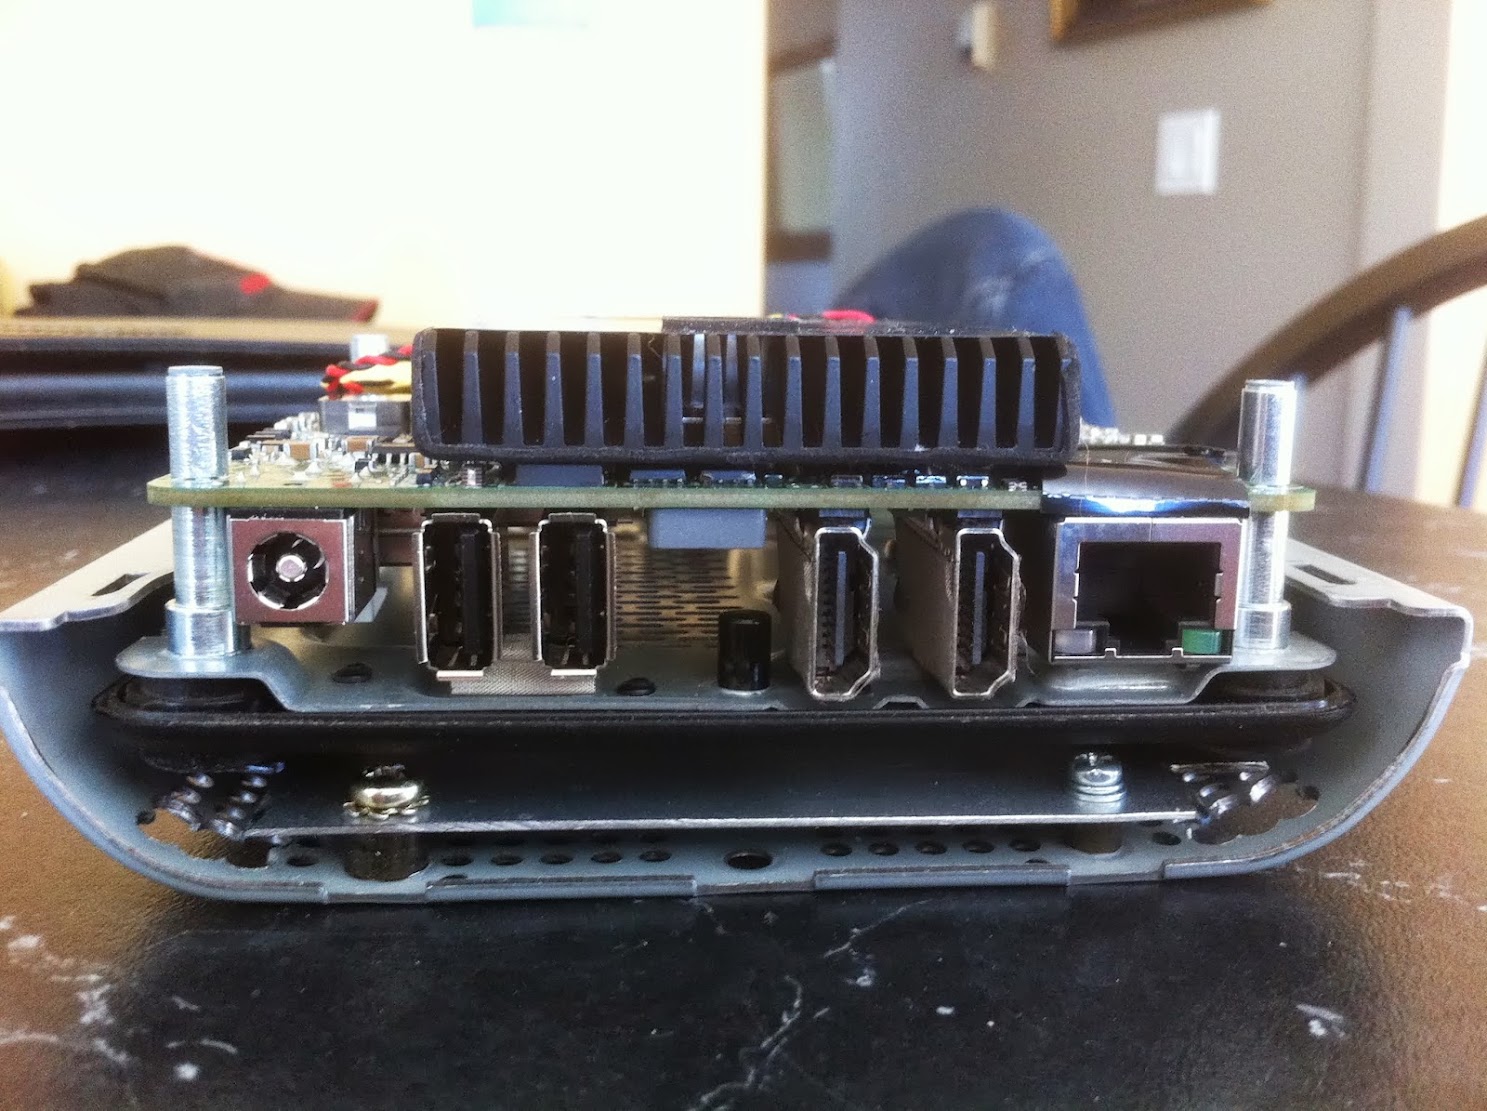
The case floor is now ready for motherboard mounting. The NUC base integrated standoff screws are accessible from below through the holes cut in the previous photos. Each of the four screws is secured at the top by the original threaded standoffs from the NUC case. These were removed from the NUC case by gently wiggling each one with a pair of pliers until it broke free. Two of the original threaded standoffs can be seen secured to the motherboard directly beside the heatsink in the photo below. Note the screwdriver access holes from underneath to allow tightening down the motherboard.

IMG_3777.JPG


Ersterhernd
 
Here is a reverse-angle view of the motherboard mounted securely to the aluminum case floor. The four original NUC case threaded standoffs are used to hold the motherboard firmly in place. It is completely solid and un-moveable.


IMG_3778.JPG


Ersterhernd
 
Build Log 3 - Fitment into Exterior Shell


The careful measurements taken at the beginning of the project paid off. When fitted into the exterior shell, the NUC motherboard I/O lines up perfectly at the vertical midpoint of the case, for a cleanly-centered final presentation. The NUC fan & heatsink are actually touching the top of the inner metal casing.


Inner Metal Casing Only

IMG_3779.JPG


Inner Metal Casing Reverse Angle

IMG_3780.JPG


Inner Metal Casing and Exterior Shell

IMG_3782.JPG


Ersterhernd
 
Build Log 3 - Rear NUC I/O


This was a tedious task. Plastic cracks very easily and the shell could be easily destroyed in this step. Using a fine-toothed hacksaw blade, a fine file and a ton of patience, I set to work to carve out a rectangular hole to access the NUC I/O. Fortunately the plastic end-cap survived the ordeal and didn't break. The recessed air-duct design provides excellent unrestricted airflow for the NUC cooler at the top of the case. The end cap fits firmly up against the NUC I/O when seated, and is held firmly in place by it's friction-fit design.


Rear NUC I/O access cut-out

IMG_3785.JPG


Full-length view

IMG_3786.JPG


With original I/O shield plate cut out from the Intel NUC Case, then painted semi-gloss black

IMG_3805.JPG


IMG_3806.JPG


Ersterhernd
 
Build Log 5 - Front Power Switch


I spent considerable time deciding on an aesthetically pleasing presentation for the front of this build. I decided to utilize an original G4 Cube NMI Switch (power and reset) to fit into what was originally the power-cord connection hole on the Cube PSU. I had planned on having both power and reset functionality, just as is in all 3 of the Cube projects I've done with this exact part. In this build I was sorely disappointed to find out that the for whatever reason, only one of the buttons will work. After much effort, I had to resign to a power button only, using the right side button of the NMI Switch. I have NO IDEA why the left button wouldn't function on this NUC motherboard front panel header. At the end of it all, I have the look I wanted and the ability to turn the machine on/off and sleep it from the front, which is fine for me.

EDIT : The Front Power Switch is now fully functional. See this link for details.


The G4 Cube NMI Switch secured to the backside of the PSU End Cap. I added the 5-pin male/male connector myself.

IMG_3796.JPG


The front presentation. These two holes are drilled into an aluminum plate JB Welded into position. I spray-painted a metallic silver finish to add a touch of class to the front face of the build. Besides, my wife liked the color!

IMG_3787.JPG


IMG_3788.JPG


IMG_3793.JPG


Completely wired in with full power and reset functionality. Also visible is the installed Apple A1181 Bluetooth Module and Antenna, plus a 5V to 3.3V reducer to supply the BT module with 3.3 Volts. The BT antenna just barely clears the NMI Switch when the PSU end cap is inserted into position in the shell.

IMG_3797.JPG


Ersterhernd
 
Build Log 6 - A1181 Bluetooth


A fairly straight forward BT install. The module connects to the internal USB header on the underside of the NUC motherboard. The 5V to 3.3V reducer takes care of supplying the BT Module with the 3.3 Volts. The antenna placement was chosen to provide minimal signal interference from the metal inner case. It sits directly behind the plastic end-cap at the front of the computer. Signal strength is excellent.


IMG_3795.JPG


Ersterhernd
 
Build Log 7 - Internal WiFi Antenna


The original Intel NUC Case contained a wired-in antenna for Wifi, with two connectors for mini pci-e card. I extracted the wires and antenna ends out of the original case and placed them neatly into the remaining available space on the Cube PSU case floor. As is the case with the other components, each is adhered to the case floor with 3M sticky pads.

The Wifi antenna wires are black and grey. Each has it's own end bracket. I have not tested this setup yet, as my Wifi Card is still in transit from eBay. EDIT : Wifi is now installed and connectivity using the NUC Antennas is excellent. 2.0 to 3.1 MB/sec across the network.


IMG_3801.JPG


The silver USB stick is going to remain inside the Cube PSU build for extra storage if needed. The USB port is sitting there, I figured why not use it? :think:


Ersterhernd
 
Very nice build and great write up.

I had wondered if the NUC would fit inside the metal inner shell and hadn't realised just how small the board really is!

Would this still work with the top half of the metal case omitted? Just thinking that if that was taken off and if it were possible to still securely have the end caps in place then airflow would probably be much improved. Interested to see how the temps go.

Do you mind me asking what your thoughts are for using this build? Or will it go into an ever growing collection to rival that of Neilhart?
 
Build Log 8 - Final Presentation


The final presentation of the build. It features:

1. Apple G4 Cube PSU Case
2. Apple 20" Cinema Display
3. Apple G4 Cube Pro Speakers
4. Apple Wireless Keyboard
5. Apple Magic Trackpad
6. Completely Silent Operation
7. 60-70 Degree Operating Temperature Range


System Presentation

IMG_3809.JPG


Lights on NUC motherboard seen from top of case

IMG_3813.JPG


GeekBench 2 - 64 Bit

screenshot02w.jpg


I hope you've enjoyed this project presentation. I'm calling it a complete success!


Regards,

Ersterhernd
 
Very nice build and great write up.

I had wondered if the NUC would fit inside the metal inner shell and hadn't realised just how small the board really is!

Would this still work with the top half of the metal case omitted? Just thinking that if that was taken off and if it were possible to still securely have the end caps in place then airflow would probably be much improved. Interested to see how the temps go.

Do you mind me asking what your thoughts are for using this build? Or will it go into an ever growing collection to rival that of Neilhart?


Thanks Minihack. The NUC is VERY tiny. You really don't realize it until it's in your hand. The top and bottom halves of the metal case clasp together firmly before re-insertion into the plastic outer. There are little plastic one-way clips in the plastic shell that snap into place into both the top and bottom of the metal casing. This prevents any end-to-end movement and is really required for the system to be solidly re-assembled. I can literally shake this thing and NOTHING moves. Very well thought out by Apple, I have to admit.

Using this build??? LOL, I should've asked YOU that. It was your idea! :lol:

I'd be interested to see what kind of masterpiece you could create with your skills and equipment. This only took a few days and was a lot of fun. Not hugely expensive either, and OSX installed in a snap.

These NUC's definitely run hotter. Flash the BIOS from 0032 to 0036 and it takes the temps to a consistent 60C at idle, 75-80 under load. With the stock BIOS (0032) it was about 10C higher yet. Yikes.

This system plays 1080p fullscreen video beautifully, and is DEAD SILENT, NO NOISE WHATSOEVER. I love that. :thumbup:


Will test it more in the coming days, but for now I'm totally satisfied with taking this on.


Cheers!

Ersterhernd
 
Status
Not open for further replies.
Back
Top