
- Joined
- Nov 25, 2010
- Messages
- 1,211
- Motherboard
- AsRock X570M Pro4
- CPU
- Ryzen 3700x
- Graphics
- RX 580
Build Log 11 - Intel NUC D54250WYK Installation
No matter which model of iMac G5 is used (I've completed three), they all face one common limitation... there is VERY LIMITED depth to work with. This A1076 model was no exception, in fact it was the shallowest yet of the models I've worked with.
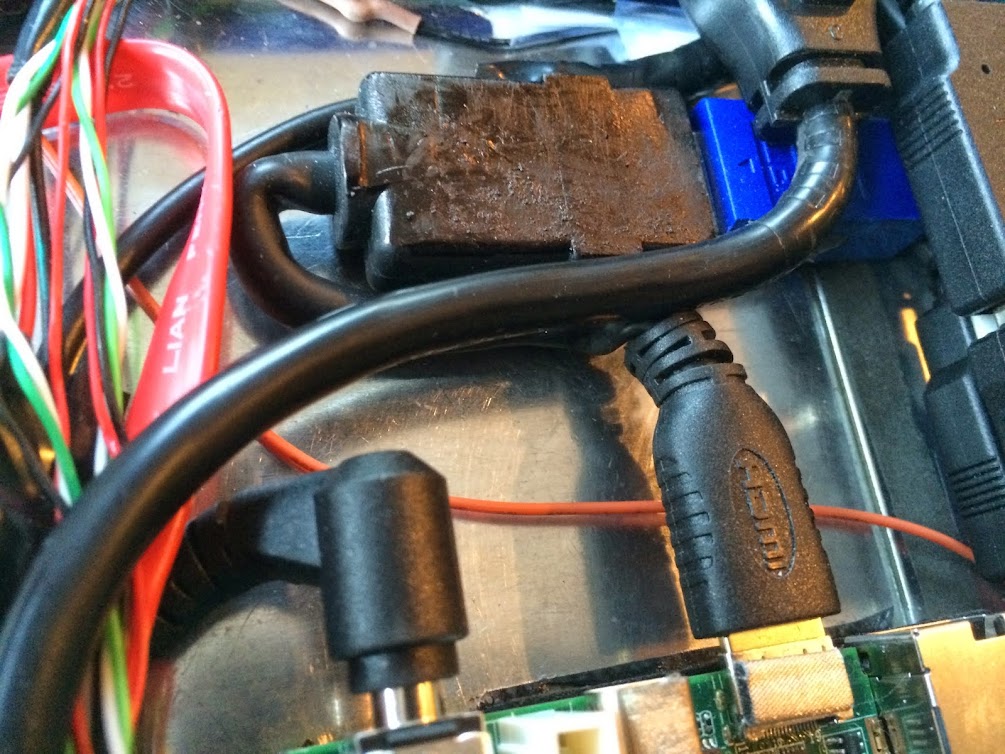
Throughout the build it is absolutely essential to continuously test the fitment of the shell. Its kind of like piecing together a jigsaw puzzle to see where each piece could potentially fit. As each component is added, it must fit within the depth available or else the iMac will not close up properly. The Intel NUC D54250WYK is the thinnest NUC produced to date. It has a clearance slightly less than its i3 predecessors, primarily due to the change to a horizontally mounted mini-HDMI port as opposed to the vertically situated full HDMI port in the i3 versions of the NUC. This was paramount in the fitment of the NUC, I'm really not certain that the i3 would've worked in this build at all due to HDMI height.
Nonetheless, I successfully tested the D54250WYK's HD5000 graphics with this 20" iMac LCD, so the new i5 Haswell version was a go. It had to be fit somewhere inside, yet leave enough room for everything else to fit as well.
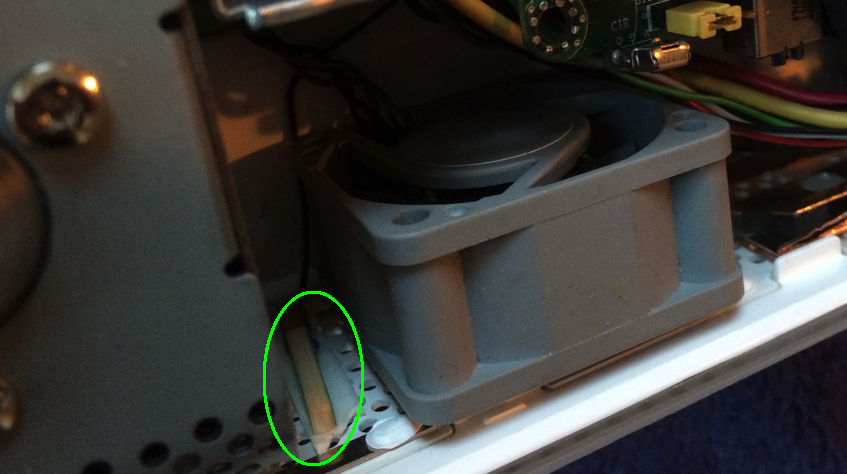
I first decided that the original iMac bottom fan housing had to go. All that I needed was the 40mm fan and not all the rest of the bulky plastic which performed essentially no function and took up critical space that I needed for other components. I removed the fan and chucked the rest. As it worked out, the fan housing location would be re-purposed as part of the new Intel NUC location in the iMac.
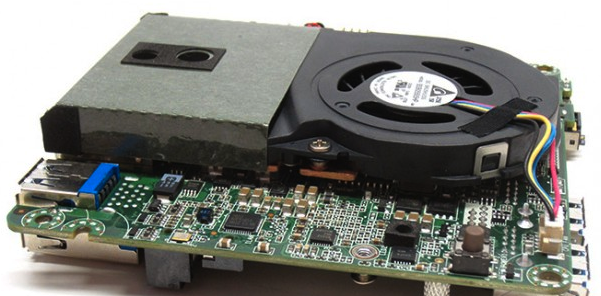
The Intel NUC has a top mounted cooling unit which is comprised of a heatsink and fan. This solution is compact and effective in keeping the NUC operating temps in check. The cooling unit protrudes upward from the NUC motherboard by about 1/2 of an inch.
NUC cooling fan and heatsink
I tested the NUC placement inside the iMac in several different locations, all of which were problematic when test-fitting the iMac rear cover over top to close the computer. The midplane of the iMac, a piece of metal that fits between the computer and the LCD, stole precious millimeters of space that were needed to fit the NUC inside.
Here was my solution. I decided to cut away a piece of the iMac midplane in the exact size and shape of the NUC cooling fan, and seat the NUC in the cut-out. This was potentially a bitter-sweet solution because on the plus side it bought me back the much needed millimeters of depth by removing the midplane, but in doing so placed the NUC heatsink directly up against the LCD backlights, a considerable source of heat. Would the NUC operate cool enough with its heatsink seated against the LCD backlight? I wasn't sure, but took a chance and started cutting.
View of the iMac midplane metal cut-out to seat the NUC heatsink and fan deeper than before.
It was very tough metal to cut with the dremel.

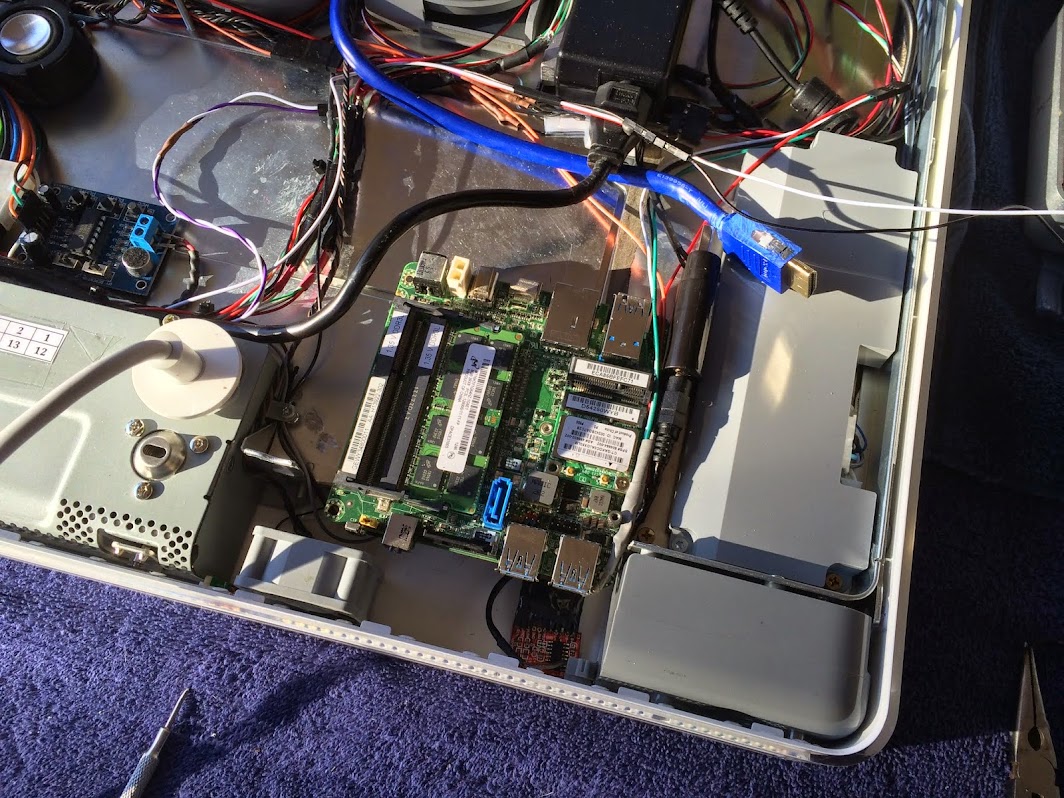
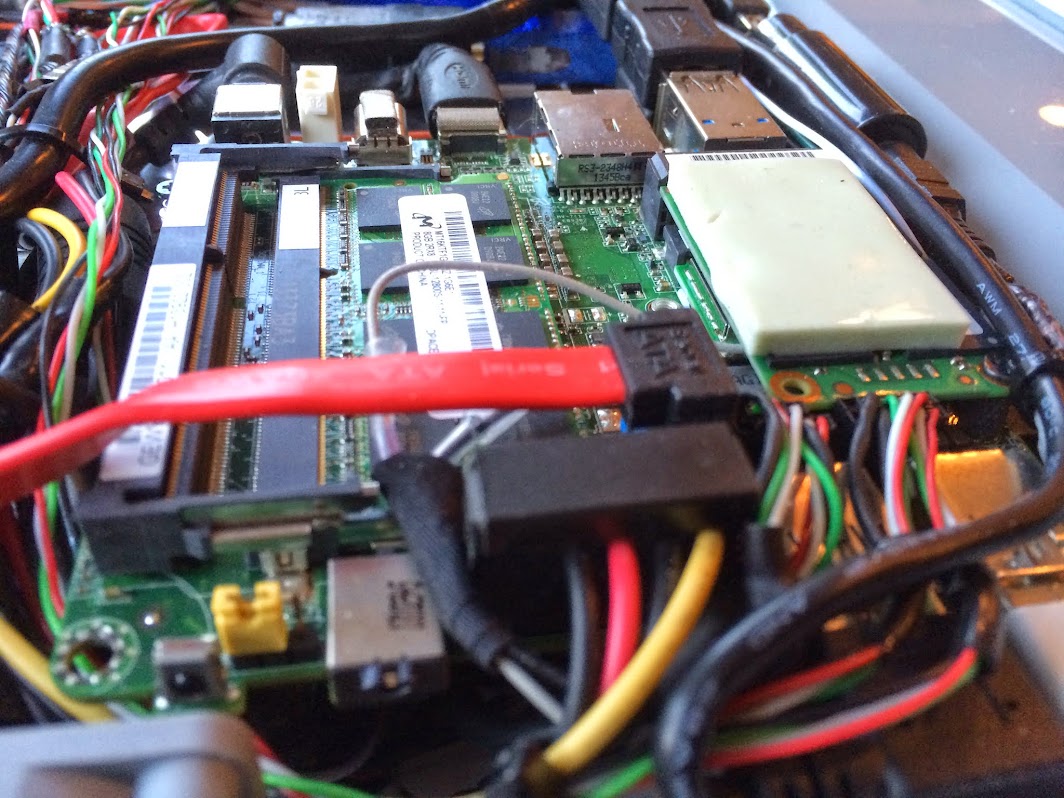
The test fitment of the D54250WYK in its new home worked out great. The cutout allowed the NUC to seat deep enough into the interior to allow the iMac rear cover to fit back on securely.
Successful test-fitment of the NUC D54250WYK
The NUC heatsink and fan are seated recessed into the midplane, up against the LCD behind it.
The next challenge was the question of how to secure the NUC. Two-sided sticky tape was an option, but not a great one. I wanted a solution that was secure yet would leave the NUC easily removable without having to apply any stress or prying force to the delicate unit. Additionally, the NUC had to be protected from potential shorting against the metal iMac midplane when the rear case cover was reinstalled.
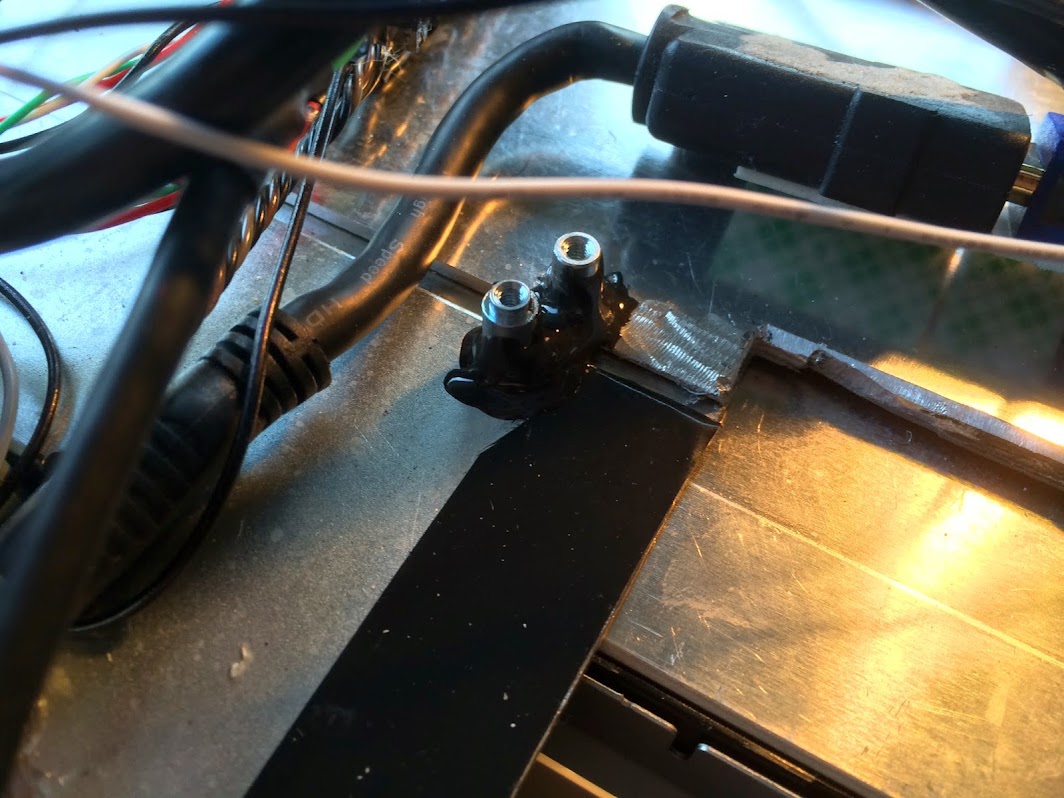
I chose to use the actual threaded standoffs from the NUC case itself. I removed three of them from NUC case and carefully positioned them (attached to the NUC with the stock screws) onto the metal iMac midplane with JB Kwik Weld. It took a few minutes for the Weld to set, and I had a permant solution I was looking for.
JB Welded Intel NUC standoffs
(Note the black electrical taped areas of the iMac midplane to protect the NUC from shorts)

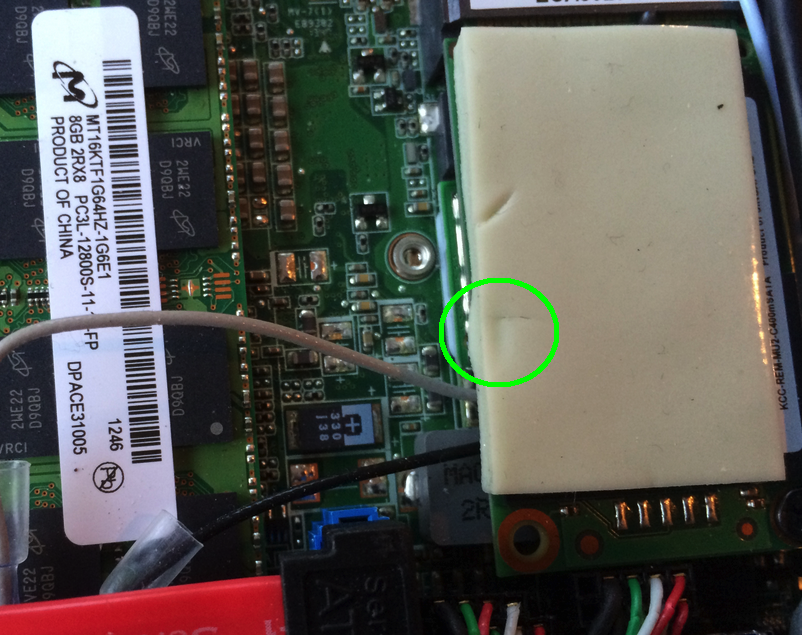
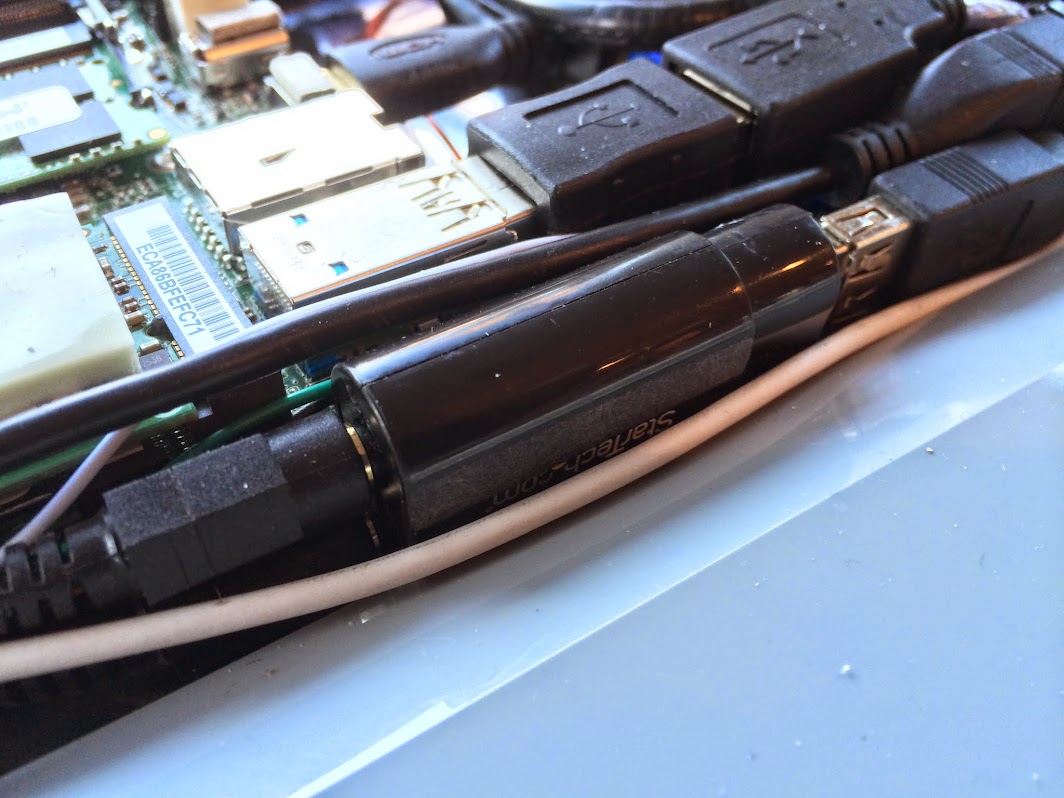
The final NUC fitment is so tight that one of the protruding furls of the rear case cover actually presses within one millimeter of the mSATA SSD in the NUC. I installed the protective heat pad (included with the NUC) and it can be clearly seen where the rear case cover has left an impression in the soft thermal pad.
Its VERY TIGHT in there. Great care needs to be taken to avoid electrical shorts.
The offending furl on the iMac rear cover

The impression left on the mSATA SSD from contact with the furl
The final result is a NUC securely installed with three of its original screws. It doesn't move at all and can be easily removed from the iMac if necessary. Also, the prior concerns I had about heat transfer from the iMac LCD backlights to the NUC heatsink have proved to be a non-issue. The system operates very cool.
Ersterhernd
No matter which model of iMac G5 is used (I've completed three), they all face one common limitation... there is VERY LIMITED depth to work with. This A1076 model was no exception, in fact it was the shallowest yet of the models I've worked with.
Throughout the build it is absolutely essential to continuously test the fitment of the shell. Its kind of like piecing together a jigsaw puzzle to see where each piece could potentially fit. As each component is added, it must fit within the depth available or else the iMac will not close up properly. The Intel NUC D54250WYK is the thinnest NUC produced to date. It has a clearance slightly less than its i3 predecessors, primarily due to the change to a horizontally mounted mini-HDMI port as opposed to the vertically situated full HDMI port in the i3 versions of the NUC. This was paramount in the fitment of the NUC, I'm really not certain that the i3 would've worked in this build at all due to HDMI height.
Nonetheless, I successfully tested the D54250WYK's HD5000 graphics with this 20" iMac LCD, so the new i5 Haswell version was a go. It had to be fit somewhere inside, yet leave enough room for everything else to fit as well.
I first decided that the original iMac bottom fan housing had to go. All that I needed was the 40mm fan and not all the rest of the bulky plastic which performed essentially no function and took up critical space that I needed for other components. I removed the fan and chucked the rest. As it worked out, the fan housing location would be re-purposed as part of the new Intel NUC location in the iMac.
The Intel NUC has a top mounted cooling unit which is comprised of a heatsink and fan. This solution is compact and effective in keeping the NUC operating temps in check. The cooling unit protrudes upward from the NUC motherboard by about 1/2 of an inch.
NUC cooling fan and heatsink
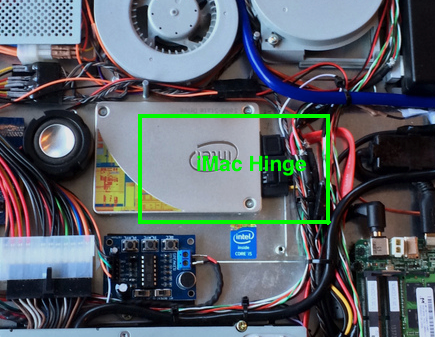
I tested the NUC placement inside the iMac in several different locations, all of which were problematic when test-fitting the iMac rear cover over top to close the computer. The midplane of the iMac, a piece of metal that fits between the computer and the LCD, stole precious millimeters of space that were needed to fit the NUC inside.
Here was my solution. I decided to cut away a piece of the iMac midplane in the exact size and shape of the NUC cooling fan, and seat the NUC in the cut-out. This was potentially a bitter-sweet solution because on the plus side it bought me back the much needed millimeters of depth by removing the midplane, but in doing so placed the NUC heatsink directly up against the LCD backlights, a considerable source of heat. Would the NUC operate cool enough with its heatsink seated against the LCD backlight? I wasn't sure, but took a chance and started cutting.
View of the iMac midplane metal cut-out to seat the NUC heatsink and fan deeper than before.
It was very tough metal to cut with the dremel.
The test fitment of the D54250WYK in its new home worked out great. The cutout allowed the NUC to seat deep enough into the interior to allow the iMac rear cover to fit back on securely.
Successful test-fitment of the NUC D54250WYK
The NUC heatsink and fan are seated recessed into the midplane, up against the LCD behind it.
The next challenge was the question of how to secure the NUC. Two-sided sticky tape was an option, but not a great one. I wanted a solution that was secure yet would leave the NUC easily removable without having to apply any stress or prying force to the delicate unit. Additionally, the NUC had to be protected from potential shorting against the metal iMac midplane when the rear case cover was reinstalled.
I chose to use the actual threaded standoffs from the NUC case itself. I removed three of them from NUC case and carefully positioned them (attached to the NUC with the stock screws) onto the metal iMac midplane with JB Kwik Weld. It took a few minutes for the Weld to set, and I had a permant solution I was looking for.
JB Welded Intel NUC standoffs
(Note the black electrical taped areas of the iMac midplane to protect the NUC from shorts)
The final NUC fitment is so tight that one of the protruding furls of the rear case cover actually presses within one millimeter of the mSATA SSD in the NUC. I installed the protective heat pad (included with the NUC) and it can be clearly seen where the rear case cover has left an impression in the soft thermal pad.
Its VERY TIGHT in there. Great care needs to be taken to avoid electrical shorts.
The offending furl on the iMac rear cover
The impression left on the mSATA SSD from contact with the furl
The final result is a NUC securely installed with three of its original screws. It doesn't move at all and can be easily removed from the iMac if necessary. Also, the prior concerns I had about heat transfer from the iMac LCD backlights to the NUC heatsink have proved to be a non-issue. The system operates very cool.
Ersterhernd


")