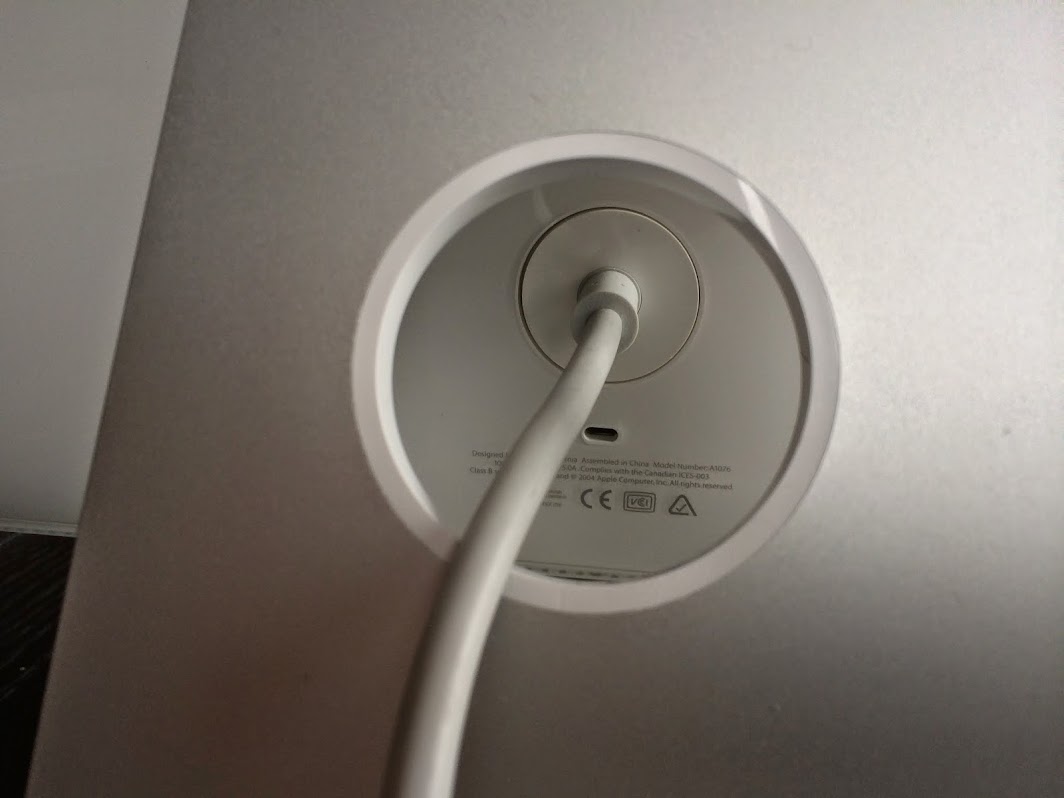
the only thing I would personally add is the ethernet on the rear IO.
Thanks for your comments, Kiwi and welcome back. I'll mix my replies into your text.
I agree about the ethernet. The cable is ordered from China, I'll be getting it soon I hope. That said, the WiFi in this system is absolutely stellar using Apple antennas from a 24" iMac. I'm maxxing out my router speeds on local network transfers.
The placement of the NUC (lower) and the cutting of the mid frame does have another advantage in that the CPU intake fan is more open and closer to fresh air in the bottom of the case. My concern against this is cutting the mid frame, reducing its strength, it is already quite thin and flexible (in parts), and also provides rigidity to the main plastic outer case.
The operating temps of this system are the lowest in my entire collection. I'm certain that the fresh air supply is a major contributor to that. The rear vent up top expels cool air, barely warm. The midframe cutting didn't compromise the structural integrity at all. I actually checked it after cutting. Very solid.
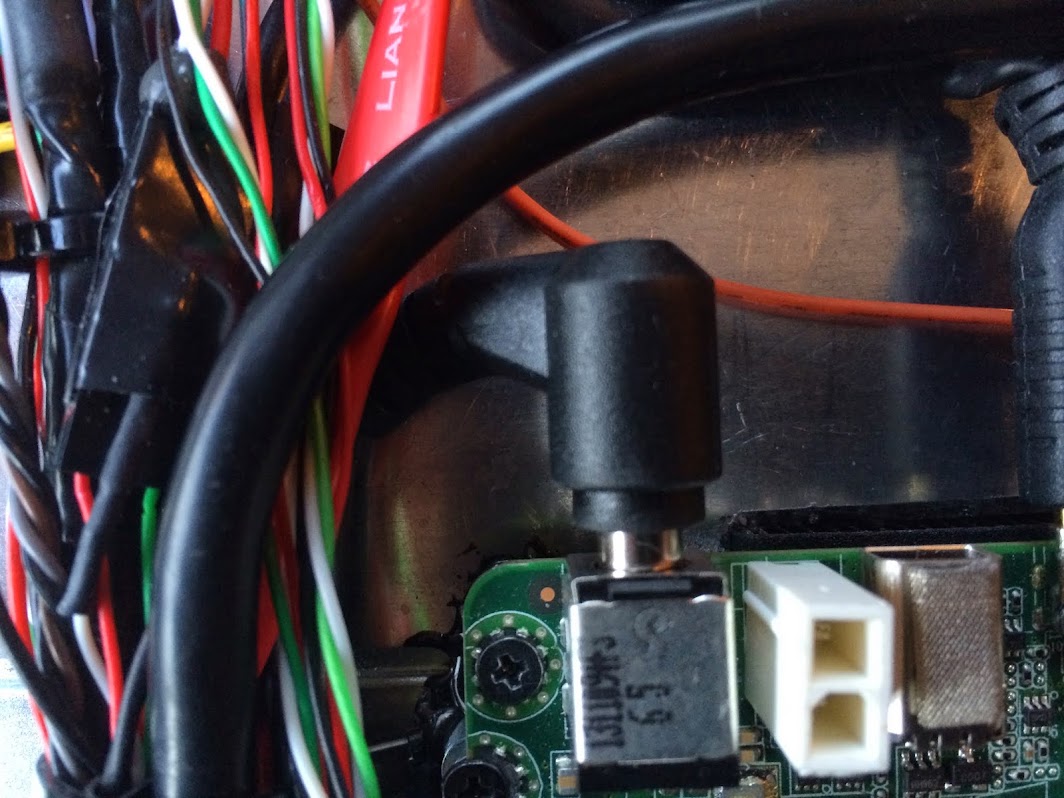
In my build I had to actually remove a couple of the “furls” you mention in you writeup, one came into contact with the NUC, and one in contact with the SMC unit. To anyone following this build, this is an option but I wouldn’t recommend removing to many of them.
Fortunately with the recessed mounting of the NUC, I didn't have to carve away the furls at all. It was damned close though, yikes.
One suggestion (to anyone following) for improvement would be to remove the second connector of the “Startech 8 inch ATX Cable”, and splice directly to the free cable ends, it removes some of the bulk, and allows the individual cables to be more directly routed.
Perhaps, yes. I liked the portability of this method though and less soldering. The DVD cover kind of hid it all anyway for better aesthetics.
The Startech ICUSBAUDIOB solution looks good, I have had issues with noise coming from the onboard NUC audio, so might consider this upgrade.
Noise? I had an issue with a 'humming' noise continuously emitting from one of my previous G5 builds. Placing a 56 Ohm resistor into the ground wire between the 5V amp and the PSU GND fixed it. In this build the sound is absolutely flawless. That said, the iSight models of iMac sport better sounding speakers than the A1076 does.
Q1. You cut an access port in the mid frame for the LCD TMDS cable. Why did you do this rather than route via the original cable path
I fiddled with this quite a bit. I wanted the HDMI cable glued to something for zero movement, so I chose the right side fan. Taking great care with the fragile TMDS wires, this solution yielded the best possible routing with the least potential for stress and damage. I can actually disconnect the video cable from the LCD without lifting the midplane, using a tiny screwdriver and a flashlight.
Q2. Interesting you implemented the ISD chime, how do you find the quality? My quality was so bad I just gave up, but have now ordered a different module, maybe the MIC quality was the issue.
Its not the stereo quality of the original iMac speakers, not by a long shot. I'm actually working on a revised solution (waiting for parts) that will implement a 44Khz wav file of the chime stored on a 2GB Sandisk card. Will post the results if or when I get it working. The iMac G4 internal speaker that I used is actually pretty good quality, its the ISD1820 recorder that is less than perfect due to its over-the-air recorder. Stay tuned...
Q3. Since you are the only modder to convert both iSight and non-iSight models of iMac, which would you recommend (and why) to builders, to achieve the best overall outcome?
They're both excellent mod candidates, in either 17 or 20 inch size. I'm hopefully going to be refitting my 20" iSight to use the original PSU and DC-DC Inverter. See my
recent post about some interesting info I've discovered to accomplish that. If successful, the 20" iSight mod should actually be an easier one to accomplish than the 20" non-iSight, due to the re-use of the stock PSU and Inverter.
The non-iSight gives a sizeable advantage with the rear I/O because of the plastic housing. The iSight version really offers no option to re-use the ethernet, unless someone can figure out the wiring of the existing port. Both you and I had no luck with that, so far.
The iSight (believe it or not) is actually a little deeper than the non-iSight. Space is still tight, but depth is not as critical.
For a comparison of difficulty, I'll reserve comment until I can accomplish the re-use of the PSU/Inverter in the iSight model. That will level the playing field between the two versions of iMac G5.
A critical part of the non-iSight build (as you know) is the soldered HDMI/TMDS connection. Use of the Haswell NUC depends on this, and I'm not certain any other NUC would even fit in the non-iSight due to its limited depth. The iSight version is not so critical, an HDMI to DVI to TMDS solution was used with an i3 NUC in both of my previous iSight builds. This is VERY important in the decision of which iMac to use.
Neither is an easy mod, but both are equally rewarding. Mine were not near as technically advanced as yours, due to the lack of SMC board, but even at that I'd say the iMac mods were definitely both around a 9 out of 10 in difficulty, compared to other types of mods accomplished on this forum.
In my opinion is that it is about the challenge of building a modern computer that stays true to the original apple design. Remember the iMac itself hasn’t fundamentally changed changed in the last 10 years when the sunflower was retired, and potentially this sort of an upgrade could give 5-10 years more life to the computer. I guess its similar to people restoring classic cars.
My sentiments exactly. Well said.
Cheers!
Ersterhernd