Contribute
Register

[Success] b1's "Mac Mini Killer" with macOS Mojave: i7-8700 | Gigabyte Z370N | RX560 | 16GB RAM

From my measurements the back panel USB 3.1 gen 1 sockets normally supply max 0.45A @ 4.9V whereby the same phone was able to drain 1.5A @ 4.9V from other sources. This setting has no effect on a Z370N WIFI Hackintosh due to hardware limitations...

This is what I found in the manual (Z370N); Gigabyte App Center Windows BIOS utility

GIGABYTE USB DAC-UP 2 allows you to increase the output voltage of the USB 3.1 Gen 1 ports on the front or back panel to strengthen the stability of your USB device(s).

• Normal: Keeps the original output voltage.
• Disable USB bus power: Disables the power of the USB connectors. High-end audio players may connect their own external USB power source.
• Voltage Compensation +0.1V: Adds 0.1V to the original output voltage.
• Voltage Compensation +0.2V: Adds 0.2V to the original output voltage.
• Voltage Compensation +0.3V: Adds 0.3V to the original output voltage.

But nothing about USB output current which supplies the juice for power hungry gadgets...

I got the same result: 0.45A @ 4.9V for iPad Pro.

So this options only removes macOS warnings for me.

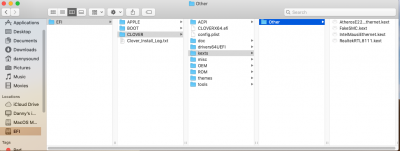
Снимок экрана 2018-11-15 в 3.14.16 ПП.png
 
As you know, I'm using a Vanilla method. All setting are perfectly matched z370n/RX5xx combo. If something will break in the future, I would know what causes a problem and how to fix it.

This method requires some knowledge and understanding how Hackintosh works. If you decided to choice Vanilla method, you can just use my EFI, that is always up to date.

I checked your EssentialsList.zip. Looks like you don't have proper Power Managment (CPU Turbo Boost) and hardware acceleration. Audio (?).

USB-ports works because you applied USB-patch. It will break as soon as next macOS 10.14.x will release.

In Vanilla method you need to install Clover on your main drive, and copy my EFI folder to main drive EFI partition. Then copy kexts from «Kexts for LE» to /L/E.


Hey @b166ar thanks for your input, and believe me, I am way more in favour of your vanilla/minimalistic approach, just want to understand bit more in detail how things work before I just copy your settings and go happy living with a rock-stable Hack.

So I have answers for my first 4 questions

Q1. How can it be that I did not (yet) use the SSDT patch for USB (which seems to be the best soltuon for stability) and still, all USB seems to be working? Answer: due to a kext injected by Multibeast, but it will most likely break upon any new update.

Q2. Since I see the USB Unibeast drive plays a key role in booting the machine properly, but also the Main HD as network drivers are on the HD not on the USB (booting Unibeast initially results in no network) I wonder what gets loaded from USB and what gets loaded from HD so that all works. Answer: parts of it are on Clover in USB stick and parts (Specially network kexts) on the harddrive.

Q3. Could I try to just copy/mimic the EFI from USB to EFI of HD and it should work? Yes, but ... it will not be as clean and stable as using SSDT specifically for this board, so, better stick with your settings.

Q4. I run the Essentials script with the EFI from USB mounted if that would be useful. The file is attached. Any particular comment on what you see there? Answer: your comments on the previous post.


Others ones came so far.

Q5. You mention I do not have proper graphics hardware acceleration, perhaps for not being using Whatervergreen/LILU on the USB Stick, rigth? Can you point me how do I see hardware acceleration is or is not in place, I would like to compare before and after installing Whatevergreen. Do you use any tool to check that?

Q6. As for power management, I can sleep/wake without problems and also upon using energy saver settings. Do you mean there are more advanced power management features that the lack of SSDT and proper kexts are missing on my setup? As for Audio, I will not patch the needed kexts as I use USB audio interface natively supported without any patching.

Again, thank you so much for sharing your setup, your config files, your time and knowledge! :D
 
Last edited:
to boot from the hard drive, you have to copy the efi folder from the usb to the hard drive
Thanks for your reply Petro I already done that still can't boot from hard drive only with the help of the USB . Im attaching my config.plist, kexts folder and hardware perhaps you can help me, thanks
 

Attachments

  • image.png
    image.png
    155.8 KB · Views: 68
  • image.png
    image.png
    69.5 KB · Views: 71
  • image.png
    image.png
    76.3 KB · Views: 81
Q1. How can it be that I did not (yet) use the SSDT patch for USB (which seems to be the best soltuon for stability) and still, all USB seems to be working? Answer: due to a kext injected by Multibeast, but it will most likely break upon any new update.

Q2. Since I see the USB Unibeast drive plays a key role in booting the machine properly, but also the Main HD as network drivers are on the HD not on the USB (booting Unibeast initially results in no network) I wonder what gets loaded from USB and what gets loaded from HD so that all works. Answer: parts of it are on Clover in USB stick and parts (Specially network kexts) on the harddrive.

Q3. Could I try to just copy/mimic the EFI from USB to EFI of HD and it should work? Yes, but ... it will not be as clean and stable as using SSDT specifically for this board, so, better stick with your settings.

Q4. I run the Essentials script with the EFI from USB mounted if that would be useful. The file is attached. Any particular comment on what you see there? Answer: your comments on the previous post.

True!

Q5. You mention I do not have proper graphics hardware acceleration, perhaps for not being using Whatervergreen/LILU on the USB Stick, rigth? Can you point me how do I see hardware acceleration is or is not in place, I would like to compare before and after installing Whatevergreen. Do you use any tool to check that?

I need to stop calling it Hardware Acceleration and call it Intel Quick Sync. This is Intel for video processing (all video editors, watching a video in Quick Time or Safari etc.) To enable QS, you need to inject iGPU (HD630) properly. It is a combo of BIOS and config.plist settings. To check QS, you will need Intel Power Gadget and any video file opened in Quick Time.

Whatervergreen/LILU is needed for external GPU: enabling DP-audio, black screen fix etc. You will not see any performance boost with this kext, but you will avoid common bugs.

Q3. Could I try to just copy/mimic the EFI from USB to EFI of HD and it should work? Yes, but ... it will not be as clean and stable as using SSDT specifically for this board, so, better stick with your settings.

Everything that you need for your hakintosh in this archive — https://d.pr/f/dy65uY
  1. Boot with your USB;
  2. Remove your USB;
  3. Install Clover on your SSD;
  4. Mound SSD's EFI partition with Clover Configurator;
  5. Replace EFI folder with EFI folder from partimers.zip;
  6. Reboot;
  7. Enter BIOS and check «UEFI Your SSD name» as a Primary boot drive;
  8. Reboot to macOS.
  9. Open terminal and apply this pmset settings.
That is all. Now you should have Vanilla hakintosh. Everything should work: QS, Sleep, PM, Lan, WiFi (if you have the same card), Audio etc. Everything.
 
Thanks for your reply Petro I already done that still can't boot from hard drive only with the help of the USB . Im attaching my config.plist, kexts folder and hardware perhaps you can help me, thanks

It is better if you make a new thread for your problem. And attache results of this script. This thread is about z370n and RX5xx.
 

I need to stop calling it Hardware Acceleration and call it Intel Quick Sync. This is Intel for video processing (all video editors, watching a video in Quick Time or Safari etc.) To enable QS, you need to inject iGPU (HD630) properly. It is a combo of BIOS and config.plist settings. To check QS, you will need Intel Power Gadget and any video file opened in Quick Time.

Whatervergreen/LILU is needed for external GPU: enabling DP-audio, black screen fix etc. You will not see any performance boost with this kext, but you will avoid common bugs.


Everything that you need for your hakintosh in this archive — https://d.pr/f/dy65uY
  1. Boot with your USB;
  2. Remove your USB;
  3. Install Clover on your SSD;
  4. Mound SSD's EFI partition with Clover Configurator;
  5. Replace EFI folder with EFI folder from partimers.zip;
  6. Reboot;
  7. Enter BIOS and check «UEFI Your SSD name» as a Primary boot drive;
  8. Reboot to macOS.
  9. Open terminal and apply this pmset settings.
That is all. Now you should have Vanilla hakintosh. Everything should work: QS, Sleep, PM, Lan, WiFi (if you have the same card), Audio etc. Everything.


Geez @b166ar, how much do you spoil us! Thank you so much for going as far as making a nice package.

Did what you told, everything works beautifully. I run the 10.4.1 update via Mac App Store and all working flawless after that!

Still got some questions (I now I am boring asking! sorry for that).

Q7. I applied pmset as per your suggestion, all work fine. One thing I notice though is that the Energy Saver pane just shows "Display time off after" not for the computer anymore. I know this delay is set by pmset standby XX, just curious why the pane do not show the Computer time Off anymore. Is this due to some of the patches? Or a config.plis

Q8. Do you know if the computer will sleep in case I am streaming video from it via its ethernet port? I normally use my Hack to host videos I play from my NVidia Shield, I share the files using NFS and play in the Shield using Kodi. I assume it will sleep. Will it? In that case I also assume there is no way to prevent that, other than disabling sleep by issuing pm sleep 0
 
Q7. I applied pmset as per your suggestion, all work fine. One thing I notice though is that the Energy Saver pane just shows "Display time off after" not for the computer anymore. I know this delay is set by pmset standby XX, just curious why the pane do not show the Computer time Off anymore. Is this due to some of the patches? Or a config.plis

I should be like this. If you check Energy Saver pane of any real iMac, you will see the same Windows with only one slider.

Modern Mac will sleep right after the display is turned off, and if there is no app which prevents sleep (file copying, Time Machine, etc.). Otherwise, macOS will wait until all apps finish their work and then will fall asleep.

Q8. Do you know if the computer will sleep in case I am streaming video from it via its ethernet port? I normally use my Hack to host videos I play from my NVidia Shield, I share the files using NFS and play in the Shield using Kodi. I assume it will sleep. Will it? In that case I also assume there is no way to prevent that, other than disabling sleep by issuing pm sleep 0

I think it will not. But you can check it by your self. Just start streaming and run pmset -g command in terminal.

If your streaming is preventing sleep, you will see it in the sleep section. For example, right now Arq is making a backup to the cloud, so my Hack will not sleep until it finishes.

sleep.png


If your streaming is not preventing sleep, there is a solution :)
 
Last edited:
@b166ar

Just in order to have my documentation tested and finished, I rebuilt my Hack and used your Vanila procedure, all looking fine!

Some questions still persist for which I would like your thoughts.

Q8 continued: I saw the pmset command telling me some process will prevent sleeping. NFS shares is one of them, so, it is fine. At the end this machine is a server for media besides being my main desktop, so I will not rely much on sleep automatically. That being said, sleep/wake are rock solid, wake-on-lan rock solid, and to top it off I will mod a wifi-relay into my power button so I can tell my google home to "turn on my PC" even from cold power off, more to come on that one :D


Q9. Looking at iStats Menu, I see frequencies of 800Mhz for CPU. Am I missing something (perhaps I am reading it wrong), or is iStats menu not getting the frequency right? Or is just the CPU doing nothing there? My CPU/Frequency/Voltage settings are all on Auto on BIOS, no OC or undervolting. Intel Power Gadget reports the same. There is a black line at 3.6Ghz which should be the nominal CPU frequency.


CPU Frequency.png Screen Shot 2018-11-19 at 12.03.40.png

And here Geekbench scores, seems a bit underwhelming?

Screen Shot 2018-11-19 at 13.05.03.png

BTW, I tried to play doing some very slight changes on OC settings on BIOS. Tried to enable XMP, and CPU upgrade and ... the machine did not boot into OSX, I suppose it messes with EFI settings? To add to strangeness, my temps are shown as 16 Celsius on BIOS but that I read somewhere is a bug on Gigabyte software for this board as temps are being read fine on iStats. :/
 
Last edited:
I only use the inbuilt 630 GPU of my i7-8700 ,
SMBIOS 18,1
In Devices IntelGFX 0x59128086
In Graphics Inject Intel and ig-platform-id 0x59120000

but there is graphics issues the screen flickers
 
@b166ar

Just in order to have my documentation tested and finished, I rebuilt my Hack and used your Vanila procedure, all looking fine!

Some questions still persist for which I would like your thoughts.

Q8 continued: I saw the pmset command telling me some process will prevent sleeping. NFS shares is one of them, so, it is fine. At the end this machine is a server for media besides being my main desktop, so I will not rely much on sleep automatically. That being said, sleep/wake are rock solid, wake-on-lan rock solid, and to top it off I will mod a wifi-relay into my power button so I can tell my google home to "turn on my PC" even from cold power off, more to come on that one :D


Q9. Looking at iStats Menu, I see frequencies of 800Mhz for CPU. Am I missing something (perhaps I am reading it wrong), or is iStats menu not getting the frequency right? Or is just the CPU doing nothing there? My CPU/Frequency/Voltage settings are all on Auto on BIOS, no OC or undervolting. Intel Power Gadget reports the same. There is a black line at 3.6Ghz which should be the nominal CPU frequency.


View attachment 366505 View attachment 366506

And here Geekbench scores, seems a bit underwhelming?

View attachment 366514

BTW, I tried to play doing some very slight changes on OC settings on BIOS. Tried to enable XMP, and CPU upgrade and ... the machine did not boot into OSX, I suppose it messes with EFI settings? To add to strangeness, my temps are shown as 16 Celsius on BIOS but that I read somewhere is a bug on Gigabyte software for this board as temps are being read fine on iStats. :/

Looks like Power Management setting is not working. Run the script again — https://github.com/corpnewt/EssentialsList
 
Back
Top