
WWDC 2024 Announced for June 10-14
Apple just announced WWDC 2024 will be held June 10-14, 2024. Unlike the last few years, it will be both an online and an in-person keynote address event at Apple Park on Monday, June 10th. Expected is news about the next version of macOS, which may or may not include Intel. New Mac hardware is also possible.
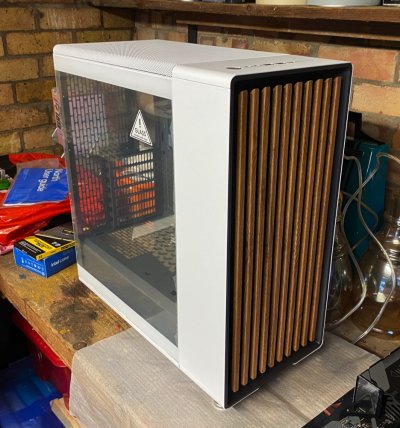 After building/owning several small form-factor PCs for the last few years I decided time was ripe to go large again. ATX was chosen. Jumping straight to a 14th Generation Intel CPU was a bit of a risk, I admit, but I’m glad to say all has worked-out nicely. For a case I went for the Fractal Design North midi-tower in White and Oak. It’s a real high-quality item.