- Joined
- Aug 3, 2010
- Messages
- 1,105
- Motherboard
- Gigabyte Z68
- CPU
- i7-2660k
- Graphics
- GTX 560Ti
- Mac
- Classic Mac
- Mobile Phone
So, I recently put my hack together, and I put a lot of work/time into getting it just right. I took some pictures along the way, so I thought I'd share. Eventually, I should take a video to get the full effect. Anyways, on to the build...
After doing quite a bit of research, I decided on some key components, started shopping for prices, and then put some pieces around it. This is what I ended up with:
The Main Components:
Mobo: GIGABYTE GA-P55M-UD2 GIGABYTE GA-H55M-USB3 LGA 1156 Intel P55 Micro ATX Intel Motherboard
http://www.amazon.com/Gigabyte-GA-H55M-USB3-LGA1156-CPNTMAX-16GB-2PCIE16/dp/B0034HROMI/ref=sr_1_1?ie=UTF8&qid=1296911929&sr=8-1
CPU: Intel Core i5-760 Lynnfield 2.8GHz LGA 1156
http://www.amazon.com/gp/product/B003VANRAQ?ie=UTF8
GPU: EVGA 512-P3-N987-TR GeForce 9800 GT Gigabyte nVidia GeForce 9800GT 1 GB
http://www.amazon.com/Gigabyte-nVidia-GeForce-PCI-Express-GV-N98TSL-1GI/dp/B002U0KEPY/ref=sr_1_2?ie=UTF8&s=electronics&qid=1296911961&sr=8-2
RAM: G.SKILL Ripjaws Series 8GB (4 x 2GB) 240-Pin DDR3 SDRAM DDR3 1600
http://www.amazon.com/gp/product/B002RPCLH6?ie=UTF8
PSU: OCZ Fatal1ty OCZ550FTY 550W ATX12V v2.2 / EPS12V
http://www.amazon.com/gp/product/B001MTYS06?ie=UTF8
Storage:
-Boot Drive - Kingston SSDNow SNV425-S2/64GB 2.5" 64GB SATA II Internal Solid State Drive (SSD) OCZ Technology 60 GB Vertex 2 Series SATA II 2.5-Inch Solid State Drive (SSD)
http://www.amazon.com/OCZ-Technology-Vertex-2-5-Inch-OCZSSD22VTXE60G/dp/B003NE5JCE/ref=sr_1_1?ie=UTF8&qid=1296912037&sr=8-1
-Storage - WD Caviar Green 500GB Samsung Spinpoint F3 1TB 7200RPM 32MB
http://www.amazon.com/7200RPM-BUFFER-3-5INCH-SAMSUNG-SPINPOINT/dp/B002NXPARA/ref=sr_1_4?ie=UTF8&s=electronics&qid=1296912091&sr=8-4
Case: LIAN LI PC-A05NB Black Aluminum ATX Mini Tower Computer Case
http://www.amazon.com/gp/product/B0029KWUIO?ie=UTF8
Optical: ASUS DRW-24B1ST/BLK/B/AS Black SATA 24X DVD Burner Sony 24X SATA Internal DVD+/-RW Drive AD-7260S-0B
http://www.amazon.com/Sony-SATA-Internal-Drive-AD-7260S-0B/dp/B003MRHOQG/ref=sr_1_4?s=electronics&ie=UTF8&qid=1296912229&sr=1-4
Display:ASUS VH242H Black 23.6" 5ms HDMI Full 1080P Widescreen LCD Monitor
http://www.amazon.com/gp/product/B001LYPIIS?ie=UTF8
Keyboard: Apple Wired Keyboard with Number Pad
http://www.amazon.com/gp/product/B000V07N9U?ie=UTF8
Mouse: Apple Magic Mouse
http://www.amazon.com/gp/product/B002TLTGM6?ie=UTF8
Cooler: COOLER MASTER V8 RR-UV8-XBU1-GP 120mm
http://www.amazon.com/gp/product/B001KUV2KQ?ie=UTF8
So, those are the main components. After this, I also purchased a ton of accessories for modding the case, and to add little touches here and there. I will attempt to outline them for anyone that is interested:
The Accessories:
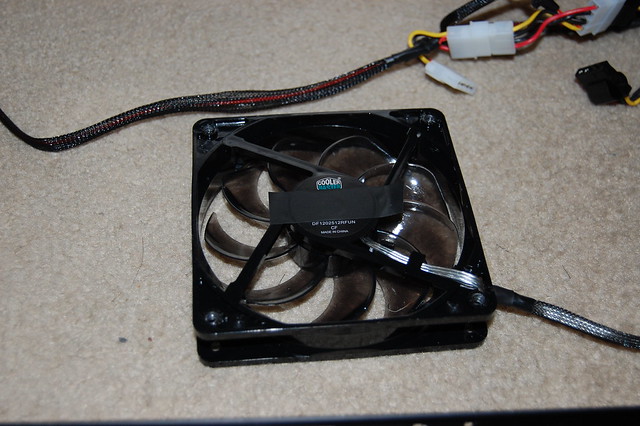
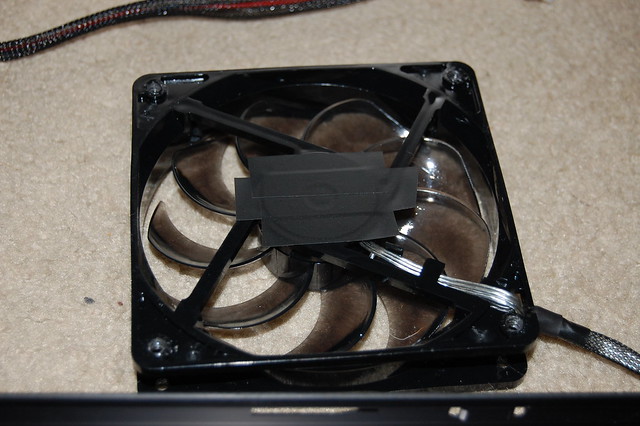
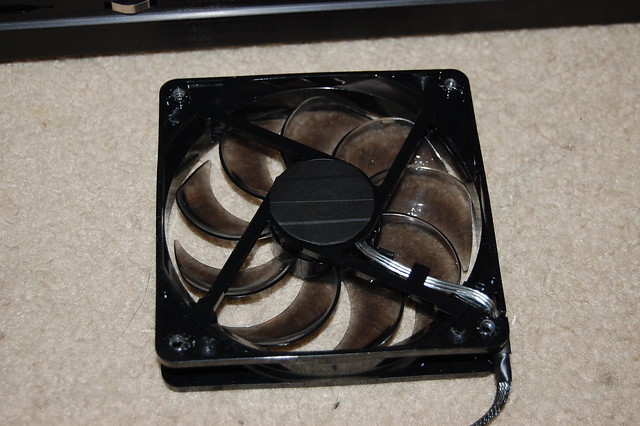
Cooler Master 120mm case fans with red LEDs (90CFM@19dB).
5" thin SATA cables (3)
Lian Li thumbscrews (Black)
Steel mesh fan filter (2 - Black)
Delrin Vandal Switch (16mm - red dot)
Delrin Vandal Switch (22mm - red ring)
Pre-wired Vandal Switch assembly (2)
Lian Li C-02B Universal CD Bezel (Black)
MNPCTech Billet Machined Aluminum Case Feet w/ Diamond Cut Edges (Black)
Cirago BTA-3210 USB 2.0 Micro Bluetooth Dongle
Lian Li Anti-Vibration Fan Mounting Kit - 8 Pack - Black (OF-01B)
Lian Li PCI 3 Fan Rheobus Speed Controller (PT-FN03)
12" 3 Pin Extension Cable
Rubber U-channel lining from McMaster
Black sleeving
Scythe Hard Disk Stabilizer II - HDD Noise Reduction
Scythe Bay Rafter 2.5 Rev. B HDD Cooler / Adapter
The concept:
In the beginning, I was so excited about building a Hackintosh that I ordered the parts, and then just threw them into an old, rickety case that I had. Once I got everything working really well, and realized just how stable/awesome this machine was, I knew I had to clean it up. In the past, I've been know to go for a pretty gaudy/cheesy look, with all kinds of lights and such. I still wanted to go for some customization, but for this build, I just wanted to keep it really clean/classy. I could have made it much more plain, but decided that wasn't as fun/enough of a project.
I wanted a case smaller than mine. Being familiar with Lian Li's reputation for quality products/build, I began my search there. Much to my delight, I found a smaller case with all the functionality I wanted. The orientation of the inside was peculiar, but it looked like fun. I then found a build of another owner of the case, and absolutely loved it. His additions were great, and I gained a lot of inspiration from his build. I found it over on overclock.net.
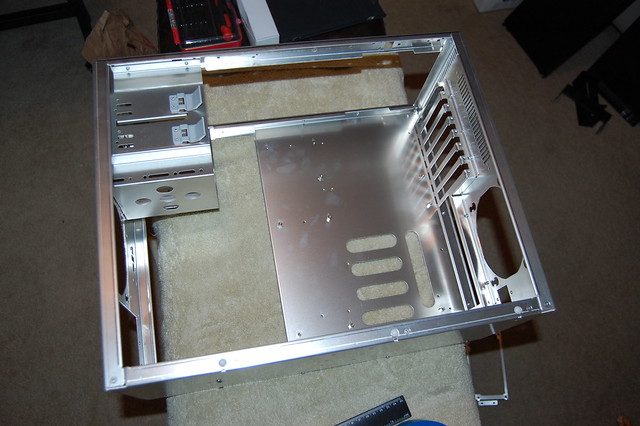
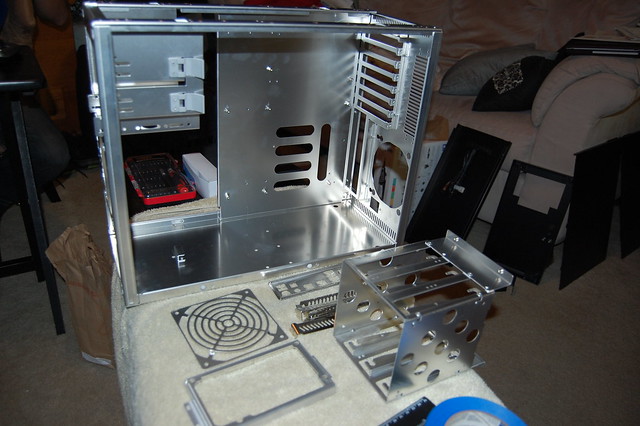
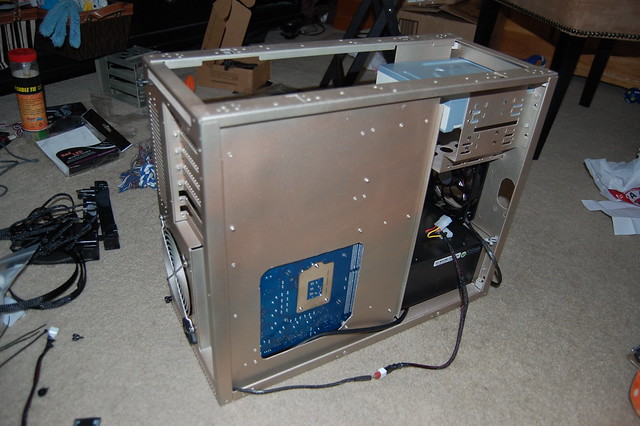
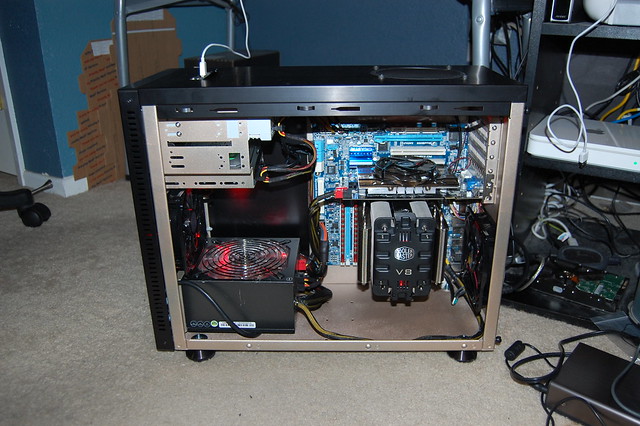
As far as the case goes, I couldn't be happier. It's smaller than most cases, but still big enough to house "normal" components, as well as a pretty substantial CPU cooler. It's aluminum, so the light weight is an added bonus. The orientation of the innards is pretty much revers what you may be used to, but I found it to have a large number of advantages. I'm not sure if I can articulate them well enough, but hopefully my pictures will help illustrate. Here are a few of them:
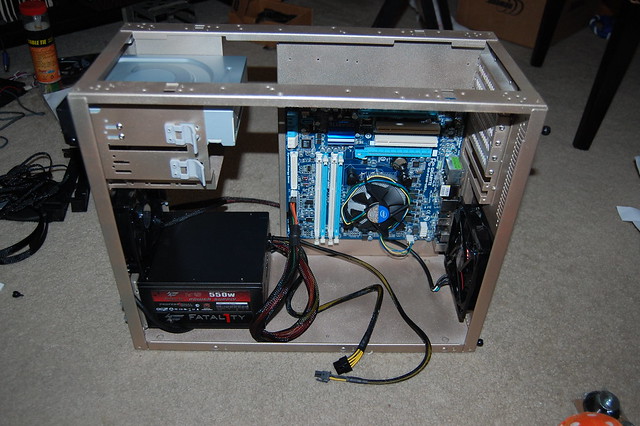
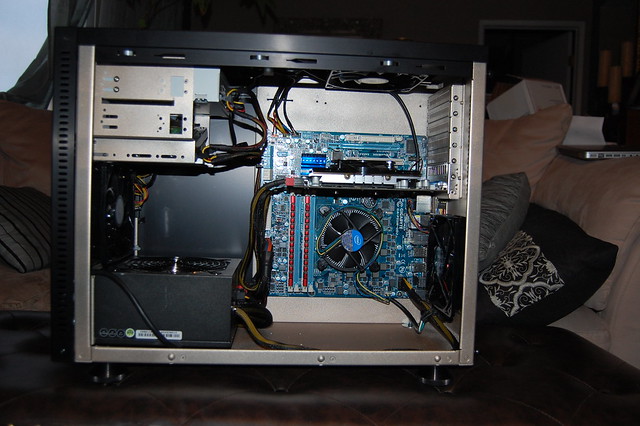
-The first, and most important, is the motherboard orientation. It's flipped upside down and reversed. This is the most important because it effects most everything else in the case, which I touch on below.
-One concern may be the reverse airflow, but I found that it was advantageous in my situation, since the rear fan is located inline with the CPU cooler fan, which pushes a lot of clean cool air through the CPU cooler in a straight line to the front of the case, where it is expelled.
-The pins for the external USB/Audio ports end up toward the top of the case. This is useful, because the USB ports etc. are on top of my case, so the cable only needs to be run a few inches, which makes the cable management extremely simple.
-The SATA ports are also located near the top of the case, right next to the drive bays. Again, this makes cable routing a cinch, given that the ports are literally within a few inches of drive bay. So nice.
-Similarly to the pins for USB/Audio, the pins for the power/reset switch are located on the top, which makes routing the switch cables brainless. I like it.
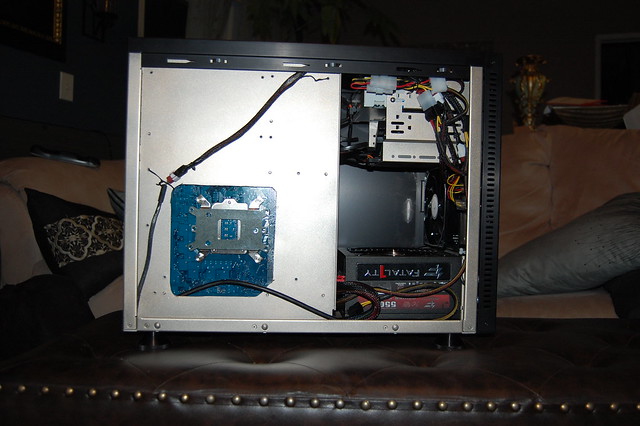
-The power supply is located at the lower front portion of the case. Because of this, the case can be shortened considerably, and I sort of like the unusual positioning. It's also nice that there is a lot of airspace right above the PSU, giving it a lot of breathing room. Removing the HDD rack above it was as simple as removing 4 thumbscrews. Lian Li pulled through.
When it came to deciding on a color scheme, my hand was forced in a few areas, but I really didn't mind that. I decided to keep the black anodized exterior because it was simple, classy, understated, and just the outer aesthetic I was going for. I decided I wanted all accents black to match.
For the lights, my hand was forced to red. The LED fan in my PSU is red, as is the writing on the side. Because of this, I decided to go with red light accents. Also, I felt blue is played out, and I've done it before.
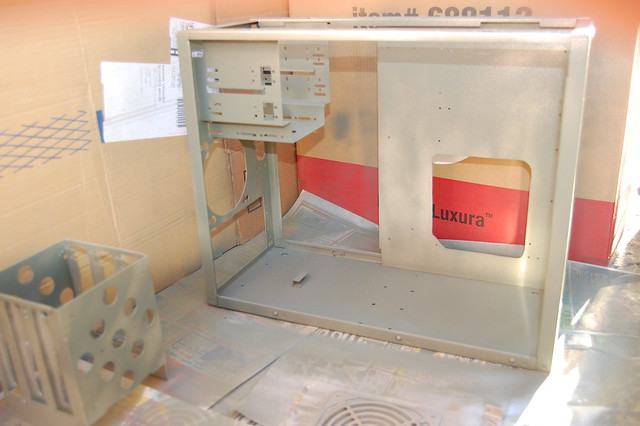
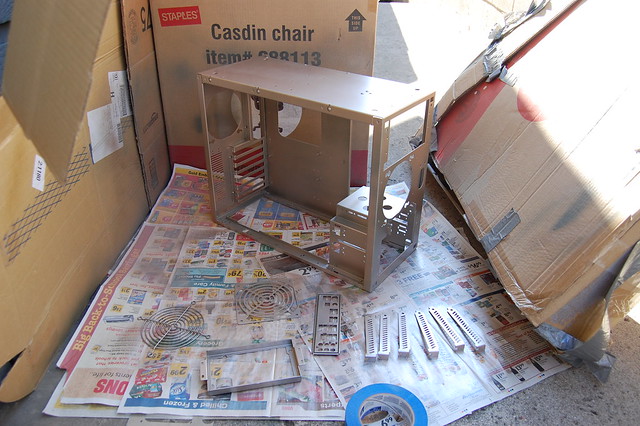
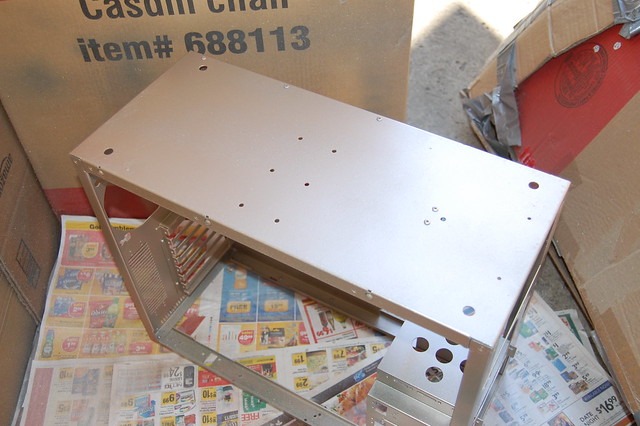
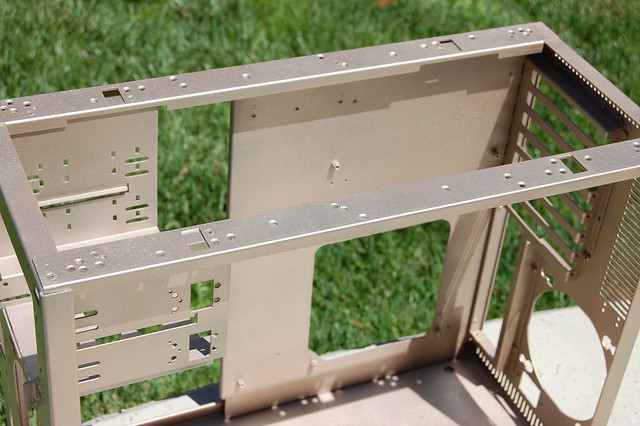
On the inside, I wanted something different than the plain grey they normally come with (although they are increasing coming in black, which I like), but not something too crazy, like, say, yellow. Since I had black and red picked out, I needed something that matched, and something the wife could tolerate as well. I decided on a pearl white, but after visiting the auto parts store, and coming up empty with that color, I ran across "Mocha Frost". I thought it would look great, so I went with it. I like the way it turned out.
Modifications:
Of course, it wouldn't be a custom build without some modification. I won't go into a terrible amount of detail here, but here are a few things:
-Cut a larger hole in chassis for the front switches.
-Cut a hole in the motherboard tray for easy access to the CPU cooler backplate.
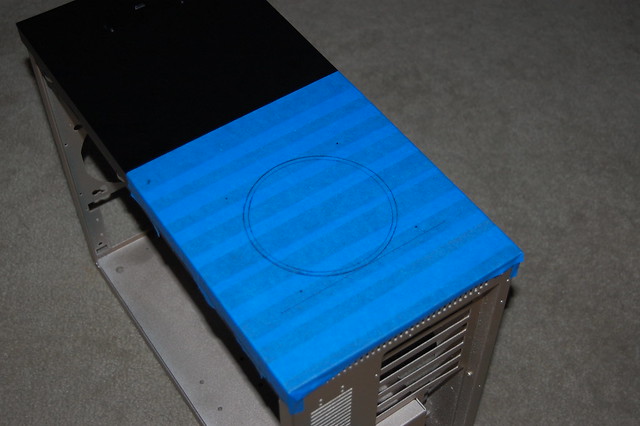
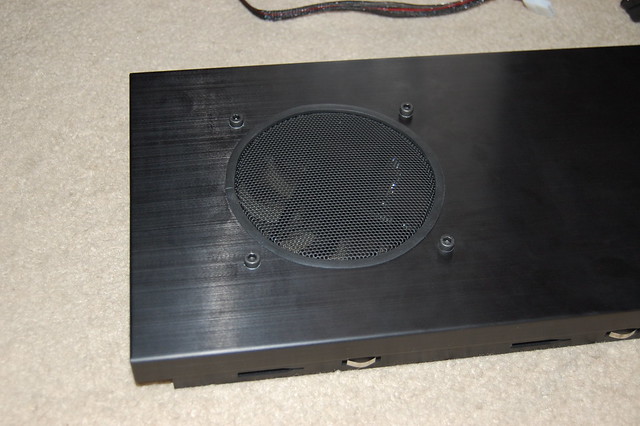
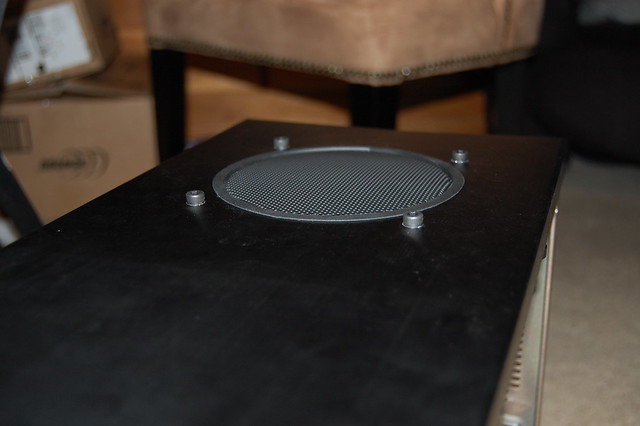
-Cut a blowhole for ventilation of excess heat.
One problem I did run into, though, was noise. Because of some amateur moves I pulled, noise was a pretty irritating problem. when I mounted the blowhole fan to the top of the case (which is thin aluminum, mind you), I didn't use any sort of dampening, so the 2000RPM fan really shook the whole case. I solved this by getting the anti-vibration kit, and a fan controller which allowed me to drop the fan speed to 1000RPM if I so choose, which quiets the case an incredible amount. The only other improvement would be the paint. I could have done a more professional paint job. In the end, I wasn't expecting much out of my rattle-canning skills, and I'm quite pleased with the results.
Overall, I'm ecstatic about the build. The accessories all worked out great, the blowhole looks great (clean) IMO, and all my cabling was pretty painless with the case, and provides for great airflow. My temps are at a rather cool (IMO) 35 degrees idle, and 55 under full load. Pretty great, considering in the old case, stock CPU cooler, and old thermal paste (before I applied arctic silver 5), my temps were more than 20 degrees hotter!
So sorry for the lengthy post, but I thought I would be thorough, since I know that myself I like to have all the details when I'm about to take on such an endeavor. Hopefully this is helpful to anyone else interested.
No worries, pictures on the way!")
After doing quite a bit of research, I decided on some key components, started shopping for prices, and then put some pieces around it. This is what I ended up with:
The Main Components:
Mobo: GIGABYTE GA-P55M-UD2 GIGABYTE GA-H55M-USB3 LGA 1156 Intel P55 Micro ATX Intel Motherboard
http://www.amazon.com/Gigabyte-GA-H55M-USB3-LGA1156-CPNTMAX-16GB-2PCIE16/dp/B0034HROMI/ref=sr_1_1?ie=UTF8&qid=1296911929&sr=8-1
CPU: Intel Core i5-760 Lynnfield 2.8GHz LGA 1156
http://www.amazon.com/gp/product/B003VANRAQ?ie=UTF8
GPU: EVGA 512-P3-N987-TR GeForce 9800 GT Gigabyte nVidia GeForce 9800GT 1 GB
http://www.amazon.com/Gigabyte-nVidia-GeForce-PCI-Express-GV-N98TSL-1GI/dp/B002U0KEPY/ref=sr_1_2?ie=UTF8&s=electronics&qid=1296911961&sr=8-2
RAM: G.SKILL Ripjaws Series 8GB (4 x 2GB) 240-Pin DDR3 SDRAM DDR3 1600
http://www.amazon.com/gp/product/B002RPCLH6?ie=UTF8
PSU: OCZ Fatal1ty OCZ550FTY 550W ATX12V v2.2 / EPS12V
http://www.amazon.com/gp/product/B001MTYS06?ie=UTF8
Storage:
-Boot Drive - Kingston SSDNow SNV425-S2/64GB 2.5" 64GB SATA II Internal Solid State Drive (SSD) OCZ Technology 60 GB Vertex 2 Series SATA II 2.5-Inch Solid State Drive (SSD)
http://www.amazon.com/OCZ-Technology-Vertex-2-5-Inch-OCZSSD22VTXE60G/dp/B003NE5JCE/ref=sr_1_1?ie=UTF8&qid=1296912037&sr=8-1
-Storage - WD Caviar Green 500GB Samsung Spinpoint F3 1TB 7200RPM 32MB
http://www.amazon.com/7200RPM-BUFFER-3-5INCH-SAMSUNG-SPINPOINT/dp/B002NXPARA/ref=sr_1_4?ie=UTF8&s=electronics&qid=1296912091&sr=8-4
Case: LIAN LI PC-A05NB Black Aluminum ATX Mini Tower Computer Case
http://www.amazon.com/gp/product/B0029KWUIO?ie=UTF8
Optical: ASUS DRW-24B1ST/BLK/B/AS Black SATA 24X DVD Burner Sony 24X SATA Internal DVD+/-RW Drive AD-7260S-0B
http://www.amazon.com/Sony-SATA-Internal-Drive-AD-7260S-0B/dp/B003MRHOQG/ref=sr_1_4?s=electronics&ie=UTF8&qid=1296912229&sr=1-4
Display:ASUS VH242H Black 23.6" 5ms HDMI Full 1080P Widescreen LCD Monitor
http://www.amazon.com/gp/product/B001LYPIIS?ie=UTF8
Keyboard: Apple Wired Keyboard with Number Pad
http://www.amazon.com/gp/product/B000V07N9U?ie=UTF8
Mouse: Apple Magic Mouse
http://www.amazon.com/gp/product/B002TLTGM6?ie=UTF8
Cooler: COOLER MASTER V8 RR-UV8-XBU1-GP 120mm
http://www.amazon.com/gp/product/B001KUV2KQ?ie=UTF8
So, those are the main components. After this, I also purchased a ton of accessories for modding the case, and to add little touches here and there. I will attempt to outline them for anyone that is interested:
The Accessories:
Cooler Master 120mm case fans with red LEDs (90CFM@19dB).
5" thin SATA cables (3)
Lian Li thumbscrews (Black)
Steel mesh fan filter (2 - Black)
Delrin Vandal Switch (16mm - red dot)
Delrin Vandal Switch (22mm - red ring)
Pre-wired Vandal Switch assembly (2)
Lian Li C-02B Universal CD Bezel (Black)
MNPCTech Billet Machined Aluminum Case Feet w/ Diamond Cut Edges (Black)
Cirago BTA-3210 USB 2.0 Micro Bluetooth Dongle
Lian Li Anti-Vibration Fan Mounting Kit - 8 Pack - Black (OF-01B)
Lian Li PCI 3 Fan Rheobus Speed Controller (PT-FN03)
12" 3 Pin Extension Cable
Rubber U-channel lining from McMaster
Black sleeving
Scythe Hard Disk Stabilizer II - HDD Noise Reduction
Scythe Bay Rafter 2.5 Rev. B HDD Cooler / Adapter
The concept:
In the beginning, I was so excited about building a Hackintosh that I ordered the parts, and then just threw them into an old, rickety case that I had. Once I got everything working really well, and realized just how stable/awesome this machine was, I knew I had to clean it up. In the past, I've been know to go for a pretty gaudy/cheesy look, with all kinds of lights and such. I still wanted to go for some customization, but for this build, I just wanted to keep it really clean/classy. I could have made it much more plain, but decided that wasn't as fun/enough of a project.
I wanted a case smaller than mine. Being familiar with Lian Li's reputation for quality products/build, I began my search there. Much to my delight, I found a smaller case with all the functionality I wanted. The orientation of the inside was peculiar, but it looked like fun. I then found a build of another owner of the case, and absolutely loved it. His additions were great, and I gained a lot of inspiration from his build. I found it over on overclock.net.
As far as the case goes, I couldn't be happier. It's smaller than most cases, but still big enough to house "normal" components, as well as a pretty substantial CPU cooler. It's aluminum, so the light weight is an added bonus. The orientation of the innards is pretty much revers what you may be used to, but I found it to have a large number of advantages. I'm not sure if I can articulate them well enough, but hopefully my pictures will help illustrate. Here are a few of them:
-The first, and most important, is the motherboard orientation. It's flipped upside down and reversed. This is the most important because it effects most everything else in the case, which I touch on below.
-One concern may be the reverse airflow, but I found that it was advantageous in my situation, since the rear fan is located inline with the CPU cooler fan, which pushes a lot of clean cool air through the CPU cooler in a straight line to the front of the case, where it is expelled.
-The pins for the external USB/Audio ports end up toward the top of the case. This is useful, because the USB ports etc. are on top of my case, so the cable only needs to be run a few inches, which makes the cable management extremely simple.
-The SATA ports are also located near the top of the case, right next to the drive bays. Again, this makes cable routing a cinch, given that the ports are literally within a few inches of drive bay. So nice.
-Similarly to the pins for USB/Audio, the pins for the power/reset switch are located on the top, which makes routing the switch cables brainless. I like it.
-The power supply is located at the lower front portion of the case. Because of this, the case can be shortened considerably, and I sort of like the unusual positioning. It's also nice that there is a lot of airspace right above the PSU, giving it a lot of breathing room. Removing the HDD rack above it was as simple as removing 4 thumbscrews. Lian Li pulled through.
When it came to deciding on a color scheme, my hand was forced in a few areas, but I really didn't mind that. I decided to keep the black anodized exterior because it was simple, classy, understated, and just the outer aesthetic I was going for. I decided I wanted all accents black to match.
For the lights, my hand was forced to red. The LED fan in my PSU is red, as is the writing on the side. Because of this, I decided to go with red light accents. Also, I felt blue is played out, and I've done it before.
On the inside, I wanted something different than the plain grey they normally come with (although they are increasing coming in black, which I like), but not something too crazy, like, say, yellow. Since I had black and red picked out, I needed something that matched, and something the wife could tolerate as well.
Modifications:
Of course, it wouldn't be a custom build without some modification. I won't go into a terrible amount of detail here, but here are a few things:
-Cut a larger hole in chassis for the front switches.
-Cut a hole in the motherboard tray for easy access to the CPU cooler backplate.
-Cut a blowhole for ventilation of excess heat.
One problem I did run into, though, was noise. Because of some amateur moves I pulled, noise was a pretty irritating problem. when I mounted the blowhole fan to the top of the case (which is thin aluminum, mind you), I didn't use any sort of dampening, so the 2000RPM fan really shook the whole case. I solved this by getting the anti-vibration kit, and a fan controller which allowed me to drop the fan speed to 1000RPM if I so choose, which quiets the case an incredible amount. The only other improvement would be the paint. I could have done a more professional paint job. In the end, I wasn't expecting much out of my rattle-canning skills, and I'm quite pleased with the results.
Overall, I'm ecstatic about the build. The accessories all worked out great, the blowhole looks great (clean) IMO, and all my cabling was pretty painless with the case, and provides for great airflow. My temps are at a rather cool (IMO) 35 degrees idle, and 55 under full load. Pretty great, considering in the old case, stock CPU cooler, and old thermal paste (before I applied arctic silver 5), my temps were more than 20 degrees hotter!
So sorry for the lengthy post, but I thought I would be thorough, since I know that myself I like to have all the details when I'm about to take on such an endeavor. Hopefully this is helpful to anyone else interested.
No worries, pictures on the way!