- Joined
- Sep 26, 2011
- Messages
- 68
- Motherboard
- 10.8.2
- CPU
- i5-3570k
- Graphics
- HD4000
- Mac
- Classic Mac
- Mobile Phone
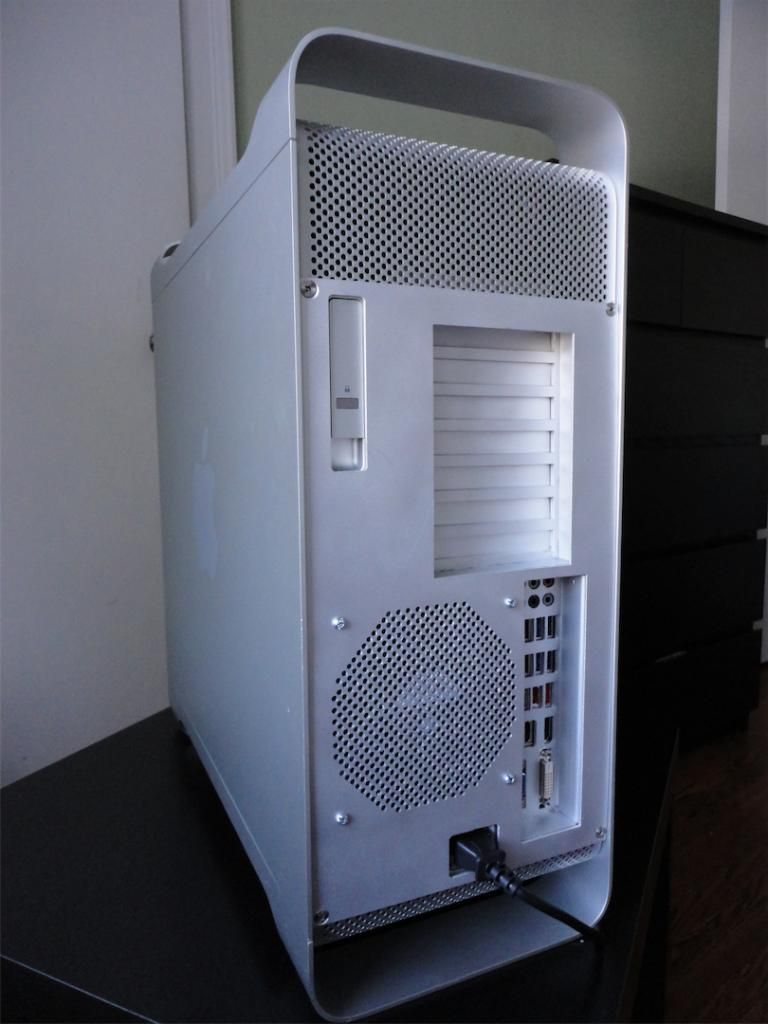
Hello, I am just in the finishing stages of my G5 Mod and thought I would share my work for inspirational purposes. Unfortunately I do not have time for a full blown build log, and I think most of it is pretty much the same as other G5 mods so I will just focus on a few things I did a little different.
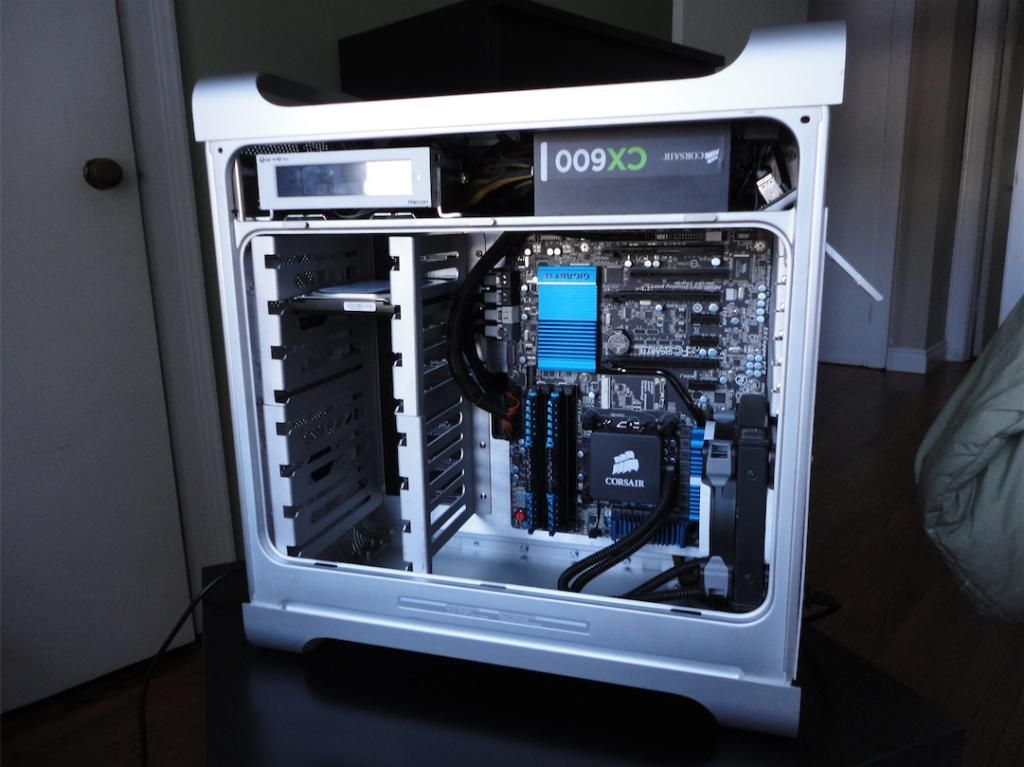
1) I Built my own Motherboard Tray and Back Plate. I had a few reasons for doing this, first was I wanted to be able to incorporate my Hot Swap cages into the motherboard tray, and have sufficient room behind the tray for the rats nest of cables needed for 8 hard drives. The second was I wanted to make an aluminium rear I/O port cover instead of using the black one that comes with the motherboard. And lastly, I was unsure of what exactly I was going to do with CPU cooling until the last minute and wanted to leave a blank slate for this.
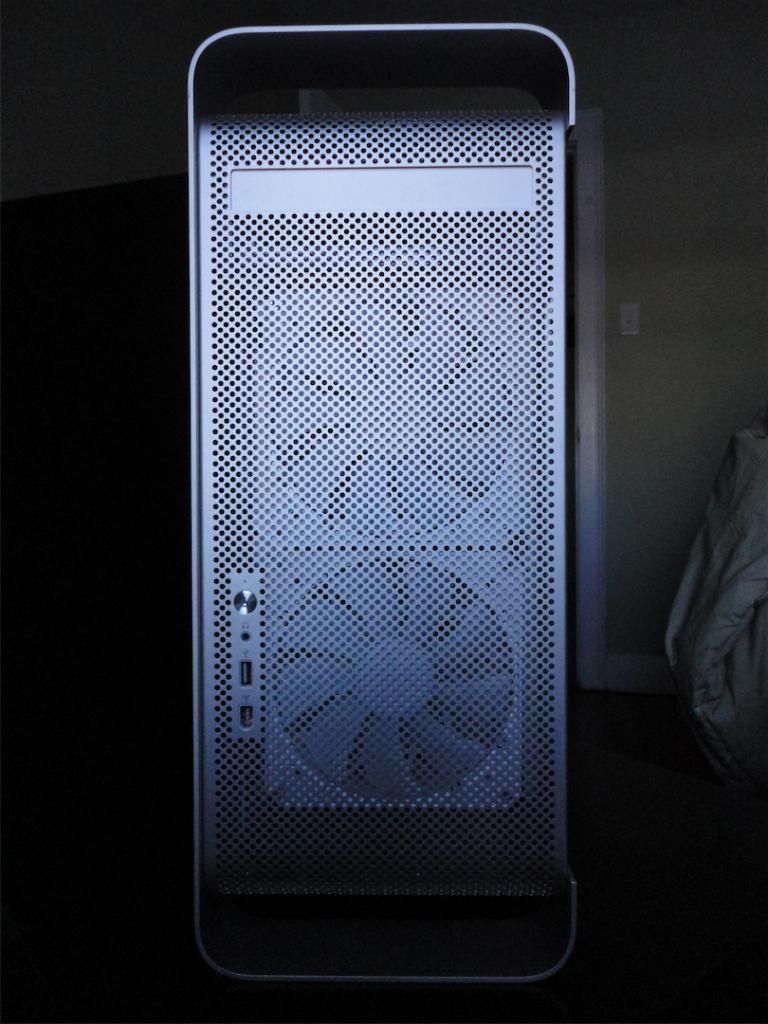
The Finish Of The Aluminium: For all aluminium I "Glass Beaded" (same as sand blast but with finer Glass sand) and this matches the anodized finish of the case nicely when looked at straight on, BUT does not reflect light the same way and looks only close when viewed on angles. It is also not very forgiving with finger marks and scratches - I had to do touch ups once all Fabricating was complete.For the rear I/O cover, I measured this completely from the supplied I/O sheild that came with my motherboard with a digital calliper, then made a CAD drawing that the water jet shop could use. This was not the most difficult thing to do but you will need to be extremely accurate with your measurements as some spaces in-between ports are very thin.
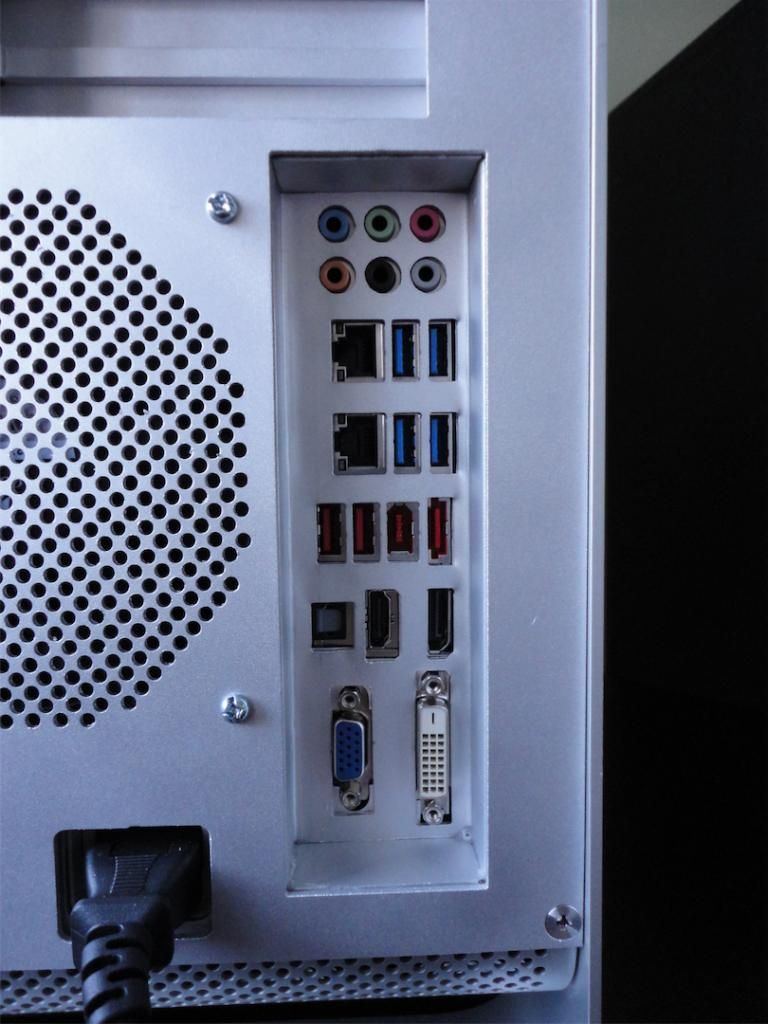
TIP: its best to pick 1 single port hole and use as a refernce point to start as the sides of the shield are meant to be squeezed into a hole on your case - you won't be able to get accurate measurements from sides or corners. For my CAD drawing I worked in mm to two decimal places.
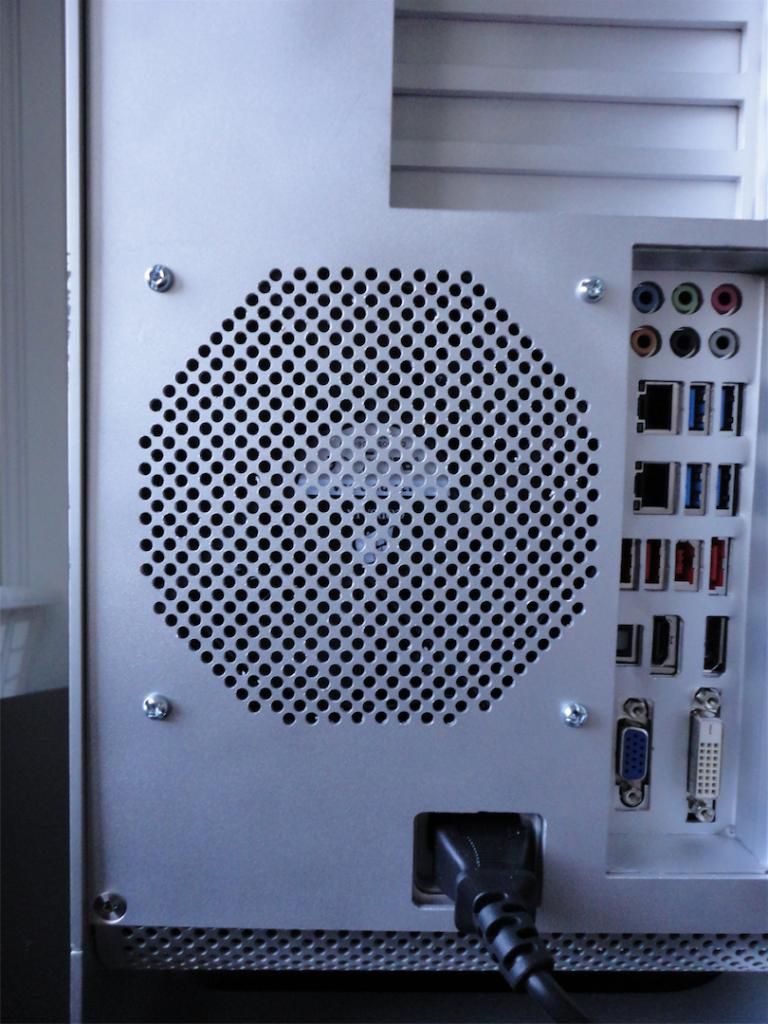
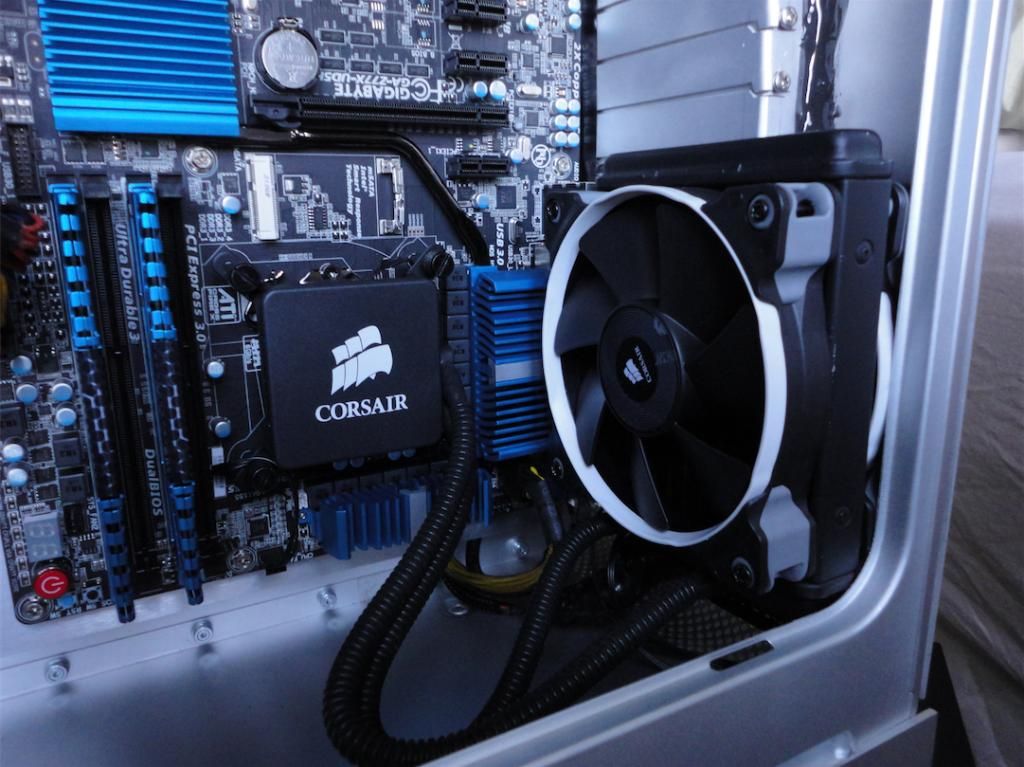
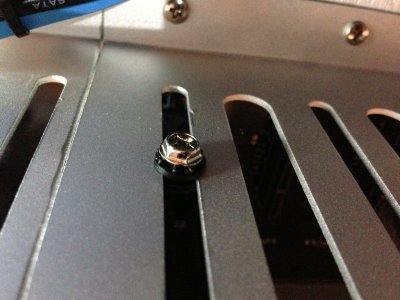
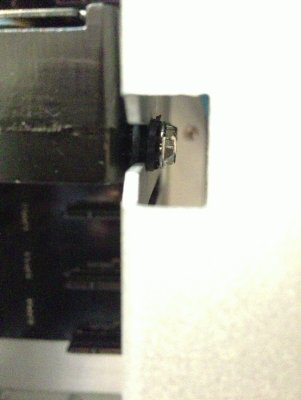
In the above picture you can see the rear exhaust vent hole for my Corsair H60 water cooler. The pattern is matched to the perforated sections of the G5 case, then de-burred and glass beaded to get rid of as much of the shiny-ness of the inner holes. I am still to get some better looking stainless bolts to hold the cooler on but have not got to that yet. I got a lit lucky as there is zero extra room in-between the I/O cover and the inside of the case - just perfectly fits a 120mm fan.
TIP: Use a scrap peice of the perforated section you need to remove from the back of the case as a guide to re-drill the pattern accurately. This is actually quite easy but time consuming. Credit goes to brammee for this idea - his G5 is actually the one that pushed me to do my own - I was first going to use his as a guide but my project later took a pretty different path in the end.
Here is the link to his build: http://www.tonymacx86.com/case-mods/78636-hackintosh-pro-powermac-g5-2004-model.html
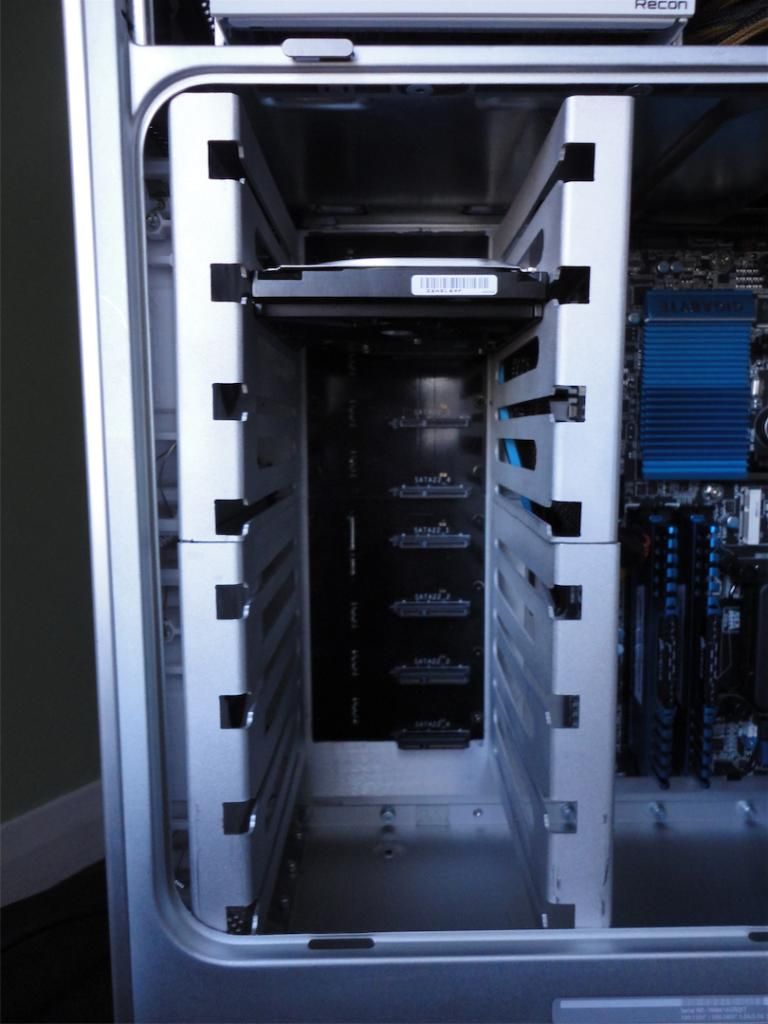
2) I decided to build my own Hard drive cage after having trouble finding a Sata 3 compatible solution for a decent price. I also already own 4 drives and often need to make backups and repairs to family members drives so i really needed more than 4 slots. I also reallyy liked the way this cleans up the case and hides all the cables. I started with 2 of Corsairs Sata 3 backplanes that are meant as an upgrade for there obsidian series cases. These are only around $10 each. Next I designed two side plates in CAD and had them water jet cut, then bent them as needed. The Hard drives slide into the rails with "Rubber Hard Drive Screws" that only allow the rubber grommet to contact the side plates - this provides vibration dampening. For 2.5" drives I have a solution that lets me use the same "Rubber Hard Drive Screws" but I have yet to complete this.
Credit goes to eelhead & minihack (and probably others) for giving me the idea and alerting me to the backplane from this post: http://www.tonymacx86.com/case-mods/55569-hot-swap-g5-mod.html
Notice while the backplanes are Sata 3 - only 4 of the motherboards ports are, the rest are Sata 2.
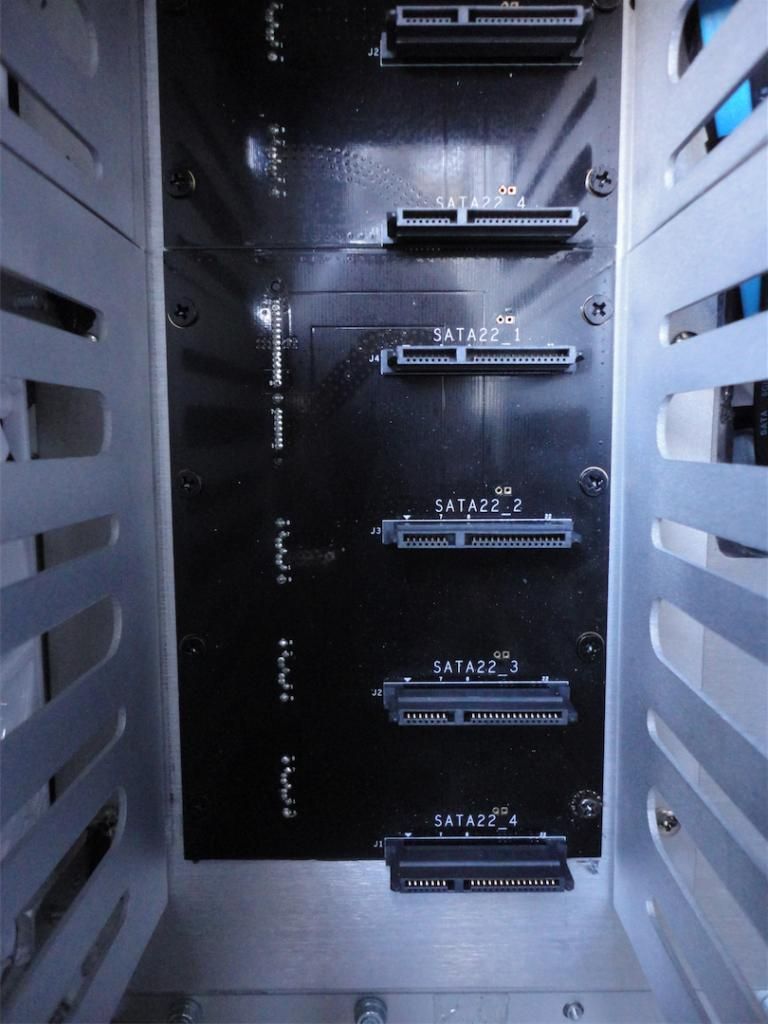
In the front view of the hard drive cage you can see the Corsair backplanes I used in the very back mounted to the motherboard plate. The sides are made in 4 separate pieces and the left 2 have my intake fans mounted to them as well. The sides are mounted to the motherboard plate only by drilling and tapping. The measurements here need to be almost perfect for this to function smoothly, I would say mine turned out "Good" but not great - but I am still happy.
Final Thoughts
If I were to do it all again (witch I probably will.. Lol) I will seriously consider using a "Pre-Made" rear plate. The PCI slots were by far the hardest part of my whole build, and turned out looking ok but are not what i imagined to say the least. This part requires extremely good fabricating and the proper resources to make it happen. I needed way more JB weld here than I ever intended to use on this build!!. At the time I was planning my build I only had heard of the Lian Li and Mountian Mods kits, and was so turned off by the price and shipping I thought I could achieve a custom Plate for a lot less. Turns out with material costs, the time spent measuring, Drawing in CAD, and fabricating plus the water Jet cutting cost - this was probably even more expensive in the end.
TIP: There is lesser known 3rd option - "The Laser Hive" (witch I believe the owner to be a member here?) That offers great looking kits for G4 and G5's as well a a very nice acrylic hard drive cage using the same corsair backplane i used. This would be a great choice for anyone not looking to do the very difficult measuring yourself (don't worry there is still plenty left Lol).
http://www.thelaserhive.com/products/powermac-g5-conversion-products/
http://www.thelaserhive.com/products/hot-swap-disk-drive-enclosure/
I hope this info helps out somebody, please feel free to ask me any questions!

 I'm using Google Chrome on my MacBook Pro.