Contribute
Register

SUCCESS: MacOS Monterey installation on Asus P7P55D LE

Status
Not open for further replies.
Here is my EFI not sure if will boot your machine, here are some things to keep in mind first i will post some basic info about my setup
Motherboard : ASUS P7P55D
no UEFI,, BIOS legacy only, NO USB 3.0 , NO SATA 6

1156 CPU Socket using an Intel Xeon X3480 (identical to the i7 880)
i7 wil support 16 gigs of RAM ,the Xeon will support 32 gigs of RAM (Xeon support is not on the users manual or support for 32 gigs of RAM but it is supported )

Graphics card: MSI Radeon RX 580 (you might need to add boot flags to your plist for your particular card)

Audio: i could not get the onboard audio to work , it uses the cheap VIA VT1828S same as your board, to make my life easier I installed an old SoundBlaster PCI card (Creative Labs CT4780) that i had laying around in one of the old PCI slots works great (kext needed) but I mainly use the Display Port audio coming from the RX 580 , so if you are using HDMI audio or Display Port Audio you may want to disable onboard audio from bios or get a cheap PCI/PCI-E card or USB dongle

SATA 6 , this board only has SATA 3 ports so your SSD will not reach its full potential, so instead i bought a cheap SATA 6 card from HighPoint model Rocket 640L with 4 SATA 6 ports and works perfectly at full SATA 6 speeds

USB 3.0: this motherboard only has USB 2.0 ports so I bought the Inateck KT406 USB 3.0 card which has 2 USB 3.0 ports and the 20 pin connector so you can use the front USB on you PC case, it uses the natively mac os supported Fresco logic FL1100 chipset, so full USB 3.0 speed with no kext needed
So 3 cards no more PC-I-e slots right? one for Video one for SATA one for USB, well i still need bluetooth and wifi right?

Bluetooth/WIFI : there is one more slot under the Video card. i just bought a PCI-E raiser and a PCI-e wifi adapter for Apple WIFI cards with detachable antenna bracket some double sided tape and i have fully functional Bluetooth and Wifi , the adapter can be easily found on Ebay. the card i use is Apple BCM94360CS2 no kekts needed
but no more room for expansion

Ethernet/LAN : use the included kext for the Realtek onboard LAN or buy a cheap and old 1gbps PCI-X card with the Intel 82545EM Chipset works natively on monterey no kext needed , it is a PCI-X card not PCI-E ,it is a long card but it will fit and work just fine in one one the old PCI 32bit slots on the motherboard

EFI folder : like i said it could only boot Monterey 12.2.1 i tried the same EFI on 12.3 and above but it will not boot
everything works for my setup Except Sleep. sleep will not work no matter what i tried
i have most of the quirks and settings right at least for my setup , it took me a while but it finally installed and booted on its own with no problems, i have attached the EFI folder without serials numbers , you must generate your own serials UUID , ROM .BOARD etc. this EFI may NOT work for you but you can give it a try , Do not change the SMBIOS type , just generate new Serials, also you may want to try OCAuxilaryTools get it from github , it is a great tool to use, it can generare EFI folders, correct errors on your plist. every single thing that Opencore Configurator can do but in a more simplified way and many many many cool stuff, but if opencore configurator is your thing , i will leave that up to you
Here is the EFI folder
And, can you advise what BIOS settings you change? I disabled quickboot, set SATA to AHCI. that is it mainly. Anything else is missing?
Also, you said you tried to boot 12.3 and above but did not boot. What error you get? Does verbose line disappear and screen turns black and goes to sleep?
 
Last edited:
yes im using opencore 0.79 you can see the release version in the upper or lower corner when the installer boots, if you still see remnants of clover is because your EFI partition is corrupted or not deleted properly, you may want to reformat the EFI partition only or do another USB preferably 2.0, and another 3.0 sometimes only one of the 2 will work properly , if you get a "BOOT MISMATCH" error that means that the "boot" file was not created properly

and yes 12.3 and above gets me stuck at the very same line just like you mentioned

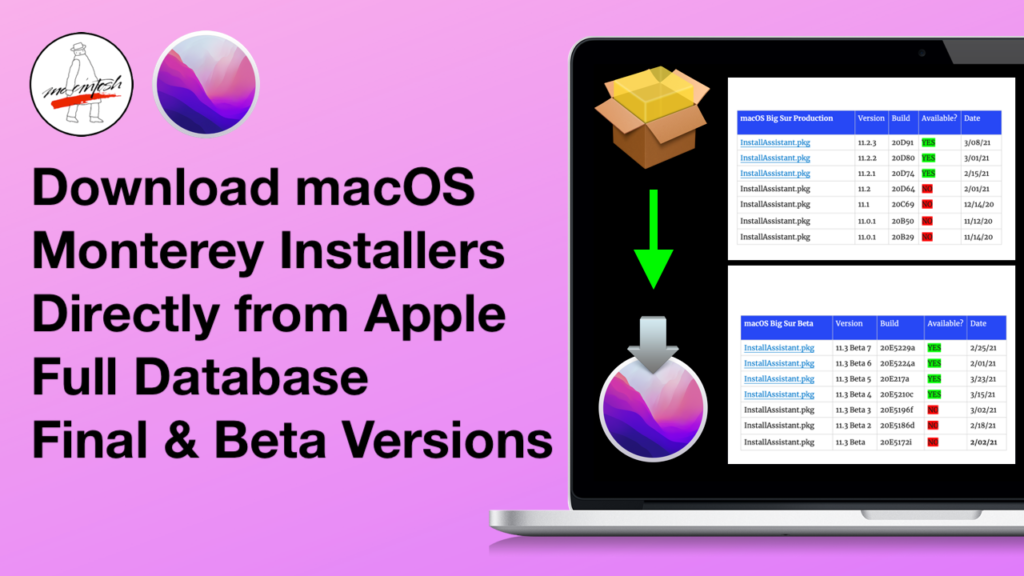
you can download the full 12.2.1 installer from this site


the installer will be called. " InstallAssistant.pkg" it will download quickly it will show a 12+ gigabyte file but in reality is less than 50MB run it, but dont choose you USB drive it will run in the background for a while, it will download the full 12GB+ installer to your "Applications" folder make sure you do not have newer version already there or it will not work, once it finishes with the download right click it get info and confirm is version 17.2.03
after that create a new usb installer in the usual way,,, at this point do not copy the EFI folder yet
head over to Dortania and download Opencore 0.79 you can try 0.81 but i will stick to 0.79 for the test
make sure you download the zip file to the download folder in your mac or other hackintosh extract the zip and rename the opencore folder to JUST OpenCore capital O and C nothing else with your usb inserted run this command in the Terminal App

sudo ~/Downloads/OpenCore/Utilities/legacyBoot/BootInstall_X64.tool

put in your password it will give you a list of available drives pick your usb drive , it will be easy to identify as most likely will be the last in the list and it will have a "Install Macos monterey name in it"
so if it is Disk3 just press the number 3 if it is Disk4 just press the number 4 and hit Enter
the EFI will be mounted automatically and the "boot" file will be created and present in the EFI partition now you can copy Your EFI folder next to the "boot" file and give it a test , see if it boots, im sure you already know all of these steps but is just a recap

now BIOS settings almost all is default but there is ONE SETTING (or maybe 2) that will not make the installer boot
check you have this settings

SpeedStep=Enabled
TurboMode Tech=Enabled
Max CPUID value Limit= Enabled ********
Virtualization=Disabled
Execute-Disable Bit Capability= Enable*******
C-State Package Limit Setting= C1*******
VT-D= Disable


good luck man
Thanks. Will try definitely. And it takes a lot of time.
And it seems my issue has got to do with graphics card (RX 6600 xt)

I had a usb made on windows, I got High sierra to install with it. Then tried monterey, but again from verbose to black screen. Then I tried Bir Sur, it gave me hopes as the installer booted into the screen to use disk utility and install big sur. As it was online installer, it took about 3 hrs, but after reboot I got black screen, however, I see that pc is working as on the case the "hdd" light is blinking, so something going on but I cannot see it at all. I tried different outputs (display port, HDMI), seems HDMI is active, since monitor light is on but screen is black. So I don't know whether to stop it but pressing restart button on the case or leave it with hopes that screen will be back.
EDIT: I waited till the light went off. Then "holding my breath" I pressed restart button. Then after several reboots, the first one was with screen freeze and "half crossed circle'', the next two reboots were just in verbose mode, last one was with apple logo and "loading line" which did not finish it allowed me to continue final stages of Big Sur installation. However, I noticed it was very slow (mouse would freeze and unfreeze sporadically). Now I am on desktop which is black and only USB has got mounted. I will post the screen photo soon.
Edit: finally the usual mac os Big Sur desktop screen came to existence :)
 
Last edited:
1. Photo of error screen with circle
2. Apple logo with loading line which did not finish and went to reboot
3. Big Sur desktop but screen black with only Finder menu and mounted usb
4. Finally, Big Sur desktop showed.

But GPU does not show properly. Any way to fix it? I read many posts including in this forum that rx 6600xt is not supported in Big Sur. I that case I need to spoof its id? Any clear guide how to do it?

If i could fix gpu showing and working properly, I will make a clone of this disk, then upgrade to Monterey and check if it works that way.
 

Attachments

  • 1.jpg
    1.jpg
    2.6 MB · Views: 54
  • 2.jpg
    2.jpg
    1.9 MB · Views: 45
  • 3.jpg
    3.jpg
    840.5 KB · Views: 56
  • 4.jpg
    4.jpg
    1.2 MB · Views: 60
Made a bootable copy of Big Sur on a separate disk. Now downloading Monterey via native upgrade in Software Update. Of course it will download latest version of Monterey. Gonna test if it boots to insaller screen or again goes to black screen.

EDIT: so, it again results in black screen. My guess is gpu output gets lost but don't know why it worked in Big Sur (Mojave, HS) but breaks in Monterey. WG is loading, and agdpmod=pikera is in boot arguments.
Attached is debug log with removed serials. Any advice on the error(s) and solutions?
 

Attachments

  • opencore-2022-06-20-051921.txt
    256 KB · Views: 32
Last edited:
yes im using opencore 0.79 you can see the release version in the upper or lower corner when the installer boots, if you still see remnants of clover is because your EFI partition is corrupted or not deleted properly, you may want to reformat the EFI partition only or do another USB preferably 2.0, and another 3.0 sometimes only one of the 2 will work properly , if you get a "BOOT MISMATCH" error that means that the "boot" file was not created properly

and yes 12.3 and above gets me stuck at the very same line just like you mentioned

you can download the full 12.2.1 installer from this site


the installer will be called. " InstallAssistant.pkg" it will download quickly it will show a 12+ gigabyte file but in reality is less than 50MB run it, but dont choose you USB drive it will run in the background for a while, it will download the full 12GB+ installer to your "Applications" folder make sure you do not have newer version already there or it will not work, once it finishes with the download right click it get info and confirm is version 17.2.03
after that create a new usb installer in the usual way,,, at this point do not copy the EFI folder yet
head over to Dortania and download Opencore 0.79 you can try 0.81 but i will stick to 0.79 for the test
make sure you download the zip file to the download folder in your mac or other hackintosh extract the zip and rename the opencore folder to JUST OpenCore capital O and C nothing else with your usb inserted run this command in the Terminal App

sudo ~/Downloads/OpenCore/Utilities/legacyBoot/BootInstall_X64.tool

put in your password it will give you a list of available drives pick your usb drive , it will be easy to identify as most likely will be the last in the list and it will have a "Install Macos monterey name in it"
so if it is Disk3 just press the number 3 if it is Disk4 just press the number 4 and hit Enter
the EFI will be mounted automatically and the "boot" file will be created and present in the EFI partition now you can copy Your EFI folder next to the "boot" file and give it a test , see if it boots, im sure you already know all of these steps but is just a recap

now BIOS settings almost all is default but there is ONE SETTING (or maybe 2) that will not make the installer boot
check you have this settings

SpeedStep=Enabled
TurboMode Tech=Enabled
Max CPUID value Limit= Enabled ********
Virtualization=Disabled
Execute-Disable Bit Capability= Enable*******
C-State Package Limit Setting= C1*******
VT-D= Disable


good luck man
Getting this error.
 

Attachments

  • Montereyinstall error.jpg
    Montereyinstall error.jpg
    3.6 MB · Views: 38
Last edited:
SpeedStep=Enabled - dont have it in BIOS
TurboMode Tech=Enabled dont have it in BIOS
Max CPUID value Limit= Enabled ******** - same
Virtualization=Disabled - same, disabled
Execute-Disable Bit Capability= Enable******* dont have it in BIOS
C-State Package Limit Setting= C1******* dont have it in BIOS
VT-D= Disable - same, disable.
 
Iaksakkah and Fartech. Thank you for reaching for help. But your EFI did not work. The EFI which I created on windows just following Dortania guide and with which I installed first High Sierra, then Big Sur helped with Monterey installation. But your suggestion of version 12.2.1 played a trick as well. So, thank you, man!
Currently typing from Monterey. And, GPU is correctly shown in system. Attached is the screenshot.
 

Attachments

  • Screen Shot 2022-06-21 at 12.06.03 AM.png
    Screen Shot 2022-06-21 at 12.06.03 AM.png
    2 MB · Views: 43
Status
Not open for further replies.
Back
Top