Contribute
Register

Sonoma 14.3.1 Installation on the Dell OptiMac 7020/9020 Desktops

Followed this guide with my 9020 usff over the weekend to test the waters, as my current Monterey install is out of support for the Home app. (Not really a deal breaker, just means managing my homepods can only be done via my phone)

The install procedure went flawlessly, save for my wifi not being supported (AW-CE123H/BCM94352HMB), which has nothing to do with the guide :p

The success of the install does have me looking at potential mini pcie upgrades tho....

Thanks trs96 for the fantastic guide :headbang:
So ended up grabbing myself a BRCM94360CD with an adapter card (to replace my current BCM94352HMB) that juuust fits with the USFF's tool-less minipci slot....

OCLP patcher picked it up and wifi works great. I suspect however the bundled adapter (I think for an iMac) doesn't have USB lines wired to the Mini PCI slot, as its not showing up on the internal port.
I assume I'll have to find an adapter that does, or get one that breaks it out to an external port and plug it in the back.....

I'll report back with updates, as otherwise having a system this inexpensive run the latest version of macOS so completely (aside from BT ATM) and so well is pretty awesome. :thumbup:


Updating to Sonoma 14.4
I haven't updated yet and don't plan to until a later date. Probably when 14.5 drops in a month or so.

If you are in a hurry to do so a few things to note.

1. Update your OCLP to the latest version before the update. Click here to download.
A lot of hardware, including Metal GPUs, WiFi cards, T1 chipsets, etc have new patches made for macOS 14.4. We highly recommend installing OCLP 1.4.2 beforehand to ensure a smooth update.
2. Set SecureBootModel to Disabled in your EFI folder's config.plist. (change it back later)
Here's where to find it:

Screen Shot 7.jpg

Change from x86legacy to Disabled

If you are an OCAT user it will look like this:

Screenshot 2024-03-13 at 5.57.10 PM.png


3. Use the newest version of the IOSkywalkFamily kext. Attached below.
How to make the change?
  1. replace IOSkywalkFamily.kext, revert OCLP root patch and reboot.
  2. apply root patch of OCLP 1.4.2 and reboot.
If you try it out on your OptiMac, post a brief note to let us know how it went for you.
 

Attachments

  • IOSkywalkFamily-v1.1.0.zip
    188.6 KB · Views: 11
Last edited:
I know that the HDMI audio doesn't work on mine. Don't have a DP monitor with speakers to test that.
The front headphone jack and rear line-out port work with no issues. I plug in a 2.1 speaker system to line-out
for audio. Sound is excellent. I never use built in TV or PC monitor speakers as most are junk. Not worth using.

View attachment 579664
oh ok, do you have any idea how to make it work? I use an old TV as my main monitor and I want to use its speakers
 
oh ok, do you have any idea how to make it work? I use an old TV as my main monitor and I want to use its speakers
I've never attempted to get HDMI audio working as I never use it. If you want to experiment try a few adjustments to your config.plist.

First I would try removing the Disable HDMI patches entry. Then reboot and see if HDMI shows up in Sound settings.

Screen Shot 5.jpg
 
Next change enable-hdmi20 in the .plist so that it starts with 01 instead of 00. Reboot and see if your HDMI audio works.
 
Sonoma 14.3 Install Guide for the Dell Optiplex 7020 or 9020 Desktops

IMPORTANT: Have a full bootable back up prepared from your previous macOS install on your Dell OptiMac. The simplest solution is to disconnect your existing macOS drive and install Sonoma to a new blank SSD. That protects all your data and your current install of macOS if you decide that Sonoma is not for you.

This guide is written as a "Clean Install" for use with Intel HD4600 graphics. If you have an AMD dGPU you'll want to uninstall it by the time you reach Step 2. It can be added back in later, post install. I use the iMacPro1,1 SMBIOS in this guide. It may be a better fit to use iMac19,1 if you plan on using both a dGPU and the HD4600 together. Adjust the guide accordingly. Make sure your USB ports kext is changed to the matching SMBIOS of iMac19,1 if you go with that.

iMacPro1,1 works well when using only HD4600 graphics exclusively. Best of all it enables DRM for streaming services like Apple TV+ Amazon Prime and Netflix. The only way I know of when using an Intel iGPU as primary graphics.

If you don't want HD4600 patches at all and will disable your iGPU, then this guide won't work for you. It will require a modified install guide. I don't plan on posting that. You should be able to figure that one out on your own.

Step 0. Make sure that BIOS is up to date and all required hidden and visible BIOS/UEFI settings are changed.

See guides:
BIOS Flash and Initial Setup for your Dell Optiplex
Changing the Dell OptiPlex 7020/9020 Hidden BIOS/UEFI Settings

Step 1. Create your Sonoma USB installer. Follow the standard tonymacx86 guide that uses Terminal. Best to use a 32 GB USB flash drive. Two of my 16 GB drives were not big enough to fit Sonoma 14.3 on them.

1. Insert the 32GB USB drive (Sonoma installer pkg should be in your Applications folder)
2. Open /Applications/Utilities/Disk Utility
3. Highlight the USB drive in left column (choose "Show all devices" first)
4. Click on the Partition tab
5. Click Current and choose 1 Partition
6. Click Options...
7. Choose GUID Partition Table
8. Under Name: type USB (You can rename it later)
9. Under Format: choose Mac OS Extended (Journaled)
10. Click Apply then Partition
11. Open /Applications/Utilities/Terminal
12. Copy/Paste the following into Terminal and hit enter.
Code:
sudo /Applications/Install\ macOS\ Sonoma.app/Contents/Resources/createinstallmedia --volume /Volumes/USB /Applications/Install\ macOS\ Sonoma.app --nointeraction
Enter your Admin password. Hit enter again. Wait until the installer is fully built. Should take 30+ minutes.

13. Mount the hidden EFI partion of the flash drive. Use EFI agent. Drag and drop your EFI folder to that partition.

Step 2. Boot from the USB installer and Clear NVRAM then enter Recovery. Open Terminal from Utilities in the Menu bar.
Type in "csrutil disable" without quotes. Press enter and SIP should be disabled. Next format your SSD: GUID partition map and APFS as required for Sonoma.

Step 3. Make sure all other hard drives are disconnected for this install. Install Sonoma. The whole process may take 40-45 minutes with multiple reboots.

Step 4. After Sonoma install completes, you'll run the OC Legacy Patcher app and apply the root patches. If you have a Broadcom Wifi/BT card installed, it will install root patches for that as well as Intel HD4600. Note that all kexts required for supported BRCM Wifi/BT cards are already included in the EFI folder. My genuine Apple BRCM94360CD card is fully enabled. BT works perfectly too.

Step 5. Copy over your USB's EFI folder to the EFI partition of your SSD. Reboot after you've ejected your USB installer. Now open up your SSD's EFI config.plist with OCAT. Go to Platform Info (PI tab). Generate all serials, MLB and ROM, SMUUID for an iMacPro1,1. Make sure to save changes by clicking on the diskette icon. Check your System Serial at Apple's website for warranty coverage. https://checkcoverage.apple.com/

The result should be: Please enter a valid Serial Number. Which means it's ok to use the one you generated.

View attachment 578234
View attachment 578215
Here's where you'll find these values in your config.plst when you open them with PlistEdit Pro or other editor.

View attachment 578399

After you reboot again and test that everything is working, you can try and sign in with your Apple ID to all the iServices and Facetime.

Step 6. If you want to use Firefox, DropBox and other third party apps, you'll need to install AMFIPass.kext to allow them to run properly. Find this kext attached below. Also remove the amfi=0x80 boot arg from the config.plist so the kext will work. If you have to run OCLP again to root patch in the future, temporarily add that boot arg back in, apply the patches, reboot, remove amfi=0x80, and reboot again.

Step 7. If you don't have a supported Broadcom Wifi card and you need Wifi for streaming, another option that will work is a Realtek USB Wifi adapter. See the following thread for what model to buy and how to install on Sonoma.


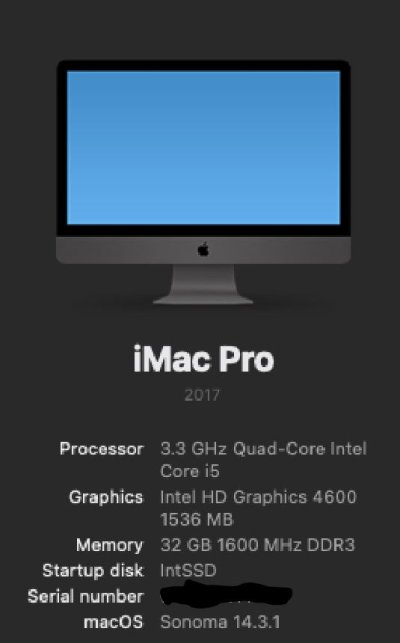
Bought a 7020 SFF for 25 dollars at a flea market, upgraded the internal HDD to a SSD, added 4 matching sticks for 32GB of ram and spent about 3-4 hours following this guide. Just wanted to say thank you for the guide! With parts I had laying around I was able turn this thing into a fun project. The only snag I hit was with dual monitors, I was wondering if anyone has mentioned issues with that. One monitor works great, but as soon as I try a second DP the system will only boot to a black screen. I have to hard power the device down and remove the second screen. When I boot into linux or windows they work fine.
 

Attachments

  • optimac.JPG
    optimac.JPG
    34.9 KB · Views: 5
but as soon as I try a second DP the system will only boot to a black screen. I have to hard power the device down and remove the second screen.
I would try to boot with just one screen attached. Then connect the other after fully booted into macOS.
Bought a 7020 SFF for 25 dollars at a flea market
I've found some great deals like that too. Even online. A 9020 with a 4790 for $18 ? Yep. And a GPU ? Yep.
Screen Shot 3.jpg
 
Last edited:
I would try to boot with just one screen attached. Then connect the other after fully booted into macOS.

I've found some great deals like that too. Even online. A 9020 with a 4790 for $18 ? Yep. And a GPU ? Yep.
View attachment 580716


I have tried the following TS steps, keep in mind hardware is all working under Linux and win10.

Power on device with with 1st DP filled only - normal display.
Power on the device with 2nd DP filled only - normal display.
Power on device with both DP's filled - apple splash screen then all black screens no response.
Power on device with both DP's filled unplug 1st or 2nd DP after splash screen - all black screen no response.
While device is powered on with 1 monitor in 1st DP move to 2nd display port. - Works no issues.
Power on device with one screen attached then plugging in 2nd screen - Main screen turns black computer becomes unresponsive and has no display on either monitor.
Power on device with no DP connected then plugging in one monitor to 1st or 2nd DP - works on one screen.
Power on device with no DP connected then plugging in both DP's at the same time - screens are black and is unresponsive.

I also tested with some VGA veriations but nothing there either.

I have a few evga usb uv+ adapters laying around, installed the software and drivers from the website the usb video devices power on but still no 2nd display.
 
I have tried the following TS steps, keep in mind hardware is all working under Linux and win10.
What is your CPU ? Are you using DP to HDMI cables or a DP to HDMI adapter ?
I also tested with some VGA veriations but nothing there either.
Don't bother with VGA. macOS hasn't supported it in over 15 years now.
 
What is your CPU ? Are you using DP to HDMI cables or a DP to HDMI adapter ?

Processor is: HSL, I5-4590, 3.3G, 84W
Monitors: Dell P2214H

Using DP cables to DP Monitors, monitors also have DVI and VGA.
I have tried a few variations thinking it could be cable related IE: DP to DVI cable and adapter, DP to VGA adapter same issues.
 
Back
Top