Edhawk
Moderator
- Joined
- Aug 2, 2013
- Messages
- 6,327
- Motherboard
- Asus ROG Strix X570-F Gaming
- CPU
- Ryzen 9 3900X
- Graphics
- RX 6700 XT
- Mac
- Mobile Phone
OK, you carry out your tests tomorrow.
In the meantime I have created an OpenCore 0.9.8 EFI for your H370, i3-8100 & RX560 system for you to try in place of your Clover EFI.
Testing/Booting:
If you want to try this OpenCore EFI, add your Serial Number, MLB, ROM and SystemUUID data to the revised config.plist. You will need Corpnewt's ProperTree or another compatible Plist Editor:
https://github.com/corpnewt/ProperTree
Rename the EFI-GJ folder to EFI.
Don't make any other changes to the setup or config.plist.
Copy the revised EFI folder to the EFI partition on a spare USB pen drive, which has been formatted HFS+, and boot your system from the pen drive.
Don't replace your current CLOVER EFI until you are sure the revised OC EFI works and boots your system without any issues.
You will need to use the ResetNvramEntry.efi option before you boot macOS with this OC setup.
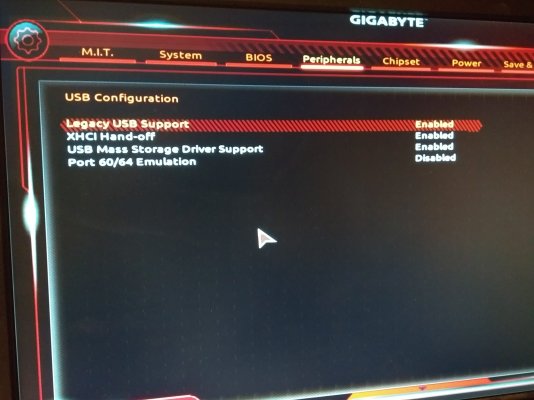
- Simply boot from the USB pen drive, use the BIOS Boot Menu to select the USB's UEFI partition (F8).
- When you arrive on the OC boot screen (GUI), Press the Spacebar button on your keyboard.
- This will unhide the tools and drivers contained in the OC setup.
- Select the ResetNvramEntry.efi icon and the system should automatically reboot.
- This will clear any old NVRAM entries and the system will use the new entries in the OC setup.
- Select your USB pen drive from the system Boot Menu again, and
- This time boot in to macOS using the revised EFI.
")