- Joined
- Aug 26, 2011
- Messages
- 12
- Motherboard
- Gigabyte EP35-DS3R
- CPU
- Q6600
- Graphics
- 8800gt
So years ago, a friend gave me a dead watercooled quad core 2.5 ghz, and the case had been living in my garage for far too long.
So my goal for this is to build a budget i7 Hackintosh, without taking a dremel to the G5 case. The idea of spending a lot of money on kits that require you to cut the hell out of a G5 case just didn't appeal to me. Also, I wanted to utilize this case I had sitting around, but without breaking the bank. Using an ITX size motherboard will help so I don't have to worry about room as much as I would with an mATX or full size ATX.
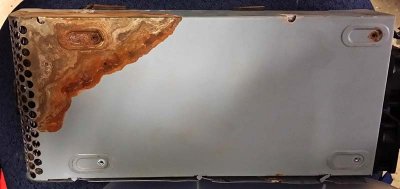
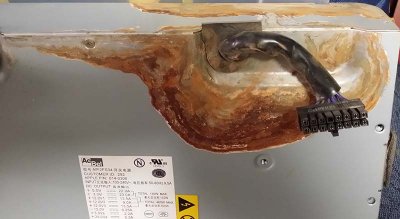
Here is the water damage on the original G5 PSU:
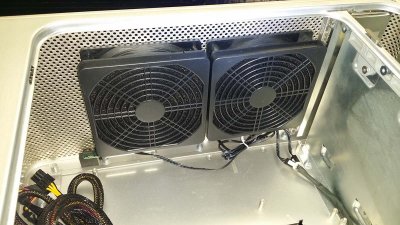
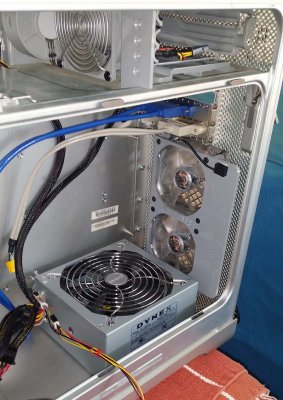
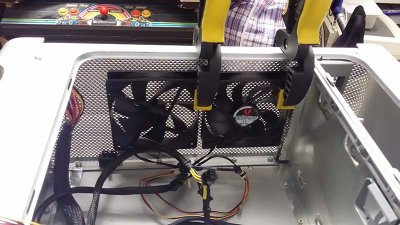
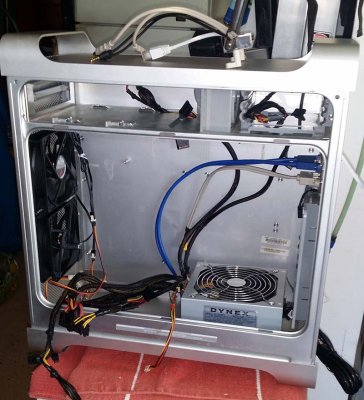
To avoid cuts to the rear, I am reusing the rear fan holder and installed 2-92mm Antec Tri-Cool fans that are adjustable with 3 fan speeds. Installed 2- 120mm case fans on the front using automotive 2-sided tape. I mounted a standard ATX power supply in the rear with industrial velcro in hopes that it will blow air out the rear of the case. I may fabricate a little duct to direct the air down and out:
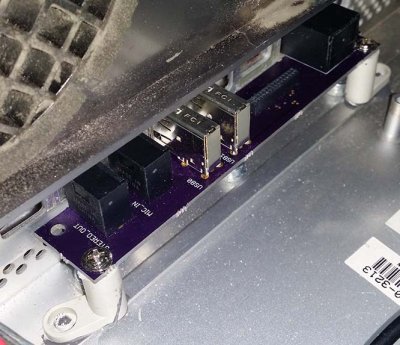
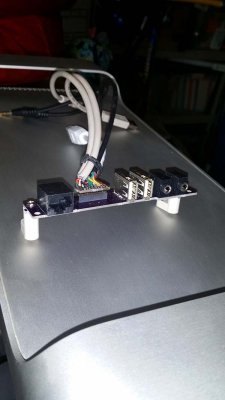
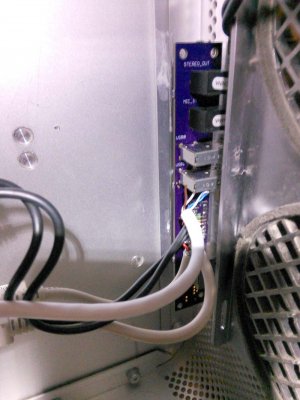
For rear I/O, I bought a custom made board from a member of InsanelyMac, that adapts the rear audio, USB & ethernet holes to a standard motherboard:
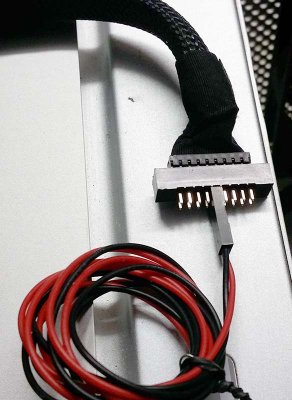
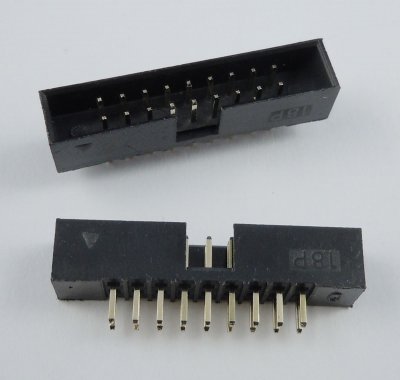
For front I/O I am planning to make my own adaptor using an 18 pin header I bought on eBay. Still working on this. Hoping the pins will make it so I can avoid soldering.
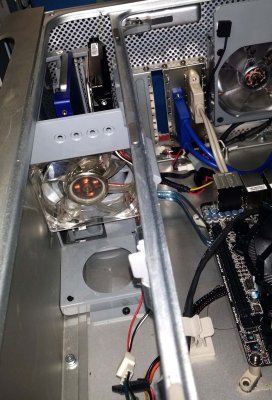
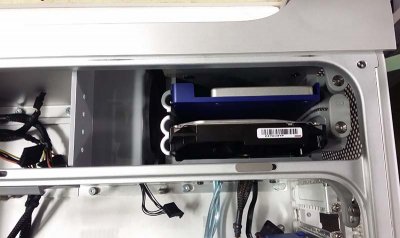
Using the existing drive bays for a 240gb SSD and a 2tb SATA drive:
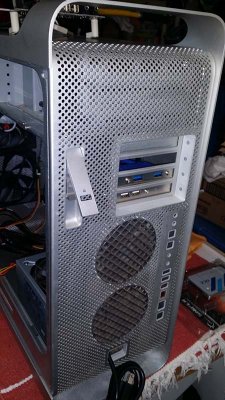
Also to improve access to ports, I am installing a USB 3 header and USB 2 header via the card slots:
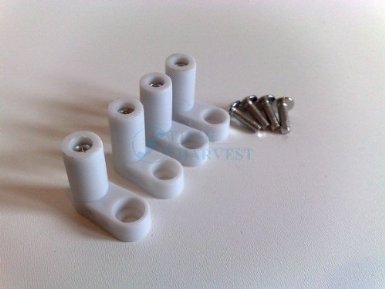
For mounting my ITX motherboard (Gigabyte H87N-Wifi, 16gb RAM, i7 4790k processor with factory fan for now) I used arcade PCB feet and epoxied them in. Not planning on using a graphics card; I think I can probably live with the built-in i7 graphics. DVI cable will go through an empty slot.
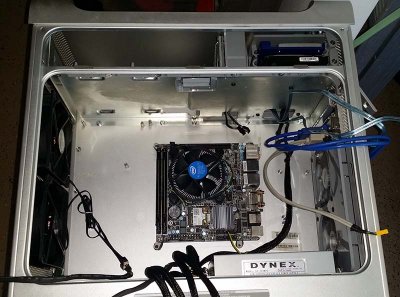
So that is where I am at right now. Left to do: hack the drive bay fan or replace it, wire up the front panel, and work out cable management. Waiting on some 120mm fan filters for the front fans. Also I plan on adding a couple of additional hard drives in the DVD bay, or maybe a drive tray towards the front of the case. Lots of room with the little ITX motherboard! Depending on temperatures inside the case, I may install a better CPU cooler - a Zalman CNPS-9900 Max that I am using in my current Q6600 build.
So that is where I am at, hoping to get this machine up and running soon!
So my goal for this is to build a budget i7 Hackintosh, without taking a dremel to the G5 case. The idea of spending a lot of money on kits that require you to cut the hell out of a G5 case just didn't appeal to me. Also, I wanted to utilize this case I had sitting around, but without breaking the bank. Using an ITX size motherboard will help so I don't have to worry about room as much as I would with an mATX or full size ATX.
Here is the water damage on the original G5 PSU:


To avoid cuts to the rear, I am reusing the rear fan holder and installed 2-92mm Antec Tri-Cool fans that are adjustable with 3 fan speeds. Installed 2- 120mm case fans on the front using automotive 2-sided tape. I mounted a standard ATX power supply in the rear with industrial velcro in hopes that it will blow air out the rear of the case. I may fabricate a little duct to direct the air down and out:


For rear I/O, I bought a custom made board from a member of InsanelyMac, that adapts the rear audio, USB & ethernet holes to a standard motherboard:


For front I/O I am planning to make my own adaptor using an 18 pin header I bought on eBay. Still working on this. Hoping the pins will make it so I can avoid soldering.


Using the existing drive bays for a 240gb SSD and a 2tb SATA drive:

Also to improve access to ports, I am installing a USB 3 header and USB 2 header via the card slots:

For mounting my ITX motherboard (Gigabyte H87N-Wifi, 16gb RAM, i7 4790k processor with factory fan for now) I used arcade PCB feet and epoxied them in. Not planning on using a graphics card; I think I can probably live with the built-in i7 graphics. DVI cable will go through an empty slot.


So that is where I am at right now. Left to do: hack the drive bay fan or replace it, wire up the front panel, and work out cable management. Waiting on some 120mm fan filters for the front fans. Also I plan on adding a couple of additional hard drives in the DVD bay, or maybe a drive tray towards the front of the case. Lots of room with the little ITX motherboard! Depending on temperatures inside the case, I may install a better CPU cooler - a Zalman CNPS-9900 Max that I am using in my current Q6600 build.
So that is where I am at, hoping to get this machine up and running soon!

