- Joined
- Aug 28, 2013
- Messages
- 20
- Motherboard
- GA-Z87MX-D3H
- CPU
- 4700 i7
- Graphics
- GTX 770 (4g)
- Mac
- Classic Mac
- Mobile Phone
This project has been a roller coaster for me...sold my '09 27" iMac in July. Couldn't afford another iMac, then decided to build a hack but was lured to the dark side by a sweet deal to get a new haswell HP Phoenix Envy 800-030qe (they were running a summer sale, so it was only about 900 bucks). As a staunch mac/video guy who's been using FCP since it was launched I decided to make the switch because FCPX and I have never got along...Adobe's CS however operates quite flawlessly on both platforms...Plus I've been finding myself at a desk less and less and at an iPad more and more for the daily rituals. After horrible transition pains and stumbling through Windows 8 I began remembering a simpler time, when backing up was easy and painless across multiple drives...raid maintenance...blah blah blah..oh yeah, it didn't seem to matter what I was doing, I'd get BSD's religiously. After a few months, I caved. Followed the buyers guide and picked up a new gigabyte board and wha-la...I was in hack land. After realizing how fun it was to be part of a unique collective, I began remembering an old love of mine...my old G5. I've always been super fond of the G5/Mac Pro design, so I new I just had to lay my hands on one. Sadly this tale is not complete without the utter destruction of a MD G4, a buddy of mine was throwing it out so I took it and made a total abomination out of it. If only I knew then what I know now...
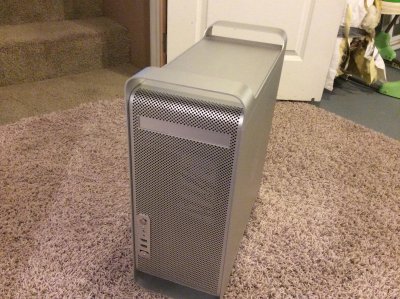
Anyway, drove quite a ways to pick up the illustrious G5 tower. The owner claimed it had long been dead. Got her home and noted she still turned over, I suspected a bad video card. I quickly demolished the computer to it's bones. I was pretty nervous about modifying this case because let me tell you, it was in absolute pristine condition. I have yet to locate a scratch of scuff mark on this case. It really shocked me as it was one of the originals, a 2003 1.8ghz. I myself once owned a '03 dual 2. I was shocked when I remembered just how large the processors/heat sinks were on these boats.
Parts:
Intel Core i7 - 4700 (4th generation haswell, came with HP)
G5 case - priceless
Gigabyte GA-Z87MX-D3H - $120
4x8GB DDR3-1600 32GB - AVEXIR Core Series (has blue led, it's kinda cool to see the sticks flash through the cheese grate) - $250
180GB OCZ-AGILITY III SSD - Already owned
4x1TB Seagate Barracuda 7200RPM drives (Raid 0 for video editing speed, time machine external) - $325
1x2tb Western Digital 7200 - (already owned, for spare/backup)
SYBA Firewire 800 PCIe - $22
Nvidia GT 640 4GB - Came with HP
HP Stock Liquid Cooler (will need to replace this soon to get a 120mm fan/radiator the HP is 80mm and is currently jury-rigged to fit)
120mm Laser Hive/mobo kit
HP mATX PSU
IOGear USB Bluetooth 4.0 Adapter - $15
Wireless TP-LINK - $43
Gutted:
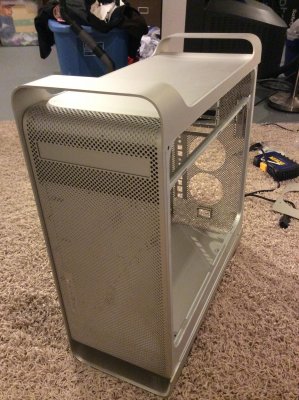
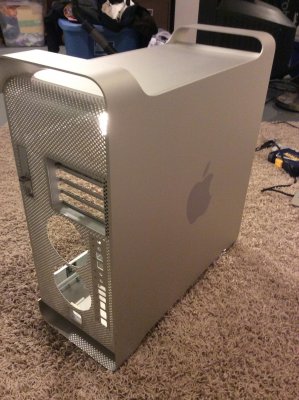

Next, the scary part...cutting. I ordering some really great parts from The Laser Hive. They were fantastic to work with. I picked up the 120mm mod kit with mobo tray. I was also pretty insistent on modernizing this case, so I went ahead and got the usb3/esata front switch as well. Really, the best thing I think I did. I've never used a dremel to cut metal before, so it was pretty nerve racking. During my research this also appeared to be the least documented portion of modification. Suffice to say, it really wasn't hard at all. I'm also never one to test before doing, kind of the Captain Kirk of projects...The only thing I was less than happy with was the power button, but I don't really care as it's covered with the new button and trim piece.
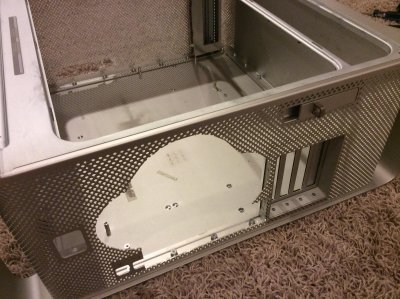

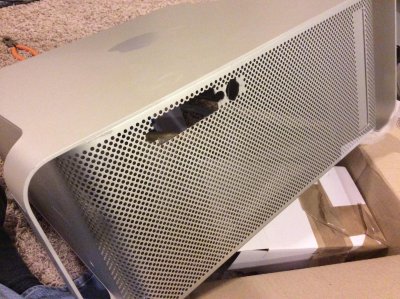
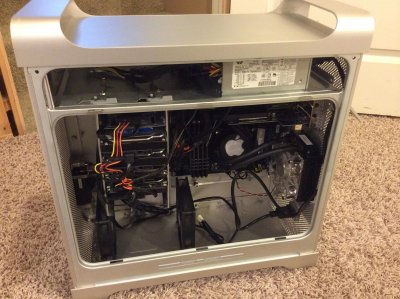
After this, I placed the Laser Hive plexi/acrylic tray into position and secured it with the supplied screws. I've gotta give them major credit as the process was entirely painless. I had to remove several standoffs that were no longer of any use, it was as easy as taking a pair of pliers and snapping them out.
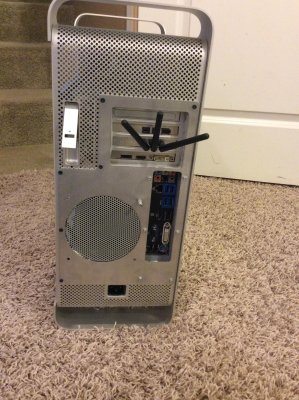
The PSU placement was always of major concern for me. I really wanted to reuse the original G5 plug, but ended up just about blowing up my basement. My first experience with soldering did not go well...Seriously, anyone out there attempting to do this, please take extreme caution as this could literally kill you if done incorrectly. I would have loved to reuse the original G5 PSU housing as well, but knew that me and capacitors probably wouldn't get along to well after lighting a perfectly good cable on fire and destroying said plug and solder connection. SOOOO, let me tell you the easy way out that I combobulated. If you're like me and weren't planning to do much with the G5 upper shelf, put your PSU there. I went ahead and measured and cut out an area of the shelf for the PSU fan to breath onto the mobo just as it was designed/intended to do. I used some industrial strength velcro on the top of the case/psu to hold it securely in place (which honestly is barely needed as the shelf really pins the unit into place once the shelf is screwed back into position. I'm not kidding...there really isn't much room to play with, it's a very tight fit. I picked up an inexpensive power extension cable from Rocketfish and cemented it to the original plastic retaining clip, then JB welded the clip to the case. I've had no problems and the whole process took just a couple of minutes...the best part...I have peace of mind that the connections are solid and safe. The wire is easily hid along the lip that runs parallel to the latch switch, a little electric tape to secure it and no one will know it's there. For me, I think it looks pretty good, the pictures can be the final judge.
I really loved the original G5 hard drive bay, but knew that I had 6 drives to give home to. I went ahead and salvaged an old bay from a ATX case and screwed/JB welded it into position using the upper shelf as a guide. I toyed with using the original G5 bay in place of the combo drive, but decided to keep that area clear for air movement if necessary.
Lastly, I installed two 120 mm fans on the bottom to move air away from and out of the case near the hard drives. I know heat rises but I decided air movement was better than no movement. I picked these up from my local best buy for 20 bucks. Overall, cable management was a bit tricky, but I'm really not all that picky. I'm rarely inside my case and that ascetic really doesn't bother me. Heat hasn't been a problem, temperatures are steady and well below what I expected.
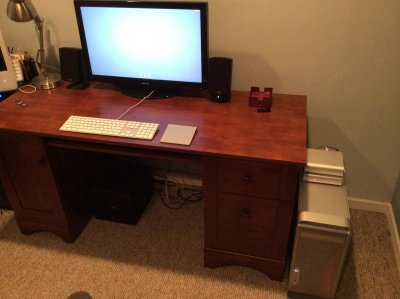
Overall, I'm completely satisfied with this build. The laser hive pieces and the power supply placement/cord really made this a breeze. If it weren't for my hiccups with the PSU plug I probably would have been done with this build in a day or two. I hope this can help someone out there, in hindsight I wish I was able to take more pictures, but when you get going you really don't want to stop!
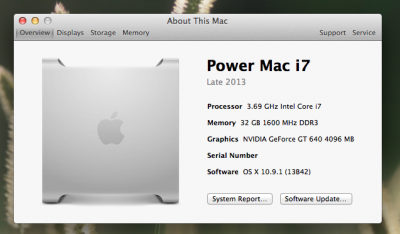
Anyway, drove quite a ways to pick up the illustrious G5 tower. The owner claimed it had long been dead. Got her home and noted she still turned over, I suspected a bad video card. I quickly demolished the computer to it's bones. I was pretty nervous about modifying this case because let me tell you, it was in absolute pristine condition. I have yet to locate a scratch of scuff mark on this case. It really shocked me as it was one of the originals, a 2003 1.8ghz. I myself once owned a '03 dual 2. I was shocked when I remembered just how large the processors/heat sinks were on these boats.
Parts:
Intel Core i7 - 4700 (4th generation haswell, came with HP)
G5 case - priceless
Gigabyte GA-Z87MX-D3H - $120
4x8GB DDR3-1600 32GB - AVEXIR Core Series (has blue led, it's kinda cool to see the sticks flash through the cheese grate) - $250
180GB OCZ-AGILITY III SSD - Already owned
4x1TB Seagate Barracuda 7200RPM drives (Raid 0 for video editing speed, time machine external) - $325
1x2tb Western Digital 7200 - (already owned, for spare/backup)
SYBA Firewire 800 PCIe - $22
Nvidia GT 640 4GB - Came with HP
HP Stock Liquid Cooler (will need to replace this soon to get a 120mm fan/radiator the HP is 80mm and is currently jury-rigged to fit)
120mm Laser Hive/mobo kit
HP mATX PSU
IOGear USB Bluetooth 4.0 Adapter - $15
Wireless TP-LINK - $43
Gutted:


Next, the scary part...cutting. I ordering some really great parts from The Laser Hive. They were fantastic to work with. I picked up the 120mm mod kit with mobo tray. I was also pretty insistent on modernizing this case, so I went ahead and got the usb3/esata front switch as well. Really, the best thing I think I did. I've never used a dremel to cut metal before, so it was pretty nerve racking. During my research this also appeared to be the least documented portion of modification. Suffice to say, it really wasn't hard at all. I'm also never one to test before doing, kind of the Captain Kirk of projects...The only thing I was less than happy with was the power button, but I don't really care as it's covered with the new button and trim piece.


After this, I placed the Laser Hive plexi/acrylic tray into position and secured it with the supplied screws. I've gotta give them major credit as the process was entirely painless. I had to remove several standoffs that were no longer of any use, it was as easy as taking a pair of pliers and snapping them out.
The PSU placement was always of major concern for me. I really wanted to reuse the original G5 plug, but ended up just about blowing up my basement. My first experience with soldering did not go well...Seriously, anyone out there attempting to do this, please take extreme caution as this could literally kill you if done incorrectly. I would have loved to reuse the original G5 PSU housing as well, but knew that me and capacitors probably wouldn't get along to well after lighting a perfectly good cable on fire and destroying said plug and solder connection. SOOOO, let me tell you the easy way out that I combobulated. If you're like me and weren't planning to do much with the G5 upper shelf, put your PSU there. I went ahead and measured and cut out an area of the shelf for the PSU fan to breath onto the mobo just as it was designed/intended to do. I used some industrial strength velcro on the top of the case/psu to hold it securely in place (which honestly is barely needed as the shelf really pins the unit into place once the shelf is screwed back into position. I'm not kidding...there really isn't much room to play with, it's a very tight fit. I picked up an inexpensive power extension cable from Rocketfish and cemented it to the original plastic retaining clip, then JB welded the clip to the case. I've had no problems and the whole process took just a couple of minutes...the best part...I have peace of mind that the connections are solid and safe. The wire is easily hid along the lip that runs parallel to the latch switch, a little electric tape to secure it and no one will know it's there. For me, I think it looks pretty good, the pictures can be the final judge.
I really loved the original G5 hard drive bay, but knew that I had 6 drives to give home to. I went ahead and salvaged an old bay from a ATX case and screwed/JB welded it into position using the upper shelf as a guide. I toyed with using the original G5 bay in place of the combo drive, but decided to keep that area clear for air movement if necessary.
Lastly, I installed two 120 mm fans on the bottom to move air away from and out of the case near the hard drives. I know heat rises but I decided air movement was better than no movement. I picked these up from my local best buy for 20 bucks. Overall, cable management was a bit tricky, but I'm really not all that picky. I'm rarely inside my case and that ascetic really doesn't bother me. Heat hasn't been a problem, temperatures are steady and well below what I expected.
Overall, I'm completely satisfied with this build. The laser hive pieces and the power supply placement/cord really made this a breeze. If it weren't for my hiccups with the PSU plug I probably would have been done with this build in a day or two. I hope this can help someone out there, in hindsight I wish I was able to take more pictures, but when you get going you really don't want to stop!


