
- Joined
- Jan 3, 2024
- Messages
- 5
- Motherboard
- Huananzhi X99-T8
- CPU
- E5-2696v3
- Graphics
- RX 6600
I was inspired by other great mods here. So, my first mod here.
The goal is to retain as many original components/features from a Mac Pro 5,1 case as possible.
Specs:
Motherboard: Huananzhi X99-T8 (ATX)
CPU: E5-2696v3, 18 cores, 36 threads, turbo boost unlocked with all cores at 3.8Ghz
RAM: 256GB (32GB DDR3 1333Mhz x8)
GPU: RX6600
Storage: NVME 1TB (macOS Sonoma 14.2.1), NVME 500GB (Windows 10), 12TB HDD in strip RAID (4TB x3)
Wifi/BT: Intel 8265
USB PCIE expansion card with 10GB/s ports
PSU: 550W non-modular
Total cost: ~US$400


Performance is more than double that of my old fully upgraded dual-Xeon mac pro 5,1, but it runs at half the power at idle. Windows gaming is quite good.
So far everything works, including sleep.


Notes for fellow modders:
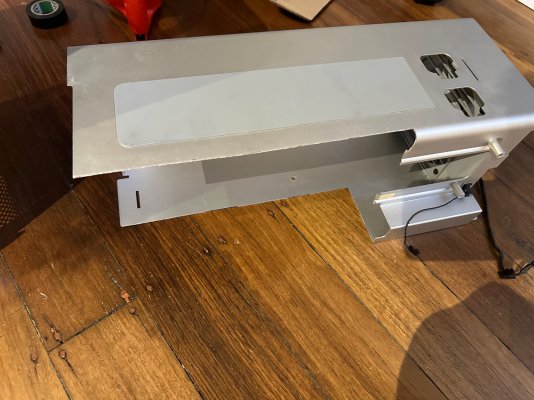
* My method is to cut a slot at the bottom of the case, so to fit the ATX with the second PCIE lane aligning with the case. I should be able to fit a dual-Xeon EATX board. My next mod will use the Huananzhi X99-F8D PLUS (EATX), which should double the performance again.
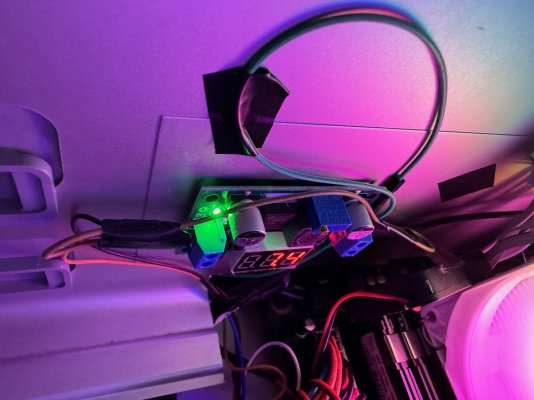
* I am reusing all the original mac pro fans, which are very good quality powerful delta industrial fans. I connect them to the PSU's SATA cable, with the fourth pin (Vcontrol) on 3.3V to get about 900RPM. For the PCIE fan, I use a voltage controller to get 7.4V otherwise it is too noisy.
* I gave up fitting the front ports and IO panel, as I want a more authentic look. By fitting the front USB ports to the back, plus a PCIE USB card, I get seven USB ports, with two at 10Gb/s speed and the other five at 5Gb/s. This is good enough for me.
* Three sound ports and the ethernet port are accessible from outside without much modification.
* I can fit three 3.5inch hard drives, two in the 5.25inch bay, one in the first HDD tray slot. I can potentially fit three other 2.5inch drives in the other three HDD tray slots. I can also use PCIE to M2 adapter to add a third NVME slot using the last PCIE lane (x4 speed), which is not accessible from outside.
* Wifi and Bluetooth using the existing locations, but replaced with new cables of the smaller connection type.
* PSU can fit in the original PSU slot, with the fan facing up. No need to open up the PSU. All the spare cables can fit behind the 5.25inch bay.
* With all these, I still have a 16x PCIE slot empty. And one more 1x PCIE slot can be used with an extension cable.
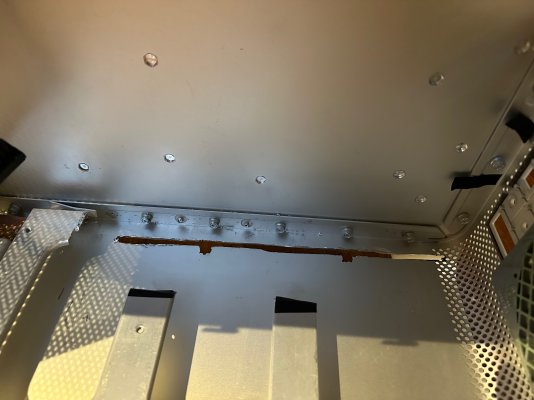
Some work-in-progress photos are attached.
The goal is to retain as many original components/features from a Mac Pro 5,1 case as possible.
Specs:
Motherboard: Huananzhi X99-T8 (ATX)
CPU: E5-2696v3, 18 cores, 36 threads, turbo boost unlocked with all cores at 3.8Ghz
RAM: 256GB (32GB DDR3 1333Mhz x8)
GPU: RX6600
Storage: NVME 1TB (macOS Sonoma 14.2.1), NVME 500GB (Windows 10), 12TB HDD in strip RAID (4TB x3)
Wifi/BT: Intel 8265
USB PCIE expansion card with 10GB/s ports
PSU: 550W non-modular
Total cost: ~US$400
Performance is more than double that of my old fully upgraded dual-Xeon mac pro 5,1, but it runs at half the power at idle. Windows gaming is quite good.
So far everything works, including sleep.
Notes for fellow modders:
* My method is to cut a slot at the bottom of the case, so to fit the ATX with the second PCIE lane aligning with the case. I should be able to fit a dual-Xeon EATX board. My next mod will use the Huananzhi X99-F8D PLUS (EATX), which should double the performance again.
* I am reusing all the original mac pro fans, which are very good quality powerful delta industrial fans. I connect them to the PSU's SATA cable, with the fourth pin (Vcontrol) on 3.3V to get about 900RPM. For the PCIE fan, I use a voltage controller to get 7.4V otherwise it is too noisy.
* I gave up fitting the front ports and IO panel, as I want a more authentic look. By fitting the front USB ports to the back, plus a PCIE USB card, I get seven USB ports, with two at 10Gb/s speed and the other five at 5Gb/s. This is good enough for me.
* Three sound ports and the ethernet port are accessible from outside without much modification.
* I can fit three 3.5inch hard drives, two in the 5.25inch bay, one in the first HDD tray slot. I can potentially fit three other 2.5inch drives in the other three HDD tray slots. I can also use PCIE to M2 adapter to add a third NVME slot using the last PCIE lane (x4 speed), which is not accessible from outside.
* Wifi and Bluetooth using the existing locations, but replaced with new cables of the smaller connection type.
* PSU can fit in the original PSU slot, with the fan facing up. No need to open up the PSU. All the spare cables can fit behind the 5.25inch bay.
* With all these, I still have a 16x PCIE slot empty. And one more 1x PCIE slot can be used with an extension cable.
Some work-in-progress photos are attached.
Attachments
Last edited: