- Joined
- Nov 27, 2011
- Messages
- 9
- Motherboard
- Gigabyte Ga-H61N-USB3 F8
- CPU
- i5 3570k
- Graphics
- HD4000
- Mac
- Classic Mac
- Mobile Phone
Hi all, good news
After a few days, I got my Yosemite install. I am not sure what changed, but I started to make some progress after downgrading the BIOS from F8 to F7 (the first review that supports my Ivy Bridge CPU). Here is a quick description. Hope it helps others.
- BIOS: Install F7 version. Set to Load Optimized Defaults. Change to AHCI. HPET to 64 bits. Similar to what is explained in here: http://tonymacx86.blogspot.com.ar/2010/04/iboot-multibeast-install-mac-os-x-on.html. No big deal in there. I tried a zillion combinations when it did not work without luck. So, I agree that it really does not make too much of a deal the fine tuning, other than what is suggested in the linked guide. Setting the DVD as first disk did not make a difference (may be that is left from the days where we installed 10.6 from DVD?)
- Prepare Yosemite install USB as described in this site. I did it from my existing version.
- I think a USB keyboard and mouse (not wireless) did help.
- I used a DVI monitor. I think that used to be mandatory.
- Booting always with -x -v -f GraphicsEnabler=Yes PCIRootUID=1
- I plugged the USB in my front ports (those that are wired to the mother board). I did not use the ports in the back. Not sure if that will make a difference.
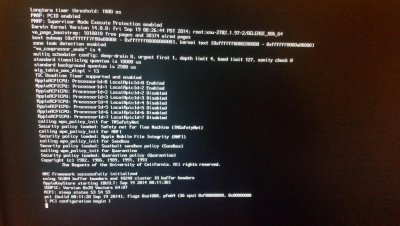
- Boot takes A WHILE (maybe over 10 minutes, it all seems dead, but is not), but eventually starts normally. There are lots of warnings and errors in the boot log, but after the long wait, it goes to a fully normal graphic mode.
- Install Yosemite as recommended (not much to choose anyway). Then select to reboot, as instructed by Apple's installer.
- Boot again to the USB and then select to boot from HD, as you should normally do. Use same parameters I mentioned for the boot program.
- Again, the boot takes A WHILE, but eventually finishes and boots to the last part of the graphic installation.
- Finish the install (create the user account, select region, etc.)
- I had a recommended Wifi card plugged in. It recognized during the last part of the install, so I had wifi during the install.
- I did not enter my AppleID (not sure if that is important)
- Login to the newly created user account.
- Run Multibeast for Yosemite. Use DSDT file downloaded from this site, VERSION F7 that matches your BIOS. I never got F8 to work (there might be a problem with it). In Multibeast also select Drivers/System/AppleACPIRollback and I also selected the 1080p. Just those three things. Nothing more.
- Reboot now normally from the hard drive. In my case, I got the boot0 error, which can be fixed as explained in here: http://www.tonymacx86.com/25-boot0-error-official-guide.html. I used the first technique (boot to USB drive, and run the terminal from there).
- Reboot from your new hardrive. The system worked all, except audio.
- Run MB again and select the audio driver for this MB (ALC889) and reboot.
- Config the audio from the control panel, to use the "internal speakers".
It all seems to be working:
- Wifi works fine, Ethernet is listed (although I did not plug in a cable).
- Video works with the HD4000, no flickering. It all works fine.
- Sleep, shutdown works without a glitch (at least when triggering these options from the Apple menu). The Wifi works after a sleep.
- USB3 recognized and working (did not test performance).
- I also have a memory card reader, that works no problem.
- I unplugged my USB KB/Mouse and plugged in my wireless Genius combo and works no problem.
- Switched language to Spanish, no problema!
FINAL TIPS: Because i had a lot of info on my previous mac (user accounts, documents, applications, etc.), this is what I did:
- Disconnected my main drive. Stored the BIOS Settings (the motherboard allows you to do this). This step is a backup, to be covered against odds...
- Got a temporary hard drive (for my test, a 250 GB was more than enough). I practiced the install with it until I got it working ok.
- I always selected a new install, formatting the drive each time, to ensure a repeatable clean Yosemite install. Once I got it to work, I repeated it to ensure that I have it right, without errors.
- Once I know the required steps and patches (and tried them more than once in my temporary drive), I disconnected the DVD and pluged also old drive (my main drive, where my existing mac OS and files are). I booted from the new empty-but-working Yosemite drive.
- Ran the Yosemite Migration Assistant, to grab all user files and applications from my old drive. This works to perfection. You may not be able to import an account that already exists in your Yosemite drive... In that case, simply create a new account in Yosemite, delete the conflicting one and ran the Migration Assistant to also import that account.
- I normally use an administration account called Installer, that has nothing important (I don't even bother to import). All the other users will be regular users.
- Disconnected my main drive and tested that my temporary works to satisfaction. All user accounts, passwords, Safari favorites, files, and so on. Make sure it works, because next step is irreversible") .
.
- I now have a fully Yosemite working with user accounts and files in my temporary drive. I also have all the instructions that ensured me that I can do the install in my hardware.
- Unplugged my temporary drive and plugged the main one again. But this time, I will wipe it for real.
- Now I did a full Yosemite install on my main drive, erasing everything to get a proper and clean install. Follow all the procedure I tested on my temporary drive.
- In my case, it worked just the same, except for the boot0 error, that only appeared with my main drive.
- Once my main drive was ready, i plugged the temporary again and booted from the main drive. Now I ran the migration assistant to move all my accounts and files from the temporary to the main disk.
- Voila!
Hope it helps!
Milci - Nov 3rd 2014
After a few days, I got my Yosemite install. I am not sure what changed, but I started to make some progress after downgrading the BIOS from F8 to F7 (the first review that supports my Ivy Bridge CPU). Here is a quick description. Hope it helps others.
- BIOS: Install F7 version. Set to Load Optimized Defaults. Change to AHCI. HPET to 64 bits. Similar to what is explained in here: http://tonymacx86.blogspot.com.ar/2010/04/iboot-multibeast-install-mac-os-x-on.html. No big deal in there. I tried a zillion combinations when it did not work without luck. So, I agree that it really does not make too much of a deal the fine tuning, other than what is suggested in the linked guide. Setting the DVD as first disk did not make a difference (may be that is left from the days where we installed 10.6 from DVD?)
- Prepare Yosemite install USB as described in this site. I did it from my existing version.
- I think a USB keyboard and mouse (not wireless) did help.
- I used a DVI monitor. I think that used to be mandatory.
- Booting always with -x -v -f GraphicsEnabler=Yes PCIRootUID=1
- I plugged the USB in my front ports (those that are wired to the mother board). I did not use the ports in the back. Not sure if that will make a difference.
- Boot takes A WHILE (maybe over 10 minutes, it all seems dead, but is not), but eventually starts normally. There are lots of warnings and errors in the boot log, but after the long wait, it goes to a fully normal graphic mode.
- Install Yosemite as recommended (not much to choose anyway). Then select to reboot, as instructed by Apple's installer.
- Boot again to the USB and then select to boot from HD, as you should normally do. Use same parameters I mentioned for the boot program.
- Again, the boot takes A WHILE, but eventually finishes and boots to the last part of the graphic installation.
- Finish the install (create the user account, select region, etc.)
- I had a recommended Wifi card plugged in. It recognized during the last part of the install, so I had wifi during the install.
- I did not enter my AppleID (not sure if that is important)
- Login to the newly created user account.
- Run Multibeast for Yosemite. Use DSDT file downloaded from this site, VERSION F7 that matches your BIOS. I never got F8 to work (there might be a problem with it). In Multibeast also select Drivers/System/AppleACPIRollback and I also selected the 1080p. Just those three things. Nothing more.
- Reboot now normally from the hard drive. In my case, I got the boot0 error, which can be fixed as explained in here: http://www.tonymacx86.com/25-boot0-error-official-guide.html. I used the first technique (boot to USB drive, and run the terminal from there).
- Reboot from your new hardrive. The system worked all, except audio.
- Run MB again and select the audio driver for this MB (ALC889) and reboot.
- Config the audio from the control panel, to use the "internal speakers".
It all seems to be working:
- Wifi works fine, Ethernet is listed (although I did not plug in a cable).
- Video works with the HD4000, no flickering. It all works fine.
- Sleep, shutdown works without a glitch (at least when triggering these options from the Apple menu). The Wifi works after a sleep.
- USB3 recognized and working (did not test performance).
- I also have a memory card reader, that works no problem.
- I unplugged my USB KB/Mouse and plugged in my wireless Genius combo and works no problem.
- Switched language to Spanish, no problema!
FINAL TIPS: Because i had a lot of info on my previous mac (user accounts, documents, applications, etc.), this is what I did:
- Disconnected my main drive. Stored the BIOS Settings (the motherboard allows you to do this). This step is a backup, to be covered against odds...
- Got a temporary hard drive (for my test, a 250 GB was more than enough). I practiced the install with it until I got it working ok.
- I always selected a new install, formatting the drive each time, to ensure a repeatable clean Yosemite install. Once I got it to work, I repeated it to ensure that I have it right, without errors.
- Once I know the required steps and patches (and tried them more than once in my temporary drive), I disconnected the DVD and pluged also old drive (my main drive, where my existing mac OS and files are). I booted from the new empty-but-working Yosemite drive.
- Ran the Yosemite Migration Assistant, to grab all user files and applications from my old drive. This works to perfection. You may not be able to import an account that already exists in your Yosemite drive... In that case, simply create a new account in Yosemite, delete the conflicting one and ran the Migration Assistant to also import that account.
- I normally use an administration account called Installer, that has nothing important (I don't even bother to import). All the other users will be regular users.
- Disconnected my main drive and tested that my temporary works to satisfaction. All user accounts, passwords, Safari favorites, files, and so on. Make sure it works, because next step is irreversible
.- I now have a fully Yosemite working with user accounts and files in my temporary drive. I also have all the instructions that ensured me that I can do the install in my hardware.
- Unplugged my temporary drive and plugged the main one again. But this time, I will wipe it for real.
- Now I did a full Yosemite install on my main drive, erasing everything to get a proper and clean install. Follow all the procedure I tested on my temporary drive.
- In my case, it worked just the same, except for the boot0 error, that only appeared with my main drive.
- Once my main drive was ready, i plugged the temporary again and booted from the main drive. Now I ran the migration assistant to move all my accounts and files from the temporary to the main disk.
- Voila!
Hope it helps!
Milci - Nov 3rd 2014