- Joined
- Aug 20, 2012
- Messages
- 28
- Motherboard
- Mid-2009 13" MBP
- CPU
- Core 2 Duo 2.26 GHz
- Graphics
- Nvidia 9400M
- Mac
- Classic Mac
- Mobile Phone
Hello, guys I decided to build myself a G5 mod. It's my first mod of... anything. So this thread will be both for questions I have and for displaying my progress ") .
.


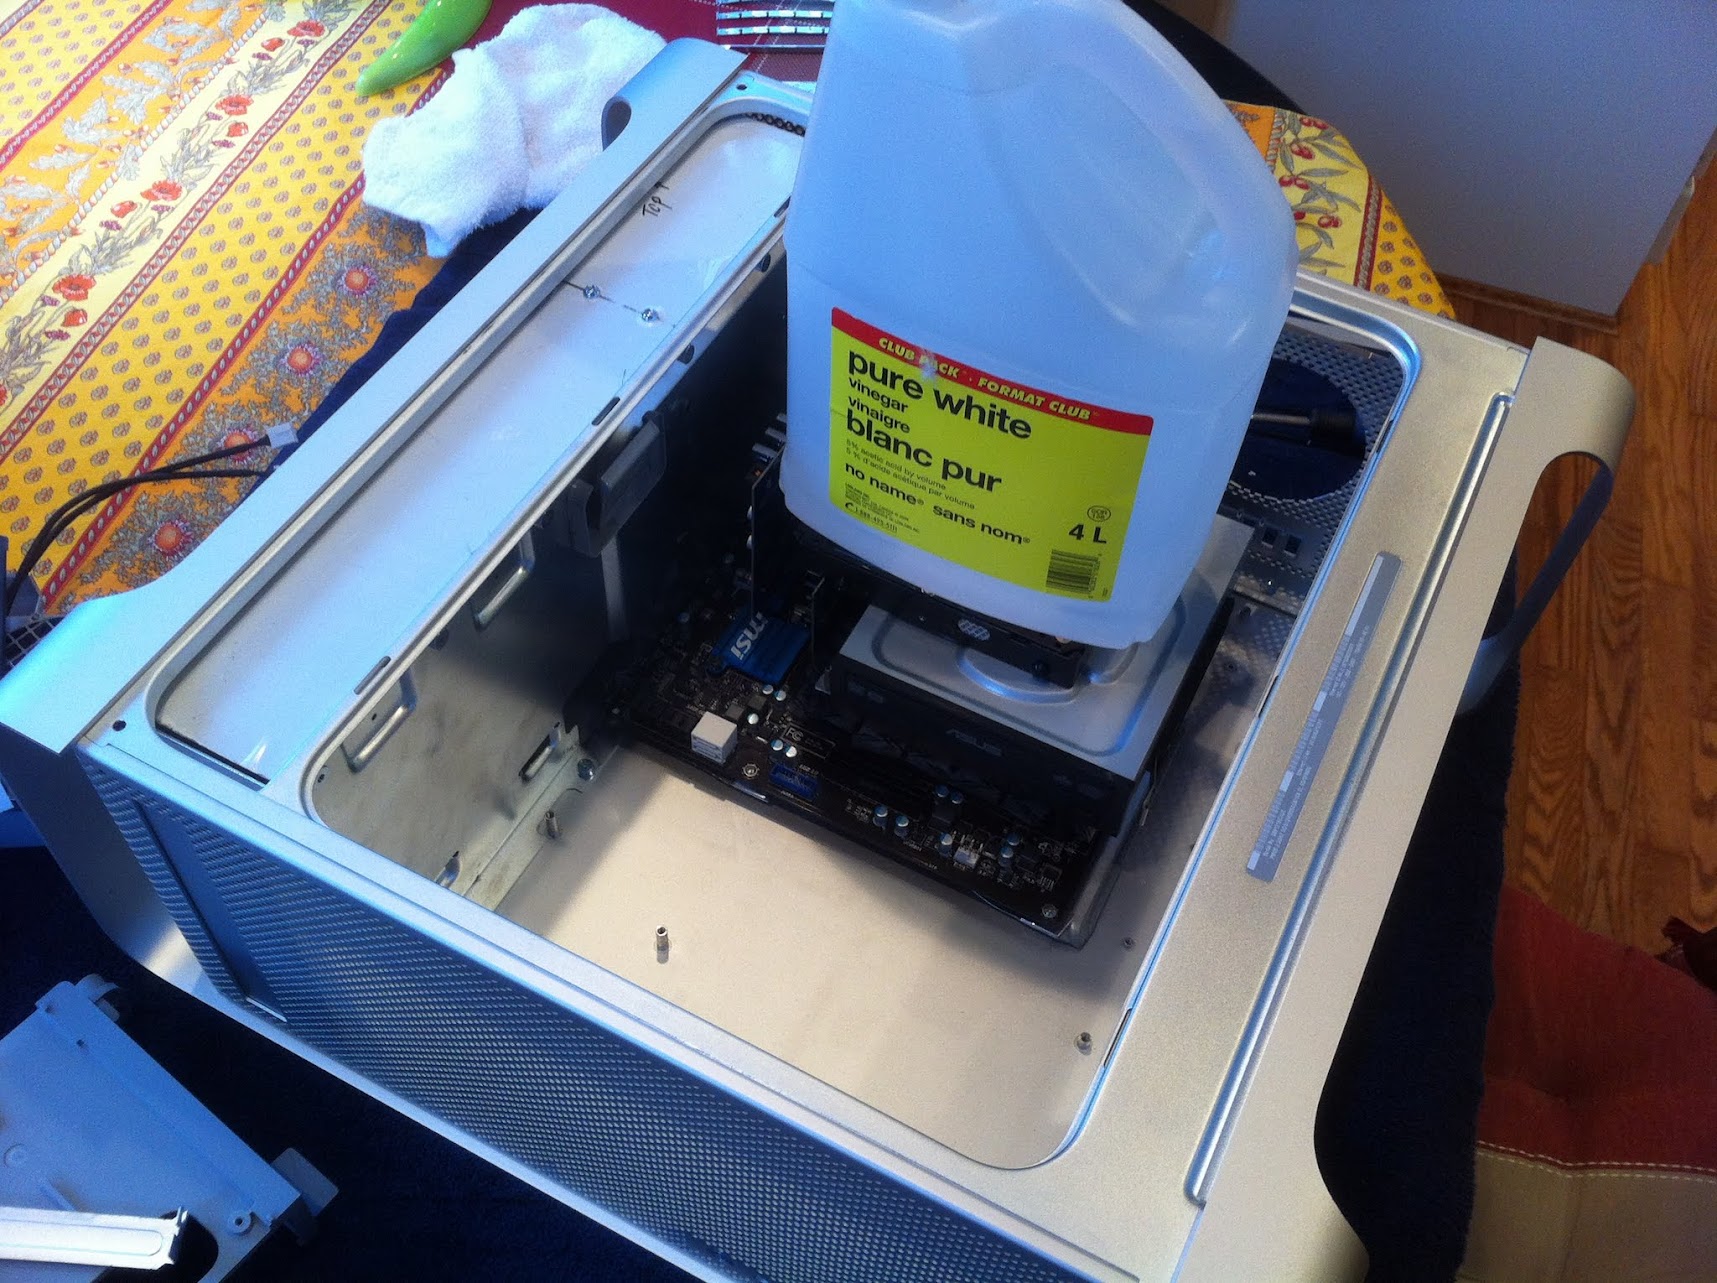
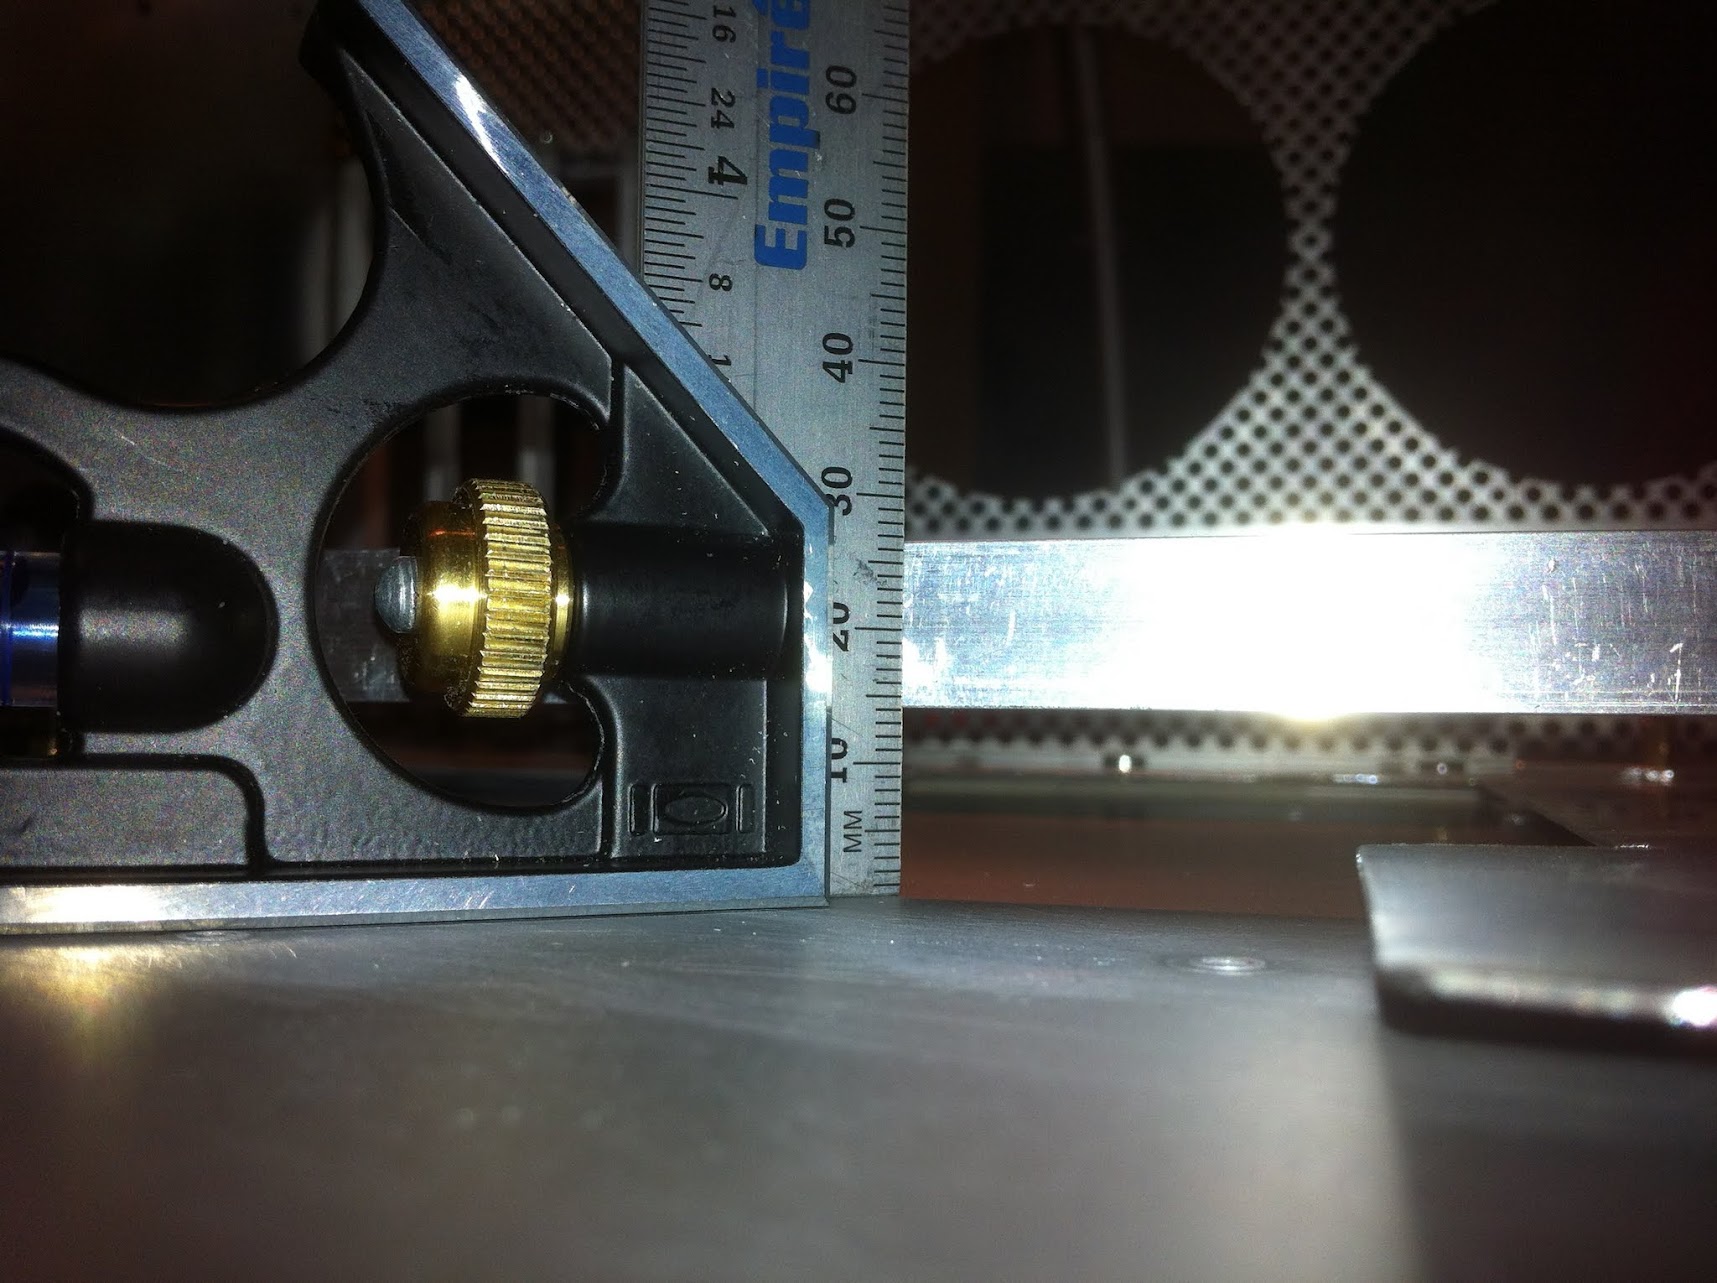
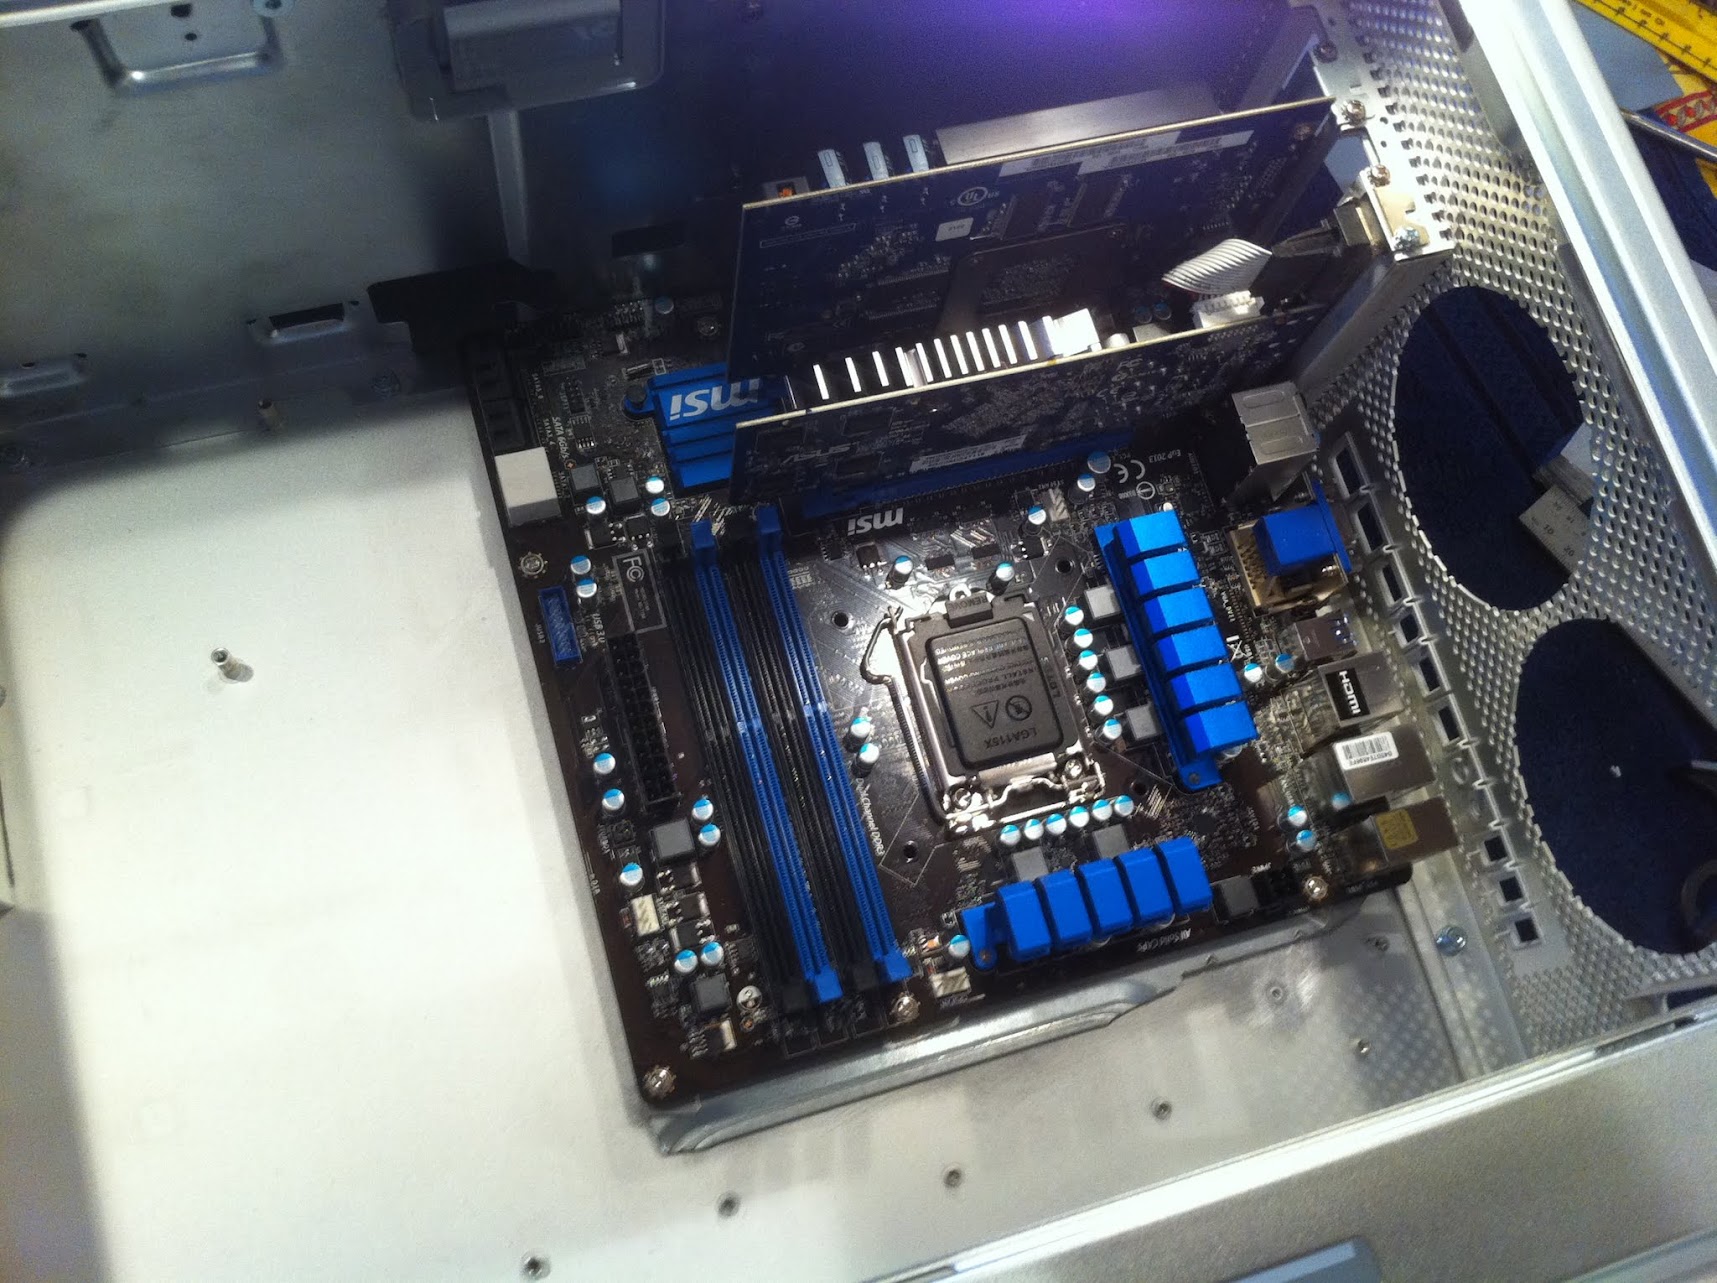
As you can see from the pictures above, I've completely gutted my G5, and test fitted an old Mobo and thelaserhive's 120mm mATX conversion kit. It will be used as a template to epoxy the standoffs. Speaking of which there are 2 type of standoffs with different heights 15.90mm and 13.90mm. So that makes a difference of 2mm or almost 0.1". Which standoffs should I use?
When I decided that I'd build a G5 hackintosh I wanted to be keep it as original as possible, but when I got the case there were 3 deep scuffs like this one... So a repaint and possibly filling them with a filler is necessary.

This Saturday or Sunday I'll prep it for sandblasting and powder coating and it's going to be almost time to start buying the components.
UPDATE March 13 2013: Hey, guys finally an update! I took my baby to be powdercoted the other day and today I'm showing you the results!
First front view: The power button and CD cover are painted matte black like the PCI brackets and door lock and latch. I'm digging this White with a hint of Black.

Insides: I haven't put the gazillion T10 screws in yet, because I'm going to spraypaint them black

Backside and me holding the 120mm fan plate from thelaserhive...

And I've temporary put the PCI brackets and installed the door lock.

Update March 15th 2013: Well guys for the last couple of days I've been spray painting all the silver bolts black... And this is the result:
First the side panel is whole again:


And this is the insides taking shape

This weekend I'm planning of putting the mobo standoffs, but... I have to finish spraypainting...
Update March 18th: I'm done with the spraypainting and if it wasn't for a single standoff to break I would have been done with the gluing the standoffs... And with that I need less than 30 minutes to put the case together and be ready for the PC parts.
I painted the plastic PCI frame black... NIIICE result

The backside with the thelaserhive's kit installed. Powdercoted aluminum plate and spaypainted IO bracket plate...


Original HDD cage spraypainted black and ORICO 2x2.5" to 3.5" mounting bracket that fits perfectly between the Superdrive and the HDD cage. A total of 4 drives...


And last but not least... Frontside with the Superdrive door Black and the frontpanel bezel and powerbutton


.As you can see from the pictures above, I've completely gutted my G5, and test fitted an old Mobo and thelaserhive's 120mm mATX conversion kit. It will be used as a template to epoxy the standoffs. Speaking of which there are 2 type of standoffs with different heights 15.90mm and 13.90mm. So that makes a difference of 2mm or almost 0.1". Which standoffs should I use?
When I decided that I'd build a G5 hackintosh I wanted to be keep it as original as possible, but when I got the case there were 3 deep scuffs like this one... So a repaint and possibly filling them with a filler is necessary.
This Saturday or Sunday I'll prep it for sandblasting and powder coating and it's going to be almost time to start buying the components
.UPDATE March 13 2013: Hey, guys finally an update! I took my baby to be powdercoted the other day and today I'm showing you the results!
First front view: The power button and CD cover are painted matte black like the PCI brackets and door lock and latch. I'm digging this White with a hint of Black.
Insides: I haven't put the gazillion T10 screws in yet, because I'm going to spraypaint them black
Backside and me holding the 120mm fan plate from thelaserhive
...And I've temporary put the PCI brackets and installed the door lock
.Update March 15th 2013: Well guys for the last couple of days I've been spray painting all the silver bolts black... And this is the result:
First the side panel is whole again:
And this is the insides taking shape
This weekend I'm planning of putting the mobo standoffs, but... I have to finish spraypainting...
Update March 18th: I'm done with the spraypainting and if it wasn't for a single standoff to break I would have been done with the gluing the standoffs... And with that I need less than 30 minutes to put the case together and be ready for the PC parts
.I painted the plastic PCI frame black
... NIIICE result The backside with the thelaserhive's kit installed. Powdercoted aluminum plate and spaypainted IO bracket plate...
Original HDD cage spraypainted black and ORICO 2x2.5" to 3.5" mounting bracket that fits perfectly between the Superdrive and the HDD cage
. A total of 4 drives... And last but not least... Frontside with the Superdrive door Black and the frontpanel bezel and powerbutton