Contribute
Register

Fly Like A G3

Status
Not open for further replies.
My bliss is short lived. Computer is spazing out. Something is up with the graphics. Happened when I plugged my keyboard back into a USB 3.0 port. HOpe this message goes through. I'll start up my iMac in a minute.
 
Can't seem to find the issue. I get the scrambled screen and can't really use it. I just started up in Safe Mode and it seems to be working properly. I'll see what else I can find and restart in standard mode and see what happens.
 
Simple fix. Just needed to add the 1080p option in Mulitbeast to make OSX recognize my monitor's resolution. Not sure why it worked before the fix, but all is well again.

I'm also typing this up on my Apple bluetooth keyboard. This thing is 100% better than the cheap thing I initially purchased. I'm also using an Apple Magic Mouse all running through a Targus dongle. Costs $20 but seems to function without issue. I'll have to play and see if it will wake from sleep with bluetooth.

I'll run some test on the system and see what's what.
 
Geekbench score is dissapointing. I'm sure it's also because I'm using the free version and it's only running 32-bit. But here it is. Any advice?

Screen Shot 2013-03-29 at 3.53.08 PM.png
 
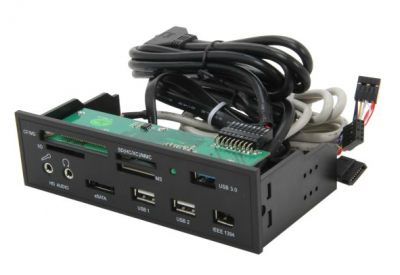
Just ordered this:

Screen Shot 2013-03-29 at 8.03.54 PM.png

Less than $30 shipped. I doubt it will work out of the box, but I'll see what I can do. I will mount this in the old CD/DVD slot. I don't really have a need for an optical drive, so I'll use this. And it will be much more convenient than hunting around the back for a port.

BTW, wake with bluetooth works great. The mouse is a little glitchy, but so am I when I first wake up.
 
Most of that should work OOB
I had one in a 775 quick build and it all worked, audio is dependent on your system audio working and everything else is like a USB hub.
If you have your audio working and USB 3.0 going then that should be plug and play
 
I've been using my system for some time now and have a few things to report.

First, the card reader bay that I ordered seems to work just fine. I don't have any USB 3.0 or some of the other devices to check various ports, but the USB 2.0 and SD carder readers work just fine. I am working on getting it mounted properly, as it cannot mount to the front of the optical drive area. The facia cover will not fit over it. The simple fix is to mount it just behind the metal structure, but I haven't done this yet, as I have just been lazy.

Next, the Bluetooth dongle that I have was getting a little glitchy. Turns out it just doesn't like the USB 3.0 port I was using on the back. Weird, as it worked just fine for quite some time before getting really stupid. But my Apple keyboard and magic mouse work flawlessly.

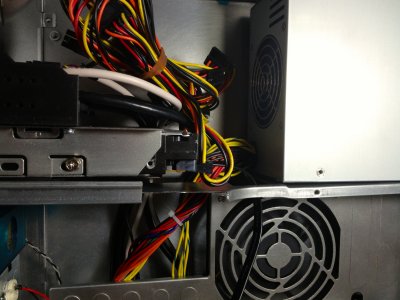
The unit itself works great and the only real complaint is the PSU fans. They create the only real noise in the system (besides the HDD). I haven't pushed the unit hard enough to get the CPU or case fans to increase RPMs much, but it's very quiet. The other small complaint is the sleep to wake that seems to take forever. It also decides to not sleep after a few sessions. Kinda like a bratty kid :p I'm hoping the Multibeast 5.3 that I just installed today will fix this.

Other than that, I installed a makeshift power button scavenged from an old system so that I would not have to open the case every time I wanted to start the system. I haven't attempted to make the stock power button work, but it's on the list. Everything else works great and I don't plan to upgrade or change parts anytime soon. We'll see what happens when I start using Adobe CS Cloud and if I need more parts or if there are any other deficiencies in the system.
 
So I finally got around to tidying up the rest of my G3. I routed the MB wires behind the stock side fan. The wires are just long enough when the door is fully open. Obviously the CPU power wires will not work in this manner if you are running a graphics card, but work for me for now.
I also finally mounted the card reader. I simply drilled two holes in the back of it's case and mounted it directly to the HDD tray that I have. It did require me to lower the HDD about 1/8", but it was easy and looks nice. Still need to get the B&W lower bay cover. I received mine with a G4 cover and just haven't done anything with it.
The item I am most proud of is my power button and LED. I used the stock cage and drilled a couple of holes. I used the power button I had from an old PC and carefully positioned it. It took many trial efforts to get it in just the right spot. I had to use a bit of hot glue to make the button slightly bigger, as the G3 button kept slipping off the small switch I have. The LED is the stock green color, but I think I'm going to get a white one to update it just a bit. It is simply slid into a hole and hot glued to hold it.

Overall, I think I'm done for now. I might make some changes if I do another build, but I like it as is. If I run into cooling issues, I'm going to drill out the bottom and run a couple of 45mm fans at the rear of the case in place of the stock side fan. If I get into video editing, I'm sure some kind of water cooling solution will be in order. But for the time being, I'll just enjoy my Apple Pi :D

IMG_0996.jpgIMG_0997.jpgIMG_0998.jpgIMG_0999.jpgIMG_1001.jpg
 
Another small improvement. The PSU fan is the only annoyance of the system and runs no matter how cool the system is. I can't do much about that (for now), but I can ensure that the other fans don't ramp up and cause more noise by adding some more cooling.

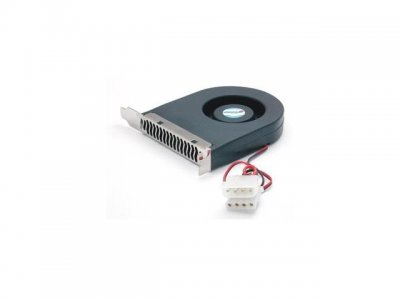
I initially installed a PCI slot fan to assist with cooling, but again, it was much too loud to use all day. However, I have found it necessary to use it when doing processor intensive tasks. Instead of simply plugging it in when needed, I decided to find a way to make it run constantly and assist with cooling without being so loud.

It's a simple two wire fan and runs on 12v through a molex connection.
35-230-027-02.jpg
Instead of the loud 12v operation, I spliced into the MB fan wiring to run it at 5v. The UD5H board that I'm using has two fan headers near the processor. I took an old harness that had a 4 wire connector that fit the fan header with a molex at the other end and depinned the connector at the molex. I then ran the yellow wire as my positive source and the red wire as my negative, effectively running the fan at 5v and a much lower RPM. I haven't seen a reduction in case temperatures, but temps would only increase on labor intensive tasks anyway. In any case, it should run cooler. Now to get more air in :roll2:

IGNORE ALL OF THAT. It appears the fan only wants to work on 12v now. I've tried running it at 7v with no success either. I'll figure something out.

I'll tackle that after I can get into the workshop and drill the bottom of the case with proper holes that would appear original to the unbeknownst. :D
 
The low volt fan issue has been resolved. I was attempting to run 5-7v from the MB fan headers and it just wasn't working. So I decided to take a look at the fan's specs and it requires 1.5 amps and the MB could not provide enough at the lower voltages. I then rewired the fan to work off the PSU molex connector, and it works. Silent fan and extra cooling.

I'm still planning to add cooling holes to the bottom of the case and I'm making a template in Illustrator right now. I'm also contemplating removing the front fan from the PSU to cut down on its noise. The PSU is really the only thing making noise at idle and there doesn't seem to be any way to cut down on the noise without removing a fan. Let me know if this is ill-advised. I can't imagine the PSU gets hot enough to require both fans at idle, but I don't want to ruin it or cause myself more issues when I upgrade to a decent graphics card.
 
Status
Not open for further replies.
Back
Top