- Joined
- Aug 9, 2015
- Messages
- 398
- Motherboard
- Gigabyte A520M-DS3H
- CPU
- Ryzen 7 5800x
- Graphics
- RX 5600 xt
- Mac
- Classic Mac
- Mobile Phone
dfritchie’s Build: G5 Skylake i5-6600 16GB Gigabyte GA-Z170M-D3H
Components
Gigabyte-LGA1151-Intel-Motherboard-GA-Z170M-D3H
https://www.amazon.com/dp/B012N6F0TO/
Intel-I5-6600-FC-LGA14C-Processor-BX80662I56600
https://www.amazon.com/dp/B0136JONRM/
Crucial 16 GB DDR4 2133 Memory
https://www.amazon.com/dp/B01BIWKUVC/
Samsung 850 EVO - 250 GB - M.2 SATA III SSD
https://www.amazon.com/dp/B00TGIVZTW
Laserhive G5 mATX kit
http://www.thelaserhive.com/product/matx-original-kit/
OSXWiFi apple broadcom PCie card
http://www.osxwifi.com/apple-broadc...-bluetooth-4-0-with-adapter-for-pc-hackintosh
EVGA Super Nova 550W Power Supply
https://www.amazon.com/dp/B00UVN20UO
Already Owned
WD Green 2 TB Hard Drive
https://www.amazon.com/dp/B008YAHW6I/
Pioneer BDR209 Blu-ray writer
https://www.amazon.com/dp/B00H2GTXKS
Comments
My Mac Pro 1,1 was is getting long in the tooth even with all the upgrades, so it was time for newer hardware. I started researching options and found this site and I had an old 1.6 GHz PM G5 sitting in the closet so…………
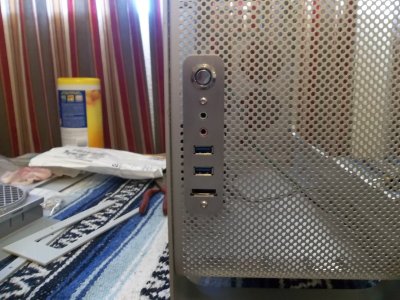
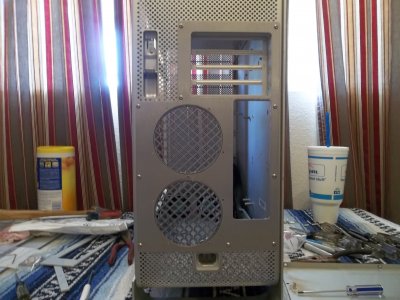
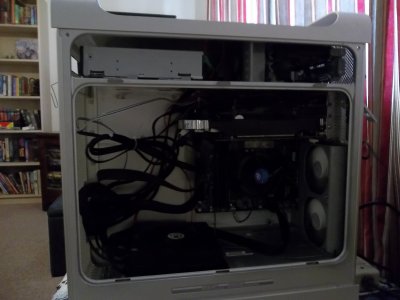
Case prep went smoother and faster than I thought it would, the hardest part was that first cut with the dremel! The kit from laserhive makes installing the motherboard very easy and practically foolproof. I also used their front panel kit so I have USB 3.0, eSATA, and audio ports up front along with the lighted power button. I gutted the G5 power supply cut an old power cord and soldered it onto the G5 power socket. I didn’t want to open the new EVGA power supply, so I cut the G5 PS top plate so the new PS sits in the tray and plugged my modified power cord in. The EVGA PS is modular so I could cut down on cable clutter. I replaced the rear case fans with Arctic 9 92mm units and the media bay fan with an Arctic 8 80mm unit. Case prep completed!
Since I was reusing the G5 drive cage, I opted for the Samsung 850 EVO M.2 SATA SSD for my boot drive. It mounts directly to the motherboard and frees up space for a second drive. It’s not as fast as a SM951 but boots OS X in about 20 seconds from the clover screen. With the SSD mounted the MB, Blu-ray, hard drive and cables were installed in the case and my first hackintosh was ready to test!
I used my MP to create a Unibeast El Capitan boot USB stick and set the bios to the settings I found at http://www.tonymacx86.com/threads/u...pitan-on-any-supported-intel-based-pc.172672/
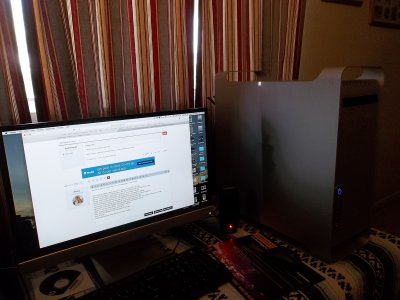
Booted the G5 and installed El Capitan, rebooted again and I had El Cap on my old G5!
I then ran Multibeast with the settings from http://www.tonymacx86.com/threads/quick-multibeast-setup-for-skylake-systems-10-11-4.192295/
EDIT: I took the radeon HD7950 out of my MP and installed it in the Skylake G5, the Intel HD 530 graphics would only ran at 11 fps in the valley benchmark, still trying to figure that one out.
Replaced the 7950 with a Sapphire Vapor-X R7- 370 4GB card.
Replaced the R7-370 with Gigabyte RX 580 Gaming 8G
Last edited:


