
- Joined
- Jan 7, 2013
- Messages
- 2
- Motherboard
- MSI PC MATE Z97
- CPU
- Intel Core i7 4790K
- Graphics
- Nvidia Geforce GTX 560ti
- Mac
- Classic Mac
- Mobile Phone
IMPORTANT
disable dell security in bios or else it will simply give you KP and you will keep scratching your head like I did.

I had budget of around $1300
wanted a dedicated video sequence rendrer. which does nothing but just keeps rendering my Adobe Premiere Pro Sequences in media encoder ON NETWORK! so that my edit station is little free of stress.
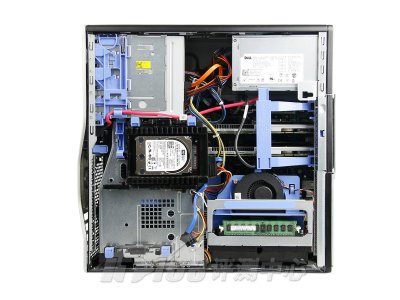
Bought in India with this same specs. and it was used, with few scratches on body.
http://www.ebay.com/itm/Dell-T5500-...134890?hash=item2ca940756a:g:ba0AAOSwYIhWkB53
Install
Clover install (No DSDT)
Create a Bootable USB Drive with UniBeast (All steps with pictures on reference link above)
1. Insert the USB drive
2. Open /Applications/Utilities/Disk Utility
3. Highlight the USB drive in left column
4. Click Erase button
5. For Name: type USB (You can rename it later)
6. For Format: choose OS X Extended (Journaled)
7. For Scheme: choose GUID Partition Map
8. Click Erase then Done
9. Download and run UniBeast
10. Click Continue, Continue, Continue, Continue, Agree
11. At Destination Select, choose USB and click Continue
12. At Select OS Installation screen choose Sierra and click Continue
13. At Bootloader Options screen choose UEFI Boot Mode
14. At Graphics Configuration screen do not choose anything and click Continue.
15. Verify installation options, then click Continue, enter password and click Install
UniBeast will now create the bootable USB drive. The process will only take more than 15 minutes, depending on system and drive speed. Do not unplug or stop during this time.
16. Drag MultiBeast to your completed USB drive.
Clover Note: UniBeast delivers basic bootloader support based on our testing on recommended CustoMac systems. For further bootloader customization, download and run the official Clover package. Advanced users may also compile Clover by downloading the full source.
Native CPU Yes
graphic acceleration Yes
AUDIO, Network everything works awesome
(kext is needed for both will attached them in EFI folder.) this EFI will boot both installer and OS for safer side keep SATA mode to AHCI and install. I used 3 disks in RAID0 and it works! but it shows External disks so really don't know how reliable the raid is.
the reason I am so happy with this build is that it supported Sata mode RAID as well (really dunno how)
added USB 3.0 addon card (no kext needed, although it works but it won't show up in system profile)
graphics DUAL Nvidia quadro 1800 (webdriver didn't work native drivers are super) using Dell U2412M display in 1080p
so all in all its a super 8 core 2.8Ghz beast. takes my 4K footage like a charm.
sorry but I am really bad at writing post (sorry admin)
goodluck.
disable dell security in bios or else it will simply give you KP and you will keep scratching your head like I did.
I had budget of around $1300
wanted a dedicated video sequence rendrer. which does nothing but just keeps rendering my Adobe Premiere Pro Sequences in media encoder ON NETWORK! so that my edit station is little free of stress.
Bought in India with this same specs. and it was used, with few scratches on body.
http://www.ebay.com/itm/Dell-T5500-...134890?hash=item2ca940756a:g:ba0AAOSwYIhWkB53
Install
Clover install (No DSDT)
Create a Bootable USB Drive with UniBeast (All steps with pictures on reference link above)
1. Insert the USB drive
2. Open /Applications/Utilities/Disk Utility
3. Highlight the USB drive in left column
4. Click Erase button
5. For Name: type USB (You can rename it later)
6. For Format: choose OS X Extended (Journaled)
7. For Scheme: choose GUID Partition Map
8. Click Erase then Done
9. Download and run UniBeast
10. Click Continue, Continue, Continue, Continue, Agree
11. At Destination Select, choose USB and click Continue
12. At Select OS Installation screen choose Sierra and click Continue
13. At Bootloader Options screen choose UEFI Boot Mode
14. At Graphics Configuration screen do not choose anything and click Continue.
15. Verify installation options, then click Continue, enter password and click Install
UniBeast will now create the bootable USB drive. The process will only take more than 15 minutes, depending on system and drive speed. Do not unplug or stop during this time.
16. Drag MultiBeast to your completed USB drive.
Clover Note: UniBeast delivers basic bootloader support based on our testing on recommended CustoMac systems. For further bootloader customization, download and run the official Clover package. Advanced users may also compile Clover by downloading the full source.
Native CPU Yes
graphic acceleration Yes
AUDIO, Network everything works awesome
(kext is needed for both will attached them in EFI folder.) this EFI will boot both installer and OS for safer side keep SATA mode to AHCI and install. I used 3 disks in RAID0 and it works! but it shows External disks so really don't know how reliable the raid is.
the reason I am so happy with this build is that it supported Sata mode RAID as well (really dunno how)
added USB 3.0 addon card (no kext needed, although it works but it won't show up in system profile)
graphics DUAL Nvidia quadro 1800 (webdriver didn't work native drivers are super) using Dell U2412M display in 1080p
so all in all its a super 8 core 2.8Ghz beast. takes my 4K footage like a charm.
sorry but I am really bad at writing post (sorry admin)
goodluck.
Attachments
Last edited: