- Joined
- Jun 26, 2012
- Messages
- 128
- Motherboard
- Motherboard OR System/Laptop make and model names > See Forum Rules!
- CPU
- i5-2500K
- Graphics
- GTX 550 Ti
- Mobile Phone
2k-jacob's Mac Pro Build: Core i5-2500k – ASRock z75 Pro3 – 16GB RAM – GTX 550ti
Components
Intel Core i5-2500K
http://www.newegg.com/Product/Product.aspx?Item=N82E16819115072
ASRock Z75 Pro3 Motherboard (1155 socket)
http://www.newegg.com/Product/Product.aspx?Item=N82E16813157304
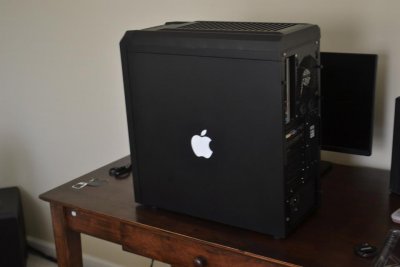
Lian Li Lancool PC-K62 ATX Computer Tower
http://www.newegg.com/Product/Product.aspx?Item=N82E16811112239
Dell 21.5” Monitor
http://www.newegg.com/Product/Product.aspx?Item=N82E16824260104
Rosewill N900PCE Wireless N Card
http://www.newegg.com/Product/Product.aspx?Item=N82E16833166076
Already Owned
Apple OS X Mountain Lion
https://itunes.apple.com/us/app/os-x-mountain-lion/id537386512?ls=1&mt=12
2 x 320GB SATA Hard Drives
http://www.newegg.com/Product/Product.aspx?Item=N82E16822148455
AOC 19” Monitor
http://www.newegg.com/Product/Product.aspx?Item=N82E16824160075
2 x 8GB Corsair xms3 DDR3 RAM
http://www.newegg.com/Product/Product.aspx?Item=N82E16820233335
ASUS GTX 550ti Graphics Card
http://www.newegg.com/Product/Product.aspx?Item=N82E16814121435
Corsair Builder Series 430w PSU
http://www.newegg.com/Product/Product.aspx?Item=N82E16817139026
Sony Optiarc Optical Drive
http://www.newegg.com/Product/Product.aspx?Item=N82E16827118067
8gb USB drive
http://www.amazon.com/dp/B0058GH5BI/
Comments:
I am starting to get into some Photography and Video editing, and my laptop was no longer cutting it for these types of applications, so I decided on getting a desktop with some power. Seeing the cost of some of these systems, especially the Macs, I was a bit weary of my wallet. I have a friend who is a huge pc gamer, and he told me how much of a good experience it was for him building his own system, and said that I should look into it.
That is how this build got started. I chose these particular components for a couple reasons. First, the price to performance ratio. I have an unlocked quad core processor that I can overclock in the future. The graphics card I used, I actually traded for so I didn't pay a penny for it (this was when the 550ti wasn't working in mountain lion). I also saw that this build would last me a while, with plenty of room to grow. I kind of borrowed the monitor from the family desktop, and decided that two monitors only made logical sense. Finally, it is just a beast.
Pre-Installation
Since I went with the ASRock z75 pro3 motherboard, I do not have a DSDT. Thankfully though, there was a patched BIOS (version 1.8) that I found online that enables native power management, and this improved the stability of this system like significantly.
1. First, make sure that your BIOS version is fully updated to 1.80
2. Go to this link (http://biosrepo.wordpress.com/asrock/z77/) and download the “Asrock Z75 Pro3 180” file
3. Now take an empty usb stick, extract the contents of that zipped folder to the usb stick
4. Insert this usb stick into the computer, and turn it on
5. Press F2 to get to the BIOS, and proceed to update the BIOS like normal
Installation
The following assumes that you have made the purchased the Mac OS X Mountain Lion app from the Mac app store on a Mac system.
1. Create the unibeast usb stick using this guide (http://www.tonymacx86.com/61-unibeast-install-os-x-mountain-lion-any-supported-intel-based-pc.html)
2. Insert into the usb 2.0 port on the back (make sure it is not the blue port)
3. Boot up and check the BIOS settings, I didn't change any of mine, as they were good to go.
4. Boot the computer and press F11 to get to the boot menu, and select the UniBeast USB drive
5. Once you are greeted with the Chimera bootloader, go ahead and highlight the UniBeast USB install partition, but before pressing enter, type the following boot flags in: -v PCIRootUID=0
6. Press enter, and after a few minutes of depressing black and white, you should be greeted with the language selection screen.
7. Go ahead, select your language.
8. Go up to Utilities, then disk Utility. Select the HDD that you are planning on installing OS X to, and click on the partition tab. Make sure that you Select one Partition. Then click options and select the “GUID Partition table”. Finally, make sure the partition type is “Mac Extended (Journaled)” and name your partition (mine is named “Macintosh”) then click Erase.
9. Now that the disk setup is out of the way, we can proceed with the installation. Close out of the Disk Utility.
10. Once the system is finished installing, reboot the computer, pressing F11 to get back to the boot menu.
11. We need to boot from the UniBeast USB drive because there is not a bootloader for the installed Mac HDD we just installed.
12. Selecting the USB drive, this time we are going to highlight the”Macintosh” option, and type in the following boot flags before pressing enter: -v PCIRootUID=0
13. Once the system boots and if all goes well, you should be greeted with the setup. Proceed through the setup until you get to the Desktop.
14. Now we are going to start up multibeast, and select the items shown in my multibeast photo.
15. DO NOT RESTART YET! If you did, it will not boot on it's own, and you will have to boot using the unibeast USB drive again.
16. You will want to show all files now, using the “Show all”app
17. Now, copy the contents of the “Extra” folder from the UniBeast USB drive to the “Extra” folder on your computer's Hard Drive. Make sure to replace the previous files.
18. Now, your computer will be able to boot on it's own!
Get nVidia 550ti working
For a while the support for the 550ti cards (along with all of the other Fermi cards) was all but none. Installing Mountain Lion was not playing well with these cards. Thankfully, nVidia has updated the drivers for Mac for these cards (well, at least mine works just fine.) Now to the installation:
1. Go to the nVidia downloads page and download the driver(http://www.nvidia.com/object/macosx-304.00.00f20-driver.html), and the cuda package (http://www.nvidia.com/object/cuda-mac-driver.html) as well for later use.
2. Now we are going to extract the files from the installer of the nvidia driver. We do not want to use the installer, as for some odd reason it doesn't work correctly (ironic, right?) so we will have to do it manually.
3. To extract the files, go ahead and right click on the .dmg file, and click “show package contents” then navigate to the kexts and copy those to a folder on your desktop, name it “new nvidia”
4. Now, open that folder, and open a new finder window and navigate to your System/Library/Extensions folder, and using the “new nvidia” folder as reference, we are going to delete the old nvidia drivers from the S/L/E folder.
5. After removing the old files, we need to empty to trash can.
6. Now, simply copy the new nVidia kexts to the S/L/E folder.
7. Make sure to go in to the Disk Utility and repair the disk permissions for your Mac Partition.
8. Finally, navigate to your /Extra folder and open up your boot.chameleon.plist and add to the string that is below the key “bootflags” “PCIRootUID=0”
9. Rebooting will complete the process.
10. Optionally,you can install the Cuda driver, the installer for this works just fine.
To get Ethernet working (and getting Authentication working)
This one was fun. It was not my first rodeo getting the Ethernet to recognize as built in so that the mac app store and iCloud work as they should. Last time though, I was using the recommended motherboard for the CustoMac mini build (GA-H61n-USB3) and was fairly simple following this guide. I went off this guide (http://www.tonymacx86.com/mountain-...re-facetime-messages-unable-authenticate.html) for the basis of my fix, but it didn't work completely. While it fixed the ethernet, it broke my graphics card support (just got a black screen). I was thankful that this motherboard has a vga port, and that onboard graphics work (not well, but for this it worked). So what I had to do for the following is Remove the Graphics card and use the onboard graphics.
1. Go ahead and boot into your OS X partition. Download the iCloud fix package found in the forum found Here.
2. Extract the zip folder, and you will see the EFI Studio app and a text file.
3. Next, navigate on your mac partition to the /Library/Preferences/SystemConfigurations and delete the Networkinfo.plist
4. Open the org.chameleon.Boot.plist file located in /Extra directory with TextEdit.
5. Append the following XML
Code:
<key>EthernetBuiltIn</key>
<string>Yes</string>
<key>device-properties</key>
<string>EFI String Placeholder</string>
6. Leave the TextEdit window open and launch the EFIStudio-1.1 App.
7. Select Ethernet from the Select Device: drop down.
8. Click Add Device, the Editor will be displayed.
9. From the Editor window click the Hex String to Clipboard button.
10. Switch back to the open TextEdit window and replace EFI String Placeholder with the EFI string you just copied.
11. SAVE and Reboot
Varying based on your settings, you final result should look something like this.
Code:
<?xml version="1.0" encoding="UTF-8"?>
<!DOCTYPE plist PUBLIC "-//Apple//DTD PLIST 1.0//EN" "http://www.apple.com/DTDs/PropertyList-1.0.dtd">
<plist version="1.0">
<dict>
<key>DSDT</key>
<string>/Extra/DSDT-GA-H61M-S2-B3-F3.aml</string>
<key>GraphicsEnabler</key>
<string>Yes</string>
<key>Kernel Flags</key>
<string>npci=0x3000</string>
<key>PciRoot</key>
<string>0</string>
<key>EthernetBuiltIn</key>
<string>Yes</string>
<key>device-properties</key>
<string>4b00000001000000010000003f0000000100000002010c00d041030a0100000001010600041c0101060000007fff0400160000006200750069006c0074002d0069006e0000000500000001</string>
</dict>
</plist>
12. After rebooting, go back into the org.chameleon.Boot.plist and REMOVE the device-properties key and efi string following it, so that it now looks similar to this:
Code:
13. <?xml version="1.0" encoding="UTF-8"?>
14. <!DOCTYPE plist PUBLIC "-//Apple//DTD PLIST 1.0//EN" "http://www.apple.com/DTDs/PropertyList-1.0.dtd">
15. <plist version="1.0">
16. <dict>
17. <key>DSDT</key>
18. <string>/Extra/DSDT-GA-H61M-S2-B3-F3.aml</string>
19. <key>GraphicsEnabler</key>
20. <string>Yes</string>
21. <key>Kernel Flags</key>
22. <string>npci=0x3000</string>
23. <key>PciRoot</key>
24. <string>0</string>
25. <key>EthernetBuiltIn</key>
26. <string>Yes</string>
27.
28. </dict>
29. </plist>
13. Finally, you are going to shut it down, install your 550ti back in, and boot it back up. It should boot just fine, graphics will work correctly and signing into iCloud and the App store will work just fine.
Things not tested or working
Sleep (not sure why it doesn't wake back up, but I don't use sleep so it doesn't affect me)
Overclock (I have the i5 overclocked to 4.5Ghz, and it shows in windows, but not in mac...help”)
Final Notes
I have really enjoyed this build, I couldn't have done it without the help of these forums. Truly a tool that I am glad to have. This computer is a beast, and running two displays is really nice, no problems at all. If you have any questions or advice, feel free to ask, I am more than happy to help.
EDITS
2/19/2013 - I enabled the OpenCL fix in multibeast and the graphics seem a bit smoother. Currently trying to get a DSDT working thanks to MiniITX.
3/26/2013 - I have successfully updated to 10.8.3, After running the combo update, I had to use the stand alone chimera installer in order to get boot working again. I also have a DSDT that provides more stability. I then used the audio kext that is used with a DSDT. I still have not been able to get sleep working, when I click "sleep" it shuts the display off. pressing a key on the keyboard wakes it to a locked screen, where I can log back in and it works just fine. Any help would be appreciated.
3/31/2013 - Well, after the update to 10.8.3 the Graphics Card seems to be locking up and freezing up the entire system, only issue I am having. I am considering upgrading my card to a 650ti, just to get something that isn't so finicky...