Contribute
Register

Haswell-E + X99 Motherboard Temporary Guide - OS X 10.10

Haswell-E + X99 Motherboard Temporary Guide - OS X 10.10.0

...a quick update: I managed to get audio through VoodooHD-v2.8.7. (none yet through display port -> any suggestions?)
also:
I have the feeling that my fans (noctua nh-d14) are running on fullspeed the whole time. does this have to do with the question of power management that was discussed in this forum? what does it actually mean, where does it happen and what is the goal? sorry for these questions, I'm new to this...

Thanks!!
 
Haswell-E + X99 Motherboard Temporary Guide - OS X 10.10.0

Hello Everybody,

I think I have a success with my system. It's now running 10.10. without -x, but with the bootstick for now. I'm currently making a CCC-Copy on a MBR-USB stick and hope to workout booting without the stick, even though it doesn't bother me that much. Thanks a lot for this forum!!!! Its really super great for people like me that something like this exists. Thank you very much!!!!

The final trick in my case was deleting the Bluetooth kexts (IOBluetooth....) in the S/L/E Folder. I had KPs because of that and I don't need Bluetooth anyway. Before that I used the unibeast methode described as here and selected only the basic stuff in Multibeast (see screenshot).

View attachment 113815

My system is:

Asus x99-a, i7 5820k, Asus R9 280x, 16 GB Crucial, Samsung 220 GB SSD

The hardware is recognized like this:

View attachment 113816

Next step is audio. I saw some different posts there, have to look into it. Otherwise everything looks great now. I'm really happy!

Thanks to everyone in this forum!

All the best

Janzwo

You might want to check what version of the UEFI BIOS that you are running. If you have working system but cannot boot without UniBeast, you may have old UEFI. The latest version (v1004) now supports legacy boot modes and you don't need USB stick. You also don't have to clone your drive on MBR drive, either. Both Tonymac & I posted links to the updated UEFI BIOS repositories earlier in this thread. Or simply go out to ASUS Web site yourself & locate. Good luck!
 
Haswell-E + X99 Motherboard Temporary Guide - OS X 10.10.0

...a quick update: I managed to get audio through VoodooHD-v2.8.7. (none yet through display port -> any suggestions?)
also:
I have the feeling that my fans (noctua nh-d14) are running on fullspeed the whole time. does this have to do with the question of power management that was discussed in this forum? what does it actually mean, where does it happen and what is the goal? sorry for these questions, I'm new to this...

Thanks!!
Yes...power management and speed step. Basically your CPU and fan are running 100% and pulling full power all the time, even though there is no substantial work load (as I understand it). There were a few things that I was able to sort of cobble together from this thread & the X99 + 10.9.4/10.9.5 thread that appear to get some limited SS and power management going. See this post for more info:
http://www.tonymacx86.com/yosemite-...orary-guide-os-x-10-10-0-a-34.html#post918063
 
Haswell-E + X99 Motherboard Temporary Guide - OS X 10.10.0

sounds like a kernel patch issue/

Guide is based on the work of stinga11, jackie099, lokicat, and tony.

1. Download the latest beta bios here : http://forums.tweaktown.com/gigabyte/28441-gigabyte-latest-beta-bios.html
2. Settings in BIOS: optimized defaults, other OS, and enabled legacy support for some other stuff like XHCI or something.
3. Dload Unibeast Installer
4. Format USB with label "USB" MBR partition table and HFS+
5. Let wizard install the files (preferably on a USB 3.0 flash drive for speed) and make sure to use a USB 2.0 port on the motherboard.
6. Change boot flags to "-v -x -f npci=0x2000" in config plist in the USB/Extras folder (folder is hidden)
7. [Add VoodooTSCSync.kext to Extra/Extensions folder on the USB drive.
Edit the .kext for your cpu cores like in the OP first post if its not already edited] or use cpus=1 bootflag but the installer will be hella slow
8. Use the first kernel patch "sudo perl -pi -e 's|\x74\x11\x83\xF8\x3C|\x74\x11\x83\xF8\x3F|g' /Volumes/USB/System/Library/Kernels/kernel"
9. I also added the boot flag nv_disable=1 for my GTX 980, you may or may not need it.
This worked for me to get the installer running and install OS X onto the SSD.

With that said I don't even know if its worth going through all that trouble because I'm pretty sure you can install OS X using a different machine onto the drive (like using a usb 3.0 adapter)

10. But assuming you get this far and the install finishes you will need to boot into USB installer once again and then launch terminal to copy the patched kernel off the USB drive and onto the SSD. "cp -R /Volumes/USB/System/Library/Kernels/kernel /Volumes/Yosemite/System/Library/Kernels/"
11. Finally reboot once more and use chameleon to boot into the SSD.
12. Install Nvidia Web Drivers.
13. Change bootflags to "npci=0x2000 kext-dev-mode=1 nvda_drv=1"
14. Reboot


15. Load the latest version of clover (right now its 2976) and install with it with the following boxes checked:
-Install for UEFi...
-Install Clover in the ESP
-(whatever theme you like)
Drivers64UEFI
--OSXAptioFixDrv-64
--ParitionDXE-64
-Install RC scripts on target volume
-Panel

16. Copy the .kext from chameleon over to clover. I use AHCIPortInjector.kext from the OP, AppleGB.kext, AppleIntelE1000e, FakeSMC, NullCPUPowerManagmenet, GenericUSBXHCI.kext and VoodooTSCSync.
17. Use clover configurator to set the bootflags of "npci=0x2000 kext-dev-mode=1 nvda_drv=1" and the profile to Mac Pro 6,1.
18. [Optional] You can use clover to get iMessage working by messing around with SmMUUID, Serial Number and Board Serial Number in SMBIOS and Custom UUID, inject System ID in System parameters.

Audio works if you apply Voodoo fix but the quality is awful.

Still need to fix the about this mac cpu name page.

I saw these Hawell-e OC SSDT so you guys are free to mess around with them.
Hi Bomerr,
i checked exactly in clover what you did, but i'm stuck here :

View attachment 113821

an idea?

Lucky you - you at least got the white circle symbol. I get nothing... just black screen. If I press a key or click mouse, Clover bootloader screen re-appears...

Here's a new thread on the subject that provides a log of me trying to follow bomerr's instructions - This is my first attempt to do anything with Clover and, being a newbie with Clover, I think I found a few gaps (albeit unintentional) in the instructions.
 
Haswell-E + X99 Motherboard Temporary Guide - OS X 10.10.0

If I press a key or click mouse, Clover bootloader screen re-appears...

the same
 
Haswell-E + X99 Motherboard Temporary Guide - OS X 10.10.0

@BoomR

thanks for the reply! Yes, I allready have the 1004 Bios update installed, but keep getting stuck at the "boot0"-error without the USB (is it relevant to say here, that I have the Asus R9 280x GPU?). I saw that theres a fix for that and will have to try it out.

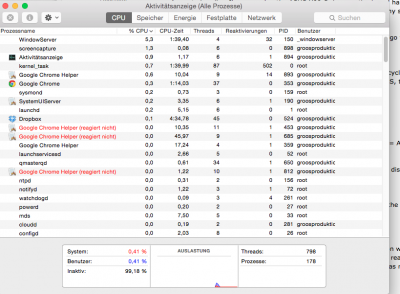
thanks for the tip with nullcpupower. I'll try it. Allready enabled the speestep etc. in Bios and installed a program that shows me the cpu usage (menu meter). The cpu doesn't seem to work on fullspeed (which would be good, because there wasn't any work) or does it just show me the amount of "work"? If its 99% inactive then maybe powermanagement allready works?
Activity_Control.png

greetings

janzwo
 
Haswell-E + X99 Motherboard Temporary Guide - OS X 10.10.0

working now.
disable CSM in the bios and secure boot to Other OS

Enjoy it
 
Haswell-E + X99 Motherboard Temporary Guide - OS X 10.10.0

You don't patch the install at this step. You open Terminal and copy the already patched kernel that's on your UniBeast key over to the proper location on your newly installed Yosemite using the terminal command at the beg. of this post - thereby replacing the kernel installed by Yosemite installer with the one on your USB.

Once you copy over patched kernel to your SSD, exit Terminal/Yosemite installer & reboot. Again, pressing F8 at POST and selecting your USB key for boot. But now, select your Yosemite install. Only flags you should need are -v (and maybe -x for safe mode) .... npci and kext-dev-mode should already be on your USB key's org.chameleon.boot. plist - entering them now has no effect.


Please see this post from me for UEFI/BIOS settings:
http://www.tonymacx86.com/yosemite-...orary-guide-os-x-10-10-0-a-34.html#post918063

Don't confuse deleting a kext with not selecting a kext in MultiBeast to install in the first place. Your MB settings should be pretty simple. For now, basically the VooDoo 6 core patch, USB3, network adapter, and system definition is all you should need. I'm attaching a MultiBeast file that works for my X99-Deluxe. Since you have SSD boot drive + 6-core CPU, this should work for you as well. **MAYBE** I'd open this file up & add NullCPUPowerManagement to help (for now) with power mgmt issues.

Also, once you finish installing MultiBeast, don't forget to go into your org.chameleon.boot.plist and make sure to add npci=0x2000 .... it goes on the same line as kext-dev-mode...just put a space after it & then type npci=0x2000.

OK, I just wanted to followup a bit on my progress using your suggestions. With your MultiBeast settings (thanks again for the settings file) I was able to boot from the installed SSD into Yosemite using the following flags:

-x -v -f npci=0x2000 kext-dev-mode=1 UseKernelCache=No

All of which are already in the boot.plist with the exceptions of -x and -v. So being able to boot from the SSD is defiantly progress. Naturally I would like to be able to boot without "Safe Mode" though.

I'm not sure what the problem is at this point but perhaps its the FakeSMC version in MultiBeast 7.0.2,....? I can delete it and replace it with the older version found on the TonyMacx86 download page.

Without -x it halts at a "System uptime in nanoseconds" error. I can provide a screenshot if necessary.

Or maybe its some other kext. I did use the NullCPUPowerManagement option you suggested.


Hello Everybody,

I think I have a success with my system. It's now running 10.10. without -x, but with the bootstick for now. I'm currently making a CCC-Copy on a MBR-USB stick and hope to workout booting without the stick, even though it doesn't bother me that much. Thanks a lot for this forum!!!! Its really super great for people like me that something like this exists. Thank you very much!!!!

The final trick in my case was deleting the Bluetooth kexts (IOBluetooth....) in the S/L/E Folder. I had KPs because of that and I don't need Bluetooth anyway. Before that I used the unibeast methode described as here and selected only the basic stuff in Multibeast (see screenshot).

For reference, which IOBluetooth kext are you referring to?

IOBluetoothHIDDriver.kext

or

IOBluetoothFamily.kext

or is it a different one,......?
 
Haswell-E + X99 Motherboard Temporary Guide - OS X 10.10.0

OK, I just wanted to followup a bit on my progress using your suggestions. With your MultiBeast settings (thanks again for the settings file) I was able to boot from the installed SSD into Yosemite using the following flags:

-x -v -f npci=0x2000 kext-dev-mode=1 UseKernelCache=No

All of which are already in the boot.plist with the exceptions of -x and -v. So being able to boot from the SSD is defiantly progress. Naturally I would like to be able to boot without "Safe Mode" though.

I'm not sure what the problem is at this point but perhaps its the FakeSMC version in MultiBeast 7.0.2,....? I can delete it and replace it with the older version found on the TonyMacx86 download page.

Without -x it halts at a "System uptime in nanoseconds" error. I can provide a screenshot if necessary.

Or maybe its some other kext. I did use the NullCPUPowerManagement option you suggested.

Remind us again of your specs? motherboard? CPU? GPU?
 
Haswell-E + X99 Motherboard Temporary Guide - OS X 10.10.0

@octavean

...I deleted both of them and repaired permissions afterwords...

greetings

janzwo
 
Back
Top