- Joined
- Aug 8, 2017
- Messages
- 23
- Motherboard
- Gigabyte H110M-A
- CPU
- i5-6500
- Graphics
- RX 570
- Mac
- Classic Mac
- Mobile Phone
I guess the best way to start off this thread is by saying (I'M A NOOB) that this build isn't exactly new, but it's taken me a while to post anything related to it. And also in a lot of ways, it's still not done. I don't think a build is ever really done (a bit like project cars), but I digress.
After lurking round here, looking at build threads, and day dreaming of one day owning that illusive and freakishly huge computer known as the chess-grater Mac Pro, I one day decided to jump in feet first to building my first computer. But not any computer, OH NO. It had to be a Mac Pro case mod. I wanted something unique in the end, and I'd say this certainly was. Whether that's good or not, well...
To be fair, in the end the build was a lot easier than I initially anticipated. So if any would-be modders see this, um, go for it!
Now, I set myself with a VERY tight budget (ie. my job didn't pay much, and I need money for school). I wanted the most bang for my buck and something that would be pretty nice (at least on the outside) when I was finished. So to start off with, I began perusing through several old computers I had lying around.
My initial plan was to use some old firewire and USB front ports I had sitting around gathering dust on some old PC's and repurposing those to use on the Hack Pro. Alas, this isn't what happened in the end (which to be fair was probably for the best). Though I did borrow something in the end.
YEP. A Dynex PSU, rated at 400W or 450W or something. I pulled this from an old work computer from a local Vet. Plus I wanted to use it since it still worked just fine and all the cables were nice and braided.
Plus plus, the best kind of PSU is free. (don't crucify me)
Alas, it also set a power limit, but more on that later.
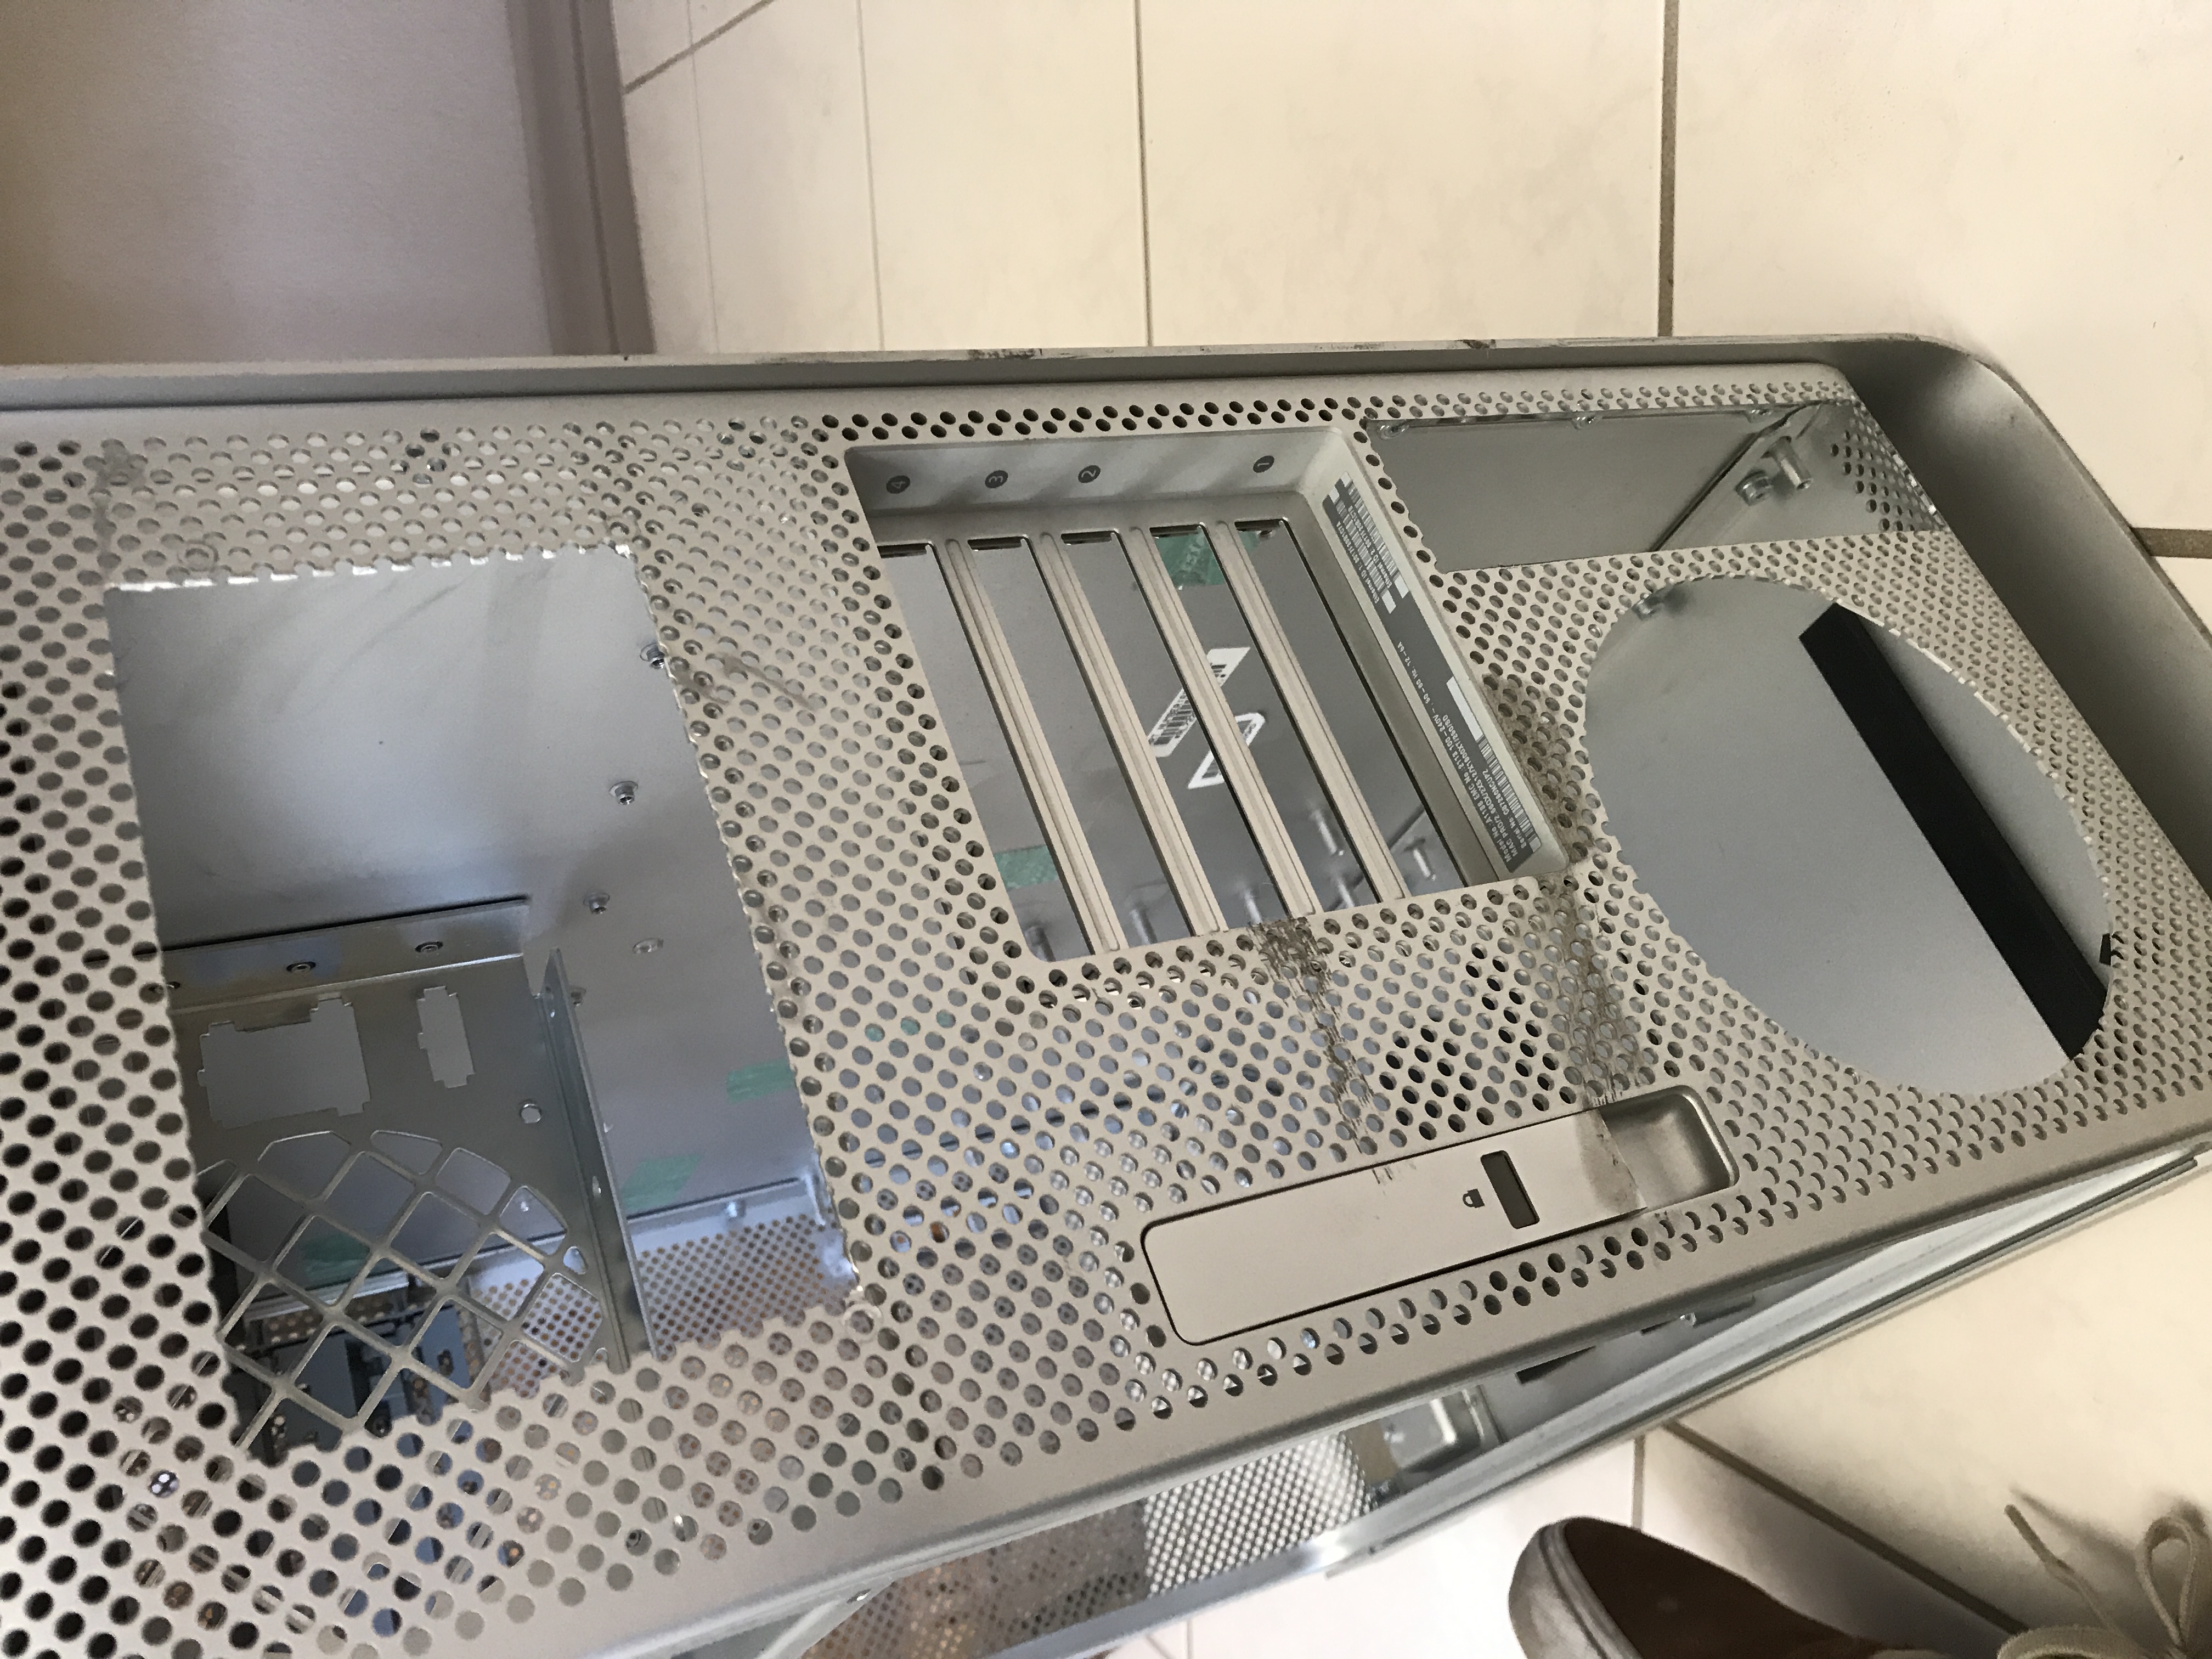
The case itself I got from ebay not much later for a pretty decent price ($40 for the case, $30 shipping). However, bang it and dang it, one of the feet get bent in transit. But using my kludge skills (some clamps, pieces of 2x4s, and patience) I was able to bend it back into place somewhat.
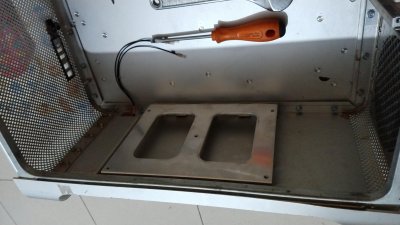
The case itself still had the front panel board, disc drive, main power cable harness, mSATA drive cable, and the PSU fan. however, I basically threw all this stuff away, since it's bits worth more or less nothing, and I didn't wanna go through the hassle of trying to repurpose any of it.
Step one, figure out how to take apart all this rubbish.
More or less, it was actually pretty easy to figure out on my own. Except for that upper tray. GOOD GOD. It didn't make sense how to take it apart then, and it still doesn't really make sense now.
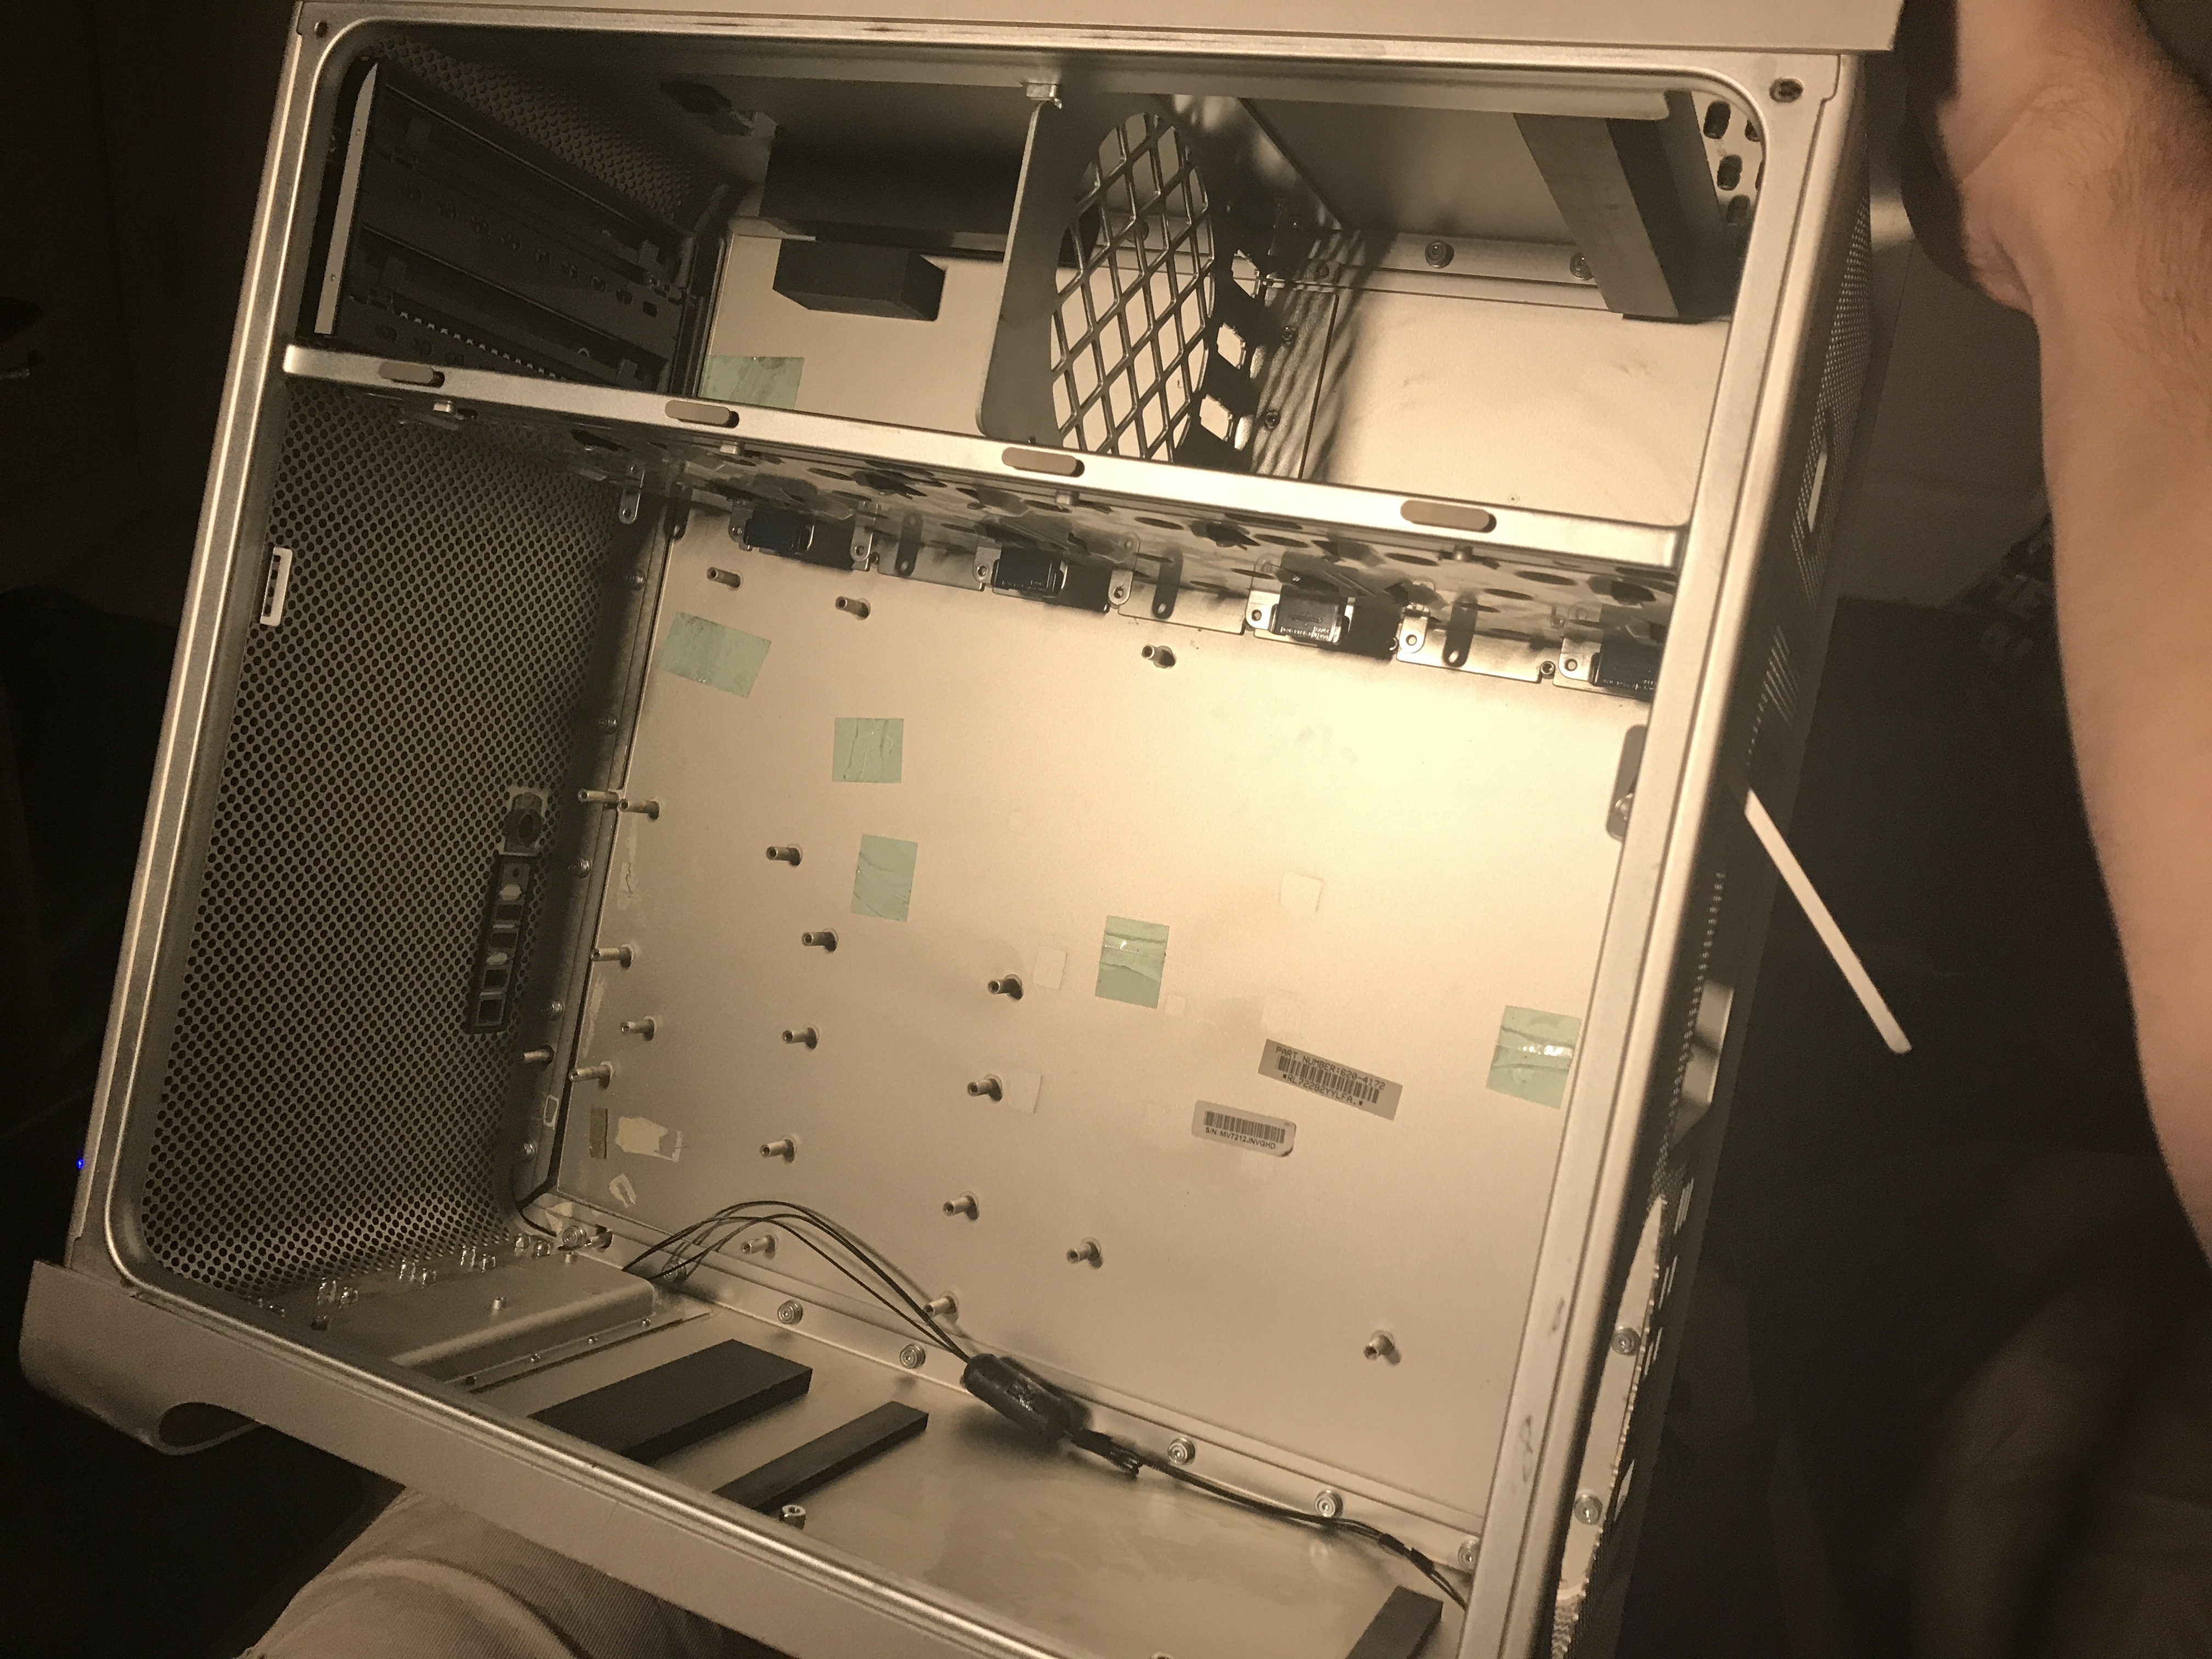
An old Board sitting in there to get an idea of where I want things placed.
That grille by the way is riveted in place, which was frustrating, but in the end didn't really cause any problems.
First step (other than buying internals, but whatever) is slicing and dicing. This part was equal parts fun, and equal parts swearing on the front porch.
I wanted to keep the back panel as clean and normal looking as possible (plus I didn't want to be rid of the rear fan grille. I love that thing for some reason.
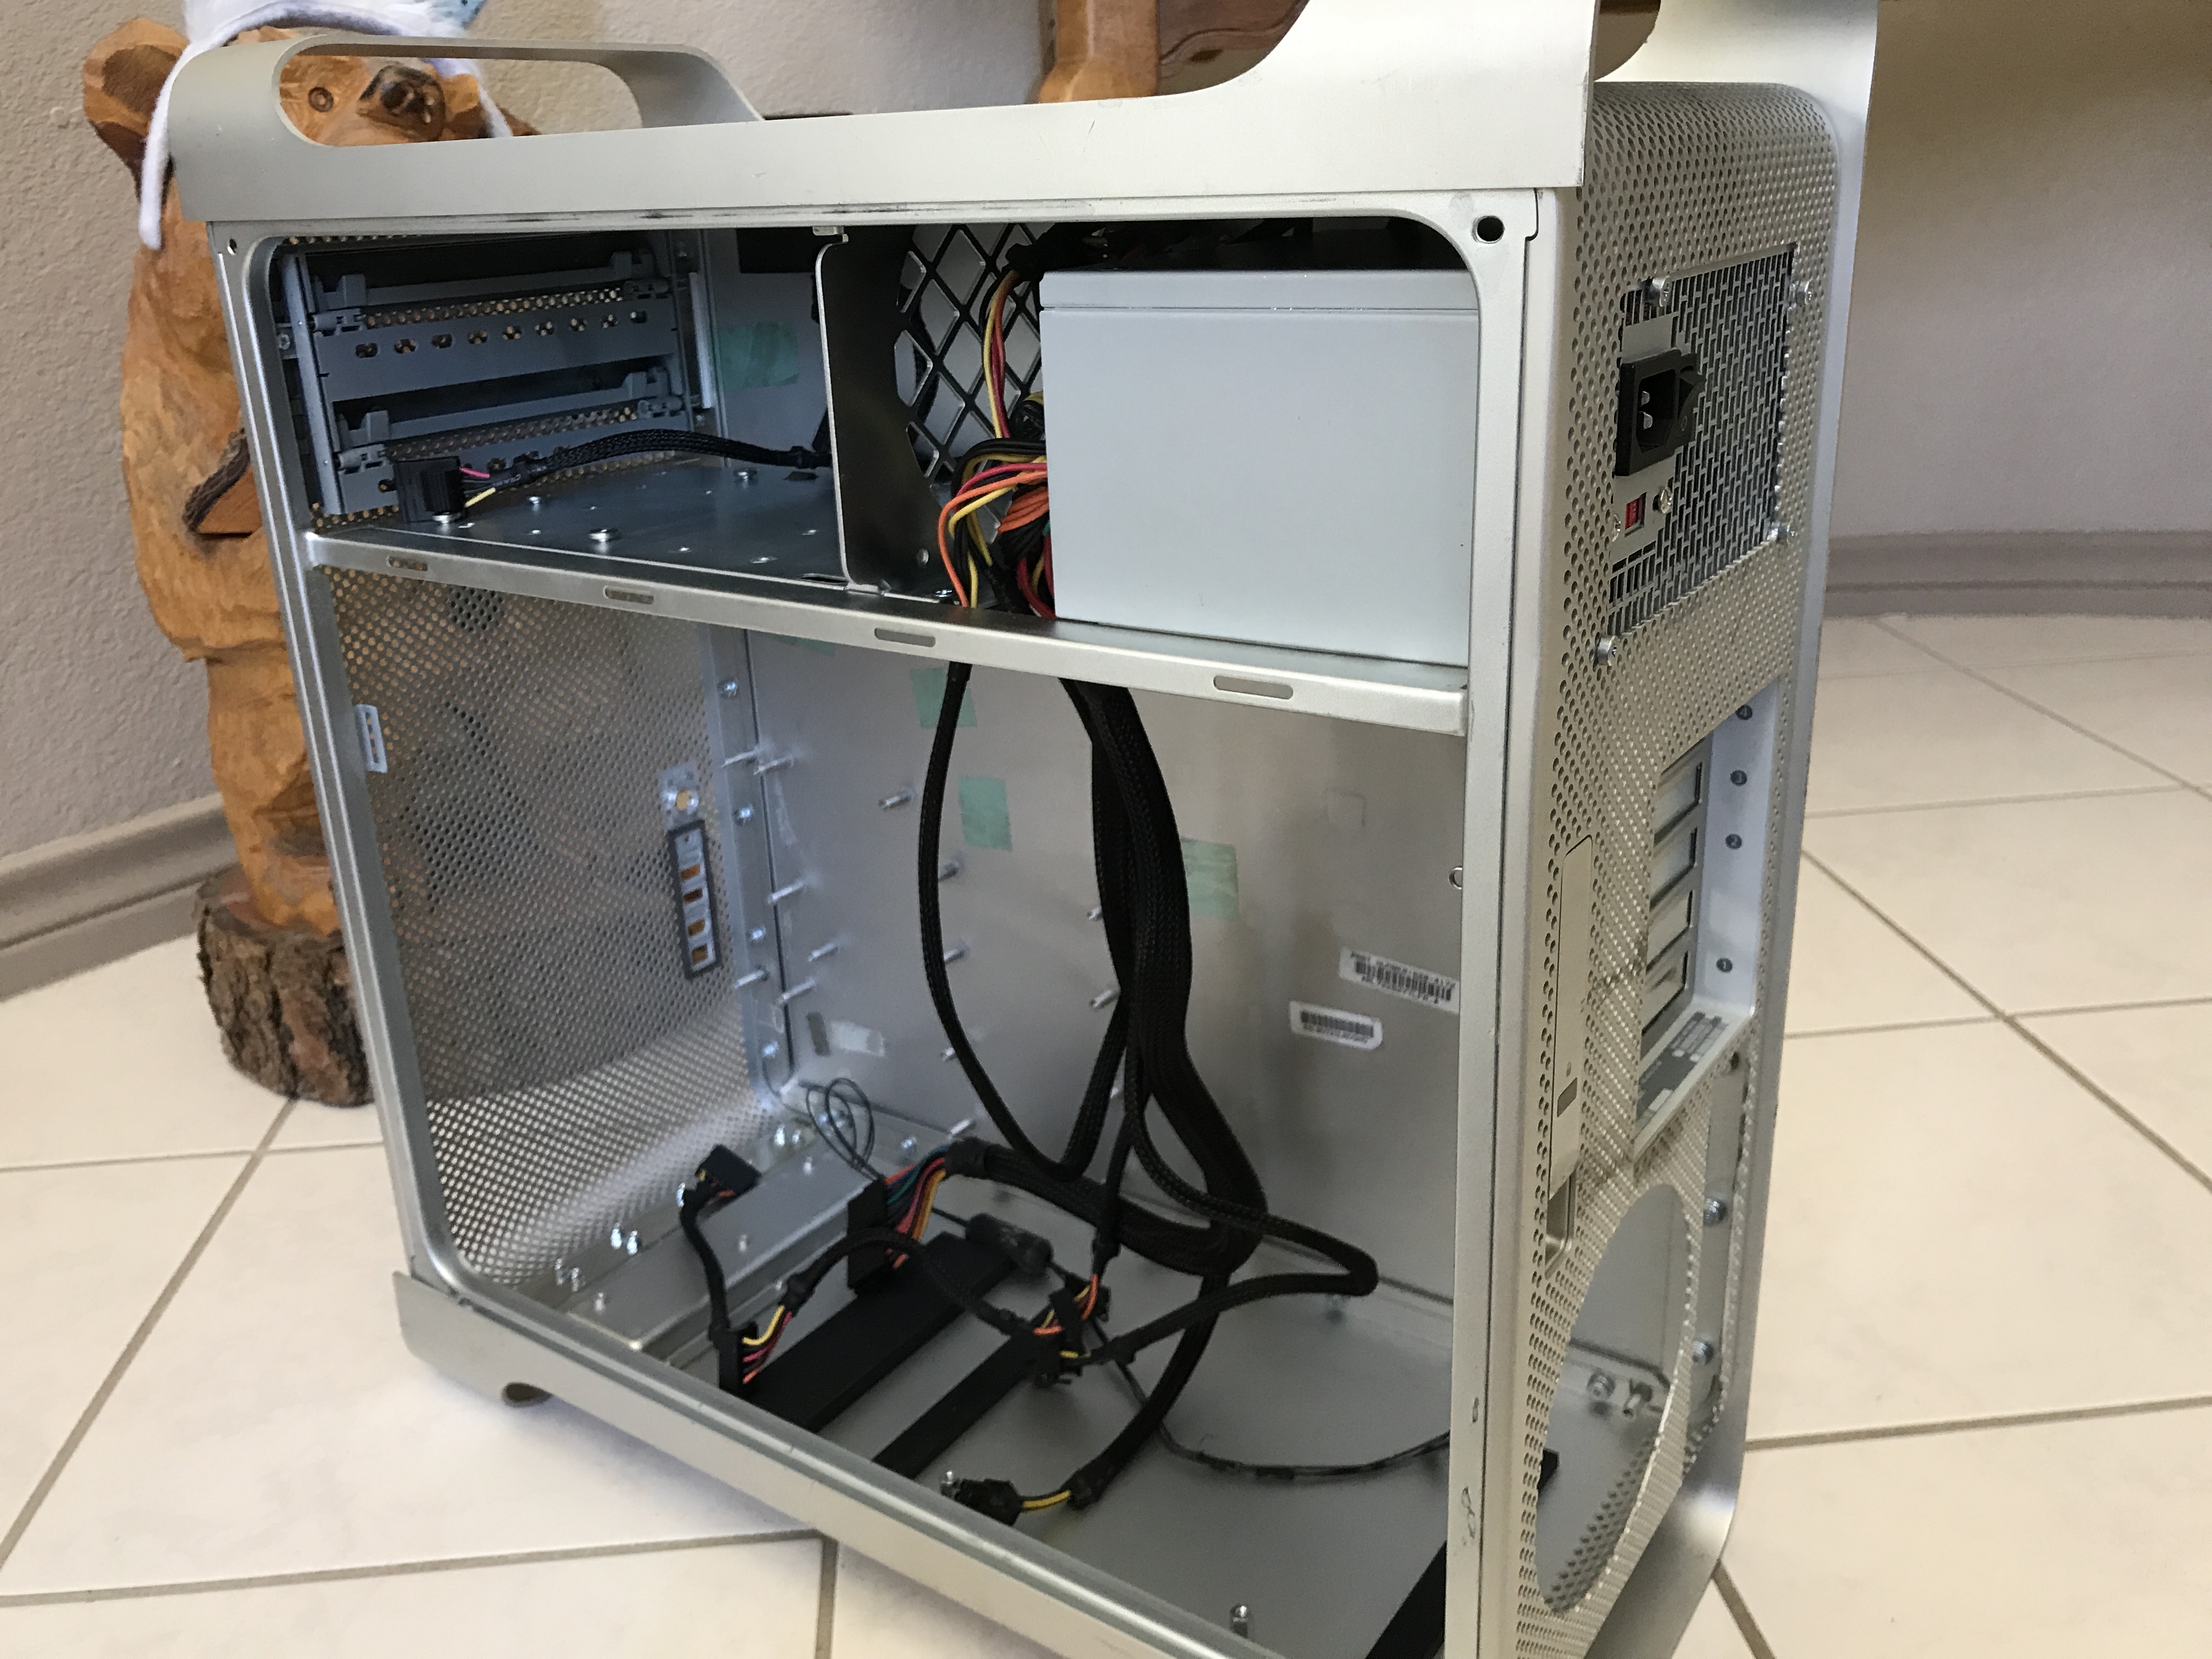
I also spent time cutting the upper tray to give the PSU a bit more room, and provide ventilation for the PSU fan, which faces down into the computer.
Moving the PSU to it's new home early in the build, it was a pretty awesome feeling.
Next conundrum. What about that front panel?
Well, after reading and reading and trying to make sense of that front panel (it was all like gibberish to me) I basically decided to forgo using it, and get a new set of front ports in it's place. As for the power button, I wanted an original one. And rewiring it seemed simple. However, I had a buy one since this case had the power button removed.
Unfortunately, this little board had the tiny tiny power light LED missing. After a little more swearing I decided to just use it as is. It was cheap, and I had a few power lights sitting around I could use as temporary replacements for the time being.
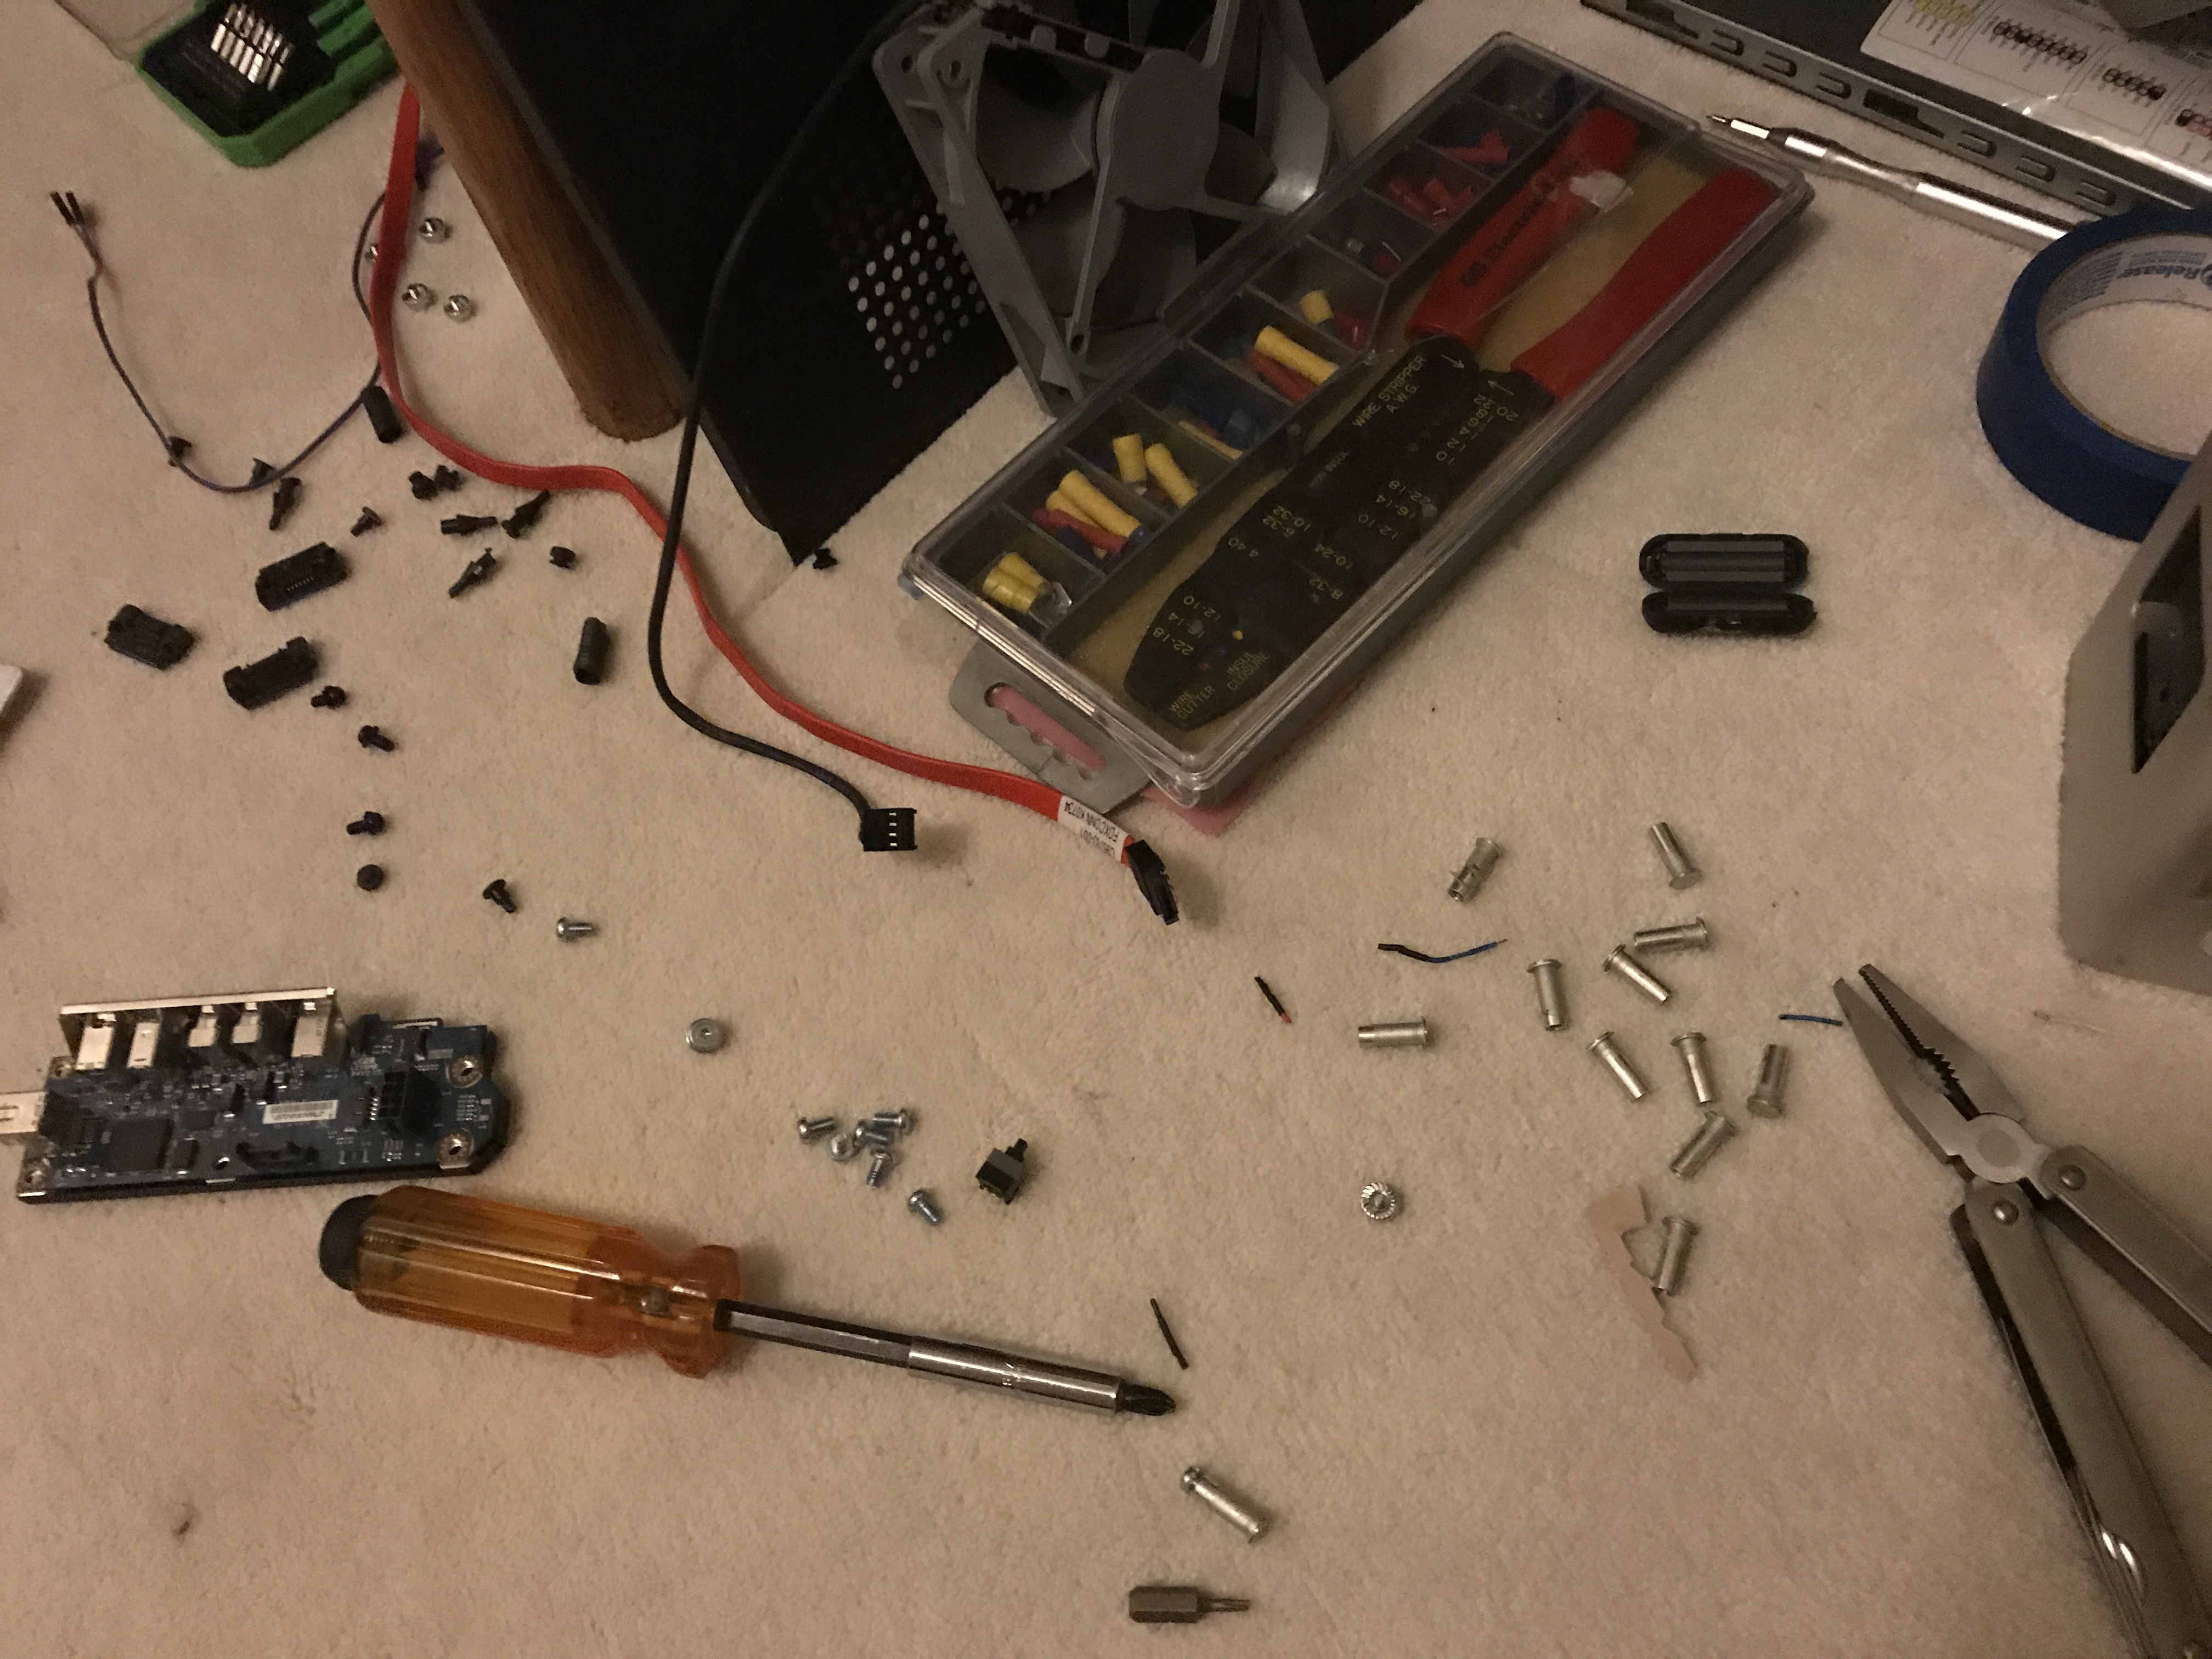
Tiny tiny parts
From what I get, the left contact is the Postive Terminal for the LED, middle is Negative AND Ground for the LED and Switch, and right is the Positive for the Switch. I'd say I did pretty good for this miniature soldering.
I also wrapped some heatshrink insulation around the ends to prevent them from contacting and doing anything funky.
The front panel itself was some cheap thing from China, but it looked pretty cool and works perfectly.
However, my placement might've been a bit off. I cut out my square but sitting the metal panel guide thingy (or whatever it's supposed to be called) on the original standoffs. In hindsight, I should've used the motherboard standoffs as supports since they're slightly shorter and it would've looked more OEM up front. Oops, and oh well.
Little bits all over the place. Those silver things are the motherboard standoffs. They came out with honestly hardly any effort with some pliers.
Time for some components!
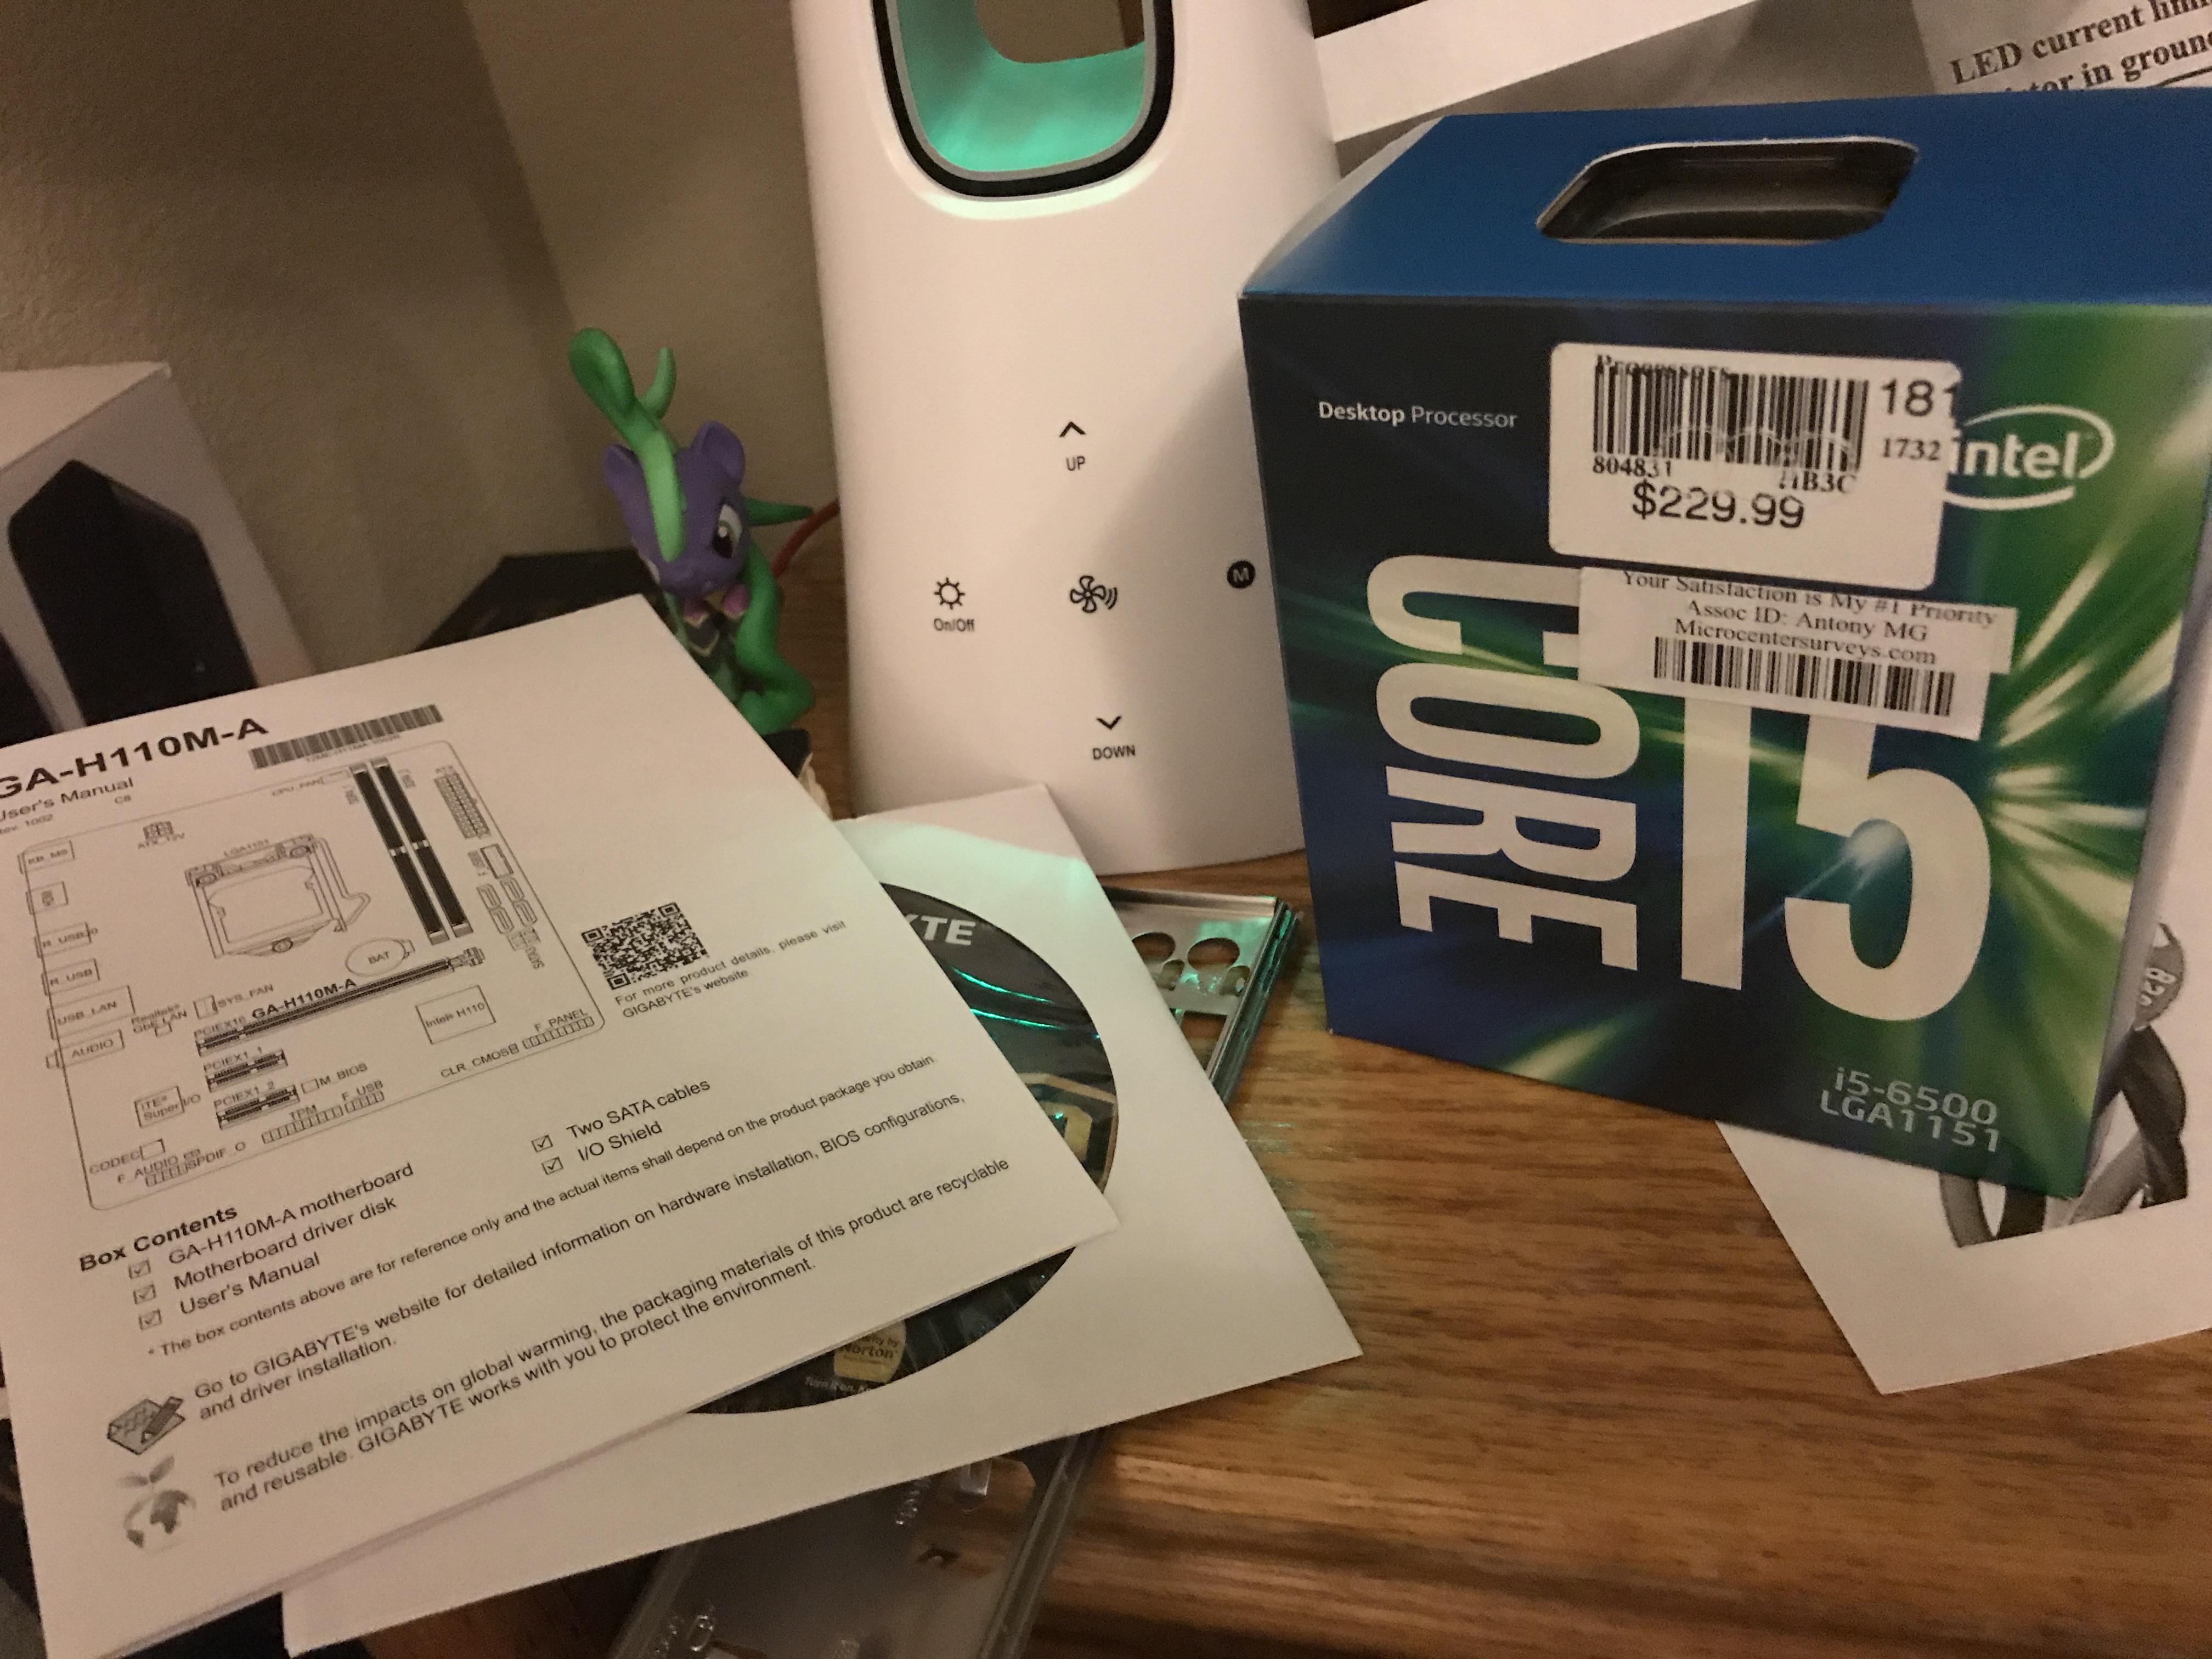
I'm lucky that I have a MicroCenter close by in Denver. Makes it pretty easy to just run and grab any stuff if I need (though they aren't always cheap, luckily they were having some sales at the time so I got some stuff at a discount).
Also, yes I do actually like the Mighty Mouse. So sue me.
Laying out the motherboard testing fitment with an older graphics card (Nvidia Geforce GT 610)
After ripping them out, I used to original standoffs to mount my motherboard.I figured the height difference was negligible at best (it's only a 1mm or 2mm difference) and secured them in place with some JB weld.
At this point, I was getting pretty darn excited! The build was almost there!
For wifi and bluetooth I used a BROADCOM 9433m1 or whatever it's called from a 2013 MacBook Pro, and a PCIe adapter I picked up from eBay for about 15 dollars. Worked perfectly with OS X out of the box. Works with no problems with Windows as well!
(searching through Bootcamp downloads for the drivers is a bit of a pain though)
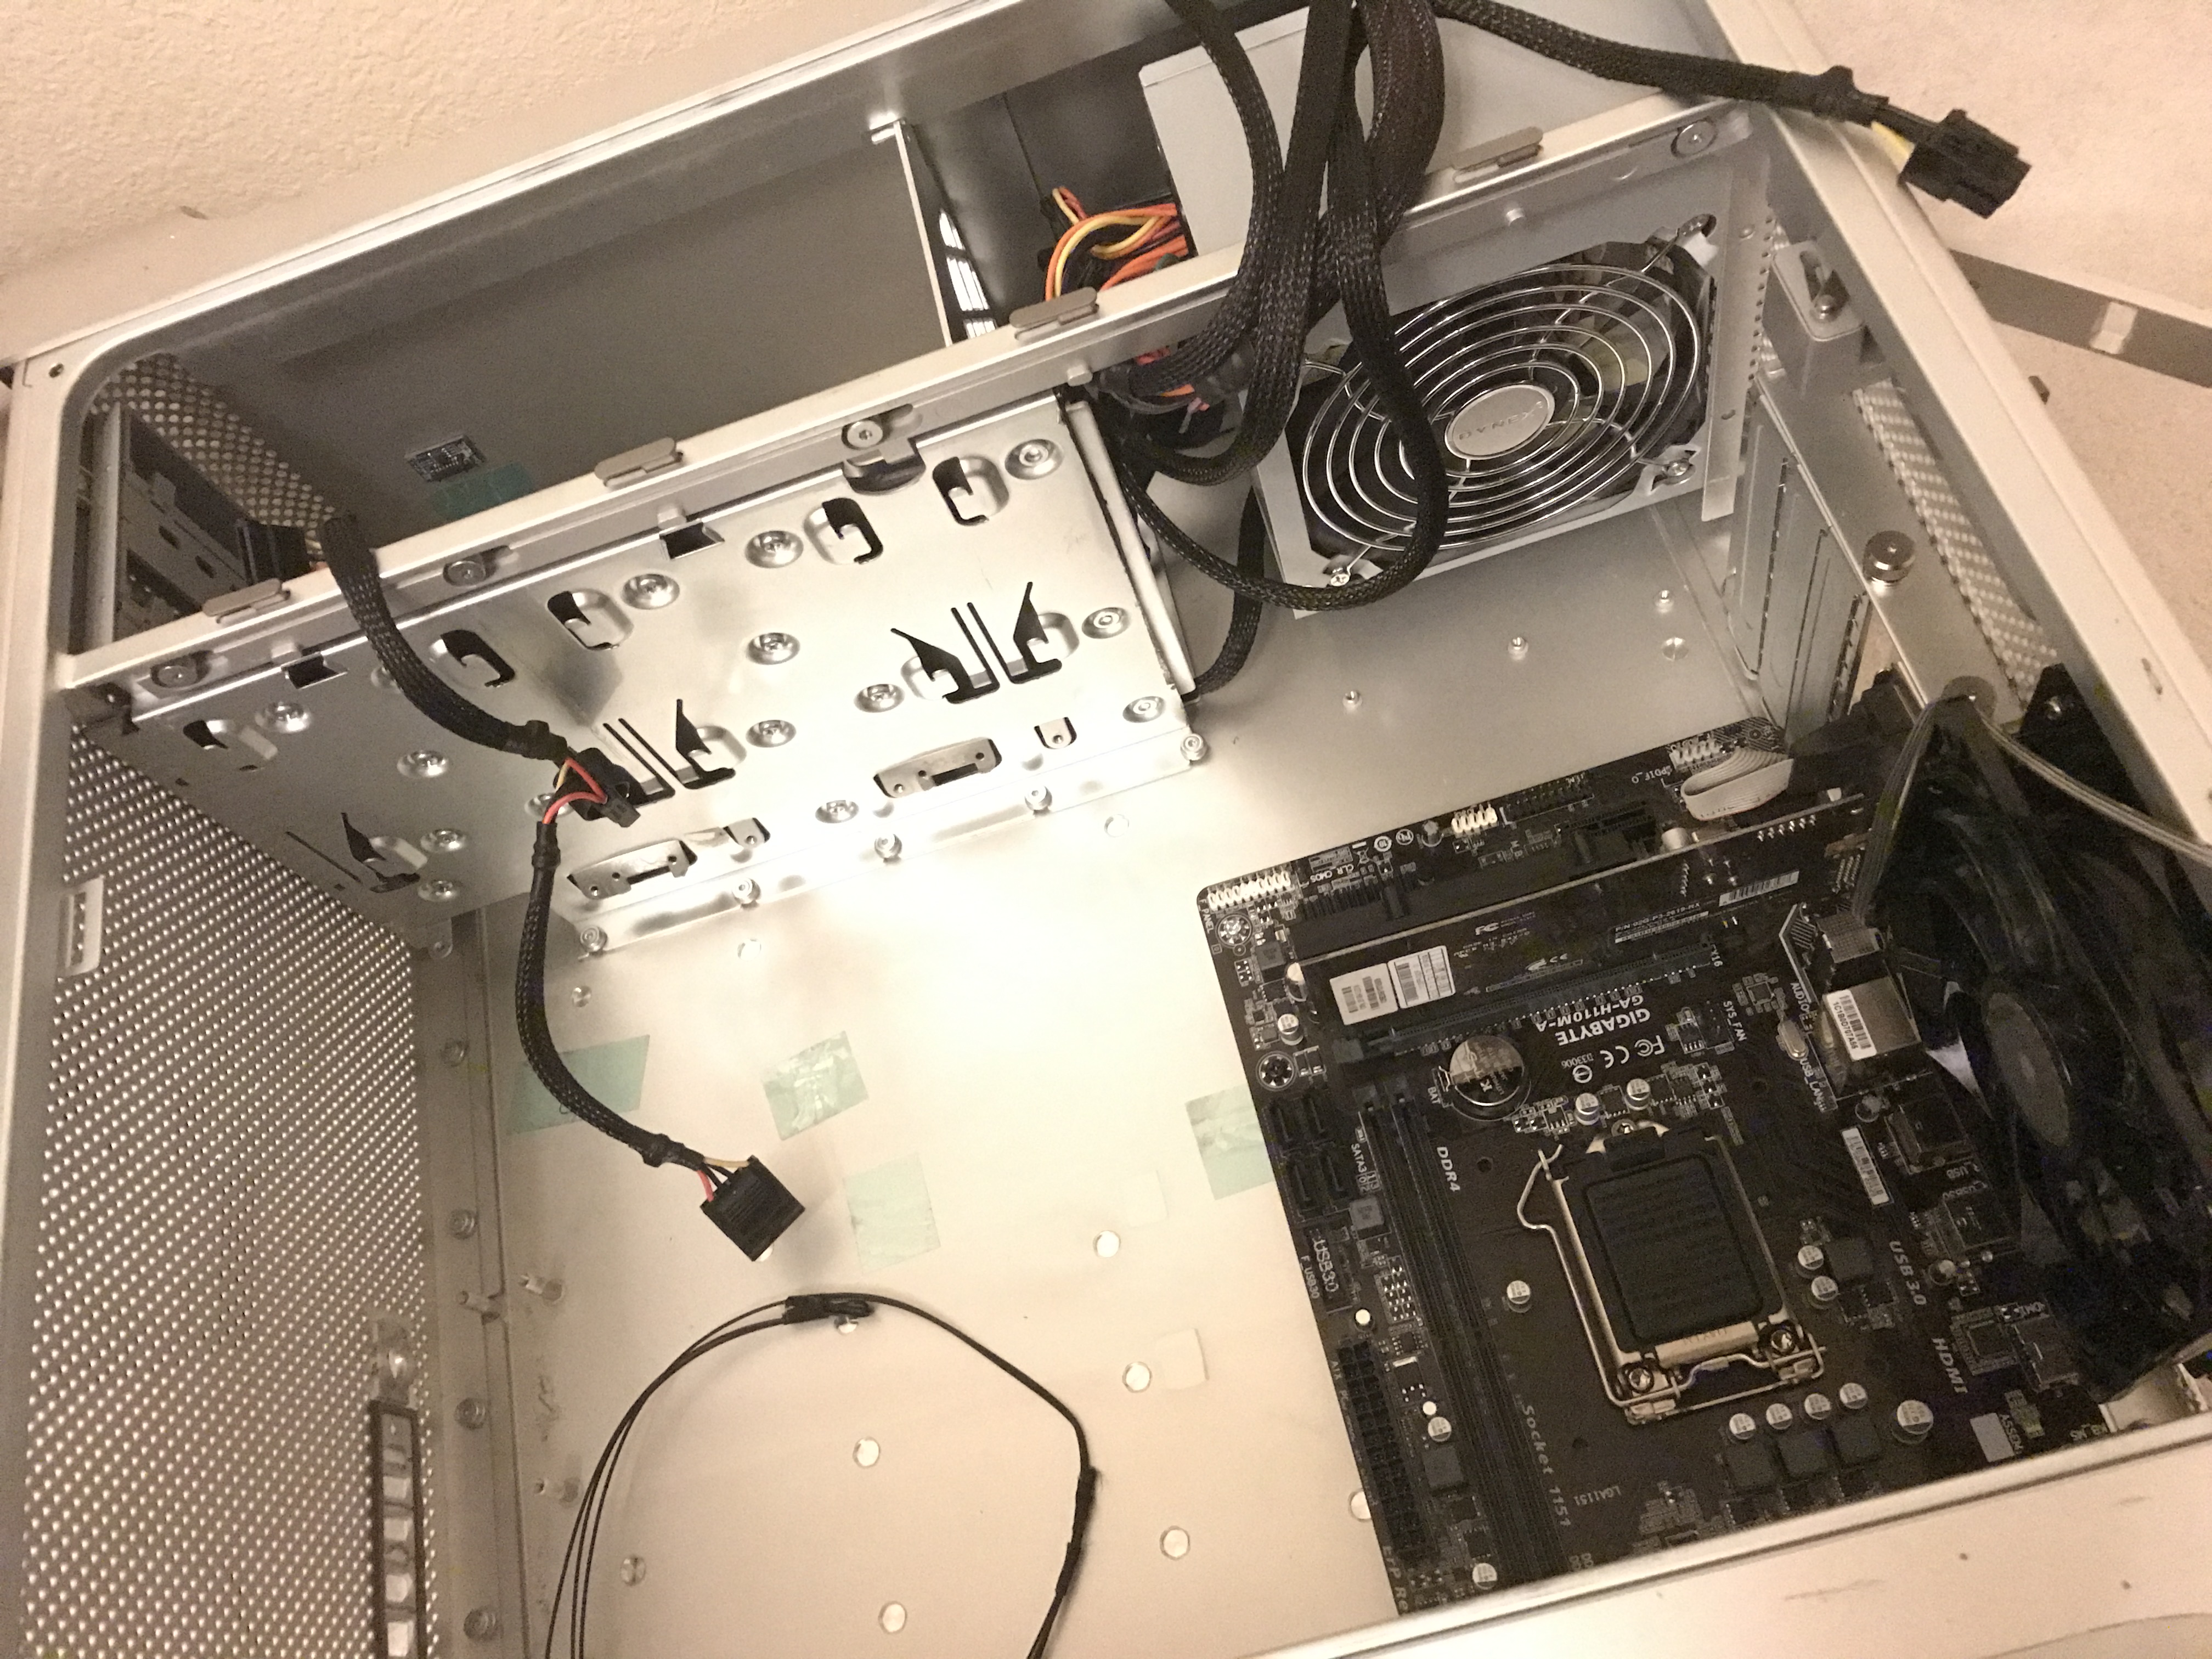
After putting all the bits together, picking some SATA cables from my parts PC's, buttoning up the hatches, and cable management be damned, this poorly computer was taking shape!
Lo and behold, after fixing one or two things, it was done!
I did this all for about five hundred-ish dollars in total, which may not be the cheapest or the fastest, but it certainly was fun. I probably went though about 7 million Dremel cutting discs though. So there's that.
Now, the million dollar question. What about OS X??? (I still call it OS X, sue me)
I've had mixed success with this to be honest.
Funny, the computer trouble accomplishing the very tasked it was designed for!
From what I've perused through on this site, the motherboard should be supported pretty darn well minus some audio funkiness. OS X Sierra was fairly easy to get running on this machine, was perfectly stable and all, but audio took me forever to figure out. It never really got fixed until I at last got a proper dedicated GPU for the machine (a GTX 1050 ti) and the relevant Nvidia Web Drivers.
Recently, I've been trying and trying and trying to get High Sierra to work. Heck, I can't even get the bloody Installer to boot up.
I've tried unplugging the GPU, various boot flags (safe mode and the like), ACPI = off, updating Clover, BIOS settings, and have probably several days of troubleshooting at this point, but nothing seems to work. I keep getting stopped at the same error message (which at this point seems to be something to do with ACPI doing something dumb). My Sierra install is broken now because of updating Clover, which oh well, oh boy, that's my fault.
OS X on this machine isn't and has never been my main machine, it's really only a test bed. I use Windows on it more, since OS X on it has been best described as "challenged". Windows itself works pretty flawlessly. Fast, pretty great for gaming, and just a fun machine to use overall. Plus I have my other Macs that I use as my Main Main machines. Windows I just use for games.
Hopefully, one day I can have this truly be what I wanted it to be. A Mac Pro on a diet. And a budget. Even though this solid block of lead is still stupidly heavy. For now though it'll keep on running as my gaming machine under Windows (btw I have windows running on a separate drive)and I'll keep working on trying to boot up that install, and then use this as my main machine for running Final Cut and Adobe CC.
I salute you ultimate Kludge. Bit rough around the edges. But still bloody cool.
HARDWARE ----
- Mac Pro 1,1 2 Ghz Model donor computer
- Gigabyte H110M-A mATX board
- Intel Core i5 6550 Quad Core 2.8 Ghz
- 16 GB DDR4 RAM
- 1 TB WD HDD (running Windows 10) / 80 GB HDD (was running 10.12.5 Sierra, now only some random version of Clover)
- Dual Layer DVD Drive
- Oem 2013 Macbook Pro Wifi and Bluetooth Module (Broadcom BCM9433CSAX I believe) with PCIe adapter
- Front panel USB 3.0 with audio
- Apple Full Size USB Keyboard w/ Apple Wired Mighty Mouse
After lurking round here, looking at build threads, and day dreaming of one day owning that illusive and freakishly huge computer known as the chess-grater Mac Pro, I one day decided to jump in feet first to building my first computer. But not any computer, OH NO. It had to be a Mac Pro case mod. I wanted something unique in the end, and I'd say this certainly was. Whether that's good or not, well...
To be fair, in the end the build was a lot easier than I initially anticipated. So if any would-be modders see this, um, go for it!
Now, I set myself with a VERY tight budget (ie. my job didn't pay much, and I need money for school). I wanted the most bang for my buck and something that would be pretty nice (at least on the outside) when I was finished. So to start off with, I began perusing through several old computers I had lying around.
My initial plan was to use some old firewire and USB front ports I had sitting around gathering dust on some old PC's and repurposing those to use on the Hack Pro. Alas, this isn't what happened in the end (which to be fair was probably for the best). Though I did borrow something in the end.

YEP. A Dynex PSU, rated at 400W or 450W or something. I pulled this from an old work computer from a local Vet. Plus I wanted to use it since it still worked just fine and all the cables were nice and braided.
Plus plus, the best kind of PSU is free. (don't crucify me)
Alas, it also set a power limit, but more on that later.
The case itself I got from ebay not much later for a pretty decent price ($40 for the case, $30 shipping). However, bang it and dang it, one of the feet get bent in transit. But using my kludge skills (some clamps, pieces of 2x4s, and patience) I was able to bend it back into place somewhat.

The case itself still had the front panel board, disc drive, main power cable harness, mSATA drive cable, and the PSU fan. however, I basically threw all this stuff away, since it's bits worth more or less nothing, and I didn't wanna go through the hassle of trying to repurpose any of it.
Step one, figure out how to take apart all this rubbish.
More or less, it was actually pretty easy to figure out on my own. Except for that upper tray. GOOD GOD. It didn't make sense how to take it apart then, and it still doesn't really make sense now.


An old Board sitting in there to get an idea of where I want things placed.

That grille by the way is riveted in place, which was frustrating, but in the end didn't really cause any problems.
First step (other than buying internals, but whatever) is slicing and dicing. This part was equal parts fun, and equal parts swearing on the front porch.

I wanted to keep the back panel as clean and normal looking as possible (plus I didn't want to be rid of the rear fan grille. I love that thing for some reason.
I also spent time cutting the upper tray to give the PSU a bit more room, and provide ventilation for the PSU fan, which faces down into the computer.

Moving the PSU to it's new home early in the build, it was a pretty awesome feeling.
Next conundrum. What about that front panel?
Well, after reading and reading and trying to make sense of that front panel (it was all like gibberish to me) I basically decided to forgo using it, and get a new set of front ports in it's place. As for the power button, I wanted an original one. And rewiring it seemed simple. However, I had a buy one since this case had the power button removed.

Unfortunately, this little board had the tiny tiny power light LED missing. After a little more swearing I decided to just use it as is. It was cheap, and I had a few power lights sitting around I could use as temporary replacements for the time being.

Tiny tiny parts

From what I get, the left contact is the Postive Terminal for the LED, middle is Negative AND Ground for the LED and Switch, and right is the Positive for the Switch. I'd say I did pretty good for this miniature soldering.
I also wrapped some heatshrink insulation around the ends to prevent them from contacting and doing anything funky.
The front panel itself was some cheap thing from China, but it looked pretty cool and works perfectly.
However, my placement might've been a bit off. I cut out my square but sitting the metal panel guide thingy (or whatever it's supposed to be called) on the original standoffs. In hindsight, I should've used the motherboard standoffs as supports since they're slightly shorter and it would've looked more OEM up front. Oops, and oh well.

Little bits all over the place. Those silver things are the motherboard standoffs. They came out with honestly hardly any effort with some pliers.
Time for some components!

I'm lucky that I have a MicroCenter close by in Denver. Makes it pretty easy to just run and grab any stuff if I need (though they aren't always cheap, luckily they were having some sales at the time so I got some stuff at a discount).
Also, yes I do actually like the Mighty Mouse. So sue me.
Laying out the motherboard testing fitment with an older graphics card (Nvidia Geforce GT 610)

After ripping them out, I used to original standoffs to mount my motherboard.I figured the height difference was negligible at best (it's only a 1mm or 2mm difference) and secured them in place with some JB weld.
At this point, I was getting pretty darn excited! The build was almost there!
For wifi and bluetooth I used a BROADCOM 9433m1 or whatever it's called from a 2013 MacBook Pro, and a PCIe adapter I picked up from eBay for about 15 dollars. Worked perfectly with OS X out of the box. Works with no problems with Windows as well!
(searching through Bootcamp downloads for the drivers is a bit of a pain though)
After putting all the bits together, picking some SATA cables from my parts PC's, buttoning up the hatches, and cable management be damned, this poorly computer was taking shape!
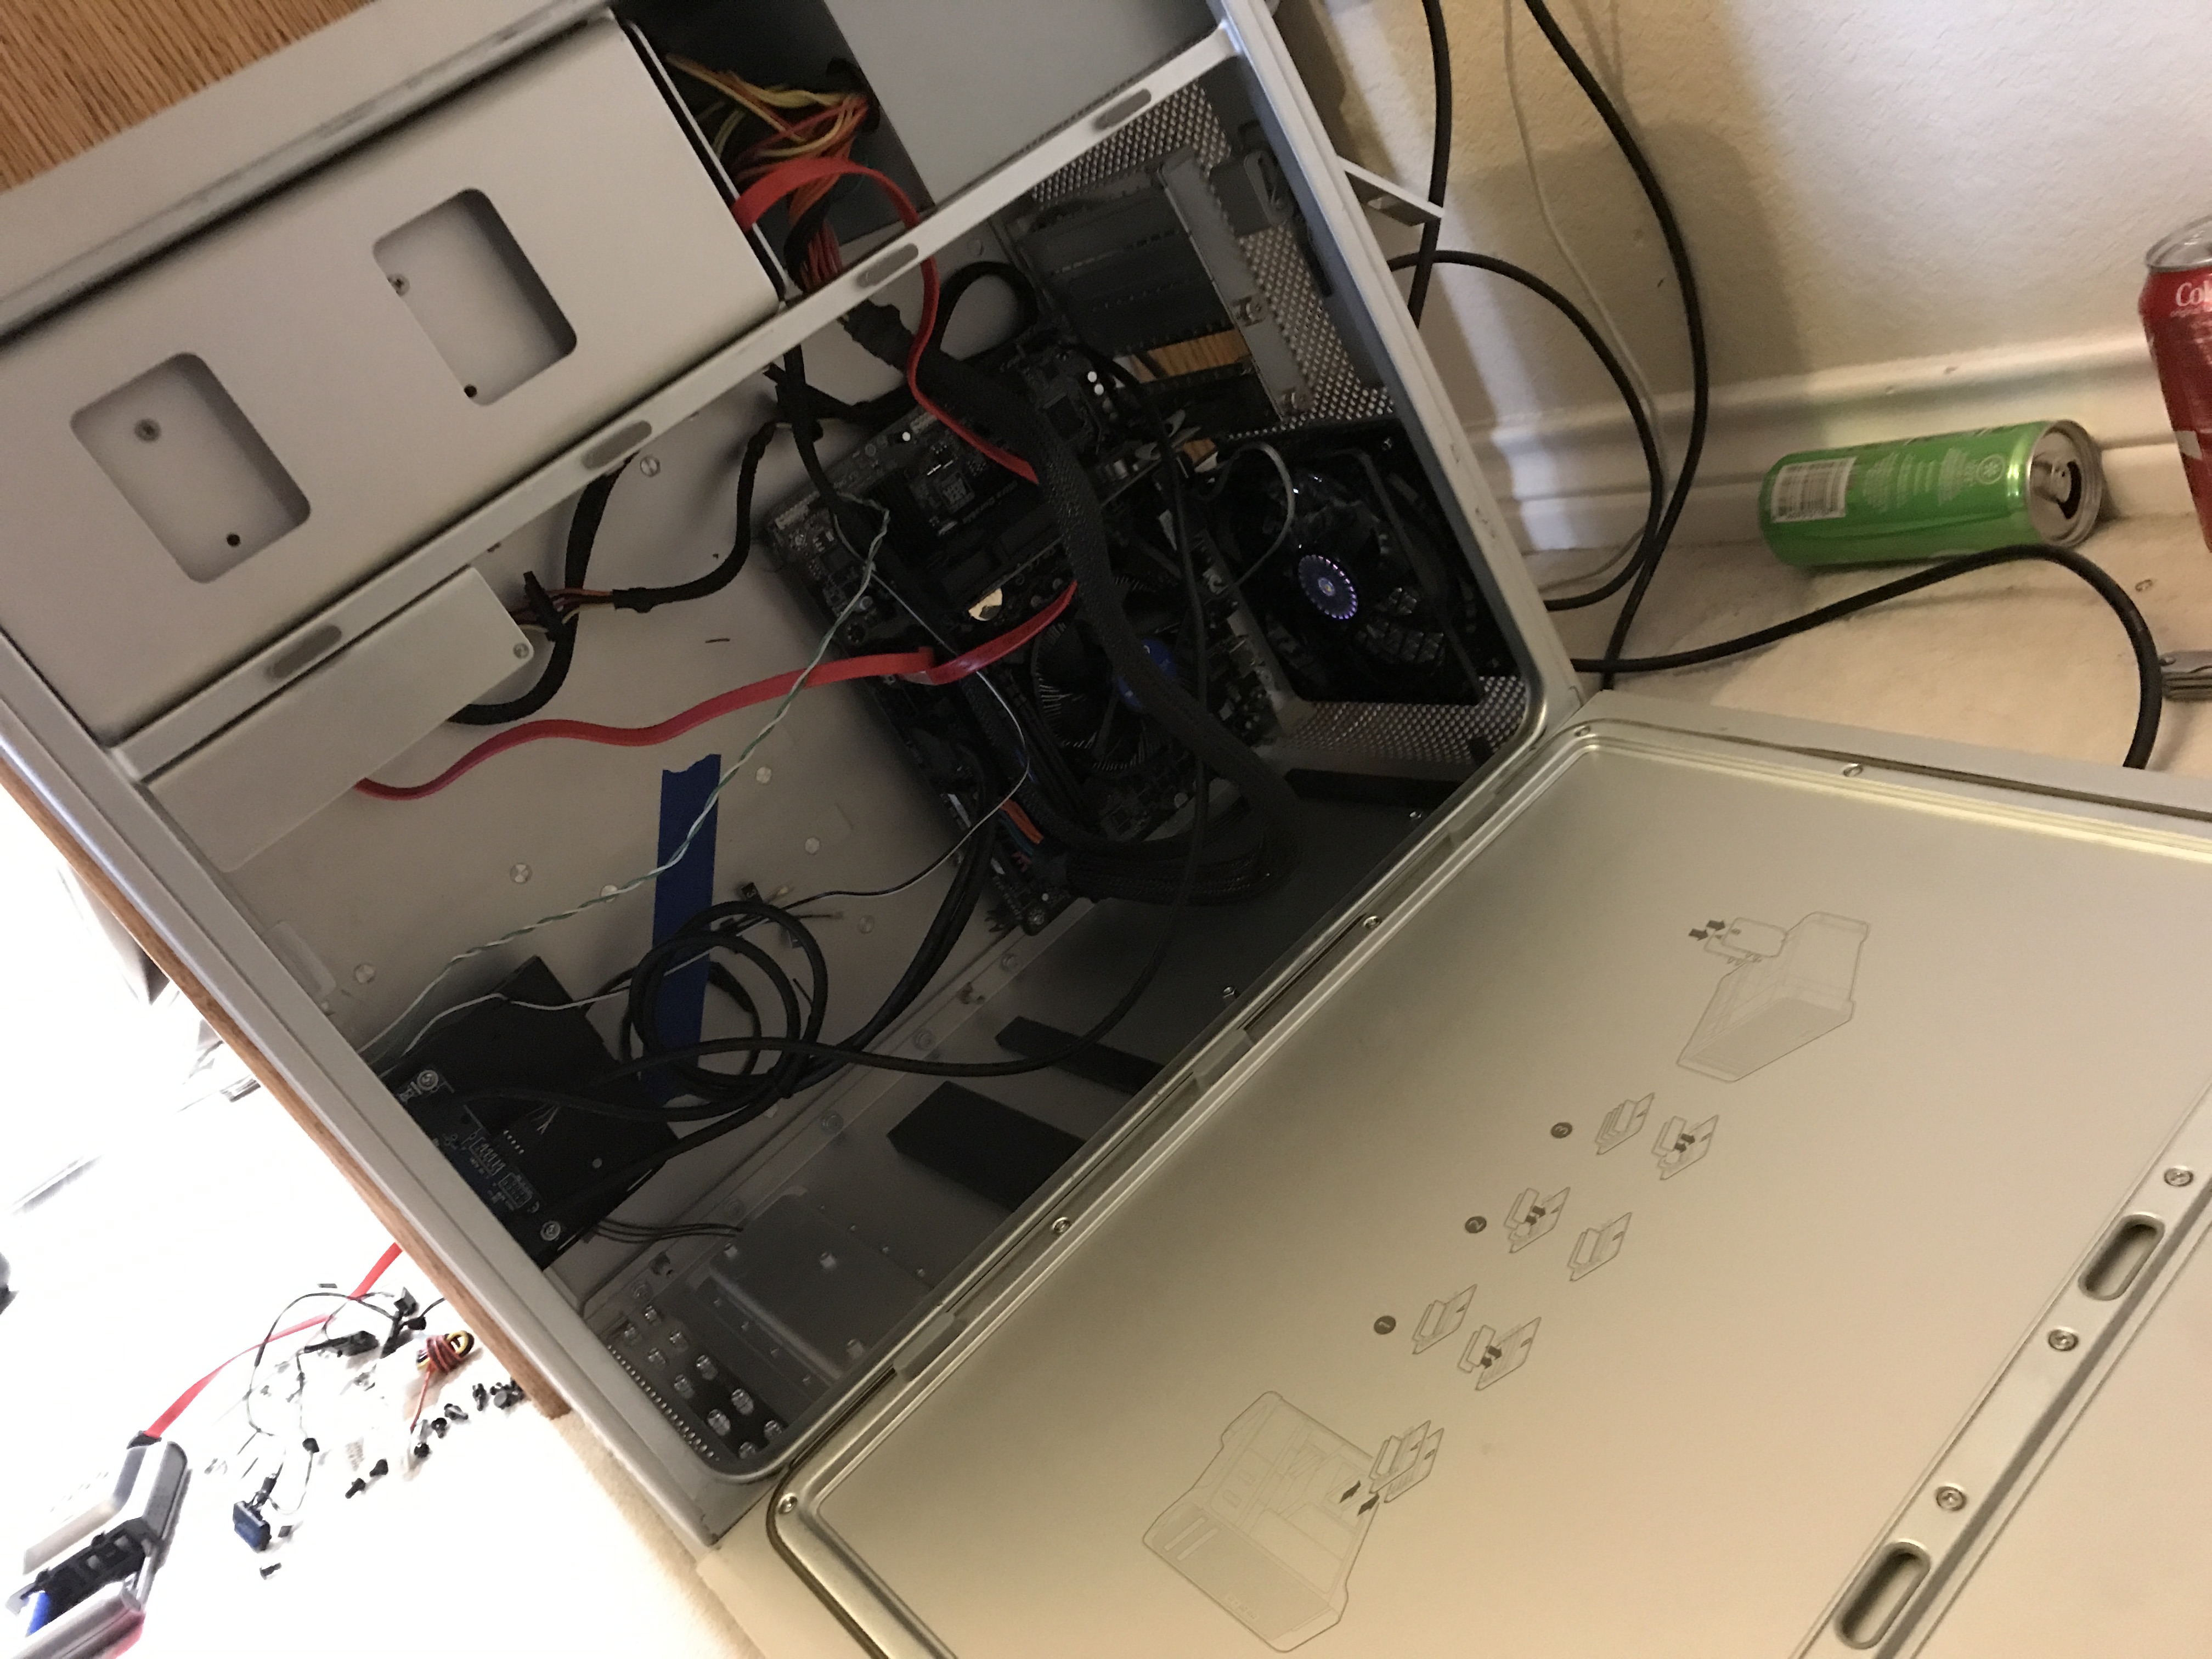
Lo and behold, after fixing one or two things, it was done!

I did this all for about five hundred-ish dollars in total, which may not be the cheapest or the fastest, but it certainly was fun. I probably went though about 7 million Dremel cutting discs though. So there's that.
Now, the million dollar question. What about OS X??? (I still call it OS X, sue me)
I've had mixed success with this to be honest.
Funny, the computer trouble accomplishing the very tasked it was designed for!
From what I've perused through on this site, the motherboard should be supported pretty darn well minus some audio funkiness. OS X Sierra was fairly easy to get running on this machine, was perfectly stable and all, but audio took me forever to figure out. It never really got fixed until I at last got a proper dedicated GPU for the machine (a GTX 1050 ti) and the relevant Nvidia Web Drivers.
Recently, I've been trying and trying and trying to get High Sierra to work. Heck, I can't even get the bloody Installer to boot up.
I've tried unplugging the GPU, various boot flags (safe mode and the like), ACPI = off, updating Clover, BIOS settings, and have probably several days of troubleshooting at this point, but nothing seems to work. I keep getting stopped at the same error message (which at this point seems to be something to do with ACPI doing something dumb). My Sierra install is broken now because of updating Clover, which oh well, oh boy, that's my fault.
OS X on this machine isn't and has never been my main machine, it's really only a test bed. I use Windows on it more, since OS X on it has been best described as "challenged". Windows itself works pretty flawlessly. Fast, pretty great for gaming, and just a fun machine to use overall. Plus I have my other Macs that I use as my Main Main machines. Windows I just use for games.
Hopefully, one day I can have this truly be what I wanted it to be. A Mac Pro on a diet. And a budget. Even though this solid block of lead is still stupidly heavy. For now though it'll keep on running as my gaming machine under Windows (btw I have windows running on a separate drive)and I'll keep working on trying to boot up that install, and then use this as my main machine for running Final Cut and Adobe CC.
I salute you ultimate Kludge. Bit rough around the edges. But still bloody cool.
HARDWARE ----
- Mac Pro 1,1 2 Ghz Model donor computer
- Gigabyte H110M-A mATX board
- Intel Core i5 6550 Quad Core 2.8 Ghz
- 16 GB DDR4 RAM
- 1 TB WD HDD (running Windows 10) / 80 GB HDD (was running 10.12.5 Sierra, now only some random version of Clover)
- Dual Layer DVD Drive
- Oem 2013 Macbook Pro Wifi and Bluetooth Module (Broadcom BCM9433CSAX I believe) with PCIe adapter
- Front panel USB 3.0 with audio
- Apple Full Size USB Keyboard w/ Apple Wired Mighty Mouse
")