- Joined
- Jan 15, 2012
- Messages
- 584
- Motherboard
- GA-Z68MA-D2H-B3
- CPU
- i5-2500K
- Graphics
- HIS 5770
- Mac
- Classic Mac
- Mobile Phone
Hey everyone, I just got my G5 case so I figured I'd start a thread. I don't even have a mobo tray yet (so it may be a while), but I'll update this thread with pics etc. as I go along. Anyway, I'll post some pics of the parts I got for now.


It came with the front panel cable!

HDD bay also included!


I couldn't figure out what these 3 parts were.


It did not come with a water cooler as some thought (I'm not sure whether this is a good or bad thing, as it probably saved me a lot of puzzling over how to use it). I hope I don't need/can get for cheap the ODD bezel thing. Unfortunately, it also came with only one set of the HDD screws. I may have to ask the seller if he has the other set.
UPDATE 9/20/12
Today I went out to Ace Hardware and bought 4 M3x10mm screws for my ODD. They work very well! They stick out about 6 or so mm from the drive and slide perfectly into the little latching drive slots. (Leave it to Apple to figure out a painless way to upgrade the optical drive, of all things - the design on this computer is really sweet. I just wish they applied the same principle of user-serviceability on those newfangled rMBPs.) M3x9mm would have been ideal as the 10mm ones are a little tall, but Ace did not have any screws in that size. Anyway, my next step will be complete case disassembly. I'm still going back and forth on the whole PSU up top right or down bottom left thing, but I'm leaning top right for looks though upgrading will be a pain in the butt. Please weigh in if you have suggestions.
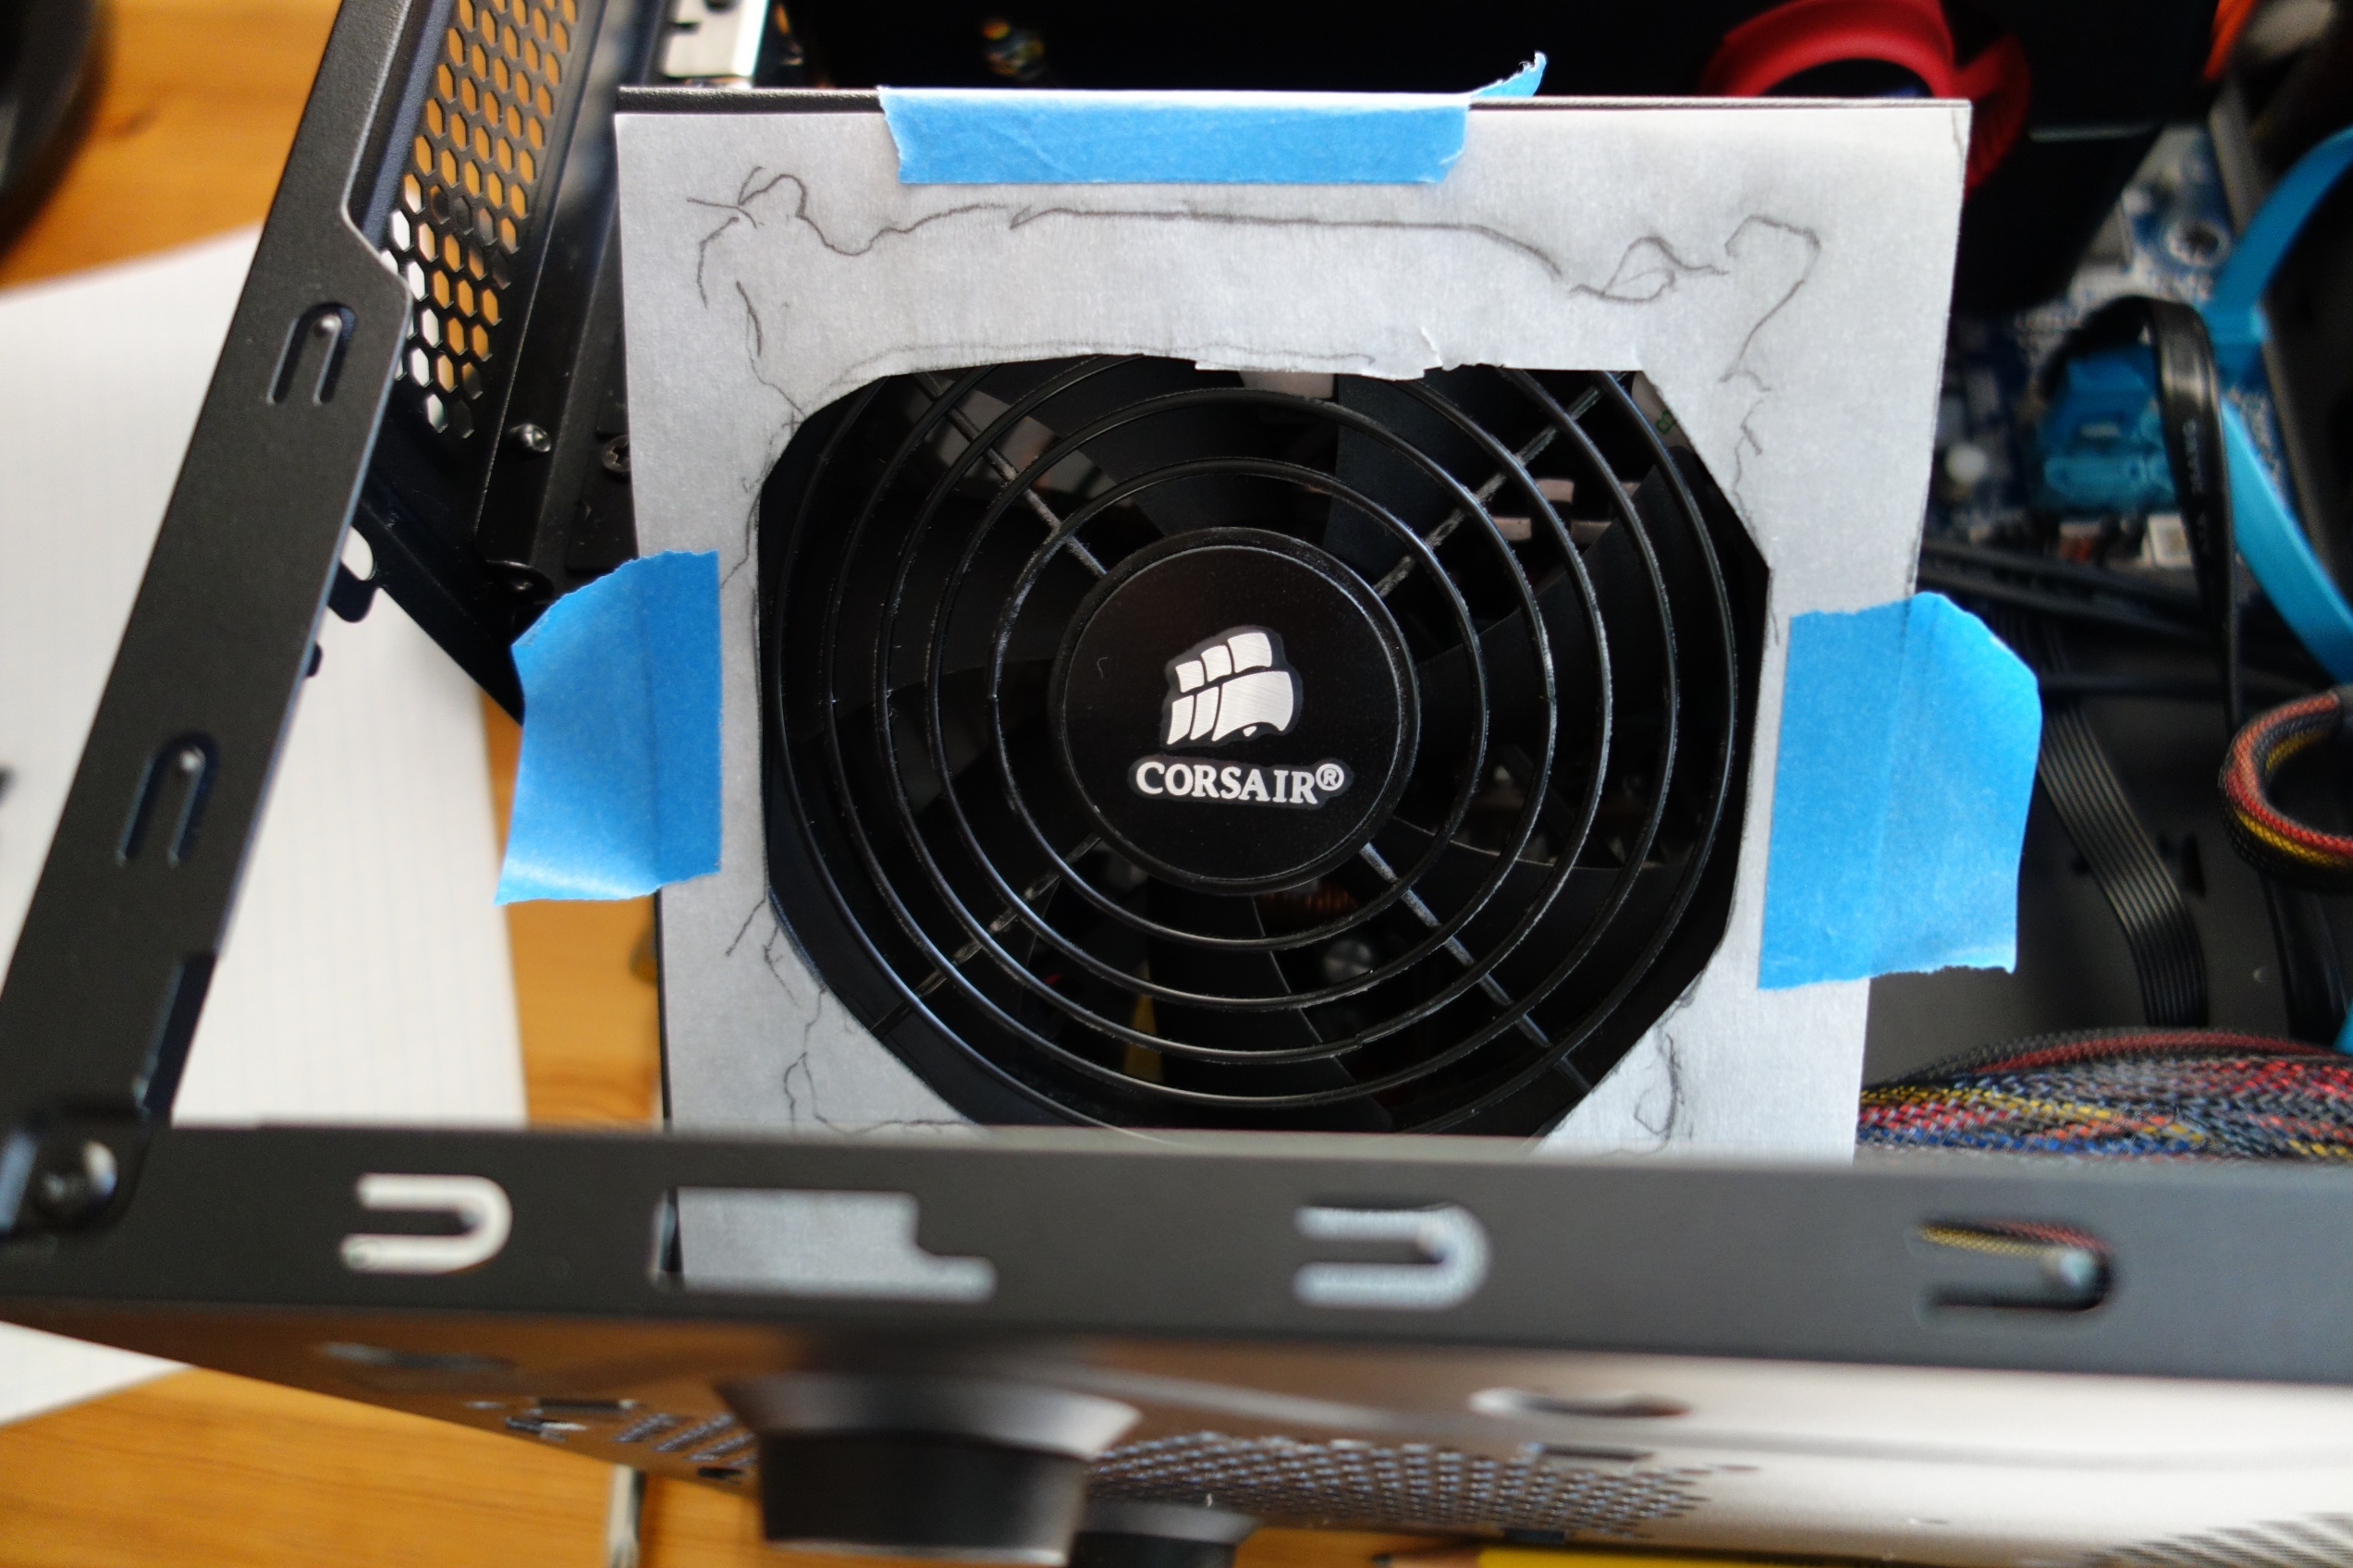
12/22/12: Cutting the PSU hole in the top shelf
Well, today I learned how to use a dremel! I cut the hole in the top shelf for my power supply's fan. It took two and a half cutoff wheels and a lot of sparks, but it came out pretty nicely! Now I need to find a drill bit (are there specific metal bits? or can I just use any old drill bit?) suitable for making the screw holes. I'm thinking about just using the screws from the fan grill.
It came with the front panel cable!
HDD bay also included!
I couldn't figure out what these 3 parts were.
It did not come with a water cooler as some thought (I'm not sure whether this is a good or bad thing, as it probably saved me a lot of puzzling over how to use it). I hope I don't need/can get for cheap the ODD bezel thing. Unfortunately, it also came with only one set of the HDD screws. I may have to ask the seller if he has the other set.
UPDATE 9/20/12
Today I went out to Ace Hardware and bought 4 M3x10mm screws for my ODD. They work very well! They stick out about 6 or so mm from the drive and slide perfectly into the little latching drive slots. (Leave it to Apple to figure out a painless way to upgrade the optical drive, of all things - the design on this computer is really sweet. I just wish they applied the same principle of user-serviceability on those newfangled rMBPs.) M3x9mm would have been ideal as the 10mm ones are a little tall, but Ace did not have any screws in that size. Anyway, my next step will be complete case disassembly. I'm still going back and forth on the whole PSU up top right or down bottom left thing, but I'm leaning top right for looks though upgrading will be a pain in the butt. Please weigh in if you have suggestions.
12/22/12: Cutting the PSU hole in the top shelf
Well, today I learned how to use a dremel! I cut the hole in the top shelf for my power supply's fan. It took two and a half cutoff wheels and a lot of sparks, but it came out pretty nicely! Now I need to find a drill bit (are there specific metal bits? or can I just use any old drill bit?) suitable for making the screw holes. I'm thinking about just using the screws from the fan grill.
")