Contribute
Register

Playstation Three Case Mod

Status
Not open for further replies.
Hello rehpotsirhc,
I think there is enough room on the case top to install a single slot Graphic Card. To install a Graphic card it would also required a PCI riser because the available height on the case is very low + a couple of Molex to PCI EXPRESS adapters.
But I think it’s not possible to install a too much powerfull Graphic Card because my PSU is only 270w. Am I right ?

I don’t plan to use this machine to play games or at least only old stuff like emulated games (Super Mario Bros lol). Intel HD4600 should be ok to play old emulated stuff.

Thank you for your comment, don’t hesitate to give your opinion.
 
Actually you could probably get away with a pretty powerful card because you'll have plenty of headroom due to your low power CPU. I would probably still stick to low power consumption card like a GTX 750 or 750 Ti because the heat, but trying to cram one in there is a whole other problem.
 
You're right and it's possible to install a graphic card because there is available room actually on the case

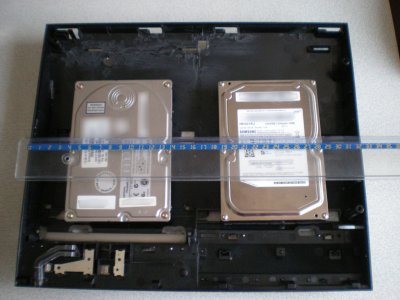
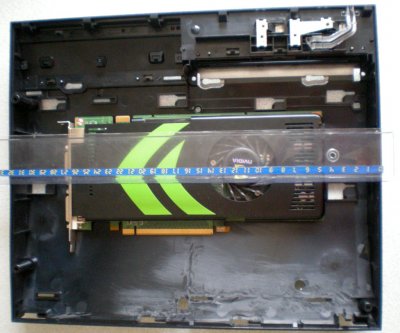
Here are some photos of the top of the case with a very long Graphic Card and two 3.5’’ hard drives.
015s.jpg016s.jpg
017s.jpg018s.jpg

The ruler is graduated in cm (1'' = 2,54 cm)

My PS3 case mod wont include graphic card because it don’t need one and I want to keep the case very silent.
 
I’m no expert of Plexiglas, this is based on the mod I’m doing.
Don’t hesitate to give your secret tips ;)

Which tools did I use to cut Plexiglas ?
To avoid any scratch I used a old soft clothe when I need to block the Plexiglas (put the clothe between the Plexiglas part and any blocking tool, table,…).

Plexiglas is easy to cut, it doesn’t take expensive tools to build or make a case mod.
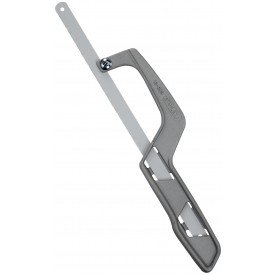
I used 2 kinds of metal saw to cut by hand only: A regular metal saw and a mini saw.
scie facom.jpgStanley_Hand_Tools_15-809_Metal_Mini-Hack_Utility_Saw.jpg

Regular metal saw, cuts, lets say the external side and the mini metal saw to cut the internal side.

To make holes or anything inside the Plexiglas just draw the shape you want to remove then take a drill big enough (higher than the metal saw blade) and drill four holes, for example if you want to make a rectangle drill 1 hole per corner.
Then use the mini metal saw to cut (remove) the unwanted part starting by the holes you’ve made.
Don’t forget to keep a little margin before drilling or cutting you’ll probably need to make some tweaks and sanding.

Which tool to sand Plexiglas?
To sand any part of Plexiglas I recommend using a soft metal file.
soft metal file.jpg

Plexiglas will melt if you use tools that spin faster to sand or even to drill. The soft metal file will sand perfectly any Plexiglas part without melting. Sandpaper will be useful for little adjustements.
I also used some Dremel sanding tools but I don’t recommend using them to sand Plexiglas (spinning too fast = melting).

Which tool to glue?
First I planned to use 2mm screw (on the 5mm Plexiglas) that I bought before starting the project. I tried to drill with a 1,6mm (metal) drill and Dremel tool. First hole was perfect. Then the Plexiglas started to melt (Dremel was spinning to fast minimum speed was 5000 RPM lol) on the drill.
I broke the drill trying to make the hole with a regular drill.
So I decided to do it the easy way with a hot melt glue gun. Result is ok.
glue gun.jpg

If you put too much glue you can cut it with a cutter. Don’t try to sand the glue. This just doesn’t work.

To glue small part I used super glue from Loctite (super glue with brush model). This worked perfectly for small parts.

Extra tips:
Try to save parts like screws, plastic mounts, wires, cables, this could be very useful. For example I kept the PS3 plastic mounts that I cut previously and used them to attach the top panel of the internal box. I also used motherboard mount screws from another old PC case.
 
You're right and it's possible to install a graphic card because there is available room actually on the case

Here are some photos of the top of the case with a very long Graphic Card and two 3.5’’ hard drives.
View attachment 122244View attachment 122245
View attachment 122246View attachment 122247

The ruler is graduated in cm (1'' = 2,54 cm)

My PS3 case mod wont include graphic card because it don’t need one and I want to keep the case very silent.

That's a single PCI bracket workstation card and most "gaming" cards are dual slot. You could possibly fit a dual slot, low profile card such as the Gigabyte GV-N75TOC-2GL GTX 750 Ti in there somehow, possibly even directly in the expansion slot with no riser.

http://www.gigabyte.com/products/product-page.aspx?pid=5160#ov
 
Hi rehpotsirhc, thanks for your support.
 
I look forward to seeing your finished product. Do you plan on reusing the front USB ports and the power button / LED?
 
Hi rehpotsirhc. Here are some spoilers:
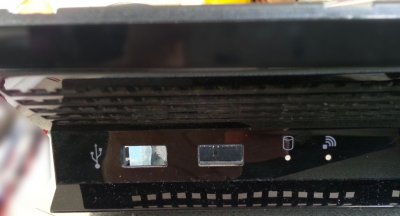
- Front USB holes will receive two brand new usb ports.
- Power button will keep the original design untouched and I'll build a homemade touch sensor PCB.
- LEDs will be kept so the mod will show "power on" and HDD activity at least (may be more but I didn't take the decision on this, for now).

I need time to achieve this correctly and give details about the mod step by step.
Stay tuned !
 
About the internal box:
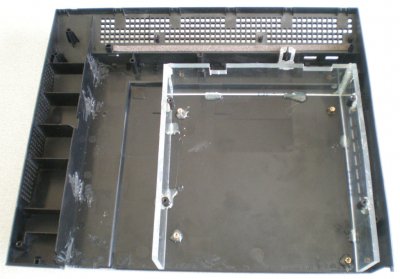
To find the internal height of the internal box I put the CPU on the motherboard and attached the CPU cooler (without thermal paste). Always follow the motherboard instructions manual and cpu cooler manual when installing the CPU.
Then I put this upside down and I measured the height of the assembly I also add the height of the motherboard mounts. The total height needed was about 5cm + little margin = 5,5cm.
The motherboard measures 17cm x 17cm.
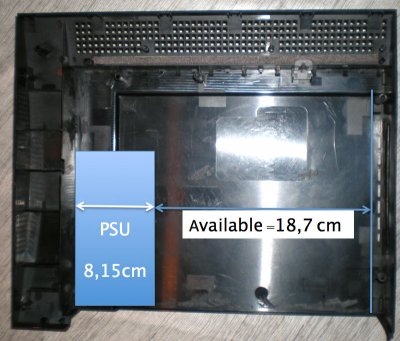
To find the width, I put the PSU inside the case bottom and measured the internal Width available, which was 18,7cm.
The purpose of this is to keep the PSU BLOCKED between the PS3 case and the internal box.

Because I’m using 5mm Plexiglas (0,5cm) the internal width would be 17,7cm which was ok.
I choose to keep some room inside and the length is 19cm.

box-available-width.jpgbox.pngbox2.jpgbox3.jpg


cpu.jpg
Here is the beast!

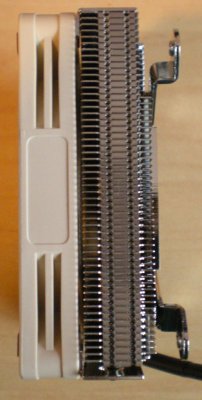
When I opened the CPU Cooler box I was very impressed by the quality.
Take look on this box, this could be a James Bond Gadget!
cpucooler1.jpgcpucooler2.jpgcpucooler3.jpg

The package quality was very impressive so was the product itself. It’s only 37mm (3,7cm) height, impressive.

Because of the PS3 case internal height I had to reconsider the cooling system.

Initially I planned to keep the CPU fan and to put the case fan over the internal box.
But the case fan was too close to the case top.
The airflow would be restricted and the airflow rate would be very bad.
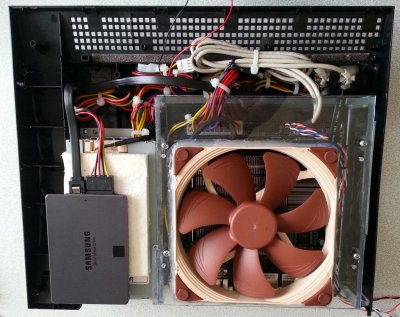
So I decided to remove the CPU fan and use only one fan to pressurise the box and cool down the CPU.
I had to cut the top of the internal box (again) to put the fan maximum as possible inside the internal box.
Then I installed the case fan and add some “points” of hot glue to attach the fan to the Plexiglas.
To create some air pressure inside the case this assembly needs to be airtight so I used a silicone gun with translucent silicone (sanitary / kitchen / bathroom silicone).
Silicone takes a wile to dry.
assembly2.jpgassembly1.jpgassembly3.jpg

After installing back everything inside the box it needed some improvements.
Added a small part of Plexiglas on the right and glued it with super glue.
Also add to cut some PS3 case plastic otherwise the PSU wont fit.
Added a small part on the top of box (left) to block the PSU also glued with super glue.

assembly4.jpgassembly5.jpg

Finally the case is closed again.
I have to make some improvements.

assembly6.jpg

For those interested on how much time it takes to do this.
Well not so much, it takes much more time to write and trying to make photos step by step.
Also I had to buy everything from the Internet except the case.
So it takes sometimes between ordered items and delivered items.


Stay tuned for the next episode of PS3 case mod.
Don’t hesitate to give your opinion on this.
 
Hello everybody
Since last time the rig ran a little bit.
The mod is running really quietly but the PSU fan gives a high-pitched noise even from 3 or 4 meters!
So I decided to replace this cheap fan with a silent one.


Replacing the PSU fan:
The original PSU fan is a 4cmx4cm 12v.
I replaced it with a Noctua NF-A4x10 FLX.
Airflow = 4,82 CFM with low level noise, only 17,9 dB.

In this mod and some other machines I choosed this brand products because I’ve never been disappointed, very quiet and reliable fans.

Here are some photos of the PSU inside and of the fans (old one black colour and the new one).
Remember it is very dangerous to open the PSU. Mine was not powered from one week everything went fine.

1---Inside-PSU.jpg2---old-fan.jpg3---new-fan.jpg

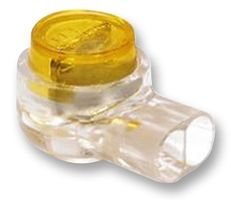
When I bought this fan I didn’t take care of the accessories. When I opened the box I was surprised to find 3M Skotchlok connectors. This makes the connection of the PSU wires and the fan connector really easy no need to solder or that kind of thing

4 - 3M.jpg

Here’s a link for those interested on connecting the fan easilly http://www.noctua.at/pdf/manuals/noctua_nf_a4x10_flx_manual_en.pdf


Installing the USB ports:
PS3 has 2 USB ports so I decided to put 2 USB ports to keep as close as possible to the original design.
Because the available room inside is now very restricted I can’t use regular female USB ports or PC stock (frontal) USB ports.
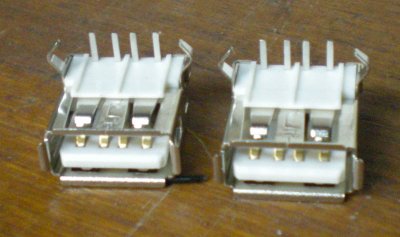
I bought 2 USB 2.0 soldering versions and recycled a old PC case internal USB cable.
Why not USB v3 ports? Well USB 3 ports required to solder 8 wires per port when USB 2 requires only 4 wires only. And also I’m a rookie on soldering, never did that before! Well ok, I trained my self ½ hour and watched some YouTube soldering tutorials that was very useful to me.
This is not a soldering tutorial so I’ll give useful tips to solder this if asked (don’t hesitate to).
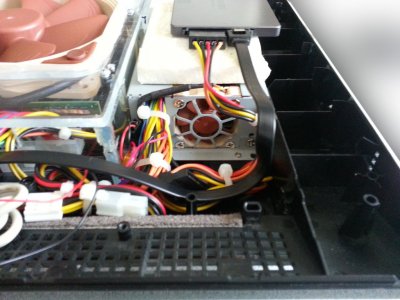
Tried to do some cable management. PSU is “breathing” correctly and quietly with the new fan.
To attach the ports to the case I used the hot glue gun.

Tips and tricks:
If you want to align correctly this ports, first block them to the case. Because of the quantity of glue it takes 5 to 10 minutes to cool down. So while the glue is warm the ports can easily move (not good!).
Before gluing the ports try them on a working machine. In my case one wire wasn’t soldered correctly and the port wasn’t working at all.

5---USB.jpg6---USB.jpg7---USB.jpg8---USB.jpg9---USB.jpg10---USB.jpg14---USB.jpg13---USB.jpg12---USB.jpg11---USB.jpg15---USB.jpg16---CABLE.jpg17---CABLE.jpg18---CABLE.jpg19---CABLE.jpg20---PS3.jpg

Stay tuned for the next episode of the PS3 case mod.
Any comment or advice is welcome :)
 
Status
Not open for further replies.
Back
Top