- Joined
- Aug 14, 2014
- Messages
- 1
- Motherboard
- GA-Z97X-UD5H
- CPU
- i7 4790
- Graphics
- GTX 760 4gb
- Mac
- Classic Mac
- Mobile Phone
Hey guys, so i just wanted to post a thread saying WOOOH I got my first hackintosh installed and working great!
So for starters here is what my build is:
MB: GA-Z97X-UD5H (rev 1.0)
GPU: EVGA GTX 760 4gb GDDR5
Ram: Corsair Vengence
HDD: Samsung Evo 840 (and other drives)
CPU: Intel i7 4790 (i ordered the wrong part and kicking myself for it was ready to overclock!)
1. Making UniBeast Thumbdrive with Mavericks 10.9.0
Followed directions on the tonymac’s website: http://www.tonymacx86.com/374-unibeast-install-os-x-mavericks-any-supported-intel-based-pc.html
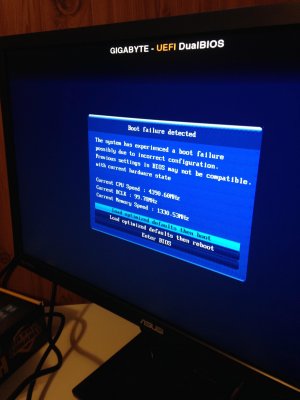
2. Next step was to update my bios to the latest update (in my case it was F8).
3. After updating my bios i had to do a couple of changes in it to get everything ready;
I tried booting it with no flags and got a kernel panic then i tried with -x still got a kernel panic, finally i tried -v and it worked fine (just give it some time to boot the files). (make sure to format drive to Mac OS Extended (Journaled) with Disk Utility (at the welcome screen) before installing)
After installing i had to restart and boot back into the usb. Once the boot loader is loaded and you can choose between usb and your hdd/ssd on your computer choose the drive you installed osx on. I tried -x to get into OS X but got a panic so i put no boot flags and it worked fine for me! Finishing the installation and i was ready to install everything from multi beast.
5. MultiBeast Settings
Install and restart.
6. Updating to latest version 10.9.4
I downloaded the update combo pack from apples website http://www.tonymacx86.com/438-os-x-10-9-4-update.html
I followed the directions that was given from one of the comments. All credits to Stork
Here's the step by step way to update:
Hope this helps anyone!
So for starters here is what my build is:
MB: GA-Z97X-UD5H (rev 1.0)
GPU: EVGA GTX 760 4gb GDDR5
Ram: Corsair Vengence
HDD: Samsung Evo 840 (and other drives)
CPU: Intel i7 4790 (i ordered the wrong part and kicking myself for it
was ready to overclock!)1. Making UniBeast Thumbdrive with Mavericks 10.9.0
Followed directions on the tonymac’s website: http://www.tonymacx86.com/374-unibeast-install-os-x-mavericks-any-supported-intel-based-pc.html
2. Next step was to update my bios to the latest update (in my case it was F8).
3. After updating my bios i had to do a couple of changes in it to get everything ready;
Load Optimized Defaults
Peripherals>xHCI Mode>Auto
Peripherals>xHCI Hand-off>ENABLED
Peripherals>EHCI Hand-off>DISABLED
Peripherals>Internal Graphics>DISABLED
Power Management>Wake on Lan>DISABLED
BIOS Features>VT-d>DISABLED
BIOS Features>Boot Mode Selection>Legacy
Save and Exit
4. Installing the operating system. This is where i was ready to go! Pressing F12 at startup and chose the USB with UniBeast installed on it (plugged it into USB 2.0 port on my case). This is kind of the “hard” part of setting up your mackintosh.Peripherals>xHCI Mode>Auto
Peripherals>xHCI Hand-off>ENABLED
Peripherals>EHCI Hand-off>DISABLED
Peripherals>Internal Graphics>DISABLED
Power Management>Wake on Lan>DISABLED
BIOS Features>VT-d>DISABLED
BIOS Features>Boot Mode Selection>Legacy
Save and Exit
I tried booting it with no flags and got a kernel panic then i tried with -x still got a kernel panic, finally i tried -v and it worked fine (just give it some time to boot the files). (make sure to format drive to Mac OS Extended (Journaled) with Disk Utility (at the welcome screen) before installing)
After installing i had to restart and boot back into the usb. Once the boot loader is loaded and you can choose between usb and your hdd/ssd on your computer choose the drive you installed osx on. I tried -x to get into OS X but got a panic so i put no boot flags and it worked fine for me! Finishing the installation and i was ready to install everything from multi beast.
5. MultiBeast Settings
Quick Start > DSDT Free
Drivers > Audio > Realtek ALCxxx > ALC1150
Drivers > Audio > Realtek ALCxxx > Intel 9 Series Motherboard SupportDrivers > Disk > 3rd Party SATA
Drivers > Disk > TRIM Enabler > 10.9.4 TRIM Patch
Drivers > Misc > ElliottForceLegacyRTC
Drivers > Misc > EvOreboot
Drivers > Misc > FakeSMC v6.9.1315
Drivers > Misc > FakeSMC v6.9.1315 Plugins
Drivers > Misc > FakeSMC v6.9.1315 HWMonitor Application
Drivers > Misc > NullCPUPowerManagement
Drivers > Misc > USB 3.0 - Universal
Drivers > Network > Intel > AppleIntelE1000e v3.0.4.1a
Drivers > System > AppleRTC Patch for CMOS ResetBootloaders > Chimera v3.0.1
Customize > Boot Options > Basic Boot Options
Customize > Boot Options > Hibernate Mode - DesktopCustomize > Boot Options > Instant Menu
Customize > Boot Options > Use KernelCache
Customize > Boot Options > 1080p Display Mode
Customize > System Definitions > Mac Pro > Mac Pro 6,1
Customize > Themes > tonymacx86 Black
Install and restart.
6. Updating to latest version 10.9.4
I downloaded the update combo pack from apples website http://www.tonymacx86.com/438-os-x-10-9-4-update.html
I followed the directions that was given from one of the comments. All credits to Stork
Here's the step by step way to update:
Repair Permissions using the Disk Utility on the drive to be updated;*
Backup your current installation using Carbon Copy Cloner or SuperDuper;
Download the latest MultiBeast for Mavericks which has the latest ACL8xy audio drivers**;
Download the Combo Update and run the Combo Update to update to 10.9.4;
Re-boot;
Run MultiBeast for Mavericks and just select your audio driver to install (TRIM patch is not yet available)***;
Re-boot; and
Repair Permissions again.*
For more information, see Stork's post here.Backup your current installation using Carbon Copy Cloner or SuperDuper;
Download the latest MultiBeast for Mavericks which has the latest ACL8xy audio drivers**;
Download the Combo Update and run the Combo Update to update to 10.9.4;
Re-boot;
Run MultiBeast for Mavericks and just select your audio driver to install (TRIM patch is not yet available)***;
Re-boot; and
Repair Permissions again.*
Hope this helps anyone!