- Joined
- Jun 4, 2014
- Messages
- 39
- Motherboard
- Z77X-UD3H
- CPU
- Intel Core i5 3570K
- Graphics
- HD7870
- Mac
- Classic Mac
- Mobile Phone
Ok, here are the steps:
Installation Media
In these steps we'll create the USB stick with the Clover bootloader and the OSX install. You'll need another Mac to perform the steps below:
Prepare the USB stick
1. Download Yosemite from the App Store
2. Grab an USB stick and use Disk Utility to format it.
=> Use MBR partition schema and create two partitions
=> Partition 1. 300MB - FAT32 - name: CLOVER (this will be your bootloader)
=> Partition 2. The rest - Mac OSX Extended - name: Installer (this will be your OSX setup)
Extract Yosemite to the USB stick
3. Extract and copy the Yosemite files to the second partition. I did it by running the commands below in a Terminal window (be sure to check them before you use them). I've tried different methods, but for some reason the OSX install wouldn't boot when I use those.
sudo hdiutil attach /Applications/Install\ OS\ X\ Yosemite.app/Contents/SharedSupport/InstallESD.dmg
sudo asr restore -source /Volumes/OS\ X\ Install\ ESD/BaseSystem.dmg -target /Volumes/Installer -erase -format HFS+ -noprompt
rm /Volumes/OS\ X\ Base\ System/System/Installation/Packages
cp -av /Volumes/OS\ X\ Install\ ESD/Packages /Volumes/OS\ X\ Base\ System/System/Installation/Packages
cp -av /Volumes/OS\ X\ Install\ ESD/BaseSystem.dmg /Volumes/OS\ X\ Install\ ESD/BaseSystem.chunklist /Volumes/OS\ X\ Base\ System
Grab the Tools
4. Download the latest copy of Clover:
http://sourceforge.net/projects/cloverefiboot/
5. Download the latest copy of Clover configurator:
6. Download the latest copy of DPCIManager:
http://sourceforge.net/projects/dpcimanager/
7. Create a folder in the root of your CLOVER partition named Tools
8. Copy Clover, Clover configurator and DPCIManager to the Tools folder
Install Clover on the USB stick
9. Run the Clover install with these options:
=> Select the CLOVER partition as destination (not the Installer!)
=> Install for UEFI Motherboards
=> You don't need themes, just copy in mine
=> Select the drivers: DataHubDXE, EmuVariable, OsxAptioFixDrv and PartitionDxe
10. Remove the EFI/CLOVER/OEM folder (we won't need it, and it might confuse Clover)
11. Copy the files from my zip to the CLOVER partition, the folder structure should match
12. Copy /System/Library/Extensions/IONetworkingFamily.kext from the Installer partition to EFI/CLOVER/kexts/10.10 on the CLOVER partition (otherwise you won't have internet during OSX install).
You won't need NullCPUPowerManagement.kext because of the DSDT.aml I've provided.
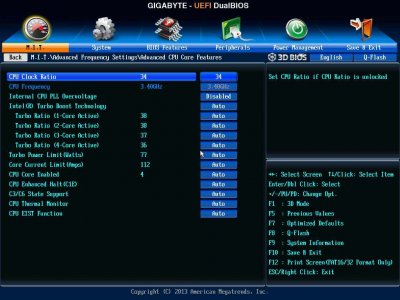
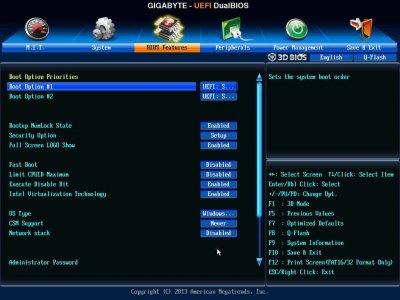
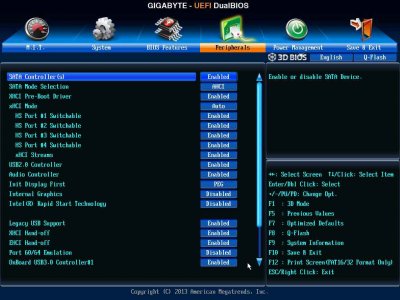
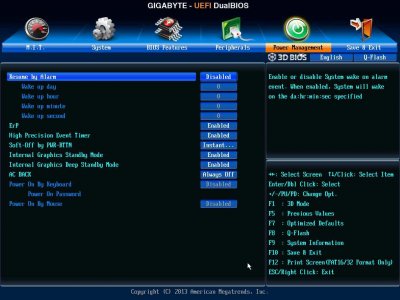
Motherboard
To make your motherboard as compliant as possible, we'll load the optimized defaults with a few customizations. I have exported them to bios-config, which you can import into your BIOS.
1. Create a folder BIOS on the CLOVER partition
2. Copy bios-config to that folder
3. Reboot your PC, go into your BIOS and load the bios-config
Installation
1. Reboot your PC
2. Press F12 to boot from your stick (UEFI)
3. Select the OSX install
4. The setup will start, some progress bars might look a bit weird, don't worry about that. If your setup freezes in one of the steps, try booting it with the -v option and report back here")
5. Go to the menu and select Disk Utility. In my case I have a separate SSD for my OSX installation (I dual boot with Windows 8.1). I've formatted the disk to 1 partition, GPT and Mac OSX Extended.
6. After the first part of the OSX install is completed your PC will restart. Hit F12 again to boot from your stick and now select OSX (not the install). The second part of the OSX install should start.
7. After the second part of the OSX install you should end up in Yosemite.
Post-installation
After the install your internet and USB3.0 devices should be working. Audio won't work just yet.
Format the EFI partition
1. Open a terminal window
2. Run diskutil list and look for the EFI partition of your OSX drive (probably disk0s1 or disk1s1)
3. Run sudo newfs_msdos -v EFI -F 32 /dev/rdisk0s1 (notice the r in front and replace 0s1 with the proper drive!)
Install Clover
4. You can copy the Tools folder from your CLOVER partition to your desktop and run the Clover setup again.
5. This time we won't change the target (it should automatically target your new OSX, and will handle the EFI partition automatically)
6. Select these options:
=> Install for UEFI Motherboards
=> Install Clover in the ESP
=> We'll copy my Yosemite theme again
=> Select only the driver OsxAptioFixDrv
=> Install RC scripts on target volume
=> You can install the Clover preferences pane if you want to easily check for updates later on
Install extra files to EFI partition
7. Open Clover configurator
8. It will probably ask you to mount the EFI partition, if not go to that option on the left and use it to mount your EFI partition.
9. Under finder you'll notice the EFI partition, open it, it will look just like your EFI folder on your USB stick's CLOVER partition
10. Copy the following files to the EFI folder on the EFI partition from your CLOVER partition:
=> EFI/CLOVER/ACPI/patched/DSDT.aml
=> EFI/CLOVER/config.plist
=> EFI/CLOVER/themes (whole folder, replace)
=> Note you don't have to copy the KEXTs, we'll install those to your system. That will decrease your boot time a bit.
Install the KEXTs
8. Start DPCIManager
9. Use the Install Kext option in the menubar to install the following KEXTs (located in your EFI/CLOVER/kexts/10.10 folder):
=> FakeSMC (most important one, or your won't be able to boot)
=> AtherosE2200Ethernet (for network)
=> AppleHDAIDT (for audio)
10. Start Disk Utility and do a Repair Disk Permissions
Hide Thunderbolt update
Your AppStore will report a thunderbolt update. Normally you can hide them by right clicking it, but that doesn't seem to work with this update. To solve that run the following command:
softwareupdate --ignore ThunderboltFirmwareUpdate1.2
All done!
After a restart you should be able to boot to OSX without the USB stick and enjoy Yosemite!
Useful links
TonyMacx86 Yosemite Installation Guide
http://www.tonymacx86.com/yosemite-desktop-guides/144426-how-install-os-x-yosemite-using-clover.html
Tips to get iMessage working
http://www.insanelymac.com/forum/topic/298027-guide-aio-guides-for-hackintosh/#entry2020598
http://www.tonymacx86.com/general-help/110471-how-fix-imessage.html
Details behind AppleHDA patch
On the fly patching: http://www.tonymacx86.com/hp-probook-mavericks/118877-patch-applehda-kext-fly-clover-bootloader.html
Patch HDA script: http://www.insanelymac.com/forum/topic/284004-script-to-patch-applehda-binary-for-osx107108109/
Clover WIKI / Config
http://clover-wiki.zetam.org/Configuration
Questions
No internet?
This guide was written for the Z77X-UD3H rev 1.1 guide. If you have the rev 1.0 you'll need a different Ethernet KEXT: AtherosL1cEthernet or ALXEthernet (I don't recommend this one, it has memory leaks and some issues with Yosemite).
Installation Media
In these steps we'll create the USB stick with the Clover bootloader and the OSX install. You'll need another Mac to perform the steps below:
Prepare the USB stick
1. Download Yosemite from the App Store
2. Grab an USB stick and use Disk Utility to format it.
=> Use MBR partition schema and create two partitions
=> Partition 1. 300MB - FAT32 - name: CLOVER (this will be your bootloader)
=> Partition 2. The rest - Mac OSX Extended - name: Installer (this will be your OSX setup)
Extract Yosemite to the USB stick
3. Extract and copy the Yosemite files to the second partition. I did it by running the commands below in a Terminal window (be sure to check them before you use them). I've tried different methods, but for some reason the OSX install wouldn't boot when I use those.
sudo hdiutil attach /Applications/Install\ OS\ X\ Yosemite.app/Contents/SharedSupport/InstallESD.dmg
sudo asr restore -source /Volumes/OS\ X\ Install\ ESD/BaseSystem.dmg -target /Volumes/Installer -erase -format HFS+ -noprompt
rm /Volumes/OS\ X\ Base\ System/System/Installation/Packages
cp -av /Volumes/OS\ X\ Install\ ESD/Packages /Volumes/OS\ X\ Base\ System/System/Installation/Packages
cp -av /Volumes/OS\ X\ Install\ ESD/BaseSystem.dmg /Volumes/OS\ X\ Install\ ESD/BaseSystem.chunklist /Volumes/OS\ X\ Base\ System
Grab the Tools
4. Download the latest copy of Clover:
http://sourceforge.net/projects/cloverefiboot/
5. Download the latest copy of Clover configurator:
6. Download the latest copy of DPCIManager:
http://sourceforge.net/projects/dpcimanager/
7. Create a folder in the root of your CLOVER partition named Tools
8. Copy Clover, Clover configurator and DPCIManager to the Tools folder
Install Clover on the USB stick
9. Run the Clover install with these options:
=> Select the CLOVER partition as destination (not the Installer!)
=> Install for UEFI Motherboards
=> You don't need themes, just copy in mine
=> Select the drivers: DataHubDXE, EmuVariable, OsxAptioFixDrv and PartitionDxe
10. Remove the EFI/CLOVER/OEM folder (we won't need it, and it might confuse Clover)
11. Copy the files from my zip to the CLOVER partition, the folder structure should match
12. Copy /System/Library/Extensions/IONetworkingFamily.kext from the Installer partition to EFI/CLOVER/kexts/10.10 on the CLOVER partition (otherwise you won't have internet during OSX install).
You won't need NullCPUPowerManagement.kext because of the DSDT.aml I've provided.
Motherboard
To make your motherboard as compliant as possible, we'll load the optimized defaults with a few customizations. I have exported them to bios-config, which you can import into your BIOS.
1. Create a folder BIOS on the CLOVER partition
2. Copy bios-config to that folder
3. Reboot your PC, go into your BIOS and load the bios-config
Installation
1. Reboot your PC
2. Press F12 to boot from your stick (UEFI)
3. Select the OSX install
4. The setup will start, some progress bars might look a bit weird, don't worry about that. If your setup freezes in one of the steps, try booting it with the -v option and report back here
5. Go to the menu and select Disk Utility. In my case I have a separate SSD for my OSX installation (I dual boot with Windows 8.1). I've formatted the disk to 1 partition, GPT and Mac OSX Extended.
6. After the first part of the OSX install is completed your PC will restart. Hit F12 again to boot from your stick and now select OSX (not the install). The second part of the OSX install should start.
7. After the second part of the OSX install you should end up in Yosemite.
Post-installation
After the install your internet and USB3.0 devices should be working. Audio won't work just yet.
Format the EFI partition
1. Open a terminal window
2. Run diskutil list and look for the EFI partition of your OSX drive (probably disk0s1 or disk1s1)
3. Run sudo newfs_msdos -v EFI -F 32 /dev/rdisk0s1 (notice the r in front and replace 0s1 with the proper drive!)
Install Clover
4. You can copy the Tools folder from your CLOVER partition to your desktop and run the Clover setup again.
5. This time we won't change the target (it should automatically target your new OSX, and will handle the EFI partition automatically)
6. Select these options:
=> Install for UEFI Motherboards
=> Install Clover in the ESP
=> We'll copy my Yosemite theme again
=> Select only the driver OsxAptioFixDrv
=> Install RC scripts on target volume
=> You can install the Clover preferences pane if you want to easily check for updates later on
Install extra files to EFI partition
7. Open Clover configurator
8. It will probably ask you to mount the EFI partition, if not go to that option on the left and use it to mount your EFI partition.
9. Under finder you'll notice the EFI partition, open it, it will look just like your EFI folder on your USB stick's CLOVER partition
10. Copy the following files to the EFI folder on the EFI partition from your CLOVER partition:
=> EFI/CLOVER/ACPI/patched/DSDT.aml
=> EFI/CLOVER/config.plist
=> EFI/CLOVER/themes (whole folder, replace)
=> Note you don't have to copy the KEXTs, we'll install those to your system. That will decrease your boot time a bit.
Install the KEXTs
8. Start DPCIManager
9. Use the Install Kext option in the menubar to install the following KEXTs (located in your EFI/CLOVER/kexts/10.10 folder):
=> FakeSMC (most important one, or your won't be able to boot)
=> AtherosE2200Ethernet (for network)
=> AppleHDAIDT (for audio)
10. Start Disk Utility and do a Repair Disk Permissions
Hide Thunderbolt update
Your AppStore will report a thunderbolt update. Normally you can hide them by right clicking it, but that doesn't seem to work with this update. To solve that run the following command:
softwareupdate --ignore ThunderboltFirmwareUpdate1.2
All done!
After a restart you should be able to boot to OSX without the USB stick and enjoy Yosemite!
Useful links
TonyMacx86 Yosemite Installation Guide
http://www.tonymacx86.com/yosemite-desktop-guides/144426-how-install-os-x-yosemite-using-clover.html
Tips to get iMessage working
http://www.insanelymac.com/forum/topic/298027-guide-aio-guides-for-hackintosh/#entry2020598
http://www.tonymacx86.com/general-help/110471-how-fix-imessage.html
Details behind AppleHDA patch
On the fly patching: http://www.tonymacx86.com/hp-probook-mavericks/118877-patch-applehda-kext-fly-clover-bootloader.html
Patch HDA script: http://www.insanelymac.com/forum/topic/284004-script-to-patch-applehda-binary-for-osx107108109/
Clover WIKI / Config
http://clover-wiki.zetam.org/Configuration
Questions
No internet?
This guide was written for the Z77X-UD3H rev 1.1 guide. If you have the rev 1.0 you'll need a different Ethernet KEXT: AtherosL1cEthernet or ALXEthernet (I don't recommend this one, it has memory leaks and some issues with Yosemite).